background image

23

Zhtw

中文

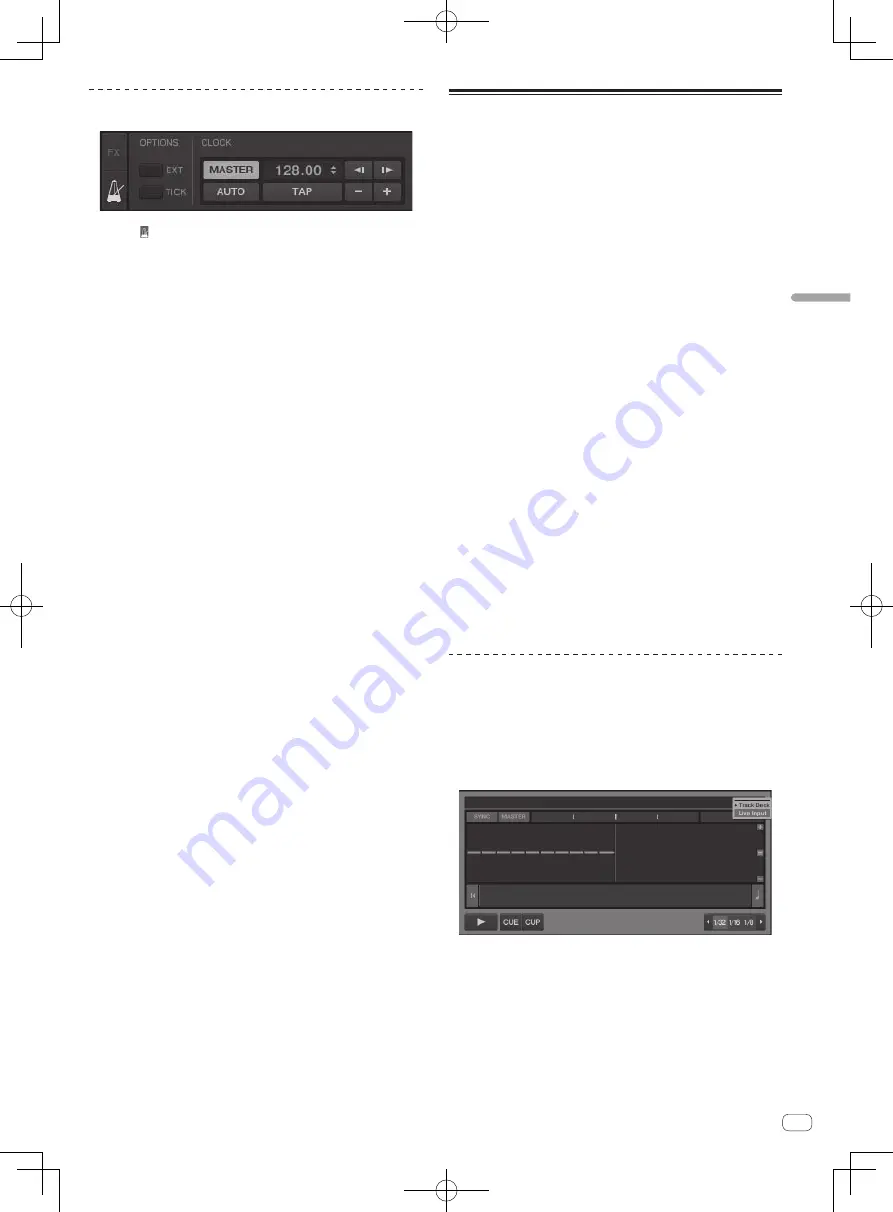
設定主要同步化

按一下 [

]。

主要同步可自以下兩類型中擇一。

 [

MASTER

]:由使用者輸入的 BPM 值或輕按設定的

BPM 值設為主要。

 [

AUTO

]:自動設定主要。 兩個唱盤在播放時,暫停

設為主要的唱盤後,另一個唱盤會自動設為主要。

輸入外部裝置或麥克風的聲音

連接至 [

AUX IN

] 端子的外部裝置聲音或連接至 [

MIC

]

端子的麥克風聲音皆可混合。

!

  操作 USB 匯流排電源時,將無法使用 [

AUX IN

] 及

[

MIC

] 端子。

  若要不受限制使用,請利用隨附的 AC 變壓器連接至電

源插座。

1  連接外接裝置與 [

AUX IN

] 或 [

MIC

] 端子。

2  切換 [

AUX

MIC

] 選擇器開關。

 [

AUX

]:選擇連接至 [

AUX IN

] 端子的外接裝置。

 [

MIC

]:選擇連接至 [

MIC

] 端子的麥克風。

3  完成 TRAKTOR 2 軟體的 [

Preferences

] > 

[

Input Routing

] 設定。

如下所示設定 [

Input Aux

]。

 [

L(Mono)

]:

1:DDJ-T1 AUX/MIC L

 [

R

]:

2:DDJ-T1 AUX/MIC R

!

  使用 TRAKTOR Pioneer DDJ-T1 EDITION 2 後,以上設

定將變為預設。

4  調整 [

AUX IN

] 或 [

MIC

] 端子的音訊位準輸入。

 轉動主機前面板上的 [

VOL

] 控制鍵: [

MIC

] 端子

的輸入音訊位準已調整。

 轉動主機後面板上的 [

VOL

] 控制鍵: [

AUX IN

] 端

子的輸入音訊位準已調整。

  先鋒 DJ 播放機: 放置在接近中央的位置。
  可攜式音訊播放機或其他低音量的裝置: 根據中央

位置順時針放置。

5  轉動 TRAKTOR 2 軟體的 [

AUX

] 旋鈕。

轉動交叉音控器右側的 [

AUX

] 旋鈕,並設為適當的音量。

分配外部裝置或麥克風的聲音至唱盤

音效功能、濾波器功能及 EQ 控制皆可在外部裝置或麥克
風聲音設為從 [

A

] – [

D

] 輸入至唱盤時使用。

!

  下列說明如何分配外部裝置或麥克風的聲音至唱盤 [

D

]。

1  按一下唱盤 [

D

] 上的 [

b

]。

在選單中選擇 [

Line Input

]。

2  完成 TRAKTOR 2 軟體的 [

Preferences

] > 

[

Input Routing

] 設定。

如下所示設定 [

Input Deck D

]。

 [

L(Mono)

]:

1:DDJ-T1 AUX/MIC L

 [

R

]:

2:DDJ-T1 AUX/MIC R

!

  若要還原唱盤設定,按一下 [

b

] 並選擇 [

Track Deck

]。

Summary of Contents for DDJ-T1

Page 1: ...to allow you to use your product in greater comfort El sitio Web de Pioneer indicado más arriba tiene una sección con las preguntas más frecuentes y además ofrece información del software y varios tipos de información y servicios para que usted pueda usar su producto con la mayor comodidad αРᡘұ ޠ ӒᎣᆪયණ ٽ ŇłŒȃ ᡞၦଊІөԓ ڐ у ޠ ၦଊᇅ ଡ଼ȂѠᡲ Р ٻޠ ң ࠣȄ Operating Instructions Manual de instrucciones ᐈձКь ...

Page 2: ...mits are designed to provide reasonable protection against harmful interference in a residential installation This equipment generates uses and can radiate radio frequency energy and if not installed and used in accordance with the instructions may cause harmful interference to radio communications However there is no guarantee that interference will not occur in a particular installation If this ...

Page 3: ...t the driver software Windows 11 Connections Names of terminals 13 Connecting the input output terminals 14 Part names and functions Control panel 15 1 Browser 16 2 Deck 17 3 Mixer 19 4 Effect 20 Operations Importing tracks to TRAKTOR 2 21 Loading tracks in decks 21 Playback 21 Using the mixer functions 22 Using the effect function 22 Synchronizing the playing speed with other decks beat sync 22 I...

Page 4: ...he years for Pioneer DJ hardware to achieve the top level of sound quality in its class System setup example A DJ system like the one on the diagram below can be created by combining this unit with a computer and peripherals PLAY PAUSE CUE ON OFF ADVANCED ACTIVE CHAINED MIN MAX DRY WET DECK FILTER A C FX1 FUNCTION IN ADJUST OUT ADJUST MOVE HOT CUE IN AUTO LOOP KEY LOCK TEMPO RANGE OUT NEEDLE SEARC...

Page 5: ...Requiring Service Unplug the unit and refer servicing to qualified service personnel in the following situations When the power cord plug or chassis is damaged If liquid has been spilled or objects have fallen into the product If the product has been exposed to rain or water If the product does not operate normally when the operating instruc tions are followed Adjust only those controls that are c...

Page 6: ...iland and Korea Using the LAPTOP DOCK The computer s keyboard section can be stowed under this unit Depending on the size of your notebook computer the keyboard section may not fit in the LAPTOP DOCK Install in such a way that the computer unit does not touch this unit Install in such a way that the cables connected to the computer are not stuck under this unit Using with the feet removed This uni...

Page 7: ...KTOR 2 software etc Use the most recent version of the web browser USB 2 0 port A USB 2 0 port is required to connect the computer with this unit Full functionality is not guaranteed on all computers even those meeting the operating environment requirements described above Even with the required memory indicated for the operating environment above lack of memory due to resident programs the number...

Page 8: ...e contents of the DVD ROM are displayed 3 Double click Traktor 2 Installer mpkg The TRAKTOR 2 installer is launched 4 Once the TRAKTOR 2 installer is launched click Continue 5 Read the contents of the license agreement carefully then click Continue 6 If you agree to the contents of the usage agreement click Agree If you do not agree to the contents of the usage agreement click Disagree to cancel i...

Page 9: ... double click the Service Center Service Center icons Activation procedure Online activation When your computer is connected to the Internet Offline activation When your computer is not connected to the Internet Online activation 1 Launch the SERVICE CENTER The log in screen is displayed 2 Input your e mail address and password then click Log in When logging in for the first time you must create a...

Page 10: ...k SUBMIT A password is sent to the e mail address input on the form Return to the log in screen and log in The personal information input when registering a new user account may be collected processed and used based on the privacy policy on the Native Instruments website PIONEER CORPORATION does not collect process or use this per sonal information 9 When the Service Center Activation Page appears...

Page 11: ...PURPOSE SATISFACTORY QUALITY ACCURACY TITLE OR NON INFRINGEMENT 4 Damages and remedies for breach You agree that any breach of this Agreement s restrictions would cause Pioneer irreparable harm for which money damages alone would be inadequate In addition to damages and any other remedies to which Pioneer may be entitled You agree that Pioneer may seek injunctive relief to prevent the actual threa...

Page 12: ...ur computer via a USB cable For details about connections see Connections on page 13 2 Slide the ON OFF switch to the ON side Turn on the power of this unit The message Installing device driver software may appear when this unit is first connected to the computer or when it is connected to a different USB port on the computer Wait a while until the message Your devices are ready for use appears Ad...

Page 13: ...e used The volume of the headphones will be lower To use the unit without these limitations connect the included AC adapter Names of terminals Rear panel MASTER OUT 2 MASTER OUT 1 TRS AUX IN VOL USB ON OFF DC IN MIN L R L L R R MAX 4 5 6 7 8 9 1 2 3 1 MASTER OUT 1 terminals Connect powered speakers etc here This is a TRS phone jack so both balanced and unbalanced outputs are supported The sound wi...

Page 14: ...ting the input output terminals Rear panel MASTER OUT 2 MASTER OUT 1 TRS AUX IN VOL USB ON OFF DC IN MIN L R L L R R MAX R L R L To audio input terminals Portable audio device TRAKTOR Computer Component amplifier powered speaker etc To audio output terminals To power outlet AC adapter included Cord hook Hook the AC adapter s power cord in the top of the cord hook the USB cable in the bottom Fasten...

Page 15: ... MAX LOW MIN MAX OFF ON GAIN MIN MAX TREE FAVORITES A LOAD A FX 1 2 SYNC 10 9 8 7 6 5 4 3 2 1 0 MASTER EQ HI MIN MAX MID MIN MAX LOW MIN MAX OFF ON GAIN MIN MAX B LOAD PUSH B FX 1 2 SYNC CH FADER START MASTER EQ HI MIN MAX MID MIN MAX LOW MIN MAX EQ HI MIN MAX MID MIN MAX LOW MIN MAX OFF ON GAIN MIN MAX D LOAD D FX 1 2 SYNC MASTER OFF ON 10 9 8 7 6 5 4 3 2 1 0 REC HOT CUE CUE CUE CUE CUE 2 4 1 4 3...

Page 16: ...llec tively called the BROWSE area Turn the rotary selector while pressing the SHIFT button Moves the cursor in the TRACK area page by page 3 FAVORITES REC button Turn the rotary selector while pressing the FAVORITES REC button Moves the cursor in the FAVORITES area The section marked 3 on the above screen is called the FAVORITES area Press the FAVORITES REC button while pressing the SHIFT button ...

Page 17: ...e can be changed by clicking b to the left of the icon 5 IN IN ADJUST button OUT OUT ADJUST button ACTIVE button IN IN ADJUST button During playback press the IN IN ADJUST button at the posi tion at which you want to start loop playback the loop in point to set the loop in point The loop in point can be fine adjusted by pressing the IN IN ADJUST button during loop playback then using the jog dial ...

Page 18: ...osition at which the button was pressed When a button at which a hot cue 1 4 is set is pressed in the play or pause mode a hot cue 1 4 is called out To cancel a hot cue 1 4 press the corresponding button 1 4 while pressing the DELETE button Buttons 1 4 at which hot cues are set flash while the DELETE button is pressed To set or call out hot cues 5 to 8 press buttons 1 to 4 while pressing the SHIFT...

Page 19: ...nitored over headphones When multiple headphones CUE buttons are pressed the sound of the decks for which the buttons are pressed is mixed and output from the headphones 8 SYNC button The track on the deck for which the SYNC button is pressed is synchronized to the BPM and Beat Grid of the deck for which the MASTER button is pressed or of the master clock 9 MASTER button Sets the tempo of the deck...

Page 20: ...he one selected effect can be adjusted in detail 2 Effect button This button is exclusively for use in the Single mode 3 DRY WET control Changes the balance between the effect sound and original sound 4 SELECT BACK button The effect type switches each time the button is pressed With TRAKTOR Pioneer DDJ T1 EDITION 2 the 6 types of effects below can be used no Effect Filter Delay Reverb Flanger Beat...

Page 21: ...nd playl ists can be accessed directly with the TRAKTOR 2 browser 1 Turn the rotary selector while pressing the TREE button to select iTunes 2 Browsing the library and playlists in the same way as with iTunes The iTunes library and playlists cannot be edited with the TRAKTOR 2 browser When played from the TRAKTOR 2 browser iTunes music files are automatically imported to the TRAKTOR 2 Track Collec...

Page 22: ...t to monitor 3 Turn the HEADPHONES MIX control Turn counterclockwise The sound of the deck for which the headphones CUE button is pressed becomes relatively louder Center position The sound of the deck for which the headphones CUE button is pressed and the MASTER OUT 1 MASTER2 sound have the same volume When turned clockwise The volume of the sound output from the MASTER OUT 1 MASTER2 terminals be...

Page 23: ...ut Aux as shown below L Mono 1 DDJ T1 AUX MIC L R 2 DDJ T1 AUX MIC R With TRAKTOR Pioneer DDJ T1 EDITION 2 the above settings are preset 4 Adjust the audio level input to the AUX IN or MIC terminals Turn the VOL control on the main unit s front panel The MIC terminal s input audio level is adjusted Turn the VOL control on the main unit s rear panel The AUX IN terminals input audio level is adjuste...

Page 24: ...r Kontrol X1 Set this when using Native Instruments Traktor Kontrol X1 Assigning the desired functions to the NEEDLE SEARCH pad When assigning the desired functions to the NEEDLE SEARCH pad first press the FUNCTION button to turn FUNCTION on Functions can be assigned to up to 5 points on the NEEDLE SEARCH pad FUNCTION NEEDLE SEARCH Function1 Function5 Function2 Function3 Function4 1 Click the TRAK...

Page 25: ...city may be insufficient Use the included AC adapter Are you using a USB hub USB hubs cannot be used Connect the computer and this unit directly using the included USB cable page 14 Are you using a commercially available USB cable Use the included USB cable Positions of controls or sliders differ on this unit and in TRAKTOR 2 When this unit s controls and sliders are moved the TRAKTOR 2 controls a...

Page 26: ...lly SYNC function does not work even when files are analyzed Is BEAT MARKER Grid set for hot cue Set at least one BEAT MARKER to Grid page 17 Put a check at Preferences File Management Set Beat Grid when detecting BPM then reload the track in the deck Fader starting is not possible Is the CH FADER START switch set to ON Set the CH FADER START switch set to ON Are you in standby at the position at ...

Page 27: ...se 127 min 98 AUTO LOOP MOVE GRID control press 9n 20 dd 9n 80 dd OFF 0 ON 127 IN IN ADJUST button 9n 16 dd 9n 76 dd OFF 0 ON 127 OUT OUT ADJUST button 9n 17 dd 9n 77 dd OFF 0 ON 127 ACTIVE button 9n 18 dd 9n 78 dd OFF 0 ON 127 FUNCTION button 9n 58 dd 9n 107 dd OFF 0 ON 127 NEEDLE SEARCH pad Bn 3 dd Bn 8 dd OFF 0 ON 1 127 position information 1 at left edge 27 at right edge Filter control Bn 4 dd...

Page 28: ...e MIDI message this unit to computer Notes MAIN VOL control B6 0 dd 0 127 HEADPHONES MIX control B6 1 dd 0 127 HEADPHONES VOL control B6 2 dd 0 127 GAIN control Deck A B6 3 dd 0 127 Deck B B6 4 dd 0 127 Deck C B6 5 dd 0 127 Deck D B6 6 dd 0 127 EQ HI control Deck A B6 7 dd 0 127 Deck B B6 8 dd 0 127 Deck C B6 9 dd 0 127 Deck D B6 10 dd 0 127 EQ MID control Deck A B6 11 dd 0 127 Deck B B6 12 dd 0 1...

Page 29: ...DI message this unit to computer Notes When SHIFT button is off When SHIFT button is on ADVANCED CHAINED selector button 9n 64 dd 9n 92 dd OFF 0 ON 127 DRY WET control Bn 0 dd Bn 16 dd 0 127 SELECT BACK 1 button 9n 68 dd 9n 96 dd OFF 0 ON 127 SELECT BACK 2 button 9n 69 dd 9n 97 dd OFF 0 ON 127 SELECT BACK 3 button 9n 70 dd 9n 98 dd OFF 0 ON 127 Effect control 1 control Bn 2 dd Bn 18 dd 0 127 Effec...

Page 30: ...ividual countries and by international treaties It is the full respon sibility of the person who has recorded the music to ensure that it is used legally When handling music downloaded from the Internet etc it is the full responsibility of the person who has downloaded the music to ensure that it is used in accordance with the contract concluded with the download site Specifications AC adapter Pow...

Page 31: ......

Page 32: ...in embargo el método de conexión y funcionamiento de la unidad es el mismo Este producto es para tareas domésticas generales Cualquiera avería debida a otra utilización que tareas domésticas tales como el uso a largo plazo para motivos de negocios en un restaurante o el uso en un coche o un barco y que necesita una reparación hará que cobrarla incluso durante el período de garantía K041_A1_Es Ante...

Page 33: ...11 Conexiones Nombres de los terminales 14 Conexión de los terminales de entrada salida 15 Nombres y funciones de los controles Panel de control 16 1 Explorador 17 2 Deck 18 3 Mezclador 20 4 Efecto 21 Operaciones Importación de pistas a TRAKTOR 2 22 Carga de pistas en decks 22 Reproducción 22 Uso de las funciones del mezclador 23 Uso de la función de efecto 23 Sincronización de la velocidad de rep...

Page 34: ...Y Este producto hereda la tecnología de calidad de sonido desarrollada a lo largo de los años para el hardware DJ de Pioneer para lograr una calidad de sonido máxima en su clase Ejemplo de configuración del sistema Combinando esta unidad con un ordenador y periféricos se puede crear un sistema DJ como el mostrado en el diagrama de abajo PLAY PAUSE CUE ON OFF ADVANCED ACTIVE CHAINED MIN MAX DRY WET...

Page 35: ...dad y solicite las reparaciones al personal de servicio cualificado en las situaciones siguientes Cuando el cable de alimentación la clavija de alimentación o el chasis estén dañados Si se han derramado líquidos o han caído objetos dentro del producto Si el producto ha estado expuesto a la lluvia o al agua Si el producto no funciona normalmente cuando se siguen las indicaciones del manual de instr...

Page 36: ...n que usted se encuentre Tipo 1 para Japón y Norteamérica Tipo 2 para Europa Tipo 3 para el Reino Unido Tipo 4 para Australia Tipo 5 para Tailandia y Corea Uso del ACOPLADOR PARA ORDENADOR PORTÁTIL La sección del teclado del ordenador se puede guardar debajo de esta unidad Según el tamaño de su ordenador portátil la sección del teclado puede que no quepa en el ACOPLADOR PARA ORDENADOR PORTÁTIL Ins...

Page 37: ...rnet para actualizar el software TRAKTOR 2 etc Use la versión más reciente del explorador Web Puerto USB 2 0 Para conectar el ordenador con esta unidad se requiere un puerto USB 2 0 La funcionalidad total no está garantizada en todos los ordenadores ni en los que cumplen con los requerimientos ambientales descritos anteriormente Incluso con la memoria requerida para el ambiente de operación indica...

Page 38: ...oneer DDJ T1 EDITION 2 incluido en la unidad de DVD del ordenador El icono Traktor 2 aparece en la pantalla 2 Haga doble clic en el icono Traktor 2 El contenido del DVD ROM se visualiza 3 Haga doble clic en Traktor 2 Installer mpkg El instalador TRAKTOR 2 se inicia 4 Una vez iniciado el instalador TRAKTOR 2 haga clic en Continuar 5 Lea cuidadosamente el contenido del acuerdo de licencia y luego ha...

Page 39: ...er Para iniciar directamente SERVICE CENTER Para Windows Desde el menú Iniciar de Windows haga clic en los iconos Native Instruments Service Center Service Center Para Mac OS X En Finder abra la carpeta Aplicación y luego haga doble clic en los iconos Service Center Service Center Procedimiento de activación Activación en línea Cuando su ordenador esté conectado a Internet Activación fuera de líne...

Page 40: ...irección de correo electrónico nombre y apellidos calle ciudad y código postal seleccione su país región y luego haga clic en NEXT Cuando aparezca una pantalla de encuesta elija las respuestas a las diversas preguntas y luego haga clic en SUBMIT Se envía una contraseña a la dirección de correo electrónico introducida en el formulario Vuelva a la pantalla de inicio de sesión e inicie la sesión La i...

Page 41: ...O RIESGO HASTA EL MÁXIMO GRADO PERMITIDO POR LA LEY PIONEER RENUNCIA DE FORMA EXPRESA A TODA GARANTÍA DE CUALQUIER CLASE EN RELACIÓN AL PROGRAMA Y DOCUMENTACIÓN YA SEA DE FORMA EXPRESA IMPLÍCITA POR LEY O QUE SURJAN COMO CONSECUENCIA DEL RENDIMIENTO TRANSACCIÓN O USO COMERCIAL INCLUYENDO SIN LIMITACIÓN LAS GARANTÍAS DE COMERCIABILIDAD O IDONEIDAD PARA UN FIN DETERMINADO PROPÓSITO CALIDAD SATISFACT...

Page 42: ...Instalar este software de controlador de todas formas y continúe con la instalación Cuando lo instale en Windows XP Si aparece Instalación de hardware en la pantalla mientras se realiza la instalación haga clic en Continuar y continúe con la instalación Cuando termina la instalación del programa aparece un mensaje de terminación Conexión de esta unidad y un ordenador 1 Conecte esta unidad a su ord...

Page 43: ... no está conectada al ordenador o cuando esta unidad y el ordenador no se comunican bien Verificación de la información más reciente en el software controlador Visite nuestro sitio web indicado abajo para conocer la información más reciente del software controlador que se va a usar exclusivamente con esta unidad http www prodjnet com support ...

Page 44: ...es será más bajo Para usar la unidad sin estas limitaciones conecte el adaptador de CA incluido Nombres de los terminales Panel trasero MASTER OUT 2 MASTER OUT 1 TRS AUX IN VOL USB ON OFF DC IN MIN L R L L R R MAX 4 5 6 7 8 9 1 2 3 1 Terminales MASTER OUT 1 Conecte aquí altavoces con amplificador etc Éste es un conector de auriculares TRS así que las salidas equilibra das y desequilibradas son com...

Page 45: ...R OUT 2 MASTER OUT 1 TRS AUX IN VOL USB ON OFF DC IN MIN L R L L R R MAX R L R L A los terminales de entrada de audio Aparato de audio portátil TRAKTOR Ordenador Componentes amplificadores altavoces con amplificador etc A los terminales de salida de audio A la toma de corriente Adaptador de CA incluido Gancho de cables Ponga el cable de alimentación del adaptador de CA en la parte superior del gan...

Page 46: ...LOAD A FX 1 2 SYNC 10 9 8 7 6 5 4 3 2 1 0 MASTER EQ HI MIN MAX MID MIN MAX LOW MIN MAX OFF ON GAIN MIN MAX B LOAD PUSH B FX 1 2 SYNC CH FADER START MASTER EQ HI MIN MAX MID MIN MAX LOW MIN MAX EQ HI MIN MAX MID MIN MAX LOW MIN MAX OFF ON GAIN MIN MAX D LOAD D FX 1 2 SYNC MASTER OFF ON 10 9 8 7 6 5 4 3 2 1 0 REC HOT CUE CUE CUE CUE CUE 2 4 1 4 3 1 4 1 2 3 4 2 3 1 3 2 1 Explorador la página 17 2 Dec...

Page 47: ...mbre de área BROWSE Gire el selector giratorio mientras pulsa el botón SHIFT Mueve el cursor en el área TRACK página a página 3 Botón FAVORITES REC Gire el selector giratorio mientras pulsa el botón FAVORITES REC Mueve el cursor en el área FAVORITES La sección marcada 3 en la pantalla de arriba se llama área FAVORITES Pulse el botón FAVORITES REC mientras pulsa el botón SHIFT Inicia para la grabac...

Page 48: ...rid se crea como mínimo un BEAT MARKER Cuando se crea BEAT MARKER ponga hot cue CUE TYPE en Grid CUE TYPE el tipo de hot cue se puede cambiar haciendo clic en b a la izquierda del icono 5 Botón IN IN ADJUST botón OUT OUT ADJUST botón ACTIVE Botón IN IN ADJUST Durante la reproducción pulse el botón IN IN ADJUST en la posición donde quiera iniciar la reproducción de bucle el punto de entrada de bucl...

Page 49: ...a con los botones SIZE c d Operación HOT CUE PANEL Cuando se pulsa en el modo de reproducción o pausa un botón en el que no se ha establecido nada se establece un hot cue 1 4 en la posición en la que se pulsó el botón Cuando se pulsa en el modo de reproducción o pausa un botón en el que se ha establecido un hot cue 1 4 se llama a un hot cue 1 4 Para cancelar un hot cue 1 4 pulse el botón correspon...

Page 50: ...ulsan múltiples botones CUE de auriculares el sonido de los decks para los que se pulsan los botones se mezcla y sale por los auriculares 8 Botón SYNC La pista del deck para el que se pulsa el botón SYNC se sincroniza con BPM y Beat Grid del deck para el que se pulsa el botón MASTER o del reloj maestro 9 Botón MASTER Establece el tempo del deck para el que se pulsa el botón MASTER como maestro par...

Page 51: ...o seleccionado se pue den ajustar con todo detalle 2 Botón de efectos Este botón es para usarlo exclusivamente en el modo Single 3 Control DRY WET Cambia el balance entre el sonido de efecto y el sonido original 4 Botón SELECT BACK El tipo de efecto cambia cada vez que se pulsa el botón Con TRAKTOR Pioneer DDJ T1 EDITION 2 se pueden usar los 6 tipos de efectos de abajo no Effect Filter Delay Rever...

Page 52: ...stas seleccionadas se cargan en los decks respectivos Reproducción de archivos de música iTunes Si administra archivos de música con iTunes a las listas de reproduc ción y a la librería iTunes podrá acceder directamente con el explorador TRAKTOR 2 1 Gire el selector giratorio mientras pulsa el botón TREE para seleccionar iTunes 2 Exploración de la librería y listas de reproducción de igual forma q...

Page 53: ...a el fader de canal en la posición interior Ajusta la salida de nivel de sonido desde varios decks 3 Ajuste el crossfader Cambie el deck cuyo sonido va a salir por los altavoces Borde izquierdo El sonido sale por el deck A o C Centro El sonido de todos los decks se mezcla y sale Borde derecho El sonido sale por el deck B o D La asignación del deck se puede cambiar con Deck Assign Button de los lad...

Page 54: ...los terminales AUX IN y MIC no se pueden usar Para usar sin limitaciones conecte a una toma de corriente usando el adaptador de CA incluido 1 Conecte el aparato externo al terminal AUX IN o MIC 2 Cambie el conmutador selector AUX MIC AUX Selecciona el aparato externo conectado a los terminales AUX IN MIC Selecciona el micrófono conectado al terminal MIC 3 Haga el ajuste Preferences Input Routing d...

Page 55: ...s de librería iTunes etc Controller Mana ger Asigne las funciones TRAKTOR 2 al controlador teclado etc Traktor Kontrol X1 Establezca esto cuando use Traktor Kontrol X1 de Native Instruments Asignación de las funciones deseadas al pad NEEDLE SEARCH Cuando se asignen las funciones deseadas al pad NEEDLE SEARCH pulse primero el botón FUNCTION para activar FUNCTION En el pad NEEDLE SEARCH se pueden as...

Page 56: ...tación USB del ordenador puede no ser suficiente Use el adaptador de CA incluido Está usando un concentrador USB No se pueden usar concentradores USB Conecte directamente el ordenador y esta unidad con el cable USB incluido página 15 Está usando un cable USB de venta en el comercio Use el cable USB incluido Las posiciones de los controles o barras deslizantes son diferentes en esta unidad y en TRA...

Page 57: ... Está BEAT MARKER Grid establecido para hot cue Ponga al menos un BEAT MARKER en Grid la página 18 Ponga una marca de verificación en Preferences File Management Set Beat Grid when detecting BPM y luego recargue la pista en el deck El inicio de fader no es posible Está el interruptor CH FADER START en ON Ponga el interruptor CH FADER START en ON Está en espera en la posición en la que se esta blec...

Page 58: ...máximo 30 Gire hacia la izquierda 127 mínimo 98 Control AUTO LOOP MOVE GRID pulsación 9n 20 dd 9n 80 dd OFF 0 ON 127 Botón IN IN ADJUST 9n 16 dd 9n 76 dd OFF 0 ON 127 Botón OUT OUT ADJUST 9n 17 dd 9n 77 dd OFF 0 ON 127 Botón ACTIVE 9n 18 dd 9n 78 dd OFF 0 ON 127 Botón FUNCTION 9n 58 dd 9n 107 dd OFF 0 ON 127 Pad NEEDLE SEARCH Bn 3 dd Bn 8 dd OFF 0 ON 1 127 información de posición 1 en el borde izq...

Page 59: ...y deck D es 3 Cuando se utiliza pulsando el botón SHIFT el código es el código para cuando el botón SHIFT está encendido Los mensajes MIDI no se pueden asignar a los botones DECK A B C D o SHIFT 3 Mezclador Nombre de interruptor Mensaje MIDI esta unidad al ordenador Notas Control MAIN VOL B6 0 dd 0 127 Control HEADPHONES MIX B6 1 dd 0 127 Control HEADPHONES VOL B6 2 dd 0 127 Control GAIN Deck A B6...

Page 60: ...k A 9n 88 dd Naranja Apagado 0 encendido 127 Deck B 9n 89 dd Naranja Apagado 0 encendido 127 Deck C 9n 90 dd Naranja Apagado 0 encendido 127 Deck D 9n 91 dd Naranja Apagado 0 encendido 127 MASTER Deck A 9n 92 dd Rojo Apagado 0 encendido 127 Deck B 9n 93 dd Rojo Apagado 0 encendido 127 Deck C 9n 94 dd Rojo Apagado 0 encendido 127 Deck D 9n 95 dd Rojo Apagado 0 encendido 127 4 Efecto Nombre de inter...

Page 61: ...censing com Cuidados para los derechos de autor Las grabaciones que usted ha hecho son para su uso personal y según las leyes de los derechos de autor no se pueden usar sin el consenti miento del propietario de tales derechos La música grabada de CD etc está protegida por las leyes de los derechos de autor de países individuales y también por tratados internacionales La persona que ha grabado la m...

Page 62: ...分國家或地區中 電源插頭與插座的形狀有時會和圖示不同 不過本機的連接及操作方式完全相同 K041_A1_Zhtw Ґ ࠣѬᎍۤΚૢঢ় ңഋȄԄ ݏ ҦܼᔗңӶ ڐ у ߩঢ় ңഋĩԄ ୧ཿңഋՅߞ ٻ ңܼᓢᢉϜȂ ܗ ٻ ңܼ آ ٚ ܗ ϜĪՅᏳयึҢࢉሬ ٯ ሰ ঔ౪ȂӶ ߴң ܜ ᐋঔ౪ຳңȄ Ԅ ԥඩ ޠ ೪റȂᔗӶ ೪റߤߗԋ၇Ѡሇᚭ ٻ ң ޠ ႬᏣඩ Ȅ D28 9 3 2_A1_Zhtw Ӷໍ ܗ ᡑ ഀ௦ࠊȂ Ӓᜱഗ ٯ ϜᘟłńᡑᔇᏣᇅ łńඩ ޠ ഀ௦Ȅ D44 9 3_A1_Zhtw_PSV ...

Page 63: ...於 TRAKTOR 2 軟體 7 安裝 TRAKTOR 2 軟體 7 啟動 TRAKTOR 2 9 執行產品啟動 9 更新 TRAKTOR 2 軟體 10 關於驅動程式軟體 Windows 11 連接 端子名稱 13 連接輸入 輸出端子 14 零件名稱與功能 控制面板 15 1 瀏覽器 16 2 唱盤 17 3 混音器 19 4 音效 20 操作 匯入曲目至 TRAKTOR 2 21 載入曲目至唱盤 21 播放 21 使用混音器功能 22 使用音效功能 22 同步化與其他唱盤 節奏同步 的播放速度 22 輸入外部裝置或麥克風的聲音 23 變更 TRAKTOR 2 喜好設定 TRAKTOR Pioneer DDJ T1 EDITION 2 設定項目清單 24 指定所需的功能至 NEEDLE SEARCH 墊 24 其他資訊 故障排除 25 當成其他 DJ 軟體的控制程式使用 27 MIDI ...

Page 64: ...S FWD TEMPO 0 SELECT BACK 1 1 2 2 3 3 MIN MAX MIN MAX MIN LOW HI MAX MIN VOL MAIN BROWSE VIEW HEADPHONES MASTER CUE MIX MAX MIN VOL MAX 5 2 6 3 7 4 8 MOVE GRID SHIFT PLAY PAUSE CUE ADVANCED ACTIVE CHAINED MIN MAX DRY WET DECK FILTER B D FX1 FUNCTION IN ADJUST OUT ADJUST MOVE HOT CUE IN AUTO LOOP KEY LOCK TEMPO RANGE OUT NEEDLE SEARCH MODE SIZE BWD FWD DELETE 1 REV MIC FWD TEMPO 0 SELECT BACK 1 1 2...

Page 65: ...裝置中 避免讓任何液體濺入 裝置或裝置外側 維修 開啟或取下外蓋可能會讓您觸電或產生其他危險 如需 維修本產品 請向先鋒授權服務代表洽詢 請參閱隨附的 服務 支援卡 受損要求維修 在下列情況 請拔下本機插頭 並向合格的維修人員請求 維修 電源線 插頭或機殼受損時 若已濺入液體或物體已掉入本產品中 若本產品已接觸雨水或水 若在遵守操作手冊的情況下本產品無法正常操作 僅 調整操作手冊提及的控制鍵 錯誤調整其他控制鍵可 能會導致產品受損 並需要合格技師花費更長的時間 才能將本機還原回正常操作 當本產品在效能上出現明顯的變化時 代表本產品 需要維修 請檢查 AC 變壓器或電源插頭是否合乎規格 然後利用指 定的程序將電源插頭插入 AV 變壓器指定的位置 直到聽 見卡嗒聲 關於詳細資訊 請參閱 第 6頁 上 安裝電源 插頭 若 AC 變壓器或電源插頭的規格不符 請向最近的先鋒授 權服務中心或經銷商要求...

Page 66: ...無須取出 PUSH PUSH 電源插頭 本產品隨附的電源插頭類型如下所示 請使用適合您所 在國家或地區的電源插頭 類型 1 適用日本及北美 類型 2 適用歐洲 類型 3 適用英國 類型 4 適用澳洲 類型 5 適用泰國及韓國 使用膝上型電腦底座 電腦的鍵盤部分可容納在本機下方 視您 筆記型電腦 電腦的大小而定 鍵盤部分可能 與 LAPTOP DOCK 不符 此安裝方式可讓電腦不觸碰本機 此安裝方式可讓連接電腦的纜線不會在本機下打結 取下雙腳使用 本機的雙腳可取下 使用十字螺絲起子取下左右腳 各 2 顆螺絲 的螺絲 DJ CONTROLLER DDJ T1 安裝雙腳時 將需要您之前取下的螺絲 請小心不要 遺失 無法使用其他螺絲來正確安裝雙腳 ...

Page 67: ...用於 Windows 7 Windows Vista 及 Windows XP 配備 2 4 GHz 或更高階 Intel Pentium 4 Intel Core Duo 或 AMD Athlon 64 處理器的 PC AT 相容電腦 記憶體需求 2 GB 或以上的 RAM 硬碟 可用空間為 500 MB 或以上 DVD光碟機 可讀取 DVD ROM 的光碟機 網際網路 連接 使用者註冊 Native Instruments 需網際網 路環境 以更新 TRAKTOR 2 等軟體 使用最新版本的網頁瀏覽器 USB 2 0 連接埠 需 USB2 0 連接埠才能連接電腦與本機 即使符合上述操作環境需求 也不保證所有電腦上的 完整功能 即使擁有以上操作環境所需的記憶體 但由於常駐程 式 服務數量等而欠缺記憶體 卻可能會影響軟體提 供優化的功能及效能 在此情況下 需釋放足夠的記 憶體 建議安裝額外...

Page 68: ...下 Next 開始安裝 一完成安裝後 安裝完成畫面就會出現 11按一下 Finish 這將完成安裝程序 關於安裝程序 Macintosh 1 將隨附的 TRAKTOR Pioneer DDJ T1 EDITION 2 軟體 DVD ROM 光碟插入電腦的 DVD 光碟機 畫面上會出現 Traktor 2 圖示 2 按兩下 Traktor 2 圖示 便會顯示 DVD ROM 裝置的內容 3 按兩下 Traktor 2 Installer mpkg TRAKTOR 2 安裝程式已啟動 4 一啟動 TRAKTOR 2 安裝程式後 請按一下 繼續 5 請詳閱授權協議內容 然後按一下 繼續 6 若您同意使用協議內容 按一下 同意 若您不同意使用協議內容 按一下 不同意 取消安裝 7 選擇 Native Instruments 硬體驅動程式 然後按一下 繼續 勾選適用您硬體的核取方塊 8 選擇安裝 T...

Page 69: ...2 選擇取得授權的方式 然後按一下 Activate 立即從 SERVICE CENTER 取得授權 Buy 從 Native Instruments 線上商店購買 TRAKTOR 2 Run Demo 在展示模式中啟動 TRAKTOR 2 從 TRAKTOR 2 Help 選單中啟動 在 TRAKTOR 2 Help 選單中 按一下 Launch Service Center 直接啟動 SERVICE CENTER 適用 Windows 在 Windows 開始 功能表中 按一下 Native Instruments Service Center Service Center 圖示 適用 Mac OS X 在 Finder 中 開啟 應用程式 資料夾 然後按兩下 Service Center Service Center 圖示 啟動程序 線上啟動 電腦連接至網際網路時 離線啟動 電腦未連...

Page 70: ...n NI account 並按一下 SUBMIT 後 就會出現新的使用者帳號註冊畫面 輸入所需的項目 電子郵件地址 姓氏及名稱 所在 城市地址及郵遞區號 選擇您的國家 地區 然後按 一下 NEXT 調查畫面出現時 選擇各項問題的回答 然後按一下 SUBMIT 密碼將傳送至表格上輸入的電子郵件地址 返回登入 畫面並登入 在Native Instruments網站上註冊新使用者帳號時輸入 的個人資訊會依據隱私權政策予以收集 處理及使用 先鋒公司不會收集 處理或使用此項個人資訊 9 Service Center Activation Page 出現時 按一下 NEXT 10檢查 Product 為 TRAKTOR Pioneer DDJ T1 EDITION 2 且 Status 為 OK 然後按一下 NEXT 已建立啟動回復檔案 在 USB 等裝置上儲存此檔案 11在要安裝 TRAKTOR P...

Page 71: ...定目的之適用程度保 證 品質滿意保證 精確性 所有權或是不侵害保證 且 不論是明白 隱含 法令規定 或是因工作所導致 因商 業往來或使用導致 您應自行負擔有關程式及使用說明 品質之全部風險 並自行負擔所有修護所需之費用 4 違約的賠償與補償 您同意因任何違反本契約約定之行為 將導致先鋒發生 無法挽回之損害 且該等損害無法以金錢加以賠償 因此 除了賠償以及任何先鋒有權取得之其他補償之外 您同 意先鋒得尋求任何法令之救濟 包括假扣押或假處分等 保全方式 以避免發生於本契約實際上的 具威脅性的或 持續的違約行為 5 契約終止 先鋒有權在您違反任一條款時 隨時終止本契約 當本契 約終止後 您必須停止使用該程式 並將其從安裝之電腦 中永久刪除 以及銷毀您以任何形式所持有的程式與使 用說明書及其複本 並以書面向先鋒確認您已經從事前 述行為 第 2 2 2 3 2 4 3 4 5 及 6 條將會在本契 ...

Page 72: ...在安裝進行時畫面上出現 Windows 安全性 請按一 下 仍安裝此驅動程式軟體 I 並繼續安裝 在 Windows XP 上安裝時 若在安裝進行時畫面上出現 硬體安裝 請按一下 繼續安裝 並繼續安裝 完成安裝程式後 將出現完成訊息 連接本機與電腦 1 使用 USB 連接線連接本裝置與電腦 如需連線的詳細資料 請參閱 第 13頁 上 連接 2 將 ON OFF 開關滑至 ON 端 開啟本裝置的電源 當本機優先連接電腦或連接至電腦上的不同 USB 連接 埠時 可能會出現 正在安裝裝置驅動程式 訊息 請稍待片刻直到 您的裝置已可使用 訊息出現 調整緩衝區大小 本裝置功能運作有如符合 ASIO 標準的音訊裝置 若應用程式將本機當作正在運作的預設音訊裝置 DJ 軟體等 使用 在調整緩衝區大小前請離開這些應用 程式 按一下 Windows 開始 功能表 所有程 式 Pioneer DDJ DDJ A...

Page 73: ...及 MIC 端子 耳機音量將變低 若要避免這些限制並使用本機 請連接隨附的 AC 變壓器 端子名稱 後面板 MASTER OUT 2 MASTER OUT 1 TRS AUX IN VOL USB ON OFF DC IN MIN L R L L R R MAX 4 5 6 7 8 9 1 2 3 1 MASTER OUT 1 端子 在此連接通電的揚聲器等設備 此為 TRS 電話插孔 所以支援平衡及不平衡輸出 若在使用不平衡輸出時位準上升太高 聲音將會失真 2 MASTER OUT 2 端子 連接至功率放大器等 3 AUX IN 端子 連接至外接裝置的輸出端子 範本 可攜式音訊裝置等 操作 USB 匯流排電源時 將無法使用此功能 4 VOL 控制鍵 調整 AUX IN 端子的音訊位準輸入 5 Kensington 安全槽 6 USB 端子 連接至電腦 使用隨附的 USB 纜線可直接連接本機...

Page 74: ...至麥克風 操作 USB 匯流排電源時 將無法使用此功能 連接輸入 輸出端子 後面板 MASTER OUT 2 MASTER OUT 1 TRS AUX IN VOL USB ON OFF DC IN MIN L R L L R R MAX R L R L ՎॲଊᒰΤᆓφ Ѡឺԓॲଊ၇ဋ TRAKTOR Ⴌဟ ೪റȃᘘτᐡȃѓ౦ඵᖑᏣ Վॲଊᒰяᆓφ ՎႬྜඩ łń ᡑᔇᏣ Ȟᓎߤȟ 線鉤 將 AC 變壓器的電源線掛在線鉤頂端 而將 USB 纜線掛在 底部 將電源線及 USB 纜線掛在線鉤上 以纏緊 AC 變壓器的電 源線與 USB 纜線至定位 這可防止電源線與 USB 纜線遭 意外拉扯 以及防止插頭與端子中斷連接 若 AC 變壓器或 USB 纜線在播放時中斷連接 聲音將 會中斷 USB ON OFF DC IN BD ᡑᔇᏣ ޠ Ⴌྜጤ ጤႚ VTC ഀ௦ጤ 前面板 PHONES INPU...

Page 75: ...DELETE 1 REV MIC FWD TEMPO 0 SELECT BACK 1 1 2 2 3 3 MIN MAX MIN MAX MIN LOW HI MAX 5 2 6 3 7 4 8 MOVE GRID SHIFT GAIN MIN MAX C LOAD C FX 1 2 SYNC MASTER EQ HI MIN MAX MID MIN MAX LOW MIN MAX OFF ON GAIN MIN MAX TREE FAVORITES A LOAD A FX 1 2 SYNC 10 9 8 7 6 5 4 3 2 1 0 MASTER EQ HI MIN MAX MID MIN MAX LOW MIN MAX OFF ON GAIN MIN MAX B LOAD PUSH B FX 1 2 SYNC CH FADER START MASTER EQ HI MIN MAX M...

Page 76: ... TRACK 區域 按下轉盤 開啟 關閉 BROWSE 區域的放大顯示 TREE 區域 TRACK 區域及 FAVORITES 區 域皆通稱為 BROWSE 區域 按下 SHIFT 按鍵時轉動轉盤 逐頁移動 TRACK 區域中的游標 3 FAVORITES REC 按鍵 按下 FAVORITES REC 按鍵時轉動轉盤 移動 FAVORITES 區域中的游標 在以上畫面標記 3 的部分稱為 FAVORITES 區域 按下 SHIFT 按鍵時按下 FAVORITES REC 按 鍵 開始 停止錄製 若要顯示 AUDIO RECORDER 面板 按一下畫 面右上方的 圖示 即使未顯示 AUDIO RECORDER 面板 仍可開 始 停止錄製 若要播放已錄製的檔案 請在 TREE 區域中選 擇 Audio Recordings 在 Preferences 下的 Recording 可檢查及變 更...

Page 77: ...鍵時按下其他按鍵後 會叫出不同 功能 4 AUTO LOOP MOVE GRID 控制鍵 轉動 AUTO LOOP MOVE GRID 控制鍵 變更 循環大小 按下 AUTO LOOP MOVE GRID 控制鍵 開啟 關閉循環播放 按下 SHIFT 按鍵時轉動 AUTO LOOP MOVE GRID 控制鍵 可調整 Beat Grid 此功能可調整分析結果的差異 調整 Beat Grid 時 至少建立一個 BEAT MARKER 建立 BEAT MARKER 後 將熱指令 CUE TYPE 設為 Grid 按一下 圖示左側的 b 即可變更 CUE TYPE 熱指令類型 5 IN IN ADJUST 按鍵 OUT OUT ADJUST 按鍵 ACTIVE 按鍵 IN IN ADJUST 按鍵 播放時在您想要開始循環播放 進入循環點 的位置 按下 IN IN ADJUST 按鍵 以設定離開循...

Page 78: ...Jump 播放位置移動 Loop 循環移動 Loop In 進入循環點移動 Loop Out 離開循環點移動 使用 SIZE c d 按鍵可設定播放位置的移動量 或按照節奏部分進行循環 按下 c BWD FWD d 按鍵可移動播放位置 或按 照使用 SIZE c d 按鍵設定的移動量進行循環 HOT CUE PANEL 操作 在播放或暫停模式按下無設定的按鍵時 會在按下 按鍵的位置設定熱指令 1 4 在播放或暫停模式按下設定熱指令 1 4 的按鍵時 會叫出熱指令 1 4 若要取消熱指令 1 4 在按下 DELETE 按鍵時按下對應按鍵 1 4 按下 DELETE 按鍵時 設定熱指令的 1 4 按鍵會閃爍 若要設定或叫出 5 至 8 的熱指令 在按下 SHIFT 按鍵時按下 1 至 4 的按鍵 若要刪除 5 至 8 的熱指令 在按下 SHIFT 與 DELETE 按鍵時按下 1 至 4 的按...

Page 79: ...ONES MIX 控制鍵 調整按下 CUE 按鍵後的唱盤聲音與 MASTER OUT 1 及 MASTER OUT 2 聲音間的螢幕音量平衡 3 HEADPHONES VOL 控制鍵 調整從 PHONES 端子輸出的音訊位準 4 GAIN 控制鍵 調整不同唱盤的輸入聲音位準 5 EQ HI MID LOW 控制鍵 這些控制鍵可調整輸入至不同唱盤的音質 這些控制鍵可分別調整 HI 高範圍 MID 中範 圍 及 LOW 低範圍 6 音效指定按鍵 按下 1 或 2 按鍵可指定 TRAKTOR 2 音效裝置 FX 1 或 FX 2 至唱盤 7 CUE 按鍵 按下耳機 CUE 按鍵產生的唱盤聲音可在耳機上監 控 按下多個耳機 CUE 按鍵時 將混合按下按鍵的唱盤 聲音並從耳機輸出 8 SYNC 按鍵 按下 SYNC 按鍵可同步化唱盤上的曲目與按下 MASTER 按鍵後唱盤的 BPM 及 Beat G...

Page 80: ...LOAD FX 1 2 REC 5 5 4 3 4 3 2 1 在本機上 TRAKTOR 2 音效模式會如下顯示 Group 模式 CHAINED Single 模式 ADVANCED Single 模式無法用 TRAKTOR Pioneer DDJ T1 EDITION 2 選擇 升級至 TRAKTOR PRO 2 或 TRAKTOR SCRATCH PRO 2 後 音效面板即可切換為 Single 模式 1 ADVANCED CHAINED 選擇器按鍵 Group 模式 在音效面板上最多可同時選取及 操作 3 種音效 Single 模式 可詳細調整其中一項選取的音效參數 2 音效按鍵 此按鍵只能在 Single 模式中使用 3 DRY WET 控制鍵 變更音效聲音與原始聲音之間的平衡 4 SELECT BACK 按鍵 每按一下按鍵就會切換音效類型 使用 TRAKTOR Pioneer ...

Page 81: ...會開啟或關閉 2 放開 TREE 或 FAVORITES 按鍵 然後轉動轉盤 選擇音軌 在按下 SHIFT 按鍵時轉動轉盤後 游標會按頁跳躍 3 按下 LOAD 按鍵以載入曲目至想要的唱盤 已選取的曲目會載入至個別唱盤 播放 iTunes 音樂檔案 若您利用 iTunes 管理音樂檔案 可使用 TRAKTOR 2 瀏覽 器直接存取 iTunes 資料庫及播放清單 1 按下 TREE 按鍵時轉動轉盤以選擇 iTunes 2 可利用與 iTunes 相同方式瀏覽資料庫及播放清單 無法使用 TRAKTOR 2 瀏覽器編輯 iTunes 資料庫及播放 清單 在 TRAKTOR 2 瀏覽器中播放時 會自動匯入 iTunes 音 樂檔案至 TRAKTOR 2 Track Collection 清單 放大瀏覽顯示區域 按旋轉選擇器 切換至 且瀏覽顯示區域會放大 若要返回一般顯示 請再次按下轉盤 播放 按...

Page 82: ...的 EQ HI MID LOW 控制鍵 以耳機監控音效 1 連接耳機至 PHONES 端子 2 按下耳機 CUE 按鍵以控制要監控的唱盤 3 轉動 HEADPHONES MIX 控制鍵 逆時針轉動 按下耳機 CUE 按鍵的唱盤聲音變 得更大聲 中央位置 按下耳機 CUE 按鍵的唱盤聲音及 MASTER OUT 1 MASTER2 聲音的音量相同 順時鐘旋轉時 從 MASTER OUT 1 MASTER2 端子輸出的音量會變得比較大聲 4 轉動 HEADPHONES VOL 控制鍵 按下耳機 CUE 按鍵的唱盤聲音從耳機輸出 再次按下耳機 CUE 按鍵時 將取消監控 使用音效功能 TRAKTOR 2 配備有兩部音效裝置 FX 1 及 FX 2 各音效裝置皆可指定一或多部唱盤 TRAKTOR PRO 2及TRAKTOR SCRATCH PRO 2皆配備有四 部音效裝置 新增音效 Group 模...

Page 83: ...所示設定 Input Aux L Mono 1 DDJ T1 AUX MIC L R 2 DDJ T1 AUX MIC R 使用 TRAKTOR Pioneer DDJ T1 EDITION 2 後 以上設 定將變為預設 4 調整 AUX IN 或 MIC 端子的音訊位準輸入 轉動主機前面板上的 VOL 控制鍵 MIC 端子 的輸入音訊位準已調整 轉動主機後面板上的 VOL 控制鍵 AUX IN 端 子的輸入音訊位準已調整 先鋒 DJ 播放機 放置在接近中央的位置 可攜式音訊播放機或其他低音量的裝置 根據中央 位置順時針放置 5 轉動 TRAKTOR 2 軟體的 AUX 旋鈕 轉動交叉音控器右側的 AUX 旋鈕 並設為適當的音量 分配外部裝置或麥克風的聲音至唱盤 音效功能 濾波器功能及 EQ 控制皆可在外部裝置或麥克 風聲音設為從 A D 輸入至唱盤時使用 下列說明如何分配外部裝置或麥克風...

Page 84: ...tor Kontrol X1 時設定此項目 指定所需的功能至 NEEDLE SEARCH 墊 指定所需的功能至 NEEDLE SEARCH 墊時 請先按下 FUNCTION 按鍵開啟 FUNCTION 可指定功能至 NEEDLE SEARCH 墊上最多 5 個點 FUNCTION NEEDLE SEARCH Function1 Function5 Function2 Function3 Function4 1 按一下 TRAKTOR 2 Preferences Button 按鍵 開啟 TRAKTOR 2 設定選單 2 按一下 Controller Manager 3 按一下 Device Setup 下的 Device 在下拉式選單中選擇 Pioneer DDJ T1 4 按一下 Assignment Table 下的 Add In 在下拉式選單中選擇要指定的功能 5 按一下 Devic...

Page 85: ...nager Device Setup Device 中是否選擇 Pioneer DDJ T1 第 24頁 即使在使用隨附的 AC 變 壓器時 本機也會使用 USB 匯流排電源操作 是否確實連接隨附的 AC 變壓器 請在隨附的 AC 變壓器上確實安裝電源插頭 第 6頁 確實連接隨附的 AC 變壓器至電源插座 第 14頁 確實連接隨附 AC 變壓器的 DC 插頭至本機 第 14頁 使用 USB 匯流排電源操作 時電源未開啟 隨附的 USB 纜線是否確實連接 使用隨附的 USB 纜線可直接連接電腦與本機 無法使 用 USB 集線器 第 14頁 電腦的 USB 電源供應器電容可能 不足 請使用隨附的 AC 變壓器 您是否正在使用 USB 集線器 無法使用 USB 集線器 使用隨附的 USB 纜線可直接連 接電腦與本機 第 14頁 您是否正在使用市售 USB 纜線 請使用隨附的 USB 纜線 本機上...

Page 86: ... 檢查 Preferences 是否如下設定 Audio Setup Audio Device PIONEER DDJ T1 Mac OS X 或 Pioneer DDJ ASIO Windows Output Routing Output Monitor L 3 DDJ T1 PHONES L 及 R 4 DDJ T1 PHONES R Output Routing Output Master L 1 DDJ T1 MASTER L 及 R 2 DDJ T1 MASTER R Input Routing Input Channel D L Mono 1 DDJ T1 AUX MIC L 及 R 2 DDJ T1 AUX MIC R 請正確設定 以便輸入外部裝置的聲音 第 23頁 連接的設備及擴大機是否正確設定 正確設定設備及擴大機上的外接輸入選擇和音量 BPM 或整體波形不會顯示 音樂檔...

Page 87: ...ngle 模式 設定 ASIO 驅動程式時將 中斷聲音 是否在 TRAKTOR 2 執行時設定 ASIO 驅動程式 請在啟動 TRAKTOR 2 前設定 ASIO 驅動程式 第 11頁 反向指令點功能無效 設置了指令點嗎 設定指令點 第 21頁 循環播放功能無效 循環點是否設定 設定循環點 第 21頁 當成其他 DJ 軟體的控制程式使用 DDJ T1 也可以按照通用 MIDI 格式輸出按鈕以及轉盤等的操作數據 當使用 USB 導線與具有內裝式 MIDI 相容 DJ 軟體 的電腦連接時 可以從本機上操作 DJ 軟體 在電腦上播放的音樂檔案的聲音也可以通過 DDJ T1 輸出 若要當成其他 DJ 軟體的控制程式使用 請先進行 DJ 軟體的音訊及 MIDI 相關設定 有關詳細資料 請參閱 DJ 軟體的操作手冊 ...

Page 88: ... MIDI 訊息 本機至電腦 注意 SHIFT 按鍵關閉時 SHIFT 按鍵開啟時 PLAY PAUSE f 按鍵 9n 11 dd 9n 71 dd OFF 0 ON 127 CUE 按鍵 9n 12 dd 9n 72 dd OFF 0 ON 127 AUTO LOOP MOVE GRID 控 制鍵 轉動 Bn 19 dd Bn 79 dd 與之前操作時的計數差異 順時針轉動 1 最大值 30 逆時針轉動 127 最小值 98 AUTO LOOP MOVE GRID 控 制鍵 按下 9n 20 dd 9n 80 dd OFF 0 ON 127 IN IN ADJUST 按鍵 9n 16 dd 9n 76 dd OFF 0 ON 127 OUT OUT ADJUST 按鍵 9n 17 dd 9n 77 dd OFF 0 ON 127 ACTIVE 按鍵 9n 18 dd 9n 78 dd ...

Page 89: ...色 熄滅 0 亮起 127 CUE 9n 12 dd 9n 72 dd 橘色 熄滅 0 亮起 127 IN IN ADJUST 9n 16 dd 9n 76 dd 橘色 熄滅 0 亮起 127 OUT OUT ADJUST 9n 17 dd 9n 77 dd 橘色 熄滅 0 亮起 127 ACTIVE 9n 18 dd 9n 78 dd 橘色 熄滅 0 亮起 127 FUNCTION 9n 58 dd 9n 107 dd 紅色 熄滅 0 亮起 127 FILTER 9n 69 dd 9n 116 dd 橘色 熄滅 0 亮起 127 MOVE 9n 43 dd 9n 92 dd 橘色 熄滅 0 亮起 127 HOT CUE 9n 44 dd 9n 93 dd 橘色 熄滅 0 亮起 127 MODE DELETE 9n 45 dd 9n 94 dd 橘色 熄滅 0 亮起 127 SIZE c ...

Page 90: ...d OFF 0 ON 127 2 按鍵 唱盤 A 96 80 dd OFF 0 ON 127 唱盤 B 96 81 dd OFF 0 ON 127 唱盤 C 96 82 dd OFF 0 ON 127 唱盤 D 96 83 dd OFF 0 ON 127 耳機 CUE 按鍵 唱盤 A 96 84 dd OFF 0 ON 127 唱盤 B 96 85 dd OFF 0 ON 127 唱盤 C 96 86 dd OFF 0 ON 127 唱盤 D 96 87 dd OFF 0 ON 127 SYNC 按鍵 唱盤 A 96 88 dd OFF 0 ON 127 唱盤 B 96 89 dd OFF 0 ON 127 唱盤 C 96 90 dd OFF 0 ON 127 唱盤 D 96 91 dd OFF 0 ON 127 MASTER 按鍵 唱盤 A 96 92 dd OFF 0 ON 127 唱...

Page 91: ...熄滅 0 亮起 127 MASTER 唱盤 A 9n 92 dd 紅色 熄滅 0 亮起 127 唱盤 B 9n 93 dd 紅色 熄滅 0 亮起 127 唱盤 C 9n 94 dd 紅色 熄滅 0 亮起 127 唱盤 D 9n 95 dd 紅色 熄滅 0 亮起 127 4 音效 SW 名稱 MIDI 訊息 本機至電腦 注意 SHIFT 按鍵關閉時 SHIFT 按鍵開啟時 ADVANCED CHAINED 選擇器 按鍵 9n 64 dd 9n 92 dd OFF 0 ON 127 DRY WET 控制鍵 Bn 0 dd Bn 16 dd 0 127 SELECT BACK 1 按鍵 9n 68 dd 9n 96 dd OFF 0 ON 127 SELECT BACK 2 按鍵 9n 69 dd 9n 97 dd OFF 0 ON 127 SELECT BACK 3 按鍵 9n 70 dd 9...

Page 92: ...或其他類型的播送方式 網際網路串流 內部網路 公司網路 或其他類型之網路 或散佈電子資訊 線上 數位音樂傳輸服務 您必須取得有關此類使用的授權 如需詳細資料 請瀏覽 http www mp3licensing com 版權注意事項 為了自己個人娛樂而復製的某些內容 根據版權法在沒 有得到版權持有者同意時也許不能使用 來自CD的復製音樂受到各個國家或國際條約的保護 錄 製音樂的人自己要對所錄製內容是否合法負全部責任 處理從互聯網上下載的音樂時 下載音樂的人自己要對 下載內容是否按照下載站點的契約使用負全部責任 規格 AC 變壓器 功率 AC 100 V 至 240 V 50 Hz 60 Hz 額定電流 300 mA 額定輸出 DC 5 V 2 A 一般 主機 耗電量 使用 AC 變壓器時 700 mA 主機重量 4 9 kg 最大尺寸 680 mm 寬 95 2 mm 高 318 mm 深 ...

Page 93: ......

Page 94: ......

Page 95: ......

Page 96: ...A SDN BHD 16th Floor Menara Uni Asia 1008 Jalan Sultan Ismail 50250 Kuala Lumpur TEL 60 3 2697 2920 ӒᎣ ӌԥ४ϵѨ ѯᢋѯіҀϲ ୣ ӏ ĵıĸ ဵ Ĺ ዃ TEL 886 0 2 2657 3588 ӒᎣႬφȞॸ෬ȟԥ४ϵѨ ॸ෬Οᓹԍؔ ڮ ኅ ݎ ၿ IJIJ ဵзࣩ୧ཿϜЗ ĺıIJĮķ ࡊ TEL 852 2848 6488 PIONEER GULF FZE Lob 11 017 Jebel Ali Free Zone P O Box 61226 Jebel Ali Dubai TEL 971 4 8815756 PIONEER ELECTRONICS DE MEXICO S A DE C V Blvd Manuel Avila Camacho 138 10 piso Col Loma...

Reviews: