


131
Chapter
8
Cu
st
om
izing t
h
e AV So
urce
S
etting
AV
— The “Video image” and sound are output
only when the appropriate setting on “
AV1
Input
” / “
AV2 Input
”.
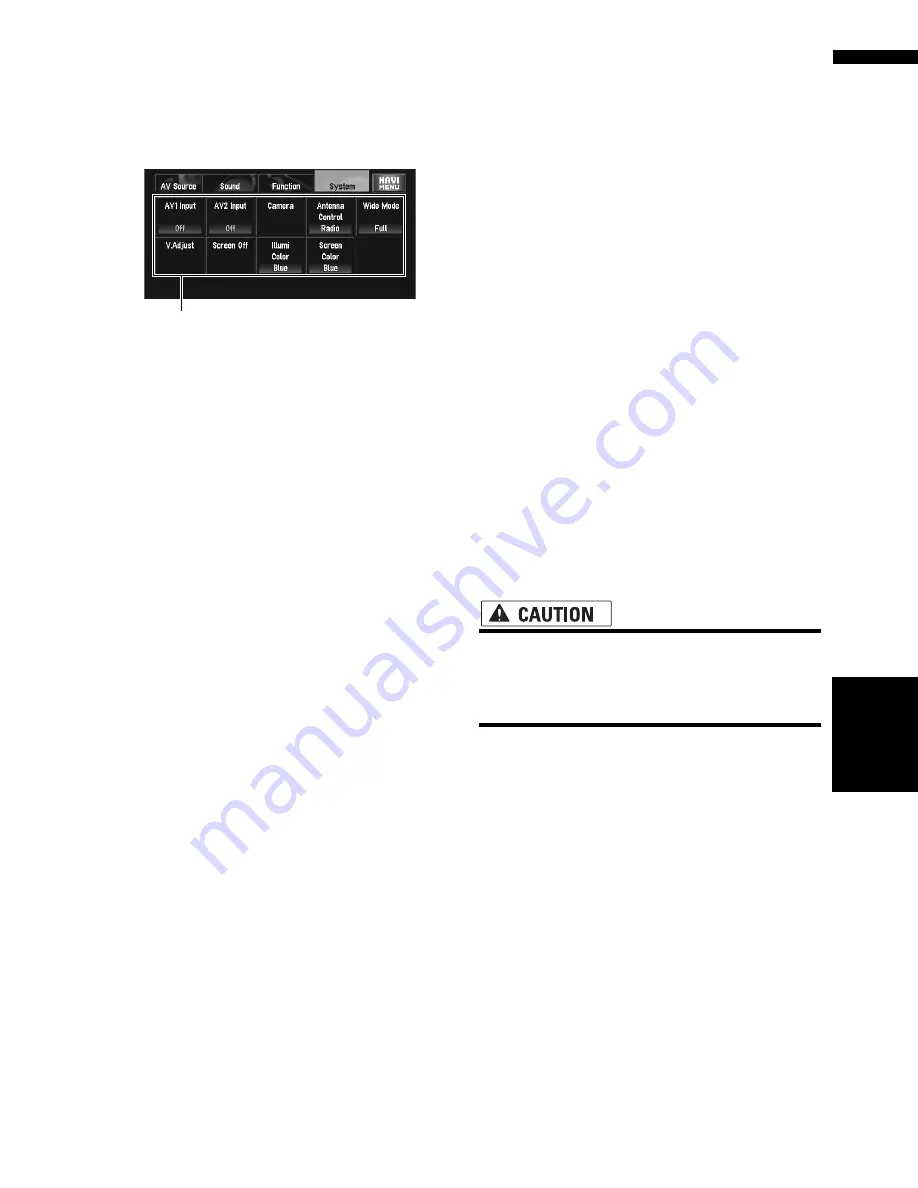
Setup adjustments
(1) System menu display
➲
How to display the
System
menu
➞
Page 79
Setting the video input
You can switch the setting according to the con-
nected component.
❒
Select “
Video
” to watch video of a connected
component as
AV-1
or
AV-2
source.
1
Touch “AV1 Input” or “AV2 Input” in the
System menu.
Each touch of the “
AV1 Input
” or “
AV2
Input
” changes the settings as follows:
AV1 Input:
•
Off
— No video component is connected
•
Video
— External video component
•
EXT
— Pioneer external unit connected
with RCA video cable
•
M-DVD
— DVD player or Multi-DVD player
connected with IP-BUS cable.
❒
When a DVD player or Multi-DVD player is
connected with IP-BUS cable and RCA
video cable, select
M-DVD
. When the AV
source is
M-DVD
, the “Video image” of the
DVD player or Multi-DVD player can be dis-
played.
AV2 Input:
•
Off
— No video component is connected
•
Video
— External video component
❒
When a Pioneer external unit is connected
with an IP-BUS cable, select
EXT
. When
the audio source is
EXT
, the “Video
image” of the Pioneer external unit can be
displayed.
❒
Use
AV2 Input
when connecting CD-
RM10 (sold separately) through the exter-
nal video component.
Setting for rear view camera
The following two functions are available. The
rear view camera feature requires a separately
sold rear view camera (e.g. ND-BC2). (For details,
consult your dealer.)
Camera for backing up
The navigation system features a function that
automatically switches to the full-screen rear
camera image installed on your vehicle. When
the shift lever is in the REVERSE (R) position, the
screen automatically switches to full-screen rear
view camera.
Camera for Rear view mode
Rear View
can be displayed at all times (e.g.
when monitoring an attached trailer, etc.) as a
split screen where map information is partially
displayed. Please be aware that in this setting,
camera image is not resized to fit, and that a por-
tion of what is seen by the camera is not view-
able.
• Pioneer recommends the use of a camera
which outputs mirror reversed images,
otherwise screen image may appear
reversed.
• Immediately confirm whether the display
changes to a rear view camera image when the
shift lever is moved to REVERSE (R) from
another position.
• When the whole screen changes to a rear view
camera image during normal driving, switch to
another setting.
❒
Initially, this function is set to
Off
.
1
Touch “Camera” in the System menu.
2
Touch “Camera” to turn rear view camera
setting on.
Touching “
Camera
” switches between “
On
”
and “
Off
”.
❒
Unless this setting is “
On
”, you cannot
switch to Rear View mode.
(1)
Other Functions
Summary of Contents for AVIC N4 - Navigation System With DVD player
Page 24: ...22 ...
Page 44: ...42 Chapter 2 Navigation Menu and Map Display NAVI ...
Page 56: ...54 Chapter 3 Setting a Route to Your Destination NAVI ...
Page 74: ...72 Chapter 4 Editing the Navigation Utilities NAVI ...
Page 80: ...78 Chapter 5 Customizing Your Navigation System NAVI ...
Page 124: ...122 Chapter 7 AV Using the AV Source Pioneer AV Equipment ...


