background image

5

If you attempt to watch video image while driving, the warning 

Viewing of front seat video source while driving is strictly 

prohibited.

” will appear on the screen. To watch video image 

on this display, stop the vehicle in a safe place and apply the 

handbrake. Please keep the brake pedal pushed down before 

releasing the handbrake.

When using a display con-
nected to V OUT

The video output terminal (

V OUT

) is for connection of a display 

to enable passengers in the rear seats to watch video images.

WARNING

NEVER install the rear display in a location that enables the 
driver to watch video images while driving.

To avoid battery exhaustion

Be sure to run the vehicle engine while using this product. Using 

this product without running the engine can drain the battery.

WARNING

Do not install this product in a vehicle that does not have an 
ACC wire or circuitry available.

Rear view camera

With an optional rear view camera, you are able to use this 

product as an aid to keep an eye on trailers, or backing into a 

tight parking spot.

WARNING

  SCREEN IMAGE MAY APPEAR REVERSED.

  USE INPUT ONLY FOR REVERSE OR MIRROR IMAGE 

REAR VIEW CAMERA. OTHER USE MAY RESULT IN 
INJURY OR DAMAGE.

CAUTION

The rear view mode is to use this product as an aid to keep 
an eye on the trailers, or while backing up. Do not use this 
function for entertainment purposes.

Handling the USB connector

CAUTION

  To prevent data loss and damage to the storage device, 

never remove it from this product while data is being 

transferred.

  Pioneer cannot guarantee compatibility with all USB mass 

storage devices and assumes no responsibility for any loss 
of data on media players, iPhone, smartphone, or other 
devices while using this product.

In case of trouble

Should this product fail to operate properly, contact your dealer 

or nearest authorised Pioneer Service Station.

Visit our website

Visit us at the following site:

http://www.pioneer-india.in

  We offer the latest information about PIONEER 

CORPORATION on our website.

  Pioneer regularly provides software updates to further 

improve it’s products. Please check the support section of 

the Pioneer website for all available software updates.

Protecting the LCD panel and 
screen

  Do not expose the LCD screen to direct sunlight when this 

product is not used. This may result in LCD screen malfunc-

tion due to the resulting high temperatures.

  When using a mobile phone, keep the aerial of the mobile 

phone away from the LCD screen to prevent disruption of the 

video in the form of spots, coloured stripes, etc.

  To protect the LCD screen from damage, be sure to touch the 

touch panel keys only with your finger and do so gently.

Notes on internal memory

Before removing the vehicle battery

  Some of the settings and recorded contents will not be reset.

Data subject to erasure

The information is erased by disconnecting the yellow lead from 

the battery (or removing the battery itself).

  Some of the settings and recorded contents will not be reset.

Resetting the microprocessor

CAUTION

Pressing the 

RESET

 button resets settings and recorded 

contents to the factory settings.

  Do not perform this operation when a device is connected 

to this product.

  Some of the settings and recorded contents will not be 

reset.

The microprocessor must be reset under the following 

conditions:

  Prior to using this product for the first time after installation.

  If this product fails to operate properly.

  If there appears to be problems with the operation of the 

system.

  If your vehicle position is shown on the map with a signifi-

cant positioning error.

1  Turn the ignition switch OFF.
2  Press the 

RESET

 button with a pen tip or other 

pointed implement.


Checking part names and functions

 on page 6

Settings and recorded contents are reset to the factory settings.

About this manual

This manual uses diagrams of actual screens to describe opera-

tions. However, the screens on some units may not match those 

shown in this manual depending on the model used.

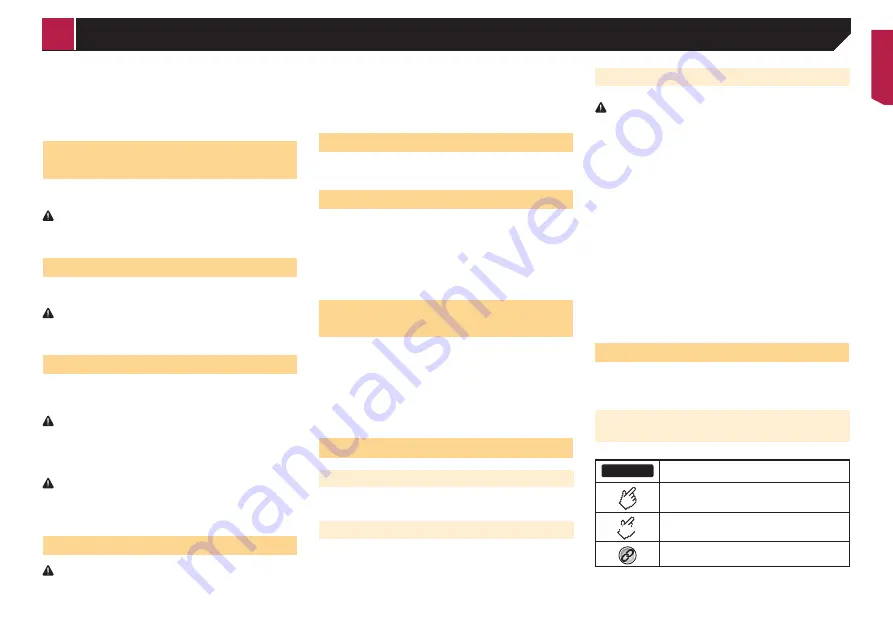
Meanings of Symbols Used in This 

Manual

000BT

This indicates model name that are supported 

the described operations.
This indicates to touch an appropriate soft key 

on the touch screen.

HOLD

This indicates to touch and hold an appropriate 

soft key on the touch screen.

This indicates that there is a reference or 

supplementary for the key or screen.

< QRB3683-A >

Precaution

Summary of Contents for AVH-199DVD

Page 1: ...Owner s Manual AVH 299BT AVH 199DVD Monitor RDS AV Receiver English ...

Page 2: ...m the file name list 17 Switching the media file type 17 Compressed video files 18 Starting procedure 18 Selecting files from the file name list 18 Still image files 19 Starting procedure 19 Selecting files from the file name list 19 Switching the media file type 19 Setting the slideshow interval 19 Bluetooth audio player 20 Starting procedure 20 Selecting files from the file name list 20 AUX sour...

Page 3: ...mation for playable media 37 Copyright and trademark notice 39 Bluetooth 40 WMA 40 DivX 40 AAC 40 Using app based connected content 40 Notice regarding video viewing 40 Notice regarding DVD Video viewing 40 Notice regarding MP3 file usage 40 Using the LCD screen correctly 41 Specifications 41 Contents ...

Page 4: ...uthorised Pioneer Service Station for internal inspection adjustments or repairs Before using this product be sure to read and fully understand the following safety information Do not operate this product any applications or the rear view camera option if purchased if doing so will divert your attention in any way from the safe operation of your vehicle Always observe safe driving rules and follow...

Page 5: ...it s products Please check the support section of the Pioneer website for all available software updates Protecting the LCD panel and screen Do not expose the LCD screen to direct sunlight when this product is not used This may result in LCD screen malfunc tion due to the resulting high temperatures When using a mobile phone keep the aerial of the mobile phone away from the LCD screen to prevent d...

Page 6: ...ntal regulations or environmental public institutions rules that apply in your country area Perchlorate Material special handling may apply See www dtsc ca gov hazardouswaste perchlorate Applicable to California U S A Using the remote control Point the remote control in the direction of the front panel to operate The remote control may not function properly in direct sunlight Important Do not stor...

Page 7: ...yback playback will start from the point where you stopped Touch the key again to stop playback completely 12 FOLDER P CH Selects the next or previous disc or folder Recalls radio station frequencies assigned to preset channel keys Inserting ejecting connecting media CAUTION Do not insert anything other than a disc into the disc loading slot Inserting and ejecting a disc Inserting a disc 1 Insert ...

Page 8: ...3 ABC A System Bluetooth Audio Rear View ON AUX OFF Month Date 12hour 24hour 10 6 2016 21 48 Time Format d m y m d y Top menu screen Time and date setting screen Setting menu screen Phone menu screen AV source icons Current source By pressing the button on any screen you can display the Top menu screen Basic operation ...

Page 9: ...h your fingers p To protect the LCD screen from damage be sure to touch the screen only with your finger gently Using the common touch panel keys Returns to the previous screen Closes the screen Operating list screens ROOT abcdefghi abcdefghi abcdefghi abcdefghi abcdefghi 1 3 2 1 Touching an item on the list allows you to narrow down the options and proceed to the next operation 2 Appears when all...

Page 10: ...uct off while the paired Bluetooth device is being deleted 1 Display the Bluetooth screen Displaying the Bluetooth screen on page 10 2 Touch Connection 3 Touch Connecting a registered Bluetooth device manually Connect the Bluetooth device manually in the following cases Two or more Bluetooth devices are registered and you want to manually select the device to be used You want to reconnect a discon...

Page 11: ... 1 4 The device number of the connected device is displayed Battery status of the mobile phone Switches to the initial search 1 Displays the preset dial screen Using the preset dial lists on page 12 2 Switches to the phone book list Calling a number in the phone book on page 11 3 Switches to the missed received and dialled call lists Dialling from the history on page 11 4 Switches the mode to ente...

Page 12: ...r hands free phoning General notes Connection to all mobile phones featuring Bluetooth wire less technology is not guaranteed The line of sight distance between this product and your mobile phone must be 10 metres or less when sending and receiving voice and data via Bluetooth technology With some mobile phones the ring sound may not be output from the speakers If private mode is selected on the m...

Page 13: ...ng and holding or you can perform non stop seek tuning If you press again non stop seek tuning is cancelled and the preset channel is switched Starting procedure 1 Press 2 Touch Radio The Radio screen appears Searching by PTY information You can tune into a station using PTY Programme Type Identification information 1 Touch 2 Touch or to select the item The following items are available News Info ...

Page 14: ...ttings screen on page 14 2 Touch Alternative FREQ to switch On or Off default Setting the Auto PI search When you switch to the broadcast station containing RDS data searches for the same PI Programme Identification code broad cast station from all frequency band automatically 1 Turn the source off Source on the Top menu screen on page 9 2 Display the Radio settings screen Displaying the Radio set...

Page 15: ...r fast forward Touch again to change the playback speed Stops playback 4 3 Performs frame by frame playback HOLD Performs slow motion playback Each time you touch it changes the speed in four steps in the following order 1 16 1 8 1 4 1 2 Hides the touch panel keys To display again the keys touch anywhere on the screen DVD 48 21 Stop 99 99 9999 99 9999 99 01 L R Pause 6 10 ᵫᶓᶊᶒᶇᴾᶁᶆ ᵐᵍᵐ ᵫᵮᵣᵥᵋᵟ ᵒᵖᶉᵦᶘ...

Page 16: ...ly the handbrake Starting procedure 1 Press 2 Insert the disc you want to play The source changes and then playback will start Inserting and ejecting a disc on page 7 p If the disc is already set select Disc as the playing source Selecting files from the file name list 1 Touch 2 Touch a track on the list to play back Switching the media file type When playing a digital media containing a mixture o...

Page 17: ...io files stored in a disc or a USB storage device Media compatibility chart on page 38 Starting procedure for Disc 1 Press 2 Insert the disc you want to play The source changes and then playback will start Inserting and ejecting a disc on page 7 p If the disc is already set select Disc as the playing source Starting procedure for USB 1 Press 2 Plug the USB storage device Plugging and unplugging a ...

Page 18: ...age 16 3 Switches the media file type Switching the media file type on page 17 p By pressing or you can also skip files forwards or backwards p By pressing and holding or you can perform fast reverse or fast forwards p Changing the wide screen mode Common operations on page 28 You can play compressed video files stored on a disc or in an USB storage device Media compatibility chart on page 38 CAUT...

Page 19: ...ng procedure 1 Press 2 Plug the USB storage device Plugging and unplugging a USB storage device on page 7 p Playback is performed in order of folder numbers Folders are skipped if they contain no playable files 3 Touch USB The image is displayed on the screen Selecting files from the file name list You can select files to view using the file name list 1 Touch 2 Touch a file on the list to play bac...

Page 20: ...the signal may cause noise for song playback p When you are talking on the Bluetooth device connected to this product via Bluetooth it may pause playback Starting procedure 1 Display the System setting screen 2 Touch AV Source Settings 3 Confirm that Bluetooth Audio is turned on 4 Press 5 Touch Bluetooth Audio Selecting files from the file name list p This function may not be available depending o...

Page 21: ...m setting screen Displaying the System setting screen on page 21 2 Touch Steering Wheel Control 3 Touch With Adapter 4 Touch OK Registering function to each key manually 1 Display the System setting screen Displaying the System setting screen on page 21 2 Touch Steering Wheel Control 3 Touch No Adapter 4 Touch the item to select the brand of your vehicle 5 Touch the item to set Follow the on scree...

Page 22: ...stem Language 3 Touch the language that you want to use Setting the beep sound 1 Display the System setting screen Displaying the System setting screen on page 21 2 Touch Beep Tone to switch On default or Off Adjusting the response posi tions of the touch panel touch panel calibration If you feel that the touch panel keys on the screen deviate from the actual positions that respond to your touch a...

Page 23: ...me display of the dimmer duration adjusting bar is depending on the clock display setting Setting the time and date on page 28 Adjusting the picture You can adjust the picture for each source and rear view camera CAUTION For safety reasons you cannot use some of these functions while your vehicle is in motion To enable these functions you must stop in a safe place and apply the handbrake Refer to ...

Page 24: ... adjust the source volume p If you directly touch the area where the cursor can be moved the SLA setting will be changed to the value of the touched point p 4 to 4 is displayed as the source volume is increased or decreased p The default setting is 0 Adjusting loudness This function compensates for deficiencies in the low frequency and high frequency ranges at low volume p This function is not ava...

Page 25: ...you select this curve the effect is applied to all AV sources p The default setting is Todoroki 1 Display the Audio setting screen Displaying the Audio setting screen on page 24 2 Touch Graphic EQ 3 Touch the equaliser you want Customising the equaliser curves You can adjust the currently selected equaliser curve setting as desired Adjustments can be made with a 5 band graphic equaliser p If you m...

Page 26: ...layback The setting made here will not be affected even if the audio language is switched during playback using the switch audio languages key Setting the menu language You can set the preferred language in which the menus recorded on a disc are displayed 1 Display the Video Setup screen 2 Touch DVD DivX Setup 3 Touch Menu Language The pop up menu appears 4 Touch the desired language When you sele...

Page 27: ...tup screen 2 Touch DVD DivX Setup 3 Touch DivX VOD The DivX VOD screen appears p If a registration code has already been activated it cannot be displayed 4 Touch Registration Code Your 10 digit registration code is displayed p Make a note of the code as you will need it when you deregis ter from a DivX VOD provider Displaying your DivX VOD deregistration code A registration code registered with a ...

Page 28: ...selected menu item is removed from the Favorites screen You can also remove a shortcut by touching the star icon in the registered menu column AUX 48 21 Full 6 10 2 1 1 Clock display Displays the time and date setting screen Setting the time and date on page 28 2 Screen display mode key Changes the wide screen mode Changing the wide screen mode on page 28 Setting the time and date 1 Touch the curr...

Page 29: ...erate this product any applications or the rear view camera option if purchased if doing so will divert your attention in any way from the safe operation of your vehicle Always observe safe driving rules and follow all existing traffic regulations If you experience difficulty in operating this product or reading the display park your vehicle in a safe location and apply the handbrake before making...

Page 30: ...re installation To prevent damage WARNING Use speakers over 50 W output value and between 4 Ω to 8 Ω impedance value Do not use 1 Ω to 3 Ω speakers for this unit The black cable is earth When installing this unit or power amp sold separately make sure to connect the earth wire first Ensure that the earth wire is properly connected to metal parts of the car s body The earth wire of the power amp an...

Page 31: ...ke switch video image on the display will be controlled by this function 2 The monitor displays the black screen with warning information to prevent the driver watching video contents during driving Speaker leads 1 2 9 a d e 7 4 3 5 6 8 b c L R F R Perform these connections when using a subwoofer without the optional amplifier d e 4 3 f b c L R SW b c g e d h i 1 To power supply 2 Power cord 3 Lef...

Page 32: ...d you while driving WARNING USE INPUT ONLY FOR REVERSE OR MIRROR IMAGE REAR VIEW CAMERA OTHER USE MAY RESULT IN INJURY OR DAMAGE CAUTION The screen image may appear reversed With the rear view camera you can keep an eye on trailers or back into a tight parking spot Do not use for entertainment purposes Objects in rear view may appear closer or more distant than in reality The image area of full sc...

Page 33: ...the vehicle Never install this product in front of or next to the place in the dashboard door or pillar from which one of your vehicle s airbags would deploy Please refer to your vehicle s owner s manual for reference to the deployment area of the frontal airbags Before installing Consult with your nearest dealer if installation requires drilling holes or other modifications of the vehicle Before ...

Page 34: ...ne on the sun visor In such cases install the microphone on the steering column Mounting on the sun visor 1 Fit the microphone lead into the groove 1 2 1 Microphone lead 2 Groove 2 Attach the microphone clip to the sun visor 1 2 1 Microphone clip 2 Clamps Use separately sold clamps to secure the lead where neces sary inside the vehicle Install the microphone on the sun visor when it is in the up p...

Page 35: ...is not with the audio language and subtitle language settings selected in DVD DivX Setup The DVD playing does not feature dialogue or subtitles in the language selected in DVD DivX Setup Switching to a selected language is not possible if the language selected in DVD DivX Setup is not recorded on the disc The picture is extremely unclear distorted and dark during playback The disc features a signa...

Page 36: ... Skipped The connected USB storage device contains DRM protected files The protected files are skipped Protect All the files on the connected USB storage device are embedded with DRM Replace the USB storage device Incompatible USB The connected USB storage device is not supported by this product Disconnect your device and replace it with a compatible USB storage device Check USB The USB connector ...

Page 37: ...atches to the disc Serious scratches can lead to playback problems on this product In some cases a DualDisc may become stuck in the disc loading slot and will not eject To prevent this we recommend you refrain from using DualDisc with this product Please refer to the manufacturer for more detailed informa tion about DualDiscs Dolby Digital This product will down mix Dolby Digital signals internall...

Page 38: ...isplaying your DivX VOD registration code on page 27 For details on the Divx video versions that can be played on this product refer to Specifications on page 41 For more details about DivX visit the following site http www divx com DivX subtitle files Srt format subtitle files with the extension srt can be used Only one subtitle file can be used for each DivX file Multiple subtitle files cannot b...

Page 39: ...n Home Theater Ver 3 11 Ver 4 x Ver 5 x Ver 6 x Compatible audio codec MP3 Dolby Digital Bit rate MP3 8 kbps to 320 kbps CBR VBR Sampling frequency MP3 16 kHz to 48 kHz 32 kHz 44 1 kHz 48 kHz for emphasis Maximum image size 720 pixels 576 pixels Maximum file size 4 GB Video files compatibility USB Files may not be played back properly depending on the environment in which the file was created or o...

Page 40: ...ation code in the DivX VOD section of your device setup menu Displaying your DivX VOD registration code on page 27 AAC AAC is short for Advanced Audio Coding and refers to an audio compression technology standard used with MPEG 2 and MPEG 4 Several applications can be used to encode AAC files but file formats and extensions differ depending on the appli cation which is used to encode This unit pla...

Page 41: ...e image quality because of the characteristics of the LCD screen Image quality will improve with an increase in temperature The product lifetime of the LED backlight is more than 10 000 hours However it may decrease if used in high temperatures If the LED backlight reaches the end of its product lifetime the screen will become dimmer and the image will no longer be visible In that case please cons...

Page 42: ...oding format Simple Profile Bluetooth AVH 299BT Version Bluetooth 3 0 certified Output power 4 dBm Max Power class 2 Frequency band s 2 400 MHz to 2 483 5 MHz FM tuner Frequency range 87 5 MHz to 108 MHz Usable sensitivity 12 dBf 1 1 µV 75Ω mono S N 30 dB Signal to noise ratio 72 dB IEC A network AM tuner Frequency range 530 kHz to 1 640 kHz 10 kHz Frequency range 531 kHz to 1 602 kHz 9 kHz Usable...

Page 43: ...43 ...

Page 44: ... 2016 PIONEER CORPORATION All rights reserved QRB3683 A ID ...

Reviews: