background image


Pico for Mac Getting Started Guide

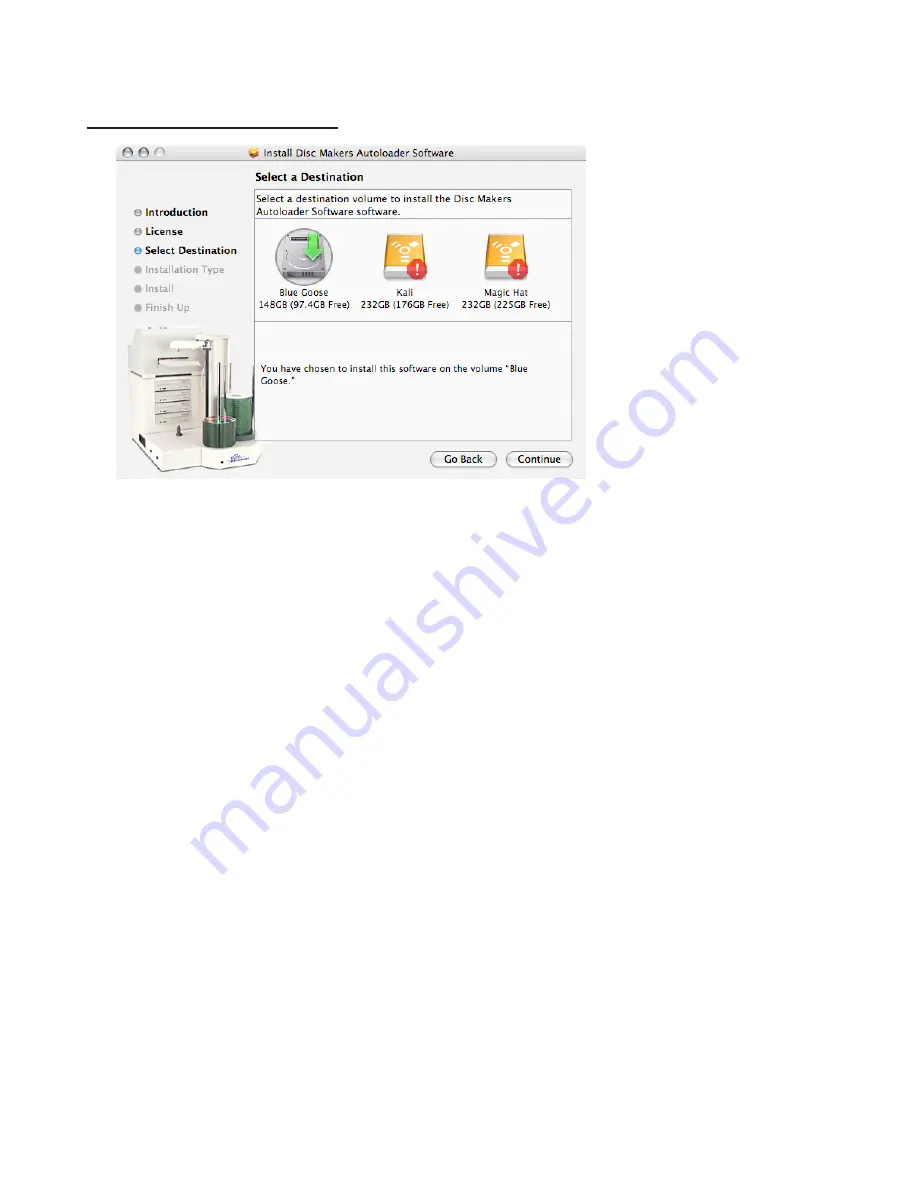
Choose the volume on which the software will be installed. Click Continue to begin 
the installation on the designated volume. 

5

  Enter the administrator password when prompted. 

6

  Select the installation type—Custom or Easy Install. If you select Custom, check the 

components that you want to have installed. Click Install to continue. 

To finish up the installation process, click Restart when prompted. While the computer 
is powered down and preparing to restart, start up the duplicator as described in the 
following steps. 

Powering on the duplicator

1

  With all cables securely connected to the duplicator, press the power switch on the 

back of the Pico duplicator cabinet to the “1” position. 

2

  Press the power switch at the rear of the cabinet once. The system fan starts spinning 

and the disc activity LED illuminates on the face of the cabinet.

3

  If the Disc Makers Autoloader Software has been properly installed and the duplicator 

is connected to the computer and powered on, the equipment will be recognized by 
Discribe Robot once the Mac restarts. 

Copying a master with Discribe Robot

1

  Select the Discribe Robot folder from the Applications options and start the Discribe 

Disc Makers program. The Quick Start window appears. 

Summary of Contents for Disc Makers

Page 1: ...the Pico with a PC refer to the Discmakers Pico User s Guide in the PC installation package The procedures in this guide explain how to connect the duplicator to a Mac con nect all components install...

Page 2: ...requirements The Pico duplicator performs most effectively when used in combination with a computer system that meets or exceeds the following requirements Computer hardware requirements Operating sys...

Page 3: ...the selected work surface with the two attachment pins facing toward the Pico 2 Lower the Pico onto the input bin The attachment pins on the input bin should slide easily into the two recesses on the...

Page 4: ...o use the duplicator Connecting the power cable 1 With the Pico power switch turned off 0 position at the back of the duplicator cabinet connect the AC power cord to the unit 2 Connect the other end o...

Page 5: ...the software Complete the installation procedures as described in the following steps You must have rights as administrator of the Mac to perform the installation 1 Power on the Macinstosh computer an...

Page 6: ...bed in the following steps Powering on the duplicator 1 With all cables securely connected to the duplicator press the power switch on the back of the Pico duplicator cabinet to the 1 position 2 Press...

Page 7: ...ed into one of the available disc drives in your system Select the Source location for the master from the options displayed in the drop down list Discribe displays the size of the copy opera tion as...

Page 8: ...as the files are recorded to disc When the write is com plete Discribe uses the robot arm to remove the disc from the recorder and transfers it to the output bin 6 Remove the disc from the output bin...

Page 9: ...in the input bin stack of the duplicator 2 From the Discribe Utilities menu select Test Robotics The primary Test Robotics win dow appears identifying the Robot and the installed recorder 3 Click the...

Page 10: ...a time from the input to the disc recorder After a short time each disc is extracted and placed in the output bin This test provides a good indication that communication between the com puter and dup...

Page 11: ...sure that you re using recordable CD discs with a CD master and record able DVD discs with a DVD master Also the quality of the media and the selected recording speed can affect the rejection rate Tr...

Page 12: ...4041 for telephone support on any duplicator related issues Copyright and contact details This document and related materials are provided as is with no warranties ex press or implied including but n...

Reviews: