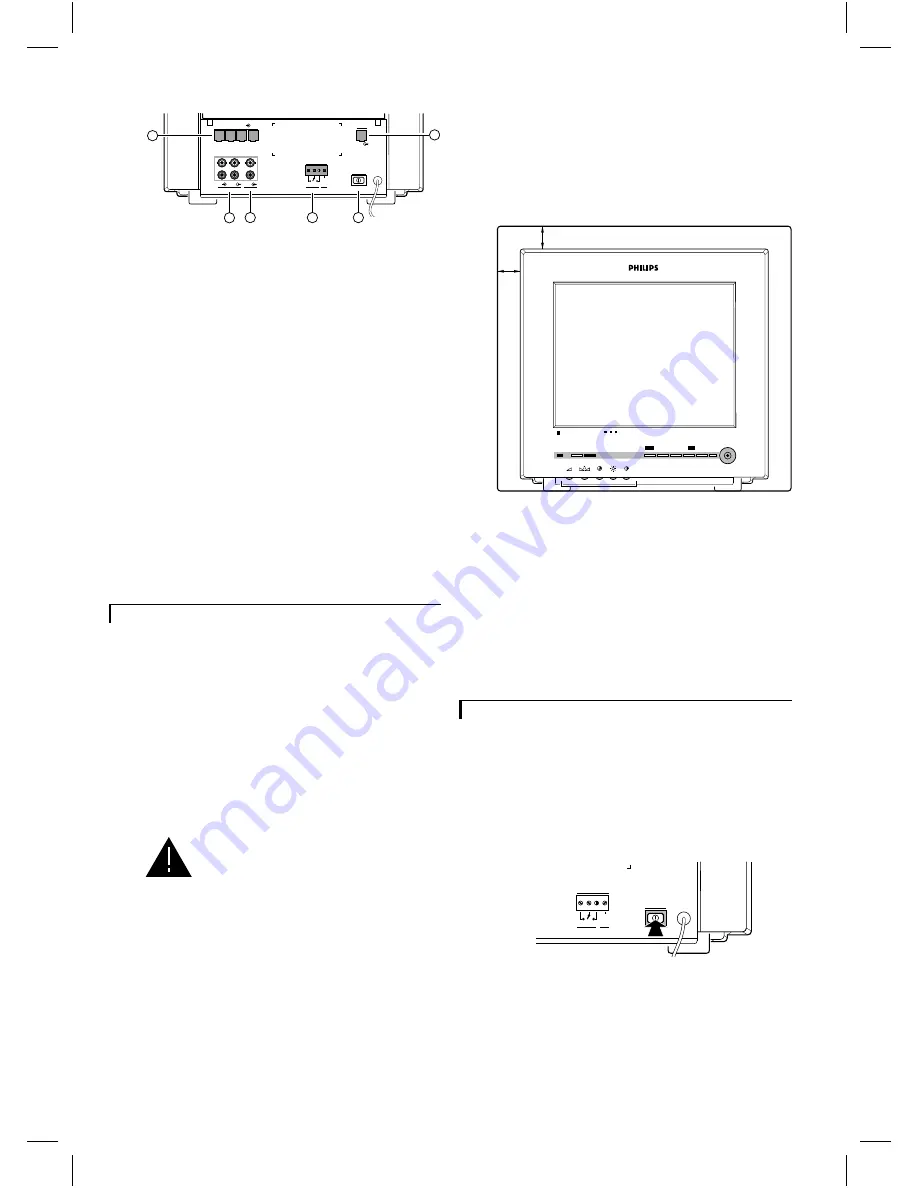
16
Camera inputs (1 to 4)
17
VCR in/output
The VCR output contains the image and sound of the
selected camera image.
18
Aux. output
Output which contains the image and sound of
one
of
the 4 camera inputs (menu controlled).
19
Slave output
Output for an optional slave monitor, showing the
image and sound of the selected camera image.
20
Alarm output contact (N.O./N.C.)
In case of an alarm this potential free contact (Normally
Open/Normally Closed; 24V/2A max.) can activate a
video recorder, siren or telephone selector.
21
Mains power switch
Observation system on/off.
Installation
Before you start to use the observation system, the
system monitor, camera(s) and optional accessories
should be installed. In this chapter the installation of the
system monitor and a camera is described. For more
detailed information about the installation and
operation of a camera and accessories you should
consult their manuals.
Remark:
When the system monitor is switched on by means
of the rear power switch, the monitor scans all camera inputs
(= system check). This to check and register which cameras and
accessories are connected to the camera inputs (= camera
configuration).
When the configuration is altered, the
system must be scanned again. Therefore
always switch off the system when a
camera or accessory is added or removed.
Only operating the power save button is
not sufficient.
Camera
To ease the installation of the camera, take it and the
system monitor to the area you want to observe. With
the monitor on site you can check whether the camera
covers the required area.
For the installation of the camera you should consult the
camera manual.
Monitor
When you have installed the camera(s) the monitor can
be installed.
1
Place the monitor on a solid base (leave at least 3 cm
around each side of the monitor for ventilation).
2
Connect the camera(s) and (optional) devices to the
monitor.
3
Connect the monitor to the mains supply.
4
Switch on the main power switch (21) and wait until the
camera image appears.
5
If necessary you can optimise the camera image by
means of the contrast
T
, brightness
(
and/or colour
S
control buttons at the front of the monitor.
Operation of the monitor
When you have installed the camera(s), the monitor and
the accessories, you can start to work with your
observation system.
Power on/off
Push button at the rear of the monitor.
CL 66610005_003.AI
1
2
3
4
camera in
in
out
VCR
out
aux
video
audio
max 24V 2A
out
alarm gnd
out
slave
power
16
17
18
20
21
19
CL 66610005_010.AI
talk
action
menu
_
+
next
auto
view
Colour Observation System
3 cm
3 cm
max 24V 2A
out
alarm gnd
power
CL 66610005_011.AI
5
g


