background image

— 27 —

Selecting Recording Format

When shipped from the factory, this
VCR has been set to select
automatically S-VHS format for
recording on an S-VHS tape and VHS
format for recording on a VHS tape. If
you want to make a recording using
VHS format on an S-VHS tape, follow
the procedure below.

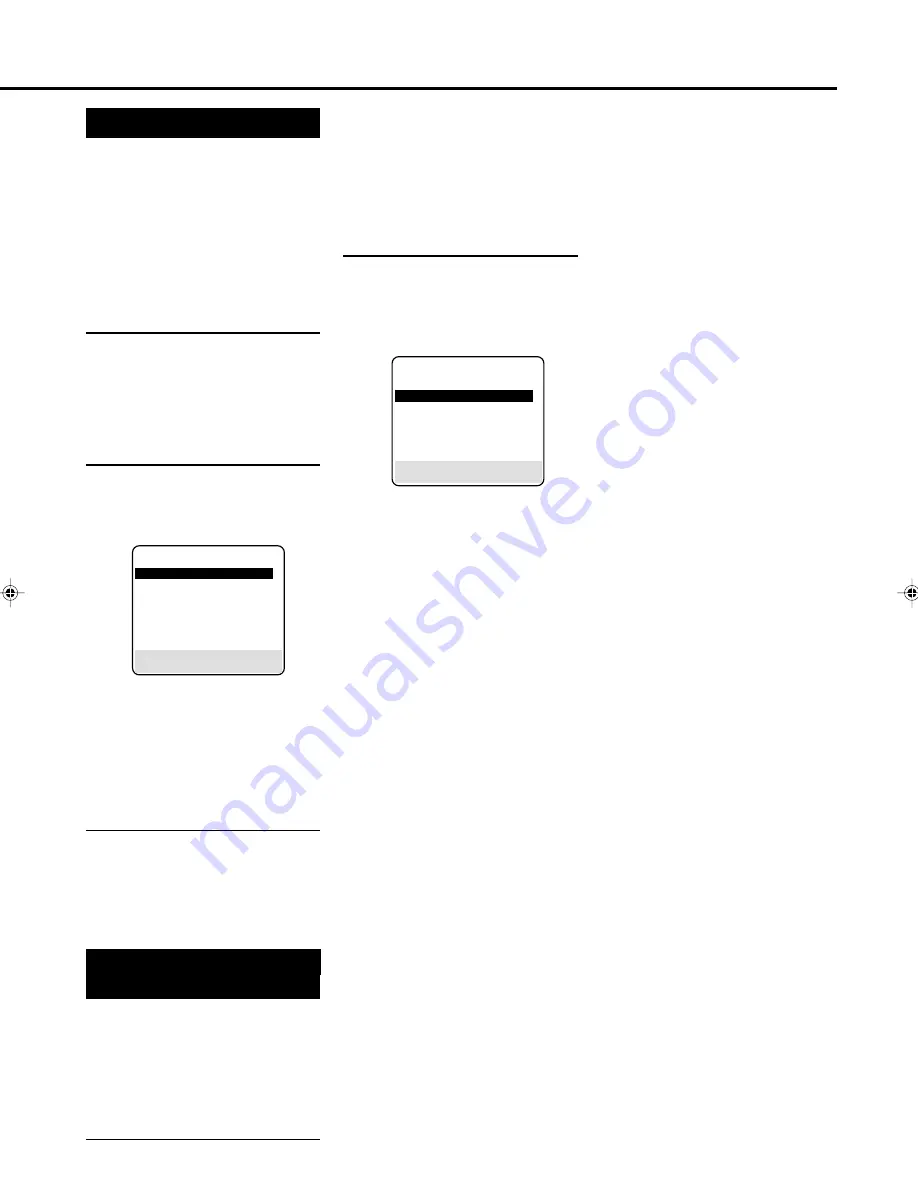
1

Select VCR Set Up Screen

Press 

VCR

.

Press 

MENU

.

Press 

5

 or 

 to select “VCR SET

UP” then press 

OK/STATUS

.

The VCR Set Up menu appears.

2

Select Recording Format

Press 

5

 or 

 to select “S-VHS”.

Press 

4

.

Each time you press the button, the
setting changes.

ON:

Normally select this.

OFF:

Select this when you want to make a
recording using the VHS format on
an S-VHS tape.

3

Finish Setting

Press 

MENU

.

Notes:
• When playing a tape that has been

recorded in S-VHS, the S-VHS indicator
lights on the display panel regardless of
the “S-VHS” mode setting.

Selecting AV1 and AV2
Output/Input signal

This VCR has two AV terminals on the
rear panel. You have to correctly set the
input or output signal depending on the
type of unit connected to these
terminals.

1

Select VCR Set Up Screen

Press 

VCR

.

Press 

MENU

.

Press 

5

 or 

 to select “OUTPUT/

INPUT SET UP” ,then press 

OK/

STATUS

.

The Output/Input Set Up menu
appears.

2

Select AV1, AV2

If you are connected to the AV1 (L-1)
IN/OUT connector and use this VCR
as a player:
Press 

5

 or 

 to select “A/V1

OUTPUT”.

Press 

4

 to select one of the

following:

VIDEO

: If a connected device’s

input is compatible only
with regular video signals.

S-VIDEO : If a connected device’s

input is compatible with

   Y/C (S-Video) signals.

This setting will let you
take advantage of higher
quality S-VHS pictures.

• If “A/V2 SELECT” is set  to

“DECODER”, it is impossible to set
“A/V1 OUTPUT” to “S-VIDEO”.

Press MENU.
If you are connected to the AV1 IN/
OUT connector and use this VCR as
a recorder:
Press 

5

 or 

 to select “

A/V1

    INPUT”

.

Press 

4

 to select VIDEO or

S-VIDEO depending on the
connected device output signal.

Press 

MENU

  to exit the menu

operations.

• If the “A/V1 OUTPUT” is set to

“S-VIDEO”, it is impossible to set
“A/V1 INPUT” to “S-VIDEO”.

If you are connected to the AV2
(L-2)  IN/DECODER connector;

Press 

5

 or 

 to select “A/V2

SELECT”.

Press 

4

 to select one of the

following:

A/V

: To use this recorder as

the recording deck,
where the player is

connected to the AV2
(L-2) IN/DECODER
connector, or to use the
satellite tuner  con-
nected to the AV2 (L-2)
IN/DECODER
connector.

DECODER : To use a decoder

connected to the AV2
(L-2) IN/DECODER
connector.

SAT

: To view a satellite

programme with the
TV set while the
recorder is turned off.
(

P. 34)

• If the “A/V1 OUTPUT” is set to

“S-VIDEO”, it is impossible to set
“A/V2 SELECT” to “DECODER”.

• If “A/V2 SELECT” is set to

“SAT”, “SAT” appears at channel
position display instead of “L-2”.

3 Then, select the video input signal:

Press 

5

 or 

 to select “A/V2

INPUT”.

Press 

4

 to select one of the

following:

VIDEO

: If a connected device’s

output is compatible only
with regular video signals.

S-VIDEO : If a connected device’s

output is compatible with
Y/C (S-Video) signals.
This setting will let you
take advantage of higher
quality S-VHS pictures.

Press 

MENU

 to exit the menu

operation.
• If you are not connecting a

decoder or satellite tuner to the
A/V2 (L-2) IN/DECODER
connector, leave “A/V2
SELECT” set to “A/V”.

•  If “A/V2 SELECT” is set to
  “DECODER”, it is impossible to

       set “A/V2 INPUT” to
      “S-VIDEO”.

• The default setting of "A/V2

SELECT" is “A/V”; if the VCR’s
memory backup has expired due
to a power cut or because the
AC was removed from the VCR,
“A/V” will be automatically
selected when the power is
restored to the VCR. If you are
using a decoder or satellite
tuner, be sure to set “A/V2
SELECT” back to appropriate
setting.

PREVIOUS PAGE


\

S-VHS

              ON


 COLOUR SYSTEM   PAL/NTSC

SELECT : 

5∞

         CHANGE :

4

END : MENU

OUTPUT/INPUT SET UP

A/V1

OUTPUT

VIDEO


\

A/V1

INPUT

VIDEO

A/V2

SELECT

A/V

A/V2

INPUT

VIDEO

SELECT : 

5∞

         CHANGE :

4

END : MENU

Untitled-2

16/08/2000, 15:38

27

Summary of Contents for VR1100/02X

Page 1: ...27 Automatic Satellite Programme Recording 28 S VHS ET 28 CinemaLink Functions 28 Timer Recording Using SHOWVIEW System 29 Timer Recording 30 Turbo Timer 31 Tape Duplication 33 Audio Dubbing 34 System Connections 35 Connection To a Satellite Tuner Simple Connections 35 Connection To a Satellite Tuner Perfect Connections 35 Connection To a Satellite Tuner Basic Connections 36 Connection To a Decode...

Page 2: ...n pressed The lamp the button itself will lit P 28 3 DIGITAL TBC NR button Removes jitter from fluctuating video to deliver a stable picture P 25 The lamp the button itself will lit P 28 4 SPEED button Selects the tape speed for recording SP or LP During playback the tape speed is automatically selected SP LP or SLP P 22 P 29 P 30 SP LP For PAL signal SP SLP For NTSC signal 5 DISPLAY button Displa...

Page 3: ... AV and TV When pressed and VCR indicator on the display window lights TV mode changes to AV mode When pressed and VCR indicator goes off TV mode changes to TV mode After pressing TV Switches TV s mode between AV and TV 3 POWER button Before using this button press VCR SAT or TV to select your target component After pressing VCR Turns the VCR on or off Sets the VCR for an unattended recording time...

Page 4: ... Stops the tape P 21 Moves down the cursor when using the menus P 16 For some PHILIPS TVs only After pressing TV operates the TV s menus 24 CH channel 5 button Before using this button press VCR TV or SAT After pressing VCR changes the channels on the VCR Release at a desired channel After pressing TV changes the channels on the TV Release at a desired channel After pressing SAT changes the channe...

Page 5: ...minal on the TV P 8 3 AV1 L 1 IN OUT connector SCART For connecting to the AV terminal on TV or another VCR P 8 P 33 4 ANT antenna IN input terminal from Antenna Connect your antenna or cable to this terminal P 8 On Screen Display The following information VCR operating status appears on the TV screen P 26 1 Current time 2 Operation mode 3 Receiving broadcast 4 Tape position indicator 5 Colour mod...

Page 6: ...aying a tape recorded in S VHS format or with S VHS ET function while recording on an S VHS tape using S VHS format and while recording on a VHS tape with S VHS function 10 VCR indicator Lights up when the VCR TV button is pressed or when playback is started or when scrambled broadcast is received 11 VPS PDC indicator Blinks while VPS PDC signal detecting mode is engaged 12 Digital clock counter C...

Page 7: ...V with No 21 pin AV input connector 1 Disconnect the antenna or cable from the TV and the AC power cord of the TV from the AC outlet 2 Connect the antenna or cable to the VCR 3 Connect the VCR to the TV using the RF coaxial cable 4 Plug the AC power cords of the VCR and TV into the AC outlets CAUTION Do not plug the AC power cords until all connections are completed Connection Diagram Outdoor ante...

Page 8: ...ion 2 Connect an S Video Audio cables between the S VIDEO OUT AUDIO OUT jacks on the VCR and an S Video Audio input jacks on a TV Notes After you plug the AC power cord into a AC outlet the Country Set display appears on the TV screen and display window on the VCR s display window when the STANDBY ON or POWER button on the remote control is pressed for the first time to power on the VCR Go to page...

Page 9: ...AGYARORSZAG Czech Republic CESKA REPUBLIKA Poland POLSKA or other countries in Eastern Europe OTHER EASTERN EUROPE be sure to use the on screen display 3 Turn on the VCR by pressing the STANDBY ON button or POWER The Country Set display appears on the TV screen and or display window 4 If you are referring to the display window press 5 on the remote control to select your international telephone co...

Page 10: ...ime press and hold 5 to change the time by 30 minutes When you set the date press and hold 5 to change the date by 15 days 7 The following display appears on the screen and or display window If you use the Auto Set Up function go to Auto Set Up on page 12 If you use the Preset Download function go to Preset Download on page 14 Language Code ENGLISH 01 NORSK 08 DEUTSCH 02 SUOMI 09 FRANCAIS 03 DANSK...

Page 11: ...et for how to do this If appears both Auto Channel Set and Auto Clock Set have failed Make sure the TV antenna cable is connected correctly and press OK STATUS to re perform the Auto Set Up 3Press OK STATUS If the correct current time is displayed on the display window the Auto Channel Set and Clock Set have been completed successfully Go to step 4 If 1 channel position is displayed on the display...

Page 12: ... using the SHOWVIEW system the VCR will record a TV programme of a different station When programming the timer using the SHOWVIEW system be sure to check whether the channel position on which your VCR receives the broadcasting station you wish to record is selected P 29 7 Your VCR memorizes all detected stations even if reception of some of them is poor In these cases picture quality may be poor ...

Page 13: ...mory the station name will be displayed at the top left corner of the screen for about 5 seconds when the VCR is tuned to a different station If you want to set the tuner manually such as to add or skip channels to change channel positions or to set or station names see pages 17 18 If no station is stored in the VCR s memory make sure the SCART cable is connected correctly and press OK STATUS to r...

Page 14: ...T 7 0 on the front panel for more than 5 seconds The following indication appears on the display 4 Press PROGRAMME5 on the front panel to select an appropriate TV system number for your area 1 For B G other countries 2 For D K Magyarorszag Ceska Republika Polska or other Eastern Europe 5 Press OK STATUS on the remote control The channel number starts flashing on the display 6 Press PROGRAMME5 on t...

Page 15: ... on the remote control unless mentioned otherwise The buttons on the front panel having the same or nearly same name or same or nearly same mark function exactly the same as those on the remote control IMPORTANT The setup and adjustment procedures explained hereafter are written under the following conditions You have turned on the TV and selected the video channel or external video input You have...

Page 16: ...ernately for 8 seconds each To view the next page use the 5 2 3 buttons on the remote control The stations located in the selected country appear at the top of the list The Guide Program numbers will also be set automatically during Auto Channel Set 3Finish Setting Press MENU to exit the menu operations Notes If you perform Auto Channel Set when the aerial cable is not connected properly NO TV SIG...

Page 17: ...r to select MANUAL TUNER SET UP then press OK STATUS 4 Press 5 2 3 until the item you want to tune begins blinking Press OK STATUS twice The Manual Channel Set screen appears 5 Press 3 until begins blinking then press 5 or until the picture is clearest 6 Press OK STATUS The programmed channel list appears 7 Press MENU to exit the menu operations If you want to change station names You can also cha...

Page 18: ... ODE ODEON ORF1 ORF1 ID STATION NAME ORF2 ORF2 ORF3 ORF3 OWL3 OWL3 PREM PREMIERE PRO7 PRO7 RAI1 RAI1 RAI2 RAI2 RAI3 RAI3 RET4 RETE4 21 TELE21 RTBF RTBF1 or 2 RTL RTL RTL2 RTL2 RTL4 RTL4 RTL5 RTL5 RTP RTP S4 SCHWEIZ4 SAT1 SAT1 SBS SBS SHOW SHOW SIC SOCIEDADE SKY SKY CHANNEL SKYN SKY NEWS SPRT SPORT SRTL SUPER RTL STAR STAR TV SVT1 SVT1 SVT2 SVT2 SWR SUEDWEST3 TCC TCC TELE TELE TEL5 TELE5 TF1 TF1 TM...

Page 19: ...n If a power failure occurs the clock will lose its setting SHOWVIEW Set Up To ensure that SHOWVIEW Timer Recording operates correctly it is necessary to set the Guide Channel GUIDE CH number for each station Guide Channel GUIDE CH number refers to the assigned TV station numbers according to broadcast area for SHOWVIEW timer recording The Guide Programme numbers can be found in most TV listings I...

Page 20: ... EJECT 7 0 on the front panel To turn off the VCR Press POWER or STANDBY ON When playing an NTSC tape Some TVs shrink the picture vertically and place black bars at the top and the bottom of the TV screen The time counter and remaining tape length will not be correct The picture may roll up and down This can be corrected using the V HOLD control found on some TVs This cannot be corrected if the TV...

Page 21: ... tape simply by pressing STOP EJECT 0 on the front panel even while the VCR is turned off When you press STOP EJECT 0 on the front panel the VCR automatically turns on ejects the tape then turns off If DIRECT REC is set to ON P 28 the programme that appears on the TV screen will be recorded Picture quality of LP recordings will not be high as on SP recordings This VCR can record on regular VHS and...

Page 22: ...me playback press PLAY 3 To view a slow motion picture Press STILL SLOW or PAUSE STILL 8 on the front panel for more than 2 seconds during playback To decrease the slow motion speed and reverse the slow motion playback press STILL SLOW To increase the slow motion speed and forward the slow motion playback press STILL SLOW To resume playback press PLAY 3 Notes No sound comes out during special effe...

Page 23: ...tion is operative ADVANCED OPERATIONS CONTINUED DSPC The DSPC Digital Studio Picture Control system checks the condition of the tape in use during recording and playback and compensates to provide the highest possible recording and playback pictures The default setting for both recording and playback is ON 1Select VCR Set Up Screen 1 Press VCR 2 Press MENU 3 Press 5 or to select VCR SET UP then pr...

Page 24: ...tereo on the Hi Fi audio track with the normal audio track recording mixed L and R channel sound Bilingual programmes A2 are automatically recorded in bilingual on the Hi Fi audio track The main soundtrack will be recorded on the normal audio track The NICAM audio programme will be recorded on the Hi Fi audio track and the Standard audio programme on the normal audio track If the quality of stereo...

Page 25: ...cator lights up and blinks on the display 5Select Recording Length Press REC OTR repeatedly until the desired recording length appears Each time you press the button the recording length increases in 30 minute intervals 0 30 1 00 1 30 5 30 6 00 REC Normal recording DSPC ON O S D ON DIRECT REC ON AUTO SP LP TIMER OFF DIGITAL 3R ON POWER SAVE OFF AUTO SAT RECORD LINK OFF NEXT PAGE SELECT 5 CHANGE 4 ...

Page 26: ...o select A V1 INPUT 2 Press 4 to select VIDEO or S VIDEO depending on the connected device output signal 3 Press MENU to exit the menu operations If the A V1 OUTPUT is set to S VIDEO it is impossible to set A V1 INPUT to S VIDEO If you are connected to the AV2 L 2 IN DECODER connector 1 Press 5 or to select A V2 SELECT 2 Press 4 to select one of the following A V To use this recorder as the record...

Page 27: ...message will appear Press POWER to turn off the VCR If you do not turn off the VCR after 30 seconds the VCR will turn off automatically The VCR will then move to stand by mode and L 2 will blink on the display panel Notes Pressing the POWER or STAND BY button while Automatic Satellite Programme Recording mode or stand by mode is in progress will cancel the mode and AUTO SAT RECORD LINK is set back...

Page 28: ... To change any item on the overlapping programs see page 31 If you want to store other programmes repeat steps 1 to 5 6Engage Timer Standby Mode Press POWER or STANDBY ON on the front panel to turn off the VCR The timer indicator lights up on the display The VCR must be turned off for a timer recording to take place If you forget to turn off the VCR PLEASE TURN OFF VCR FOR TIMER RECORDING appears ...

Page 29: ...P VPS PDC OFF DATE DAILY 8 WEEKLY 9 CONFIRM OK END TIMER ONE TIME PROGRAM PROGRAM 1 TV PROG 12 START 20 00 STOP 22 00 REC SPEED SP VPS PDC OFF DATE DAILY 8 WEEKLY 9 CONFIRM OK END TIMER ONE TIME PROGRAM PROGRAM 1 TV PROG 12 START 20 00 STOP 22 00 REC SPEED LP VPS PDC OFF DATE DAILY 8 WEEKLY 9 CONFIRM OK END TIMER ONE TIME PROGRAM PROGRAM 1 TV PROG 12 START 20 00 STOP 22 00 REC SPEED LP VPS PDC ON ...

Page 30: ...he detail information of the program you want to change 3 Go to step 4 through 9 on page 30 for Timer Recording to modify the selected program To cancel any timer recording press CLEAR If you do not modify the overlapping programs the VCR will record the earlier program completely Only the remaining part of the later program will be recorded If the START time for the two programs are the same the ...

Page 31: ...he station VPS PDC will stop blinking If no VPS PDC signal is detected from the station VPS PDC will blink at a slower rate 3 Press OK STATUS DISPLAY or SKIP SEARCH again to return to normal display 7 Press TIMER to exit from the menu operations if necessary PR CH START STOP DATE 1 12 08 00 10 00 15 06 2 10 10 00 10 45 14 08 3 45 03 00 03 15 D15 10 4 24 11 30 13 00 DAILY 5 20 20 00 21 00 W18 6 7 8...

Page 32: ...T INPUT SET UP screen P 27 S Video Audio output jacks rear panel if another VCR has S Video Audio input jacks 1At VCRs Insert a source tape in the playing VCR and a blank tape in the recording VCR 2At TV Tune the channel on the TV to your video channel or external line input 3Select Line Input Press Number button 0 and or PROGRAMME 5 or CH 5 on the remote control to select the line input L 1 For r...

Page 33: ...EC blinks PLAY and PAUSE lights up on the display window 4Start Dubbing Engage the audio component s PLAY mode then press PAUSE STILL 8 to start the tape in your VCR Audio Dubbing begins at this point To stop dubbing temporarily press PAUSE STILL 8 To resume dubbing press the button again 5End Audio Dubbing Press STOP 7 to stop the tape in the VCR and engage the audio component s stop mode Note Wh...

Page 34: ...er s connector AV1 L 1 IN OUT connector to TV s connector and AV2 L 2 IN DECODER connector to the satellite tuner s connector Then connect the satellite tuner and TV NOTES Set A V2 SELECT to A V P 27 You can use Automatic Satellite Program Recording function P 28 with this connection To record a programme via the satellite select L 2 mode by pressing Number button 0 and or CH 5 so that L 2 appears...

Page 35: ...for an external decoder descrambler Simply connect a decoder and you can enjoy the variety of programming that is available through scrambled channels Connect your VCR s AV2 IN DECODER connector to the decoder s Euroconnector using a 21 pin SCART cable NOTES Set A V2 SELECT to DECODER P 27 Perform the procedure as described in if you want to descramble programme when receiving a scrambled broadcas...

Page 36: ...r off your setting is completed If not repeat steps above using another code After replacing the batteries You need to reset the manufacturer s code again Note The buttons you can use to operate your TV are explained on page 4 You can use this remote control to operate your TV To use this remote control for operating the TV you first need to set the manufacturer s code properly You first need to s...

Page 37: ...rol can now operate the satellite tuner of the selected code 2Confirm Setting Press POWER pointing the remote control at the satellite tuner If the satellite tuner turns on or off your setting is completed If not repeat steps above using another code After replacing the batteries You need to reset the manufacturer s code again To use this remote control for operating the satellite tuner you first ...

Page 38: ...ust the vertical hold control manually on the TV if available Because the VCR playback signal is not as stable as an off the air TV signal the top of your TV screen may be bent or unstable during playback To solve this problem slowly turn the horizontal hold control on your TV to correct the wavy picture If your TV does not have the horizontal hold control or adjusting the control does not help co...

Page 39: ...e 5 C to 40 C Relative humidity 10 to 80 Dimensions Approx 435 W x 94 H x 343 D mm Mass Approx 4 7kg Position for use Horizontal Video output channel UHF E36 adjustable between 22 69 Possible number of TV channel 99 Number of pre programmable memory blocks 8 Number of days in advance 365 or every day or every week Tuner Aerial input B G D K VHF L 47 MHz 89 MHz VHF H 104 MHz 300 MHz 302 MHz 470 MHz...

Reviews: