7
2. Setting up the monitor
Internet connection
The Android application programs require an
Internet connection. SmartMonitor provides
three most common options to link your
Internet connections.
1. Wireless Internet:
Plug the USB WiFi dongle to one of
the USB ports at the side IO of the
SmartMonitor. Setup the Wireless Internet
in the SETTING menu.
2. Ethernet Connection:
Connect with your Ethernet to the RJ-45
port at the down IO of the SmartMonitor.
Setup the Ethernet in the SETTING menu.
3. Broadband Connection:
Connect with your Broadband Internet
to the RJ-45 port at the down IO of
the SmartMonitor. Setup the Broadband
Internet in the SETTING menu.
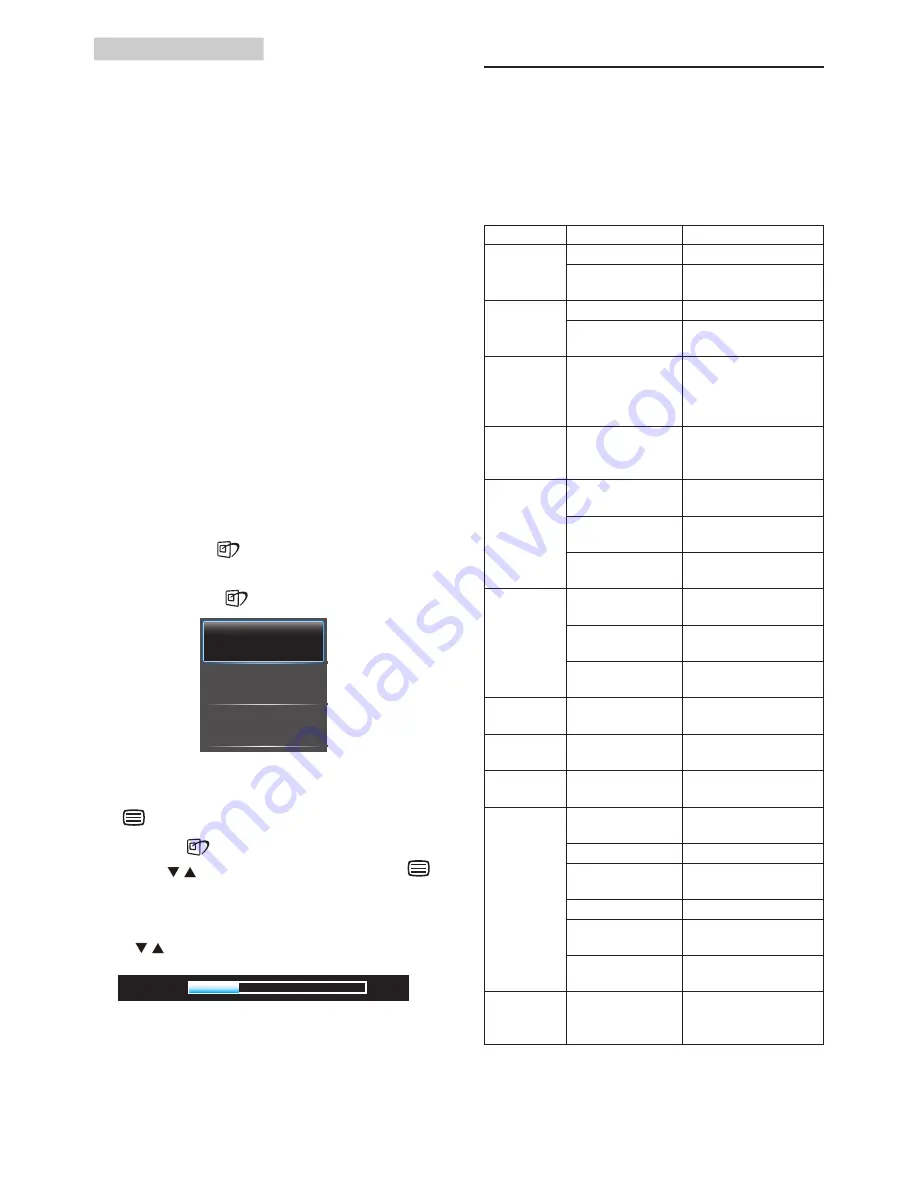
Volume control
1. Press hotkey
to launch the SmartImage
OSD.
2. Keep pressing
to select
Volume
.
3. The SmartImage OSD will remain on
screen for 5 seconds, or you can also press
button to confirm.
Except using
key to scroll down, you can
also press buttons to choose and press
to confirm selection and close the SmartImage
OSD.
Press buttons to set the volume.
2.4 SmartMonitor Setting
Adjustments
When the SmartMonitor function is used, all
the system settings can be adjusted by system
setting icon. The main adjustment items are as
below:
Main Menu
Sub Menu Item
Description
Wireless
internet
Wi-Fi
Switch On/Off Wi-Fi
Wi-Fi Setting
Scan and connect to the
available Wi-Fi internet.
Ethernet
setting
Ethernet
Switch On/Off Ethernet
Ethernet setting
Select and connect to
the available Ethernet.
Broadband
setting
Type in the account and
password information
to enable Broadband
internet
Display
Animation
Display the animation
when the screen is
turned on or off
Security
Safety security
Disable safety security
function
Password setting
Change and set
password
Clean the storing
space
Delete password
Application
Program
Un-known resource Non-Android Market
application program
Application
manager
Manager and remove
current loaded program
Current service
View and manager
current program
Privacy
setting
Reset to factory
setting
Clean all the data
SD card
Storing space
information
Showing the storing
space on SD card
Language and
Key board
Language selection Language display
selection and setting
Date and
Time
Automatically
The internet data is used
after clicking the option
Date setting
Set the date
Time zone selection Time zone for current
region
Time selection
Set the time
24hr format
Set the time format to
24hr
Date format
selection
Select the preference
date format
Information Law information,
Android version,
Version number
Display the information
for the monitor


