


Connect 7
3 Connect
Notice
You need to connect the projector to
an HDMI or USB-C device, so that the
projection screen can show images.
Make sure all devices are disconnected
from the power outlet before establishing
or changing any connections.
HDMI connection for image
projection
Connect a playback device (e.g. a Blu-ray
player, gaming console, camcorder, digital
camera or PC) to the projector through HDMI
connection. With this connection, images are
shown on the projection screen, and audio is
played on the projector.
1
Using an HDMI cable, connect the
HDMI
connector on the projector to the HDMI
output on the playback device.
This product supports HDMI ARC function.
HDMI
DC
USB
2 If the projection screen does not show
images, select HDMI input. Press on the
remote control to access the settings menu,
then navigate to select
HDMI
.
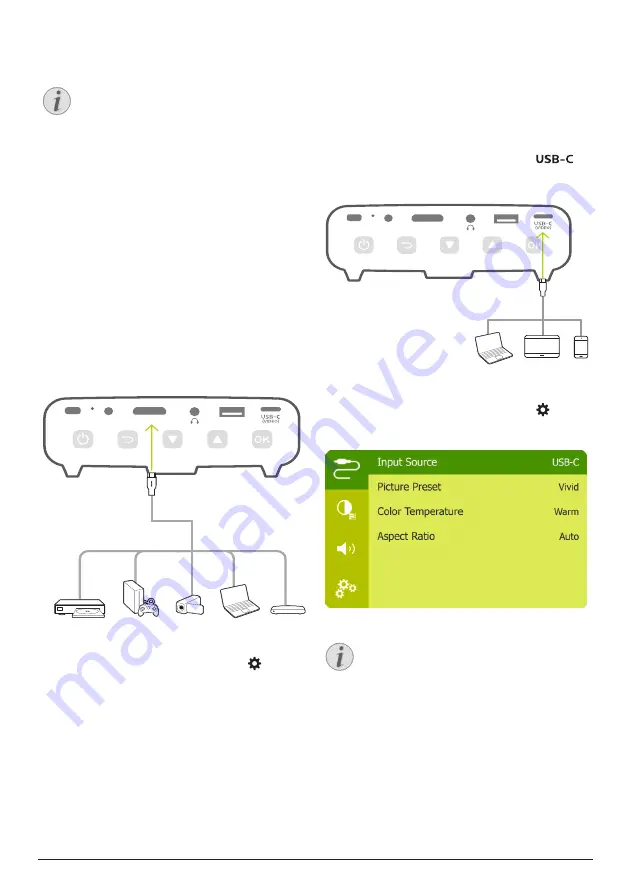
USB-C connection for
image projection
Connect a USB-C device (e.g. a mobile phone,
tablet or laptop) to the projector through USB-C
connection. With this connection, images are
shown on the projection screen, and audio is
played on the projector.
1
Using a USB-C cable, connect the
connector on the projector to the USB-C
port on the playback device.
HDMI
DC
USB
2 If the projection screen does not show
images, select USB-C input. Press on the
remote control to access the settings menu,
then navigate to select
USB-C
.
Notice
The projector supports stereo audio
format only. If no audio from the
playback device is heard on the
projector, check that the audio output
format is set to stereo on the playback
device.