


Change settings 13
Picture settings
You can access the following picture settings.
•
Keystone Correction:
Select an option to
correct keystone or distorted images to be
rectangular or square.
•
Auto Keystone: Enable or disable
auto correction of the image shape
when tilting the projector upwards or
downwards. When
Auto Keystone
is
activated, manual keystone correction
options will be deactivated.
•
Manual Keystone:
Manually correct
keystone or distorted images in the
horizontal orientation.
•
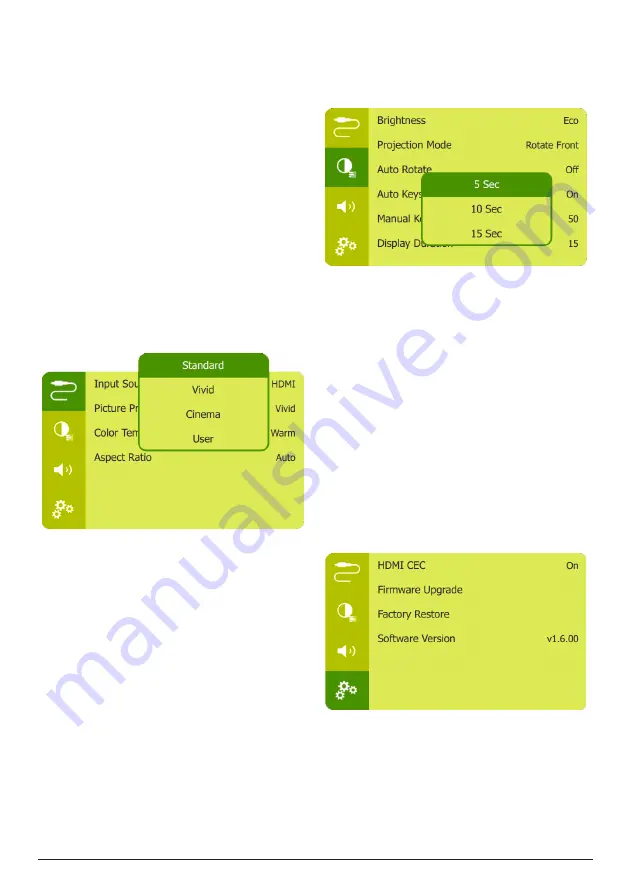
Projection Mode:
Adjust the projection to
the correct position based on different
installation of the projector.
•
Picture Preset:
Select a predefined color
brightness setting for picture and video
display, or select
User
to customize color
brightness and image clearness.
•
Color Temperature:
Set to
Warm
to
enhance hotter colors such as red; set to
Cool
to make picture bluish; set to
User
to
customize color values in RGB mode.
•
Auto Rotate:
Automatically rotate the
projection screen when the projector is
detected being rotated.
•
Aspect Ratio:
Select a picture format to fit
the projection screen.
Sound settings
Select a preset sound mode or customize
sound to suit your video or music.
•
Navigate to select
Sound Presets
, and press
the
Navigation button
to select a sound
mode then press
OK
.
Power control settings
Go to the following menu options to control
power consumption.
•
Brightness:
Select a screen brightness mode.
•
Display Duration:
Select a timer to
automatically turn the screen off when the
projector is idle.
Restore default settings
If the projector does not function normally,
reset the projector to the default settings. It will
delete all the current settings.
•
Navigate to
Factor Restore,
and press
OK
, then follow on-screen instructions to
complete resetting.
Other settings
You can also access the following options.
•
Volume:
Adjust volume of the projector.
•
HDMI ARC:
Activate or deactivate HDMI
ARC function (
see Use HDMI ARC function,
page 12
).
•
HDMI CEC:
Activate or deactivate easy
link between the devices through HDMI
connection (
see Use easy link, page 12
).
•
Position:
Re-position the settings menu on
the projection screen when it appears.
•
Software Version:
Display the current
software version of the projector.
•
Firmware Upgrade:
Upgrade system
software via a USB device (
see Update
software, page 14
).