background image

PDS-60ca  Product 

Guide

8

Connect Luminaires to PDS-60ca

Make sure line power is OFF before connecting luminaires to the device. On most 

PDS-60ca models, the luminaire ports are at the end of a short cable attached to the 

board adjacent to device’s data ports. (See the illustrations on the previous page.)
1.  Guide the connector and cable through an opening in the device’s luminaire 

connection chamber.

2.  Connect a iColor/eW Flex strand or luminaire leader cable to one of the two 

available ports in the device’s power connection chamber. 

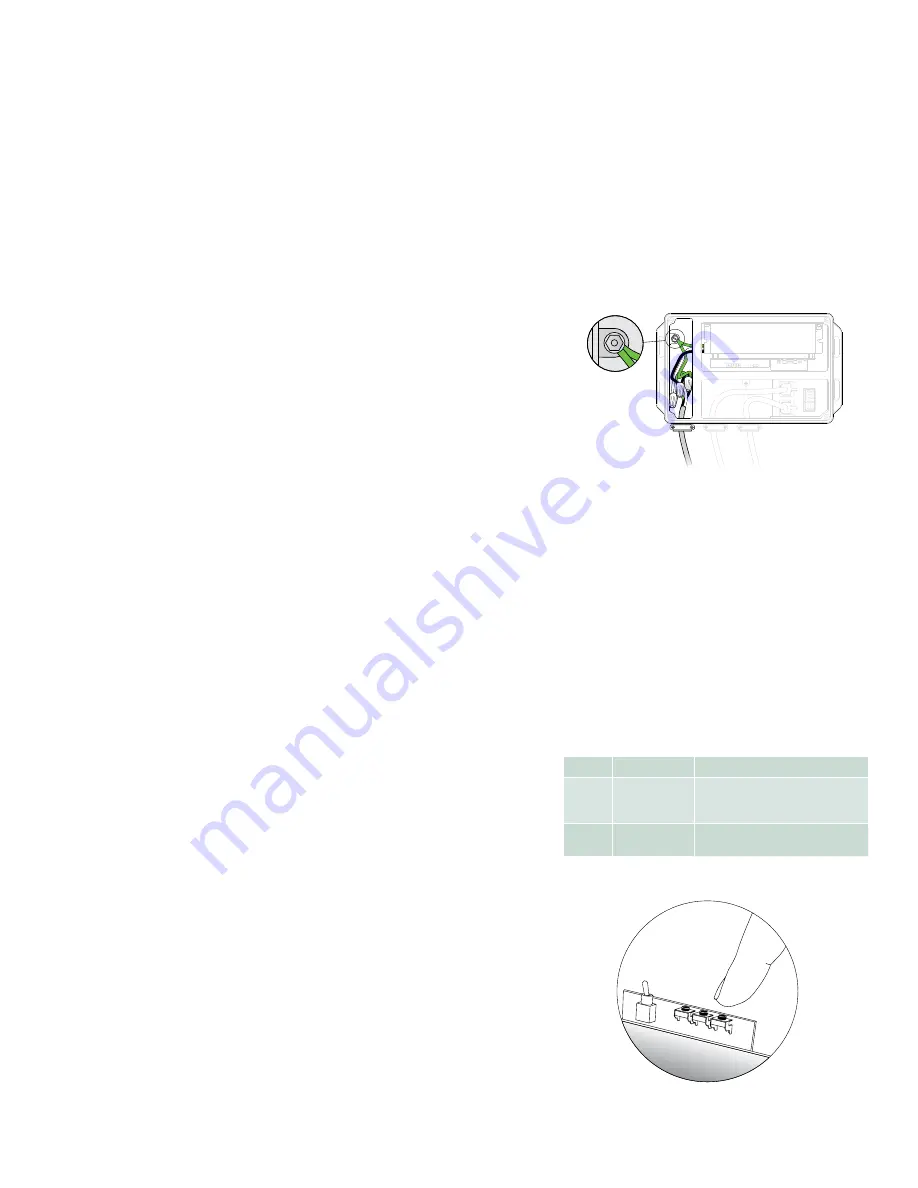
Connect the PDS-60ca to Line Power

The device arrives with line, neutral, and ground wires in the form of flying leads 

ready for connection in the power connection chamber. You connect line power to 

the leads by using wire connectors.
1.  Install a cable strain relief connector in one of the device’s 3/4 in openings in 

the power connection chamber. If necessary, use conduit as required by local 

electrical codes. 

2.  Run the mains line power cable through the opening. Pull at least 152 mm (6 in) 

of wire into the chamber.

3.  Strip at least 10 mm (0.38 in) of insulation from the wires. Join the mains line 

power cable with the flying leads using three wire connectors. 

Display Light Effects (Pre-Programmed Only)

If you have the pre-programmed version of the PDS-60ca, you are able to display 

effects on your luminaires without a controller. Pre-programmed controllers cannot 

receive signals from external controllers. But they can send light show data to other 

downstream devices via the DMX OUT port, thereby effectively playing the role of 

a controller. (Refer to the Make Data Input Connections section for instructions on 

how to link other power/data supplies via DMX OUT ports.)

To achieve the effects you want, you can use the controls inside the device, which 

consists of a toggle switch and three buttons. Once you have set the mode, speed, and 

options for effects using the control button, PDS-60ca stores settings and records 

them, even after you have cycled the power on the device.
To display effects:  

1.  With the PDS-60ca cover removed and the power off, use the toggle switch 

inside the housing to select the type of luminaires that are attached to the device. 

(See the luminaire type switch settings table on the right.) 

2.  Power the device on. (For chasing comet shows, hold down the MODE button 

during power up to run a blink scan of attached nodes to determine the run 

length.)

3.  Use the Mode button to select an effect. Press and release the Mode button to 

cycle through each effect described in the Lighting Effects Settings table on the 

next page.

4.  If desired, use the Options button to modify the effect you chose with the mode button.
5.  Use the Speed button to change the speed of the effect. Hold down the Speed 

button to change the color for the Fixed Color effect.

Effect setting changes are immediate.

Position

Setting

Luminaire

s

1

Linear RGB 

Effects

iColor Flex MX gen2, eW Flex Micro, 

eW Flex Compact, iColor Flex LMX 

gen2

2

Monochromatic 

Effects

Best used with eW Flex 

Luminaire Type Toggle Switch Settings

DMX/ETHERNET 

IN

DM
X

OU
T

1

2

3

O

S

M

PDS-60ca connected to mains line power

DMX/ETHERNET


IN

DM
X

OU
T

1

2

3

O

S

M

Option

s

Speed

Mod
e

S

O

M

Effects buttons and toggle switch

1  2  3 

E


Before connecting to line power, set the 

luminaire type using the toggle switch. If the 
luminaire type is changed after power is engaged, 
the power supply must powered off and turned 
back on to recognize the toggle switch change.

Summary of Contents for PDS-60ca

Page 1: ...PDS 60ca Power data supply for indoor and outdoor applications ...

Page 2: ...nal power data supplies A downstream power data supply does not have to be a PDS 60ca but can be any DMX or Ethernet based power data supply Instead of attaching luminaires to a Pre Programmed PDS 60ca you could use it as an outdoor rated light show controller for DMX or Ethernet based power data supplies and their luminaires Compatible Luminaires Device Luminaire Max Quantity Per Device PDS 60ca ...

Page 3: ...nput and output connectors Power Output 2 4 pin output receptacles Power Input Line neutral ground cable flying leads Temperature Ranges 10 to 40 C 14 to 104 F Operating 10 to 50 C 14 to 122 F Startup 40 to 80 C 40 to 176 F Storage Humidity 0 to 95 non condensing Cooling Convection Heat Dissipation 25 of total power input at maximum load Data Input Source PDS 60ca 7 5 V DMX Ethernet Philips full r...

Page 4: ...applications Typical DMX installations with luminaires from Philips Color Kinetics use a controller such as iPlayer 3 a Controller Keypad for turning lights on and off and triggering light shows and one or more PDS 60ca devices PDS 60ca devices can be connected in series to deliver DMX data from a single controller to all connected lights Note that the maximum for DMX data run lengths is 305 m 1 0...

Page 5: ...tions as required Standard 3 31 mm2 12 AWG stranded wire is recommended Three wire connectors CAT 5e or better data cable as required The included black magnetic EMI suppression core for the power cable The included two white magnetic EMI suppression cores for iColor Flex eW Flex strands or luminaire leader cables Power screwdriver for mounting Four screws suitable for the mounting surface Phillip...

Page 6: ... cord is doubled into the suppression core Be sure the cord is securely in the core s middle Snap the core shut around the doubled cord Attach a white suppression core to the luminaire strand or leader cable attached to port 1 Near the connection to the power data supply coil the strand or cable into a small loop Place the section of the loop where the cord is doubled into the suppression core Be ...

Page 7: ...cted PDS 60ca automatically switches to the appropriate mode Since pre programmed devices do not accept controller data you will not be able to use the DMX IN port on these devices However you can use the device s DMX OUT port to link to downstream power data supplies which can receive light show data DMX 1 Using an RJ45 connector cable connect your controller s DMX output port to the DMX IN port ...

Page 8: ...ection for instructions on how to link other power data supplies via DMX OUT ports To achieve the effects you want you can use the controls inside the device which consists of a toggle switch and three buttons Once you have set the mode speed and options for effects using the control button PDS 60ca stores settings and records them even after you have cycled the power on the device To display effe...

Page 9: ...gs Cycles through four width settings 2 White Chasing Comet Displays a band of light that appears to move across a dark background Cycles through five distinct comet width settings 3 Dark Chasing Comet Displays a dark band that appears to move across a light background Cycles through five distinct comet width settings 4 Random Sparkle Produces a series of light flashes at regular intervals on rando...

Page 10: ... discover all PDS 60ca devices in an installation using QuickPlay Pro which automatically determines how many luminaires are connected to each output port and addresses them Light System Manager and Video System Manager Pro Ethernet lighting controllers from Philips Color Kinetics also automatically discover and address all connected luminaires Pre programmed PDS 60ca devices cannot receive input ...

Page 11: ... or damp location seal with RTV silicone Installing in Damp or Wet Locations When installing in damp or wet locations seal all junction boxes power supplies and other devices with electronics grade RTV silicone sealant so that water or moisture cannot enter or accumulate in any wiring compartments cables luminaires or other electrical parts You must use suitable outdoor rated junction boxes when i...

Page 12: ...ng in a wet or damp location seal with RTV silicone Device Replacement Fuse PDS 60ca 7 5 V 2 5 A 5 x 20 slow blow fuses PDS 60ca 24 V 2 4 A 5 x 20 slow blow fuses Fuse OUT 1 OUT 2 DMX IN DMX OUT ETHERNET Power Indicators Copyright 2018 Philips Lighting Holding B V All rights reserved Chromacore Chromasic CK the CK logo Color Kinetics the Color Kinetics logo ColorBlast ColorBlaze ColorBurst ColorGr...

Reviews: