background image

EN

9

English

3 Get 

started

Caution

Use of controls or adjustments or performance of 

procedures other than herein may result in hazardous 
radiation exposure or other unsafe operation.

Always follow the instructions in this chapter in 
sequence.
If you contact Philips, you will be asked for the 
model and serial number of this apparatus. The 
model number and serial number are on the 
back of the apparatus. Write the numbers here: 
Model No. __________________________
Serial No. ___________________________

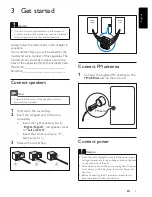
Connect speakers

Note

Ensure that the colors of the speaker wires and 

terminals are matched.

1

  Hold down the socket fl ap.

2

  Insert the stripped part of the wire 

completely.

Insert the right speaker wires to 

Right L/Right H

”, left speaker wires 

to  

“Left L/Left H

”.

Insert the red/blue wires to “ 

+

”, 

black wires to “ 

-

”.

3

  Release the socket fl ap.

a

b

c

Connect FM antenna

1

  Connect the supplied FM antenna to the 

FM AERIAL

 jack on the main unit.

Connect power

Caution

Risk of product damage! Ensure that the power supply 

voltage corresponds to the voltage printed on the back 
or the underside of the unit.
Risk of electric shock! When you unplug the AC power 

cord, always pull the plug from the socket. Never pull 
the cord.
Before connecting the AC power cord, ensure you 

have completed all other connections.

Speaker

(Right)

Speaker

(Left)

HIGH CH

LOW CH

Right L

Left L

Right H

Left H

SPEAKERS 6Ω

FM aerial

Summary of Contents for MCM355

Page 1: ...er your product and get support at MCM355 12 Micro System EN User manual DA Brugervejledning DE Benutzerhandbuch ES Användarhandbok FR Mode d emploi IT Manuale utente NL Gebruiksaanwijzing SV Användarhandbok ...

Page 2: ...s 12 Display play information 12 6 Listen to the radio 13 Tune to a radio station 13 Program radio stations automatically 13 Program radio stations manually 13 Select a preset radio station 13 Show RDS information 13 Set clock with RDS 14 7 Adjust sound 15 Adjust volume 15 Select a preset sound effect 15 Enhance bass 15 Mute sound 15 8 Other features 16 Set the sleep timer 16 Set the alarm timer 1...

Page 3: ...radiators heat registers stoves or other apparatus including amplifiers that produce heat i Protect the power cord from being walked on or pinched particularly at plugs convenience receptacles and the point where they exit from the apparatus j Only use attachments accessories specified by the manufacturer k Use only with the cart stand tripod bracket or table specified by the manufacturer or sold wit...

Page 4: ...ing loss for a normal person even for exposure less than a minute The higher decibel ranges are offered for those that may have already experienced some hearing loss Sound can be deceiving Over time your hearing comfort level adapts to higher volumes of sound So after prolonged listening what sounds normal can actually be loud and harmful to your hearing To guard against this set your volume to a ...

Page 5: ...alth Your product contains batteries covered by the European Directive 2006 66 EC which cannot be disposed of with normal household waste When you see the crossed out wheel bin symbol with the chemical symbol Pb it means that the batteries comply with the requirement set by the directive for lead Please inform yourself about the local rules on separate collection of batteries The correct disposal ...

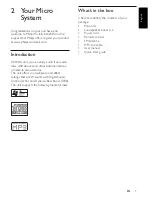
Page 6: ...dio from audio discs USB devices and other external devices or listen to radio stations The unit offers you multiple sound effect settings that enrich sound with Digital Sound Control DSC and Dynamic Bass Boost DBB The unit supports the following media formats What s in the box Check and identify the contents of your package Main unit Loudspeaker boxes x 2 Power cord Remote control FM antenna MP3 ...

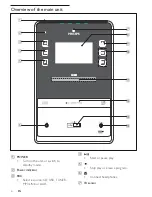
Page 7: ...a POWER Turn on the unit or switch to standby mode b Power indicator c SRC Select a source CD USB TUNER MP3 LINK or AUX i g n h j l m b a c d e f k d Start or pause play e Stop play or erase a program f Connect headphones g IR sensor ...

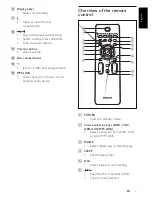
Page 8: ...ck 3 5mm for an external audio device Overview of the remote control a POWER Switch to standby mode b Source selection keys DISC TUN USB AUX MP3 LINK Select a source CD TUNER USB or AUX MP3 LINK c MODE Select repeat play or random play d SLEEP Set the sleep timer e DSC Select a preset sound setting f Search within a track disc USB Tune to a radio station DISC POWER TUN USB AUX MP3 Link MODE SLEEP ...

Page 9: ...bum j TIMER Set the alarm timer Activate or deactivate the alarm timer k CLOCK DISPLAY Set the clock During play select display information l DBB Turns on or off dynamic bass enhancement m Start or pause play n RDS Display available RDS Radio Data System information of an FM radio station o Stop play or erase a program p VOL Adjust volume q MUTE Mute volume ...

Page 10: ...matched 1 Hold down the socket flap 2 Insert the stripped part of the wire completely Insert the right speaker wires to Right L Right H left speaker wires to Left L Left H Insert the red blue wires to black wires to 3 Release the socket flap a b c Connect FM antenna 1 Connect the supplied FM antenna to the FM AERIAL jack on the main unit Connect power Caution Risk of product damage Ensure that the p...

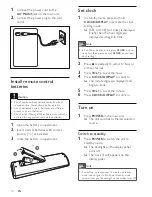
Page 11: ...tting mode SET CLOCK set clock is displayed briefly Then the hour digits are displayed and begin to blink Note In Eco Power Standby mode press CLOCK to show clock first then press and hold CLOCK to proceed clock setting 2 Press repeatedly to select 12 hour or 24 hour format 3 Press VOL to set the hour 4 Press CLOCK DISPLAY to confirm The minute digits are displayed and begin to blink 5 Press VOL to s...

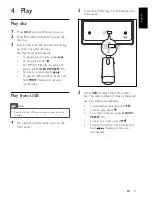
Page 12: ... press To search within a track press and hold Release to resume normal play Play from USB Note Ensure that the USB device contains playable audio content 1 Flip open the USB socket cover on the front panel 2 Insert the USB plug of a USB device into the socket 3 Press USB to select the USB source The total number of tracks is displayed Play starts automatically To pause resume play press To stop p...

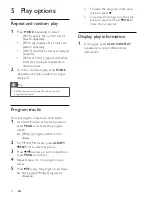
Page 13: ...racks Program tracks You can program a maximum of 20 tracks 1 At CD USB mode at the stop position press PROG to activate the program mode PROG program blinks on the display 2 For MP3 WMA tracks press ALBUM PRESET to select an album 3 Press to select a track number then press PROG to confirm 4 Repeat steps 2 to 3 to program more tracks 5 Press to play the programmed tracks During play PROG program i...

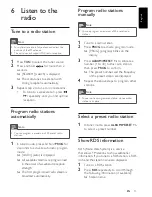
Page 14: ...tion strength The first programmed radio station is broadcast automatically Program radio stations manually Note You can program a maximum of 40 preset radio stations 1 Tune to a radio station 2 Press PROG to activate program mode PROG program blinks on the display 3 Press ALBUM PRESET to allocate a number 1 to 40 to this radio station then press PROG to confirm The preset number and the frequency o...

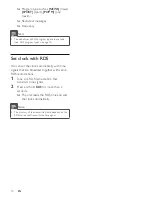
Page 15: ...clock with RDS You can set the clock automatically with time signals that are broadcast together with some RDS radio stations 1 Tune to a RDS radio station that transmits time signals 2 Press and hold RDS for more than 2 seconds The unit reads the RDS time and sets the clock automatically Note The accuracy of the transmitted time depends on the RDS station that transmits the time signal ...

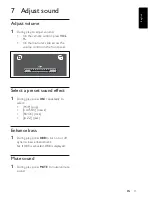
Page 16: ...cross the volume control on the front panel Select a preset sound effect 1 During play press DSC repeatedly to select POP pop CLASSIC classic ROCK rock JAZZ jazz Enhance bass 1 During play press DBB to turn on or off dynamic bass enhancement If DBB is activated DBB is displayed Mute sound 1 During play press MUTE to mute unmute sound ...

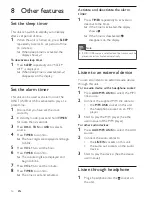
Page 17: ...ess VOL to set the minute 8 Press TIMER to confirm The timer is set and activated Activate and deactivate the alarm timer 1 Press TIMER repeatedly to activate or deactivate the timer If the timer is activated the display shows If the timer is deactivated disappears on the display Note If DISC USB source is selected and the track cannot be played tuner is activated automatically Listen to an externa...

Page 18: ...ner FM Tuning Range 87 5 108 MHz Tuning grid 50 KHz Sensitivity Mono 26dB S N Ratio 22 dBu Search Selectivity 28 dBu Total Harmonic Distortion 3 Signal to Noise Ratio 45 dB Speakers Speaker Impedance 6ohm General information AC power 220 230V 50Hz Operation Power Consumption 42W Standby Power Consumption 20W Eco Standby Power Consumption 0 8W Dimensions Main Unit W x H x D Speaker Box W x H x D 17...

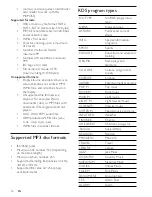
Page 19: ...ormat Supported MP3 disc formats ISO9660 Joliet Maximum title number 512 depending on file name length Maximum album number 255 Supported sampling frequencies 32 kHz 44 1kHz 48 kHz Supported Bit rates 32 256 kbps variable bit rates RDS program types NO TYPE No RDS programme type NEWS News services AFFAIRS Politics and current affairs INFO Special information programs SPORT Sports EDUCATE Education ...

Page 20: ... response from the unit Disconnect and reconnect the AC power plug then turn on the system again As a power saving feature the unit switches off automatically 15 minutes after track play reaches the end and no control is operated Remote control does not work Before you press any function button first select the correct source with the remote control instead of the main unit Reduce the distance betw...

Page 21: ... 2009 Koninklijke Philips Electronics N V All rights reserved MCM355_UM_12_V2 0 Document order number ...

Reviews: