background image

English

5

General Information

Features

Your DVD MICRO THEATRE System  with 2.1-

channel full analog amplifier creates the same
dynamic sound qualities that you find in full
fledged cinemas and incorporates some of the
best features in home theater technology. Other
features include:

Additional Component Connections

Lets you connect other audio and audio/visual

components to the DVD micro system.

Night Mode

Selects Dynamic ON or OFF cyclically

Parental Control (Rating Level)

Lets you set a ratings level so that your children

cannot watch a DVD that has a rating higher
than you set.

Supplied accessories

– Remote control with one CR2025 battery
– Two speakers and one subwoofer
– AC power cord

– DIN cable

– Composite video cable (yellow)
– User Manual and Quick Start Guide

If any item is damaged or missing, contact
your retailer or Philips.

Environmental information

All unnecessar y packaging has been omitted. We

have tried to make the packaging easy to
separate into three materials: cardboard (box),
polystyrene foam (buffer) and polyethylene (bags,
protective foam sheet).

Your system consists of materials which can be

recycled and reused if disassembled by a
specialised company. Please observe the local
regulations regarding the disposal of packaging
materials, exhausted batteries and old equipment.

Installation

Place the player on a flat, hard, and stable surface

In a cabinet, allow about 10cm (4 inches) of free
space all around the player for adequate
ventilation.

Do not expose your player to extreme
temperatures or humidity.

The apparatus shall not be exposed to dripping
or splashing and that no objects  filled with liquid
such as vase shall be placed on the apparatus.

No naked flame sources, such as lighted candles,
shall be placed on the apparatus.

The ventilation should not be impeded by
covering the ventilation openings with items,
such as newpapers, table-cloths, curtains, et.

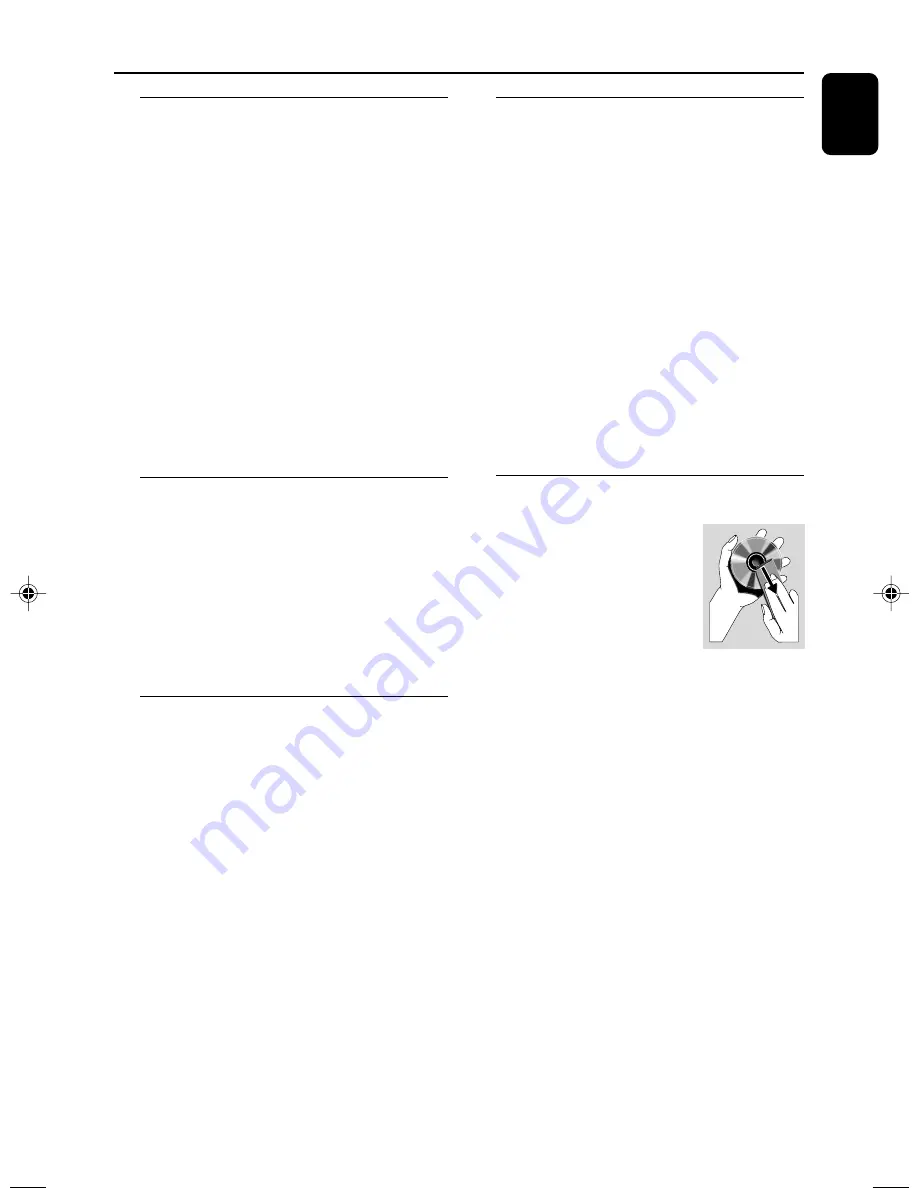
Maintenance of disc and disc lens

When a disc becomes dirty,
clean it with a cleaning cloth.
Wipe the disc from the center
out, in a straight line.

Do not expose the player,
batteries or discs to humidity,
rain, sand or excessive heat
(caused by heating equipment or direct sunlight).
Always keep the disc tray closed to avoid dust
on the lens.

Do not use solvents such as benzene, thinner,
commercially available cleaners, or anti-static
spray intended for colour discs.

The lens may cloud over when the player is
suddenly moved from cold to warm
surroundings, making it impossible to play a disc.
Leave the player in the warm environment until
the moisture evaporates.

To protect the CD lens for its
peformance, use CD lens cleaner to clean
the lens regularly or when the lens
performance is reduced.

Summary of Contents for MCD129

Page 1: ...MCD129 DVD MicroTheatre ...

Page 2: ...ratories This product incorporates copyright protection technol ogy that is protected by method claims of certain U S patents and other intellectual property rights owned by Macrovision Corporation and other rights owners Use of this copyright protection technology must be authorized by Macrovision Corporation and is intended for home and other limited viewing uses only unless otherwise au thorize...

Page 3: ...3 English Index English 4 33 ...

Page 4: ...e Audio Subtitle and Disc Menu language Basic Functions Switching the system on off 17 Auto power saving standby 17 Volume control 17 Sound Control 17 DBB Dynamic Bass Boost DSC Digital Sound Control Disc Operations Playable Discs 18 Region Codes 18 Playing discs 19 Using the Disc Menu 19 Using PBC feature available for 2 0 version VCD only Resuming playback 19 Selecting and searching 19 20 Select...

Page 5: ... packaging materials exhausted batteries and old equipment Installation Place the player on a flat hard and stable surface In a cabinet allow about 10cm 4 inches of free space all around the player for adequate ventilation Do not expose your player to extreme temperatures or humidity The apparatus shall not be exposed to dripping or splashing and that no objects filled with liquid such as vase sha...

Page 6: ...pair of speaker terminals Do not connect speakers with an impedance lower than the speakers supplied Please refer to the SPECIFICATIONS section of this manual Connections Step 1 Placing speakers and subwoofer For best possible surround sound locate your speakers and subwoofer as follows Place the left and right speakers at equal distances from theTV set and at an angle of approximately 45 degrees ...

Page 7: ...jack Pr PbY Use the component video cables red blue green not supplied to connect the system s PR PB Y jacks to the corresponding Component video input jacks or labeled as Pr Cr Pb CbY or YUV on theTV set To listen toTV channels through this system use the audio cables white red not supplied to connect AUX IN L R jacks to the corresponding AUDIO OUT jacks on theTV set Or to listen to disc playback...

Page 8: ...t jack on the RF modulator Use the RF coaxial cable not supplied to connect the RF modulator to yourTV s RF jack Using S Video In jack Use the S Video cable not supplied to connect the system s S VIDEO jack to the S Video input jack or labeled asY C or S VHS on the TV set To listen toTV channels through this system use the audio cables white red not supplied to connect AUX IN L R jacks to the corr...

Page 9: ...cks on theVCR or Cable Satellite box Before starting operation press AUX on the remote control to select AUX in order to activate the input source Using the VCR for recording DVDs Some DVDs are copyright protected You cannot record or dub protected discs using aVCR 3 Connect the system s COMPOSITEVIDEO jack to theVIDEO IN jack on theVCR 4 Connect the system s LINE OUT R L jacks to the AUDIO IN jac...

Page 10: ...digital Connect the system s COAXIAL OUT digital out jack to the DIGITAL IN jack on a digital recording device DTS DigitalTheater System compatible with a Dolby Digital decoder for example Before operation set COAXIAL OUTPUT according to the audio connection Digital audio recorder DVD player ...

Page 11: ...errupts disc playback SOURCE selects the respective sound source DVD or AUX press to skip to the previous next chapter title track 9 stops disc playback or erases a program 6 iR Sensor point the remote control towards this sensor 7 OPEN CLOSE opens or closes the disc door 8 PROGRAM ForVCD CD only program the favourite tracks 9 MODE selects various repeat play modes For VCD with PBC feature PBC mus...

Page 12: ...er title track For JPEG selects different zooming rates 9 stops disc playback or erases a program Numeric Keypad 0 9 inputs a track title chapter number of the disc PROG ForVCD CD only program the favourite tracks DISPLAY OSD displays disc playback time during playback SLOW selects different slow playback modes for aVCD SVCD DVD A B repeats playback of a specific section within a title of DVD or a...

Page 13: ...ing a time title or chapter ForVCD with PBC feature PBC must be turned off ZOOM DVD VCD JPEG enlarges a picture or active image on theTV screen For JPEG turns on off the zooming feature DSC selects different types of preset sound equalizer settings CLASSIC POP ROCK or JAZZ DBB enables or disables bass enhancement ANGLE selects a DVD camera angle ...

Page 14: ...eTV IMPORTANT Make sure you have completed all the necessary connections See ConnectingTV 1 Switch the DVD system on and then select DISC source See Switching the system on off 2 Turn on theTV and set to the correct video in channel You should see the blue Philips DVD background screen on theTV Usually these channels are between the lowest and highest channels and may be called FRONT A V IN orVIDE...

Page 15: ...ss OK on the remote to confirm Getting Started 1 In disc mode stop playback then press SYSTEM MENU The menu bar will appear across the top of theTV screen 2 Select icon and press 4 3 Press à á 4 3 keys on the remote control to navigate in the menu Move to and press á Move to TVTYPE and press á MULTI Select this if the connectedTV set is compatible with both NTSC and PAL multi system The output for...

Page 16: ... off progressive scan as described in To deactivate Progressive manually Press SYSTEM MENU on the remote to exit the system menu The setup is complete now and you can start enjoying the high quality picture To deactivate Progressive manually When the distorted sign still appears on theTV it may be because the connectedTV does not accept progressive signals and progressive is set by mistake You mus...

Page 17: ...press any button within 30 minutes in the stop mode Volume control Press VOLUME or VOL on the remote to increase or decrease the volume level The display briefly shows VOL and a volume value from 01 to 39 MIN or MAX is displayed when adjusted to the lowest or highest volume level To switch off the volume temporarily Press MUTE on the remote Playback will continue without sound and MUTE is displaye...

Page 18: ... any objects other than disc on the disc tray Doing so may cause the disc player malfunction If the inhibit icon appears on theTV screen when a button is pressed it means the function is not available on the current disc or at the current time Playable Discs Your DVD Player will play DigitalVersatile Discs DVDs Video CDs VCDs SuperVideo CDs SVCDs Digital Versatile Discs Recordable DVD R DigitalVer...

Page 19: ... menu on the display such as allowing you to select favourite songs To switch PBC on or off 1 In disc mode press SYSTEM MENU The menu bar will appear across the top of theTV screen 2 Press à á 4 3 keys on the remote control to navigate in the menu Press à á to move to PBC option and press 4 If PBC was ON it will switch to OFF and continue playback If PBC was OFF it will switch to ON and return to ...

Page 20: ...now repeat continuously A B play is available within a title of DVD or a track 3 To exit the sequence press A B again ATO B CANCELLED is displayed briefly on theTV screen Fast forwarding reversing For DVD VCD CD MP3 1 During playback press à á repeatedly to select fast search speed in forward FF or reverse FR playback The disc plays at a high speed with no sound 2 To resume to normal playback pres...

Page 21: ...ly until PLAY is displayed Programming favourite tracks ForVCDs CDs You can select and program up to 99 desired tracks for playback in the desired sequence If you like store any track chapter title more than once 1 During playback press 9 twice to fully stop the playback 2 Press PROG on the remote control or PRGOGRAM on the system to activate programming mode On theTV screen PROGRAM and P 00 00 ar...

Page 22: ...repeatedly to select the desired language for sound track The feature is disc dependant For VCDs Press AUDIO repeatedly to select the audio channel for sound output displayed on theTV screen LEFT VOCAL RIGHT VOCAL MONO LEFT MONO RIGHT and STEREO SUBTITLE DVD only Press repeatedly SUBTITLE on the remote control to select different subtitle languages The feature is disc dependant Camera Angle DVD on...

Page 23: ...the MP3 CD menu is switched off You can only play the current title by pressing 2 While in playback mode press to select the previous next title The title number will appear Root SMART NAVI ROOT 0 TITLE NAME1 1 TITLE NAME2 2 TITLE NAME3 3 TITLE NAME4 4 TITLE NAME5 5 1 Load a Kodak picture disc The disc reading time may exceed 30 seconds due to complexity of the directory file configuration 2 Playb...

Page 24: ...t a desired audio language on the SVCD VCD LeftVocal p RightVocal p Mono Left p Mono Right p Stereo x Slow Motion The slow motion speed will display Press 4 repeatedly to select a reverse or forward slow motion speed To cancel the slow function press 2 STATUS In DISC mode select this icon and press 4 to view the time title or chapter information of the playing disc Time Search A time edit box appe...

Page 25: ...sabled DVD Menu Operations Using the setup menu user preference settings This DVD setup is carried out via yourTV set enabling you to customize the DVD System to suit your particular requirements AUDIO MUTE OK SYSTEM MENU SUBTITLE REPEAT A B SHUFFLE DISC MENU 1 3 2 4 1 In disc mode press SYSTEM MENU The menu bar will appear across the top of theTV screen 2 Select icon and press 4 to enter the setu...

Page 26: ...d You can change the four digit code used as Password 1 In disc mode press SYSTEM MENU 2 Select icon and press 4 Playback will pause 3 Press à á 4 3 on the remote control to navigate in the menu Move to and press á Move to PASSWORD and press á 4 Use the numeric keys 0 9 to enter your four digit code The password supplied by default is 1234 If you forget the four digit code press 9 four times the s...

Page 27: ...ess 4 3 to select a rating level between 1 8 and press OK DVDs rated above the level you select will not play unless you enter your four digit password or choose a higher level rating Select No Parental to deactivate Parental level and have all discs play 6 Press SYSTEM MENU again to remove the menu Rating explanations NO PARENTAL It will play all discs 8 ADULT material for adults only riewed only...

Page 28: ...tal definition 500 TV Dimensions 222 W x 90 H x 219 D mm Weight 1 1 kg L R SPEAKER System 2 way bass reflex system Impedance 4 Ω Dimensions w x h x d 125mm x 250mm x 249mm Weight 2 42 kg left speaker 1 95kg right speaker SUBWOOFER System bass reflex system Impedance 8 Ω Dimensions w x h x d 150 mm x 250 mm x 232 mm Weight 2 48 kg REMOTE Distance 6m Angle 300 Specifications and external appearance ...

Page 29: ...mote Set yourTV to the correctVideo In channel This channel is usually near channel 00 Or you may have a button on theTV remote control that selects Auxiliary or A V IN channel See yourTV owner s manual for details Or change channels at theTV until you see DVD screen on theTV If the progressive scan feature is activated but the connectedTV does not support progressive signals or the cables are not...

Page 30: ...tem is in pause slow motion or fast forward reverse mode press É Å or É Å on the remote to resume normal play mode Insert a readable disc with the playback side facing down Check the disc type colour system and regional code Check for any scratches or smudges on the disc Press SYSTEM MENU to turn off the setup menu screen Cancel the parental control rating function or change the rating level Moist...

Page 31: ...he remote control at the remote sensor of the unit Reduce the distance to the player Remove any possible obstacles Replace the battery with new one Check that the battery is loaded correctly Place the DVD micro system as far away as possible from electrical devices that may be causing interference Check all speakers for correct polarity Check that the output of the video signal is switched to Ypbp...

Page 32: ...or CD RW can contain about 10 times as much data volume as a regular CD can Multichannel DVD is specified to have all sound tracks constitute one sound field Multichannel refers to a structure of sound tracks having three or more channels Parental control A function of the DVD to limit playback of the disc by the age of the users according to the limitation level in each country The limitation var...

Reviews: