background image

8

User manual

1

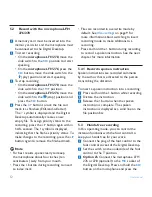
  Press and hold the pedal for fast rewind. 

When rewinding reaches the desired 
position, release the pedal.

2

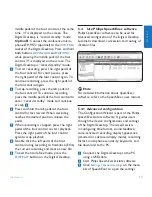
  Press and hold the pedal to fast forward. 

When forwarding reaches the desired 
position, release the pedal.

3

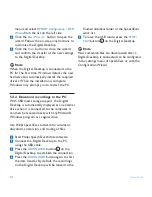
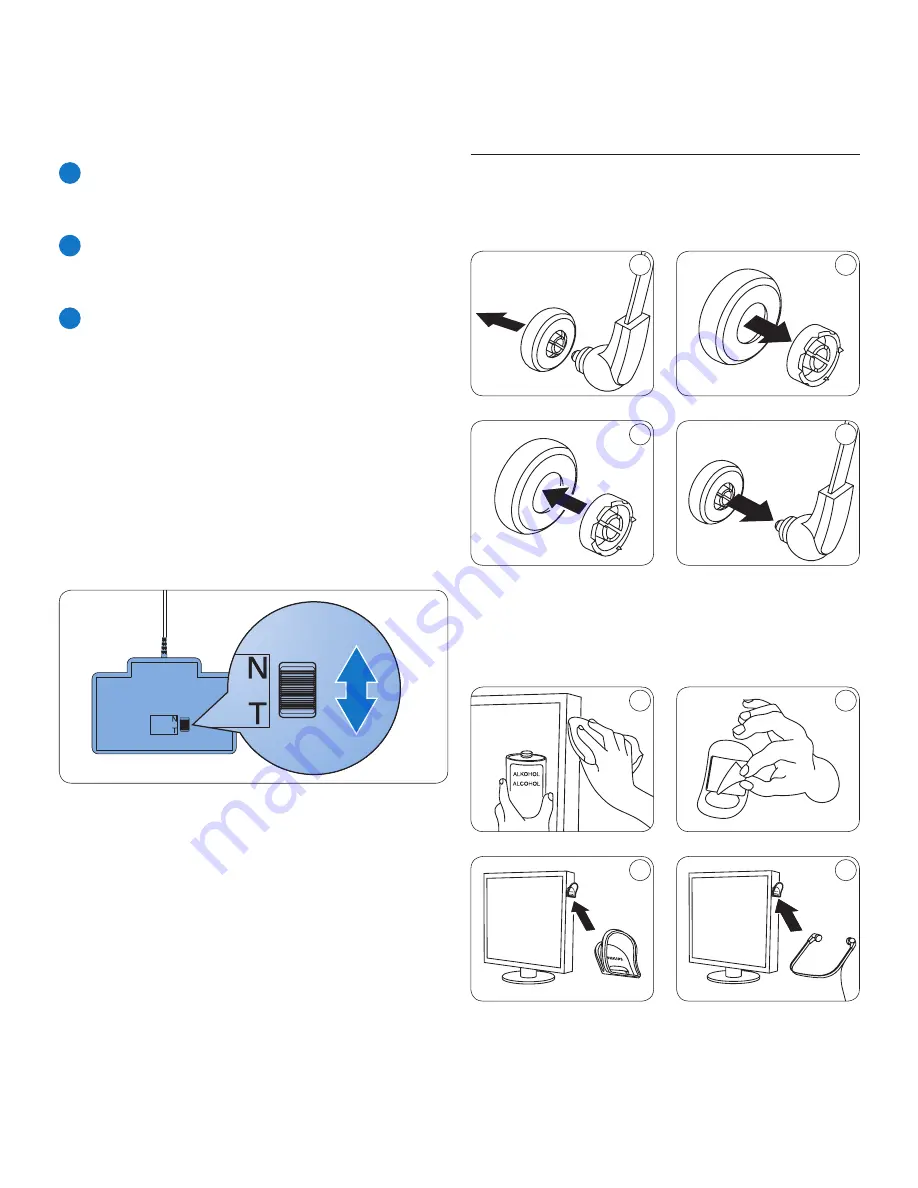
  The pedal starts playback. The behavior for 

starting and stopping playback depends on 
the setting of the playback switch on the 
underside of the foot control:

N (Neutral) position:

• 

 Press and hold the 

right pedal for playback. When the pedal 
is released, playback is stopped.

T (Toggle) position: 

• 

Press and release the 

right pedal to start continuous playback. 
Press the right pedal again to stop 
playback.

Use the Philips headphones

4.4 

The headphones are equipped with soft ear 
cushions for wearing comfort and a hanging 
bracket that attaches the headphone to a 
monitor.

B


Warning

Listen at a moderate volume to avoid hearing 
damage.

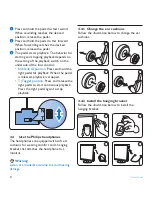
Change the ear cushions

4.4.1 

Follow the illustration below to change the ear 
cushions:

1

2

3

4

Install the hanging bracket

4.4.2 

Follow the illustration below to install the 
hanging bracket:

1

2

3

4

Summary of Contents for LFH 9750

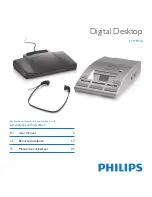
Page 1: ...Digital Desktop EN User manual 3 DE Benutzerhandbuch 17 FR Manuel de l utilisateur 31 LFH 9750 For product information and support visit www philips com dictation ...

Page 2: ......

Page 3: ...4 Use the Philips headphones 8 4 4 1 Change the ear cushions 8 4 4 2 Install the hanging bracket 8 4 5 Delete 9 4 5 1 Delete a file 9 4 5 2 Delete part of a recording 9 4 6 Menu settings 9 4 6 1 Menu list 10 5 Use more of your Digital Desktop 11 5 1 Overview of the Philips microphone LFH 276 and LFH 278 optional 11 5 2 Record with the microphone LFH 276 278 12 5 2 1 Record a spoken instruction 12 ...

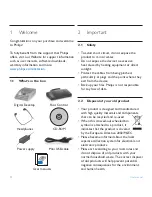
Page 4: ...ase become informed about the local separate collection system for electrical and electronic products Please act according to your local rules and do not dispose of old products with your normal household waste The correct disposal of old products will help prevent potential negative consequences for the environment and human health Welcome 1 Congratulations on your purchase and welcome to Philips...

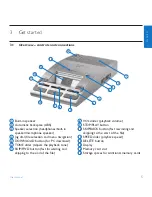
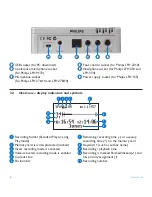
Page 5: ...ation 5 DOWNLOAD button for PC download 6 TONE slider adjusts the playback tone 7 SKIP FWD button fast forwarding and skipping to the end of the file 8 VOL sllider playback volume 9 STOP PLAY button 10 SKIP BACK button fast rewinding and skipping to the start of the file 11 SPEED slider playback speed 12 DELETE button 13 Display 14 Memory card slot 15 Storage spaces for additional memory cards 12 ...

Page 6: ...Power supply socket for Philips LFH 155 16 17 18 19 20 21 1 Recording format Standard Play or Long Play mode 2 Memory card is write protected locked 3 Insert recording mode is activated 4 Voice activated recording mode is enabled 5 Current time 6 Position bar 1 2 3 4 5 11 10 9 6 7 8 7 Remaining recording time or used up recording time on the memory card 8 Keyword 1 such as author name 9 Recording ...

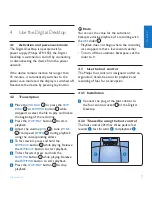
Page 7: ...he corresponding sliders To fast rewind press and hold the 4 SKIP BACK button 10 while playing Release the SKIP BACK button to start playback To fast forward press and hold the 5 SKIP FWD button 7 while playing Release the SKIP FWD button to start playback Press the 6 STOP PLAY button 9 to stop playback D Note You can set the value for the automatic backspace during playback of a recording with th...

Page 8: ... right pedal for playback When the pedal is released playback is stopped T Toggle position Press and release the right pedal to start continuous playback Press the right pedal again to stop playback Use the Philips headphones 4 4 The headphones are equipped with soft ear cushions for wearing comfort and a hanging bracket that attaches the headphone to a monitor B Warning Listen at a moderate volum...

Page 9: ...d mark position by playback 3 or forward rewind and press the DELETE button Press and hold the 4 DELETE button for two seconds to confirm the deletion or press the STOP PLAY button 9 to exit without deleting Menu settings 4 6 The menu offers general and user defined setting options to make dictation and transcription easier Press and hold the 1 JOG DIAL 4 for two seconds to open the menu Move the ...

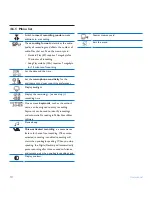
Page 10: ...recording preferences Display backlight Display the remaining or used up recording time One or more keywords such as the author s name can be assigned to every recording Keywords can be used to identify recordings and automatic file routing in Philips SpeechExec software Device beep Voice activated recording is a convenience feature for hands free recording When voice activated recording is enable...

Page 11: ...poken instruction 3 LFH 276 REC record button LFH 278 FWD forward button 4 Slide switch LFH 276 LFH 278 Fast forward REC Record Play STOP Stop Stop PLAY Play Fast rewind BACK Fast rewind 7 1 6 2 4 5 3 5 Speaker 6 Microphone sensitivity DICT normal dictation environment CONF recording in conference situation 7 Mark finished locked EOL end of letter assign priority ...

Page 12: ...nches ten centimeters away from your mouth Press the S button during recording to insert an index mark Files are recorded in overwrite mode by default See Menu settings on page 9 for more information about switching to insert recording mode to make additions to a recording Press and hold the S button during recording to record a spoken instruction See the next chapter for more information Record a...

Page 13: ... of the foot control to start playback Press the right pedal of the foot control again to stop playback Double click the left pedal of the foot 8 control during recording to finish lock EOL the current recording and create a new file To exit the hands free mode press the 9 STOP PLAY button on the Digital Desktop Use Philips SpeechExec software 5 4 Philips SpeechExec software can be used for advanc...

Page 14: ...ally displayed as an external drive when it is connected to the computer It can then be accessed easily with any Microsoft Windows program as a regular drive Use Philips SpeechExec software for automatic download conversion and routing of files Start 1 Philips SpeechExec Dictate software Connect the Digital Desktop to the PC 2 using the USB cable Press the 3 DOWNLOAD button 5 on the Digital Deskto...

Page 15: ...e questions that your dealer cannot answer or any other related question visit www philips com dictation to contact us No components are user serviceable Do not open or remove covers and do not insert objects not suitable for the specific connectors Repairs may be made only by Philips service centers and official repair facilities Failure to do so will void any warranty stated or implied Any opera...

Page 16: ...m Cable length 3 m 10 ft Connector 3 5 mm stereo right angled Dimensions W D H 160 mm 150 mm 18 mm Weight 53 g Technical data 7 Foot control 2210 Connector 3 5 mm plug Dimensions W D H 195 130 35 mm Weight 660 g SpeechExec Dictate Software Minimum Pentium III 500 MHz and 512 MB RAM Recommended Pentium IV or similar 1 GHz and 1 GB RAM Hard disk space 100 MB for SpeechExec 250 MB for Microsoft NET F...

Page 17: ...ww philips com dictation This device complies with Part 15 of the FCC Rules Operation is subject to the following two conditions 1 This device may not cause harmful interference 2 This device must accept any interference received including interference that may cause undesired operation The CE mark confirms that the device corresponds to the relevant guidelines of the European Union The cardboard ...

Page 18: ... property of Royal Philips Electronics or their respective owners 2008 Royal Philips Electronics All rights reserved Document Version 1 0 17 10 2008 5103 109 9526 6 Discover the comprehensive range of professional dictation products from Philips www philips com dictation ...

Reviews: