background image

61

'

Subpictures

'

This function is only required if recordings were made through a video
camera connected to the

DV IN (CAM2)

socket. In this case, you can

display/hide information on the date and time of the recording.

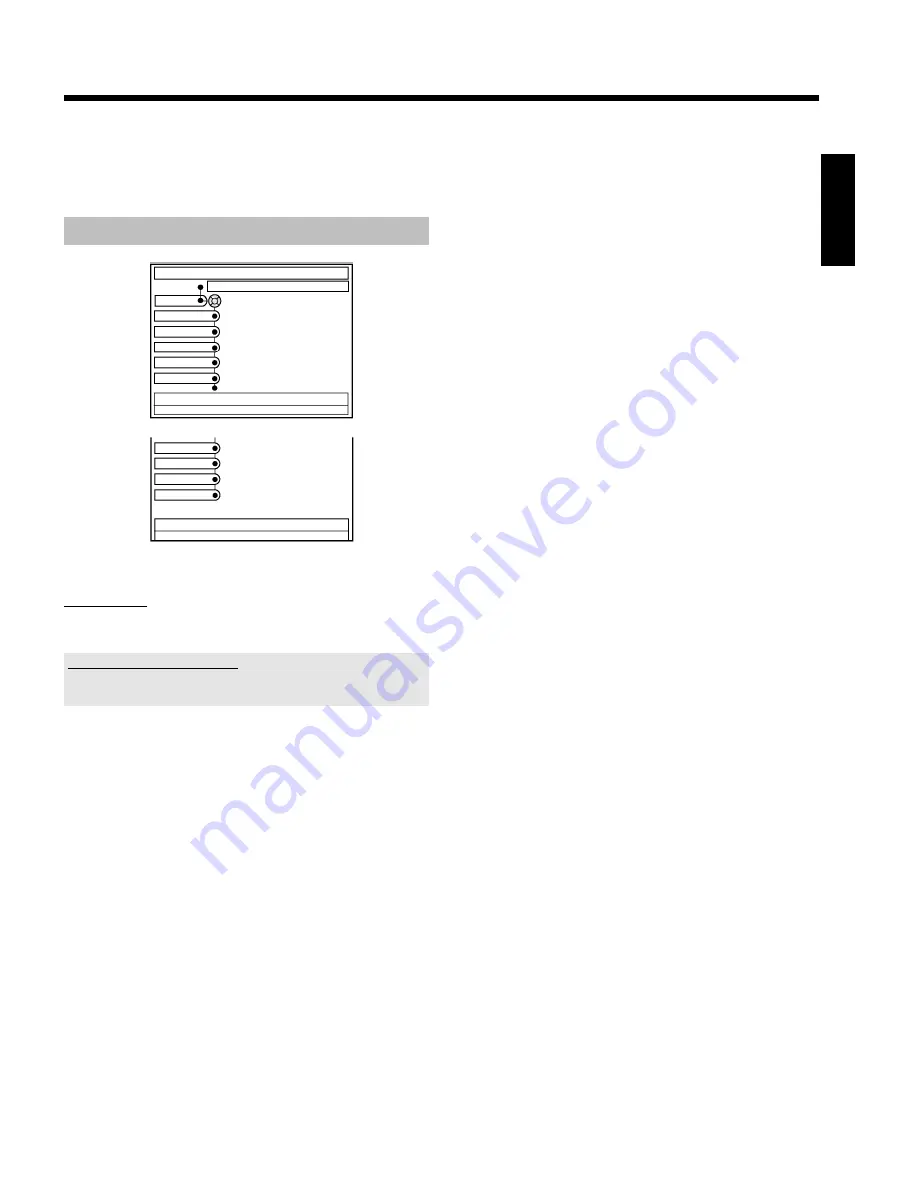
Preferences

SYSTEMMENU

Recording

Preferences

Record mode

Camera mode

Chapters

HDD buffer

Language

Sat record

Direct rec.

Filter

Safety Slot

Recording

In this menu, you can select one of the following functions for
recording:

I can not select some functions

During a recording the selection of some functions are not possible. e.g.
'

HDD buffer

'.

'

Record mode

'

Select from the settings displayed the record mode (picture quality of
the recording). M1, M2x, M3,... M8.
For recordings on a DVD+RW/+R (archiving function) always the
recording mode used for the recording on the HDD will be taken.
Observe the maximum possible recording time on a DVD+RW/+R.
The maximum possible recording time on the HDD depends from the
recording mode and the average length of the recordings (titles).

The recording mode matches the storage space available on a
DVD+RW/+R. This means that only 1 hour of recording on the hard
disk in recording mode M1 will fit on a DVD+RW/+R (M2...2 hours,
M2x...2.5 hours, ...M8...8 hours). If the recording on the hard disk is
longer, you must use the function 'Dividing Titles' and store the
recording on two DVD+RW/+R's.

O

'

M1

'

High Quality (high recording quality)
offers the best picture quality and a recording time of:

DVD+RW/+R:

1 hour.

HDD:

approx. 16 hours

O

'

M2

'

Standard Play (pre-recorded DVD quality)
offers standard picture quality and a recording time of:

DVD+RW/+R:

2 hours.

HDD:

approx. 32 hours

O

'

M2x

'

Standard Play plus (better than S-VHS quality)
offers standard picture quality and a recording time of:

DVD+RW/+R:

2,5 hours.

HDD:

approx. 40 hours

O

'

M3

'

Long Play (S-VHS picture quality).
Recording time of:

DVD+RW/+R:

3 hours.

HDD:

approx. 48 hours

O

'

M4

'

Extended Play (better than VHS picture quality).
Recording time of:

DVD+RW/+R:

4 hours.

HDD:

approx. 64 hours

O

'

M6

'

Super Long Play (VHS-picture quality).
Recording time of:

DVD+RW/+R:

6 hours.

HDD:

approx. 96 hours if the average recording time for a

title is at least 20 minutes.

O

'

M8

'

Super Extendend Play (VHS-LP-picture quality).
Recording time of:

DVD+RW/+R:

8 hours.

HDD:

approx. 130 hours if the average recording time for a

title is at least 20 minutes.

'

Camera mode

'

Select the recording mode (picture quality for recording) from one of
the displayed settings for the recording from external sockets.

M1

,

M2

x,

M3

,...

M8

. Read the previous section (Record Mode) on the

picture quality that corresponds to each setting.

'

Chapters

'

O

'

Off

'

No auto chapters

O

'

On

'

Automatic chapter marking after 5 minutes.

In the case of camcorder recordings via the front socket

DV IN

(CAM2)

, the chapter marker will be transferred from the camcorder.

ENGLISH

User preferences for the HDD

Summary of Contents for HDRW720/69

Page 1: ...e shift Buffer 27 Symbols in the Time Shift Buffer 28 Navigation in the time shift buffer 28 Mark TV shows for recording 29 Manual recordings 30 Starting a recording 30 Starting a recording from the current position from here onward 30 Ending a recording 30 Recording from a video recorder DVD player 31 Recording from a camera connected to the front sockets 32 Programming a recording TIMER 33 Gener...

Page 2: ...DD buffer 62 Language 62 Sat record 62 Direct rec 62 Filter 62 Safety Slot 62 Set up 62 System 62 Auto delete 62 Jump forward 62 Jump back 62 Installation 63 Flush Buffer 63 Additional user preferences 64 General 64 Picture settings 64 Sound settings 65 Language settings 66 Additional settings 66 Disk feature menu 67 Access control Child Lock 68 Child lock DVD and VCD 68 Activating deactivating ch...

Page 3: ......

Page 4: ......

Page 5: ...it was interrupted Time Shift Buffer The above features are available because the HDRW 720 69 uses a so called Time Shift Buffer As soon as you turn on your DVD recorder it starts recording from the current TV channel into the Time Shift Buffer The DVD recorder stores all the TV shows you watched since you turned on the recorder If you watched a TV show for more than 60 seconds the recorder will i...

Page 6: ...meantime by pressing CHANNEL q CHANNEL r Please note that you cannot use the FlexTime Instant Replay and Pause LiveTV features of the Time Shift Buffer or play back a recording from the HDD during the archiving process since the HDD is already playing back a recording copying from the HDD to the DVD RW R Nevertheless it is possible to make recordings into the Time Shift Buffer the Time Shift Buffe...

Page 7: ...ime of the Time Shift Buffer has reached that position the indicator reaches the left end of the time bar When it reaches the end the DVD recorder will automatically switch to playback PLAY G Playback at normal speed The limits of the Time Shift Buffer cannot be exceeded Recordings using the Time Shift Buffer Recordings are always stored in the Time Shift Buffer first The following recording optio...

Page 8: ...as M1 M2 M2x M3 M4 M6 and M8 The number indicates the number of hours that will fit on a single layer 4 7GB DVD RW or DVD R This means that you can store only 1 hour of M1 recordings on a DVD RW R while 8 hours of M8 recordings will fit on the same disc This is particularly important when you want to copy recordings from the HDD onto a DVD RW R The quality of recordings on the HDD cannot be change...

Page 9: ... value You can mark several titles in the media browser Switch on repeat play during playback from a disc TUNER This button lets you switch to the picture of the internal tuner TV channel During play back from the Time Shift Buffer you can jump to the actual TV show live of the selected TV channel SYSTEM MENU Call up Cancel the system menu Depending on the operating mode from which you press this ...

Page 10: ...Previous chapter or previous title Hold down the button Search backwards Hold down the button during the still picture slow motion backwards O Briefly press the button during playback Next chapter or next title Hold down the button Search forwards Hold down the button during the still picture slow motion forward JUMP FWD To jump forward by a certain time period that can be changed in the settings ...

Page 11: ...this code number you will read in the chapter Using your DVD Recorder remote control with your TV set TV VOLUME q Increase TV volume TV VOLUME r Reduce TV volume For the following functions you need to hold down the TV button on the left side and then select the function you need with the appropriate button STANDBY m Switch on off TV set 0 9 Number buttons 0 9 CHANNEL q To select a higher programm...

Page 12: ...g s on the HDD G Playback button Play back a recorded disc or a title on the HDD N select previous title search backwards O select next title search forwards h Stop button Interrupt playback recording Cameramode Behind the flap at the right hand corner on the front S VIDEO CAM1 Connection of SVHS Hi8 camcorders or SVHS Hi8 video recorders programme number CAM1 Yellow socket VIDEO CAM1 Video input ...

Page 13: ...eo compatible TV set VIDEO OUT CVBS Yellow cinch socket for the connection of a TV set with video input CVBS Composite Video AUDIO OUT L R White red cinch socket for the connection of a TV set with audio input sockets or an additional device COMPONENT VIDEO OUT Red blue green cinch sockets for the connection of an additional device with Component Video input interlaced no progressive scan Output s...

Page 14: ... if the recording was made in video mode and the recording was finalised Audio CD Compact Disc Digital Audio Super Audio CD plays only the CD layer of a hybrid SACD disc Video CD Format 1 0 1 1 2 0 Super Video CD CD R CD Recordable with Audio MP3 content CD RW CD Rewritable with Audio MP3 content Regional code DVDs must be marked ALL for all regions or 3 for region 3 to work in this machine If the...

Page 15: ...lots on the side and the fan opening at the back of the device to avoid overheating The device should be placed on a firm surface ADo not insert any objects into the openings or ventilation slots of the device C These operating instructions have been printed on non polluting paper C Please dispose of old batteries safely C Please take the packaging to your local recycling centre C This electronic ...

Page 16: ...ll facilitate the use of these operating instructions 1 Step s for carrying out an operation O Another possible operating step that is not absolutely necessary P Reaction of the device When only one operation step is necessary You will find additional information in this section Cleaning the discs Some malfunctions frozen or distorted picture and broken sound for example may be due to dirt on the ...

Page 17: ...sic files The data is compressed to 1 10 of the volume of the original audio material using a special process This means that 10 hours of music can be stored on a single CD The Philips DVD recorder can play back pre recorded DVDs and CDs DVDs recorded using this DVD recorder can be played back on current and future DVD players Dolby Digital is a standard developed by Dolby Laboratories for transmi...

Page 18: ...eed it for service queries or if your machine is stolen The serial number PROD NO is printed on the type plate at the back or bottom Made in Hungary 220 240V 50 60Hz 38W MODEL NO HDRW 720 69 PROD NO _______________________ Overview of functions ...

Page 19: ...ntered the code number check that the TV set will responds to the TV VOLUME r or TV VOLUME q buttons a My TV set will not react b Also try to enter the other code numbers or that of other manufacturers b In some cases it is possible that your TV set will not react to the selected code numbers If this is the case you unfortunately cannot use this function a How can I reset the code b Enter the numb...

Page 20: ... C cable This connecting cable also known as the SVHS cable is used to transmit the brightness signal Y signal and colour signal C signal separately This mini DIN socket plug is also called a Hosiden socket plug 1 Insert one end of an S Video SVHS cable into the S VIDEO OUT Y C socket at the back of the DVD recorder and the other end into the S Video SVHS input socket on the TV set usually labelle...

Page 21: ...evices on how to connect additional devices satellite receivers videorecorders to the input output sockets Then read the chapter on Connecting to the mains Connection with the aerial cable only To connect this DVD Recorder to a TV set without external Audio Video input sockets you need a modulator With the modulator the audio video signal is converted in an UHF channel This signal can be received ...

Page 22: ...ting additional devices only via aerial cable If you want to connect additional devices e g satellite receiver only via aerial cable please observe the following The DVD Recorder must be connected directly to the TV set If there is a video recorder or an additional device in between the picture quality may be poor because of the copy protection system built into the DVD Recorder The additional dev...

Page 23: ... the analogue audio sockets Two analogue audio sockets AUDIO OUT L R audio signal output left right are located at the back of the DVD recorder These can be used to connect the following a receiver with Dolby Surround Pro Logic a receiver with two channel analogue stereo Can I use the Phono input on my amplifier This socket input on the amplifier is designed only for a record player without preamp...

Page 24: ...ntinue a My screen is empty b Depending on the initialisation procedure it can take some time before the picture appears Please press no button in the meantime b If the TV set does not automatically switch to the programme number of the input socket select the corresponding programme number on your TV set manually see your TV s operating instructions b Check that the scart cable is connected from ...

Page 25: ...he cable connection from the aerial aerial socket to the DVD recorder and to the TV set b Please have patience The DVD recorder searches the entire frequency range in order to find and save the largest possible number of TV channels b If you have not connected an aerial go through all the basic settings right to the end and then if you wish start the automatic search see Automatic TV channel searc...

Page 26: ... store Press OK 7 In Channel freq select the desired display using C Freq Frequency CH Channel S CH Special hyperband channel 8 In Entry search enter the frequency or channel of the TV station using the number buttons 0 9 O Press C in the line Entry search to start the automatic search P A changing channel number frequency number will appear on the TV screen Continue the automatic search until you...

Page 27: ...TV channel manually in Manual TV channel search Sorting and deleting TV channels manually With this function you can rearrange the TV channels already stored or to delete TV channels you don t want or those with poor reception Preparation The TV set is switched on and if necessary the programme number for the DVD recorder has been selected the DVD recorder is switched on 1 Press the BROWSER HDD bu...

Page 28: ...splay shows an incorrect time or the time and date must be reset manually SMART CLOCK SMART CLOCK automatically sets the time and date using the information transmitted by the TV channel Normally the TV channel stored at programme number P01 is used In the Clock preset line you can select the programme number channel name whose TV channel transmits this information If the time date is not displaye...

Page 29: ...re usually green luminance Y blue U Pb Cb B Y and red V Pr Cr R Y Attention If you choose this type of connection the DVD recorder must already be connected and completely installed initial installation complete Switching of the signal to the COMPONENT VIDEO OUT sockets is carried out in a menu that is not yet available during the initial installation Preparation Switch on the TV set and if necess...

Page 30: ...pulse Please observe the colour sequence The colours of the sockets at the DVD recorder and the connectors must match those of the socket colours at the TV set red red blue blue green green If they don t the colours of the picture may get mixed up or the picture may not be visible 8 Use an audio cinch cable connect the red white cinch socket AUDIO OUT L R at the back of the DVD recorder with the m...

Page 31: ...k recordings from the time shift buffer while the recording is still in process Therefore you can jump back to the currently selected TV programme using JUMP BACK and watch a scene again Moreover you can use all playback features such as still picture slow motion search by time search with N O even with recordings that are still in the time shift buffer In the meantime the recording continues If y...

Page 32: ...NER 1 Press INFO to display the bar of the time shift buffer on the screen 2 The following buttons are available O N O PLAY G PAUSE 9 D C JUMP FWD JUMP BACK for navigation in the time bar O T C Switching between title chapter for selection using N O The top screen line displays either TITLE for selecting titles or CHAPTER for selecting chapters O REC OTR n To start a recording that will be stored ...

Page 33: ...on the HDD 1 Press INFO to display the bar of the time shift buffer on the screen O You can also press the yellow colour button to get a better overview of the recordings 2 Select the title you want to store with B A 3 The following options are available O Freely selectable end Press REC OTR n to select the entire title The colour changes to red Search for the desired end using D C Hold down the r...

Page 34: ...f the most recent recording using C or D and hold down the RED function button to cut off the end You can remove the marker using the RED function button Starting a recording from the current position from here onward You can also start a recording immediately regardless of the recordings in the Time Shift Buffer 1 Hold down REC OTR n until the red light on the record button n at the front switche...

Page 35: ...nterrupt it with the button STOP or PAUSE on the video recorder DVD player 5 Start recording by pressing REC OTR n on the DVD recorder and playback by pressing PLAY G on the video recorder DVD player 6 Choose the switch off time in 30 minute steps using REC OTR n Please observe If you do not choose a switch off time the DVD recorder automatically switches off after 30 minutes a When copying video ...

Page 36: ...mcorder to the front sockets 2 Press CAM on the remote control P The DVD recorder will switch to camera mode 3 Select the socket to which the camera is connected using CHANNEL q CHANNEL r O CAM1 For recordings from the VIDEO CAM1 S VIDEO CAM1 sockets Switching between the two sockets is done automatically If a signal is available at both sockets at the same time the signal at the S VIDEO CAM1 sock...

Page 37: ...ter the date programme number start and finish times All the information needed by the DVD recorder for programming is contained in the G Code programming number This 9 digit G Code number is found in most TV listings magazine 1 Switch on the TV set If required select the programme number for the DVD recorder 2 Press TIMER s on the remote control P The Schedule screen will appear 3 Press the red f...

Page 38: ...ay Mon Repeated weekly recordings every week on the same day e g Monday 6 If all information is correct press the OK button The data is stored 7 To end press TIMER s If one or more recordings have been programmed TIMER will light up on the display Programming recordings without the G Code System Preparation Switch on the TV set and if necessary select the programme number for the DVD recorder Swit...

Page 39: ...VD recorder Switch on the DVD recorder 1 Press TIMER s on the remote control while the DVD recorder is switched on P The Schedule screen will appear Frequency VPS PDC Home Single recording Grid Search Schedule Info Record Freq Timing 21 Oct 20 00 21 30 BBC1 Once 0 21 Oct Matrix Once 0 2 Use B or A to select the programmed recording you want to change or delete Depending on the programming method w...

Page 40: ...g proceed as follows 1 If necessary switch the TV set to the programme number input socket of the DVD recorder 2 Press STOP h P A message appears on the screen asking whether you really want to end the recording O If you want to end the recording select Yes with D and confirm with OK O If you do not want to end the recording confirm No using OK O The programmed recording can also be canceled as de...

Page 41: ... 9 Still picture Go forwards or backwards one frame at a time using C D 5 Press STOP h to end playback P You will return to the media browser The position where playback was interrupted will be automatically stored By pressing PLAY G playback resumes at this position Additional playback features Search by time During playback of a title from the HDD or recordings in the time shift buffer you can s...

Page 42: ...ly possible to a certain degree with such recordings Title editing includes change delete archive lock child lock protect against automatic deletion Titles in the Time shift Buffer marked for storage on the HDD can only be locked or deleted Symbols in the Media Browser If you call up the Media Browser with the BROWSER HDD button following symbols can appear in the infobar at the top of the screen ...

Page 43: ...wser appears 2 Select the title you want to change with B A 3 Choose one of the following functions with the colour buttons of your remote control O Delete title red function button The tiltle recordings will be erased from the HDD O Archive title green function button The title will be transferred to DVD RW R If it is not possible to record on a DVD RW R an error message appears disc not inserted...

Page 44: ...The Media Browser appears 2 Select the title whose settings you want to change with B A Press EDIT 3 Select Video edit and confirm with C P Playback starts automatically 4 Search the position where you want to make changes with D C N O To enlarge the actual position of the timebar in several steps you can use A You can switch back using B 5 Press PAUSE 9 O You can insert or remove chapter markers ...

Page 45: ...p pressing O until ä appears For special characters press 1 several times The position for the following character is selected automatically Press 1 to insert an empty space Press the red function button to delete 8 Repeat 6 and 7 until you have made the changes you want 9 Save the new name with OK 0 To end press EDIT Divide title You can divide a title in several parts titles as large as you like...

Page 46: ...Insert remove chapter markers To find you special scenes in one title faster you can insert chapter markers These markers can also be deleted 1 Press BROWSER HDD on the remote control P The Media Browser appears on the screen 2 Select the title you want to modify using B A 3 Press EDIT on the remote control P The title editing menu appears on the screen O If you want to remove all automatically cr...

Page 47: ...bar in several steps you can use A You can switch back using B To find the right position you can step a frame forward or backward using the D C button To select the end of the title use O 8 Press PAUSE 9 at the corresponding position 9 Set the end marker with the blue function button P The hidden area is greyed out P The description of the blue function key changes to HIDE End with EDIT P Additio...

Page 48: ...M1 only 1 hour can be stored on a DVD RW R M2 only 2 hours M2x only 2 5 hours M8 only 8 hours 3 Press BROWSER HDD P The media browser appears with an overview of all recordings on the HDD 4 Select the title you want to copy on the DVD RW R using B A O Archiving of the edited title A The hidden szenes were not copied on the DVD RW R O Archiving of the original title The hidden szenes were copied as...

Page 49: ... protected 2 Press STOP h on the remote control while the index screen is displayed P The first title is highlighted 3 Press A P This takes you to the disc info screen 4 Press C Select Protection Confirm with C 5 Select Protected using B and confirm with OK 6 Press D and then DISC MENU to terminate P The entire disc is now protected If you attempt to record on a protected disc DISC LOCKED will app...

Page 50: ... to delete the contents or eject the disc b The disc inserted is a DVD RW but its contents are not DVD video compatible e g a data disc Recordings on this disc can only be made if the entire disc is first deleted with the REC OTR n button Switch over to the actual TV channel during playback As soon as you turn on the DVD recorder the currently selected TV channel on the DVD Recorder is recorded in...

Page 51: ...P01 2 If playback does not start automatically use the B or A button to select the title you want to play on the index screen With N O you can jump to the begin or the end of the index screen 3 Press the PLAY G button P title chapter number elapsed time will appear on the display a I can see the message EMPTYDISC b The disc does not contain any recordings 4 To stop playback press STOP h on the rem...

Page 52: ...of the albums will be shown on the TV screen and on the display Further information on the album track and artist will also be displayed if included in the ID tag 2 Stop playback using STOP h P The number of albums is displayed in the display O Using N or O select the next or previous title O You can also use the T C button to select titles and albums Press the T C button and use the C or D button...

Page 53: ...r at the top of the screen Select the K symbol using C or D and confirm with B You can now use the D or C button to select different forward and backward search speeds If necessary switch the menu bar off with the SYSTEM MENU button To continue playback press PLAY G Still picture 1 During playback press PAUSE 9 to stop playback and display a still picture C01 2 04 Frame advance via menu bar During...

Page 54: ...hapter You need to indicate the start and end of the passage 1 During playback press PAUSE 9 at the start point P You will see a still picture 2 Keep pressing SELECT until appears on the screen P The start point is now saved 3 Press PLAY G to start playback 4 When the end point is reached press OK P appears on the TV screen Playback now takes place within these points 5 To end the repeat press the...

Page 55: ... playback in the two menus may be different Please note that with some DVDs the audio language and or subtitle language can be changed only via the DVD menu 1 During playback press SYSTEM MENU and select the D icon using C 2 Select the required audio language using B or A O You can also enter the number directly using the number buttons 0 9 P Play continues in the new audio language Subtitles Many...

Page 56: ...n insert delete chapter markers hide chapters select a new index or split up a title In this menu you can adapt a title on a DVD RW R to suit your particular needs You can insert delete chapter markers delete all chapter markers or split up the title Press EDIT on the remote control during recording to open this menu Insert chapter markers During recording you can set or delete chapter markers wit...

Page 57: ...ange the chapter number Select the chapter between the new markers using B or A Press PAUSE 9 Select Delete marker with B to delete the current chapter marker Confirm with OK The current chapter number decreases by one 7 Press T C twice to change the chapter number C 8 Select the previous chapter with B since you are already in the next chapter end of the chapter is also the beginning of the next ...

Page 58: ...reen Once the revision has been completed successfully the DVD recorder reverts to the index overview Dividing titles You can divide a title into several sections titles of any size Each of these sections titles is identified by its own index Note This division cannot be undone Can I divide titles on DVD R discs As recordings on DVD R discs cannot be overwritten it is not possible to divide titles...

Page 59: ...with O as often as ä appears For special characters press the button 1 repeatedly The position for the following character will be selected automatically To enter a space press the button 1 To erase a character press the red function button 6 Repeat 4 and 5 until you have made the changes you want 7 Save the new name with OK P Storing name appears on the TV screen for confirmation 8 To end press D...

Page 60: ...dex picture display If the deleted title was very short less than 1 minute Empty title will not appear at this point Can titles be deleted from a DVD R disc Titles on DVD R discs are only marked as deleted Deleted title will appear in the display instead of Empty title During playback the deleted title is skipped The space used for this title cannot be used again as the title has not been physical...

Page 61: ... will move from left to right indicating progress Finalising DVD R discs This feature is required to play back a DVD R disc in a DVD player Once the disc has been finalised no further recordings or changes can be made 1 In the Disc info display press C P The Settings for menu appears on the TV screen 2 Select Finalise disc using A or B and confirm with OK a Finalise disc does not appear b Either t...

Page 62: ...ically Preparation Switch on the TV set and if necessary select the programme number for the DVD recorder Switch on the DVD recorder 1 Insert the DVD RW R disc that you want to add in the DVD recorder Disc Manager Find title C04 Browse discs Disc number001 Remove a disc Disc number001 Add current disc Next free disc number 001 To exit press DM a When I insert a disc I see a number on the screen in...

Page 63: ...t the appropriate disc After a brief check the DVD recorder will jump to the start of the selected recording Searching discs You can easily search for the title of a recording stored in the Disc Manager To do this the appropriate disc does not have to be in the DVD recorder 1 Press DISC MANAGER on the remote control 2 Select Browse discs using B or A 3 Confirm with C P The screen will show the con...

Page 64: ... C Select the functions you want to change as described in the following pages 5 Confirm the new setting with OK 6 Close the menu item with D Toolbar SYSTEMMENU Options Toolbar Audio Zoom Time search Subpictures Options In this menu you can choose functions for the playback of recordings titles on the HDD Audio Selection of the language for the TV show currently selected on the DVD recorder Lang I...

Page 65: ... the recording on two DVD RW R s O M1 High Quality high recording quality offers the best picture quality and a recording time of DVD RW R 1 hour HDD approx 16 hours O M2 Standard Play pre recorded DVD quality offers standard picture quality and a recording time of DVD RW R 2 hours HDD approx 32 hours O M2x Standard Play plus better than S VHS quality offers standard picture quality and a recordin...

Page 66: ...ways differ from the actual start and stop time e g always 2 minutes Please observe The DVD recorder switches on e g 5 minutes before the start time recording in the Time Shift Buffer As soon as it reaches the start time the recording red marker on the time bar advances forward 5 minutes As a result the lead time will not become effective until the start time is reached Set up SYSTEMMENU System Se...

Page 67: ...w TV No function If this item is confirmed exit with SYSTEM MENU O Manual search Manual TV channel search O Sort TV channels Sorting TV channels manually O Time Date Setting Correcting the time and date For more information please read chapter Additional installation features Flush Buffer Using this function you can store recordings on the HDD that were marked for recording in the time shift buffe...

Page 68: ...rmation on each function read the following pages 5 Select the corresponding function using B or A or the setting with D or C Select the functions you want to change as described in the following pages 6 Confirm the new setting with OK 7 Close the menu item with D Picture settings You can select the following functions in this menu Picture TV shape 16 9 Black level shift Off Video shift ï video ou...

Page 69: ...GB signal is switched off The RGB signal is switched off O S video YPbPr Component Video YUV and S Video Y C TIMER input screen only available on YUV ouput sockets O CVBS YPbPr Component Video YUV and Video FBAS CVBS TIMER input screen only available on YUV ouput sockets With all other settings the signal is switched off at the COMPONENT VIDEO OUT sockets This will also be displayed as information...

Page 70: ...ndby You can switch off the clock display on your DVD recorder to save energy Programmed recordings will be carried out despite of this In addition you can choose that an introduction movie will be played every time the DVD recorder is connected to the mains O Low power When the DVD recorder was switched off using STANDBY m the clock display is also switched off O Normal When the DVD recorder was ...

Page 71: ...OPEN CLOSE J playback will resume where it stopped after you reinsert the disc This applies not only to the current disc but also to the last 20 discs you played You can switch off this feature if you do not want it PBC This line appears only if you insert a VCD Using this function you can activate or deactivate the PBC menu Playback Control of a Video CD For more information read section Playing ...

Page 72: ...or A and confirm with C Disc features Access control Enter code Auto resume On 4 Confirm Access control using C 5 Enter a 4 digit code of your choice This code will also be used for locking titles on the HDD Media Browser P If the code is new you may have to enter the code a second time as confirmation 6 Select Child lock using A or B and confirm with C 7 Select the icon using B or A 8 Confirm wit...

Page 73: ... code a second time as confirmation 8 Select the Parental level using A or B and confirm with C A bar appears to select the parental level 9 Select the appropriate rating using B A or the number buttons 0 9 What do the ratings mean Rating 0 displayed as parental control not active Rating 1 suitable for children Rating 8 only suitable for adults What happens if a DVD scene contains a higher level t...

Page 74: ...res Access control Enter code Auto resume On 4 Confirm Access control using C 5 Enter your four digit PIN code If the code is new you may have to enter the code a second time as confirmation 6 Select Change code using A or B and confirm with C 7 Enter the new code using the number buttons 0 9 Enter the same code again as confirmation 8 Quit using D and SYSTEM MENU I have forgotten my code Press ST...

Page 75: ...on K Fast motion L Search by time Field for temporary messages The top left corner of the menu line contains a field for temporary messages relating to the various operating modes This information appears briefly on the screen when certain disc functions have been activated Shuffle Scan Repeat entire disc Repeat title Repeat track Repeat chapter Repeat from A to the end Repeat from A to B Camera a...

Page 76: ...adequate or unstable MENU The menu on the screen is active OPENING Disc tray opening TRAY OPEN Disc tray open CLOSING Disc tray closing READING Disc being read MENU UPDATE Once recording has been successfully completed the table of contents is created CREATE MENU The menu structure is created after the first recording has been made on a new disc COPYPROTECT You received a copy protected signal Thi...

Page 77: ...s message appears if an attempt is made to insert a chapter marker on this inserted DVD RW R DISC ERROR An error occurred when reading the title from a DVD RW R If this error keeps occurring please clean the disc or use a new one For instructions on how to clean a disc see the section on Cleaning the discs in the next chapter DISC WARN An error occurred when writing the title on a DVD RW R Recordi...

Page 78: ...ect again If this doesn t help you can reset your DVD recorder to the default factory settings Resetting the machine to the default factory settings bImportant All the information stored TV channels time and date TIMER will be lost 1 Disconnect from the mains power supply 2 Press and hold down the STANDBY ON m button on the device and reconnect to the mains power supply 3 Release the STANDBY ON m ...

Page 79: ...he format of self recorded s VCD s 1 0 1 1 2 0 Play back of S VCD s in a different format can be distorted Poor playback on DVD recorder distorted picture distorted sound bYour TV set is not properly adjusted bDisc is dirty Clean the disc bSometimes the picture may be temporarily distorted This is not a defect of your DVD recorder Digital distortions bThe low quality of some digital picture materi...

Page 80: ... settings match the selected inputs and connected additional devices For more information see section Sound setting in chapter User preferences There could be difference in the search speed of a DVD and DVD RW bDepending on the different structure of a DVD and a DVD RW R this can lead to the different search speeds This is not a fault in your machine A DVD RW disc cannot be played on certain DVD p...

Page 81: ...rs on the display and the DVD recorder will start the repair process This may take up to four times as much time as the recording in which the error occurred 4 If the disc is recovered the index screen will appear Please observe the following The recovering procedure is successfully only if there was a previous recording on the disc Error during recording The title may be missing Error while chang...

Page 82: ...e and better colours Region code Since DVD films are not normally released in all parts of the world at the same time all DVD players have a specific regional code Discs can be given a regional code If the regional codes differ between the player and the disc playback is not possible The regional code of the DVD recorder is shown on the type plate at the back or bottom 2 channel sound Some TV prog...

Page 83: ...79 ENGLISH ...

Page 84: ...72 Expert 312 Fenner 246 332 Ferguson 213 226 263 278 291 303 341 Fidelity 250 Finlandia 216 279 Finlux 208 209 211 212 250 254 255 256 257 258 262 279 283 Firstline 201 219 224 225 246 250 255 257 272 276 277 283 Fisher 033 044 096 129 140 149 211 216 231 249 253 255 260 306 Formenti 209 256 312 Frontech 222 246 272 332 Fujitsu 032 255 257 266 Funai 028 032 115 116 136 222 224 262 276 330 332 Gal...

Page 85: ...92 Radiola 203 247 250 320 Radiomarelli 209 250 272 RadioShack 250 Radiotone 246 250 289 RCA 001 003 004 005 006 007 015 052 053 054 055 056 095 097 098 099 102 111 112 115 118 119 122 123 124 130 131 141 143 146 153 Realistic 111 Recor 250 Revox 250 Rex 222 272 283 312 RFT 209 255 275 Roadstar 201 217 222 246 266 332 Robotron 306 Runco 82 Saba 209 226 278 291 303 306 310 319 Saisho201 219 222 228...

Page 86: ...7 041 042 045 049 051 111 113 120 122 123 131 134 136 137 141 144 148 262 Watson 250 266 288 289 Watt Radio 257 Wega 209 249 250 Weltblick 250 White Westinghouse113 120 144 146 147 154 157 250 Yamaha 004 005 006 015 120 137 151 154 Yoko 222 246 250 266 332 Yorx 266 332 Zenith 004 082 083 084 105 117 138 154 ENGLISH 3103 605 21421 4363 000 W w n n N N N w w n n w W N n w N w n N w n N n W N w n n W...

Page 87: ...alk 1kHz 105 dB Distortion Noise 1kHz 90 dB Front Connections i LINK DV in IEEE 1394 4 pin S video in Hosiden 4 pin Video in Cinch yellow Audio Left Right in Cinch white red Rear Connections SCART1 CVBS S video RGB out SCART2 CVBS S video RGB in Video out Cinch yellow Audio L R out 2x Cinch white red S video out Hosiden 4 pin Digital audio out Coaxial Optical RF antenna in Coaxial 75 ohms F type R...

Page 88: ...E DENMARK SWEDEN Phone 0825 889 789 Tlf 808 82814 Phone 08 5985 2250 PHILIPS POLSKA PHILIPS ELECTRONICS IRELAND LIMITED PHILIPS REPRESENTATION OFFICE AL Jerozolimskie 195B Consumer Information Centre Ul Usacheva 35a 02 222 Warszawa Newstead Clonskeagh 119048 MOSCOW POLSKA DUBLIN 14 RUSSIA Tel 022 571 0 571 Phone 01 7640292 Phone 095 937 9300 PHILIPS SERVICE PHILIPS CONSUMER ELETRONICS PHILIPS INFO...

Page 89: ...ress TUNER WwnnNNNwwnnwWNnwNwnNNwnNwNwwnN HDRW 720 69 3103 605 22861 4431 000 ENGLISH ADDENDUM SHEET Dear customer Please observe In the TIMER input screens shown below a programme number can be entered only using the 0 9 buttons on the remote control It is not possible to enter the programme number using the up A and down B buttons If EXT1 or EXT2 is visible in the entry field press up A or down ...

Reviews: