background image

26

10 Product 

information

Note

Product information is subject to change 

‡

without prior notice.

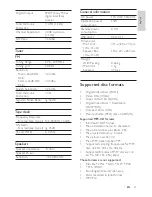
6SHFLÀFDWLRQV

$PSOLÀHU

Rated Output Power

2 X 10W RMS

Frequency Response

100 - 10000Hz, 
±3dB

Signal to Noise Ratio

> 50dB

Output Sensitivity
 Line Out (1 kHz 0dB) 2±0.2V

Disc

Laser Type

Semiconductor

Disc Diameter

12cm/8cm

Video Decoding

MPEG-2/MPEG-1

Video DAC

10 Bits

Signal System

PAL/NTSC

Video Format

4:3/16:9

Video S/N

56 dB (minimum)

Composite Video 
Output

1.0 Vp-p, 75 ohm

Audio DAC

24Bits / 96 kHz

Total Harmonic 
Distortion

<1%

Frequency Response

4 Hz - 20 kHz 
(44.1kHz)
4 Hz - 22 kHz 
(48 kHz)
4 Hz - 44 kHz 
(96 kHz)

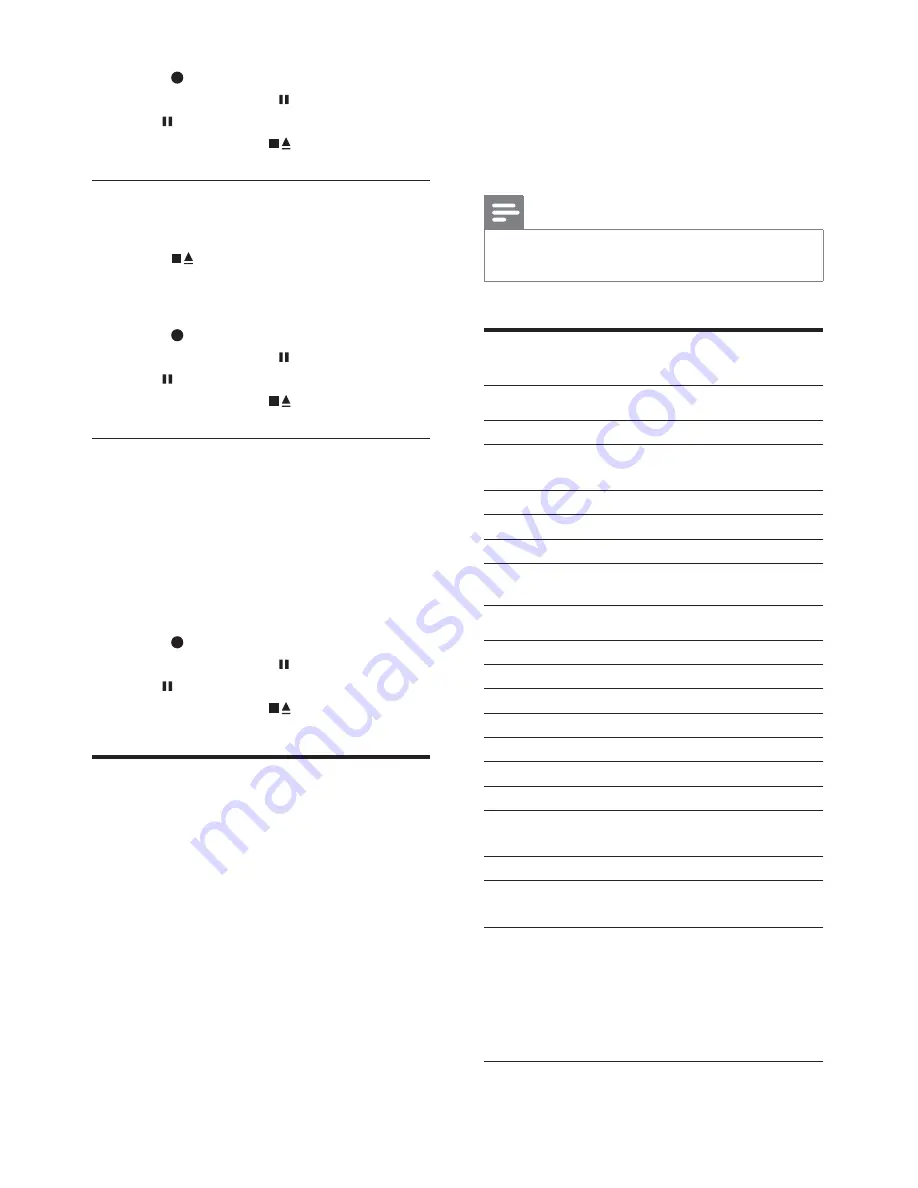
6

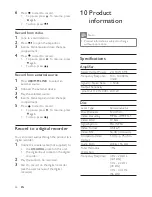
Press 

 to start to record.

To pause, press 

‡

. To resume, press 

 again.

To stop, press 

‡

.

Record from radio

1

Tune to a radio station.

2

Press 

 to open the tape door.

3

Insert a blank tape and close the tape 
compartment.

4

Press 

 to start to record.

To pause, press 

‡

. To resume, press 

 again.

To stop, press 

‡

.

Record from external source

1

Press 

USB/MP3 LINK 

 to select an 

external source.

2

Connect the external device.

3

Play the selected source.

4

Insert a blank tape and close the tape 
compartment.

5

Press 

 to start to record.

To pause, press 

‡

. To resume, press 

 again.

To stop, press 

‡

.

Record to a digital recorder

You can record audios through the product to a 
digital recorder.

1

Connect a coaxial cable (not supplied) to:

the 

‡

COAXIAL

 socket on this unit.

the digital input socket on the digital 

‡

recorder.

2

Play the audio to be recorded.

3

Start to record on the digital recorder 
(see the user manual of the digital 
recorder).

EN

Summary of Contents for FWD14

Page 1: ...Register your product and get support at www philips com welcome EN User manual 3 TH คู มือผู ใช 33 FWD14 ...

Page 2: ...28 11 Troubleshooting 29 12 Glossary 30 Contents 1 Important 4 Safety 4 Notice 5 2 Your Mini Hi Fi System 7 Introduction 7 What s in the box 7 Overview of the main unit 8 Overview of the remote control 9 3 Connect 11 Connect video cables 11 Connect audio cables 12 Route audio to other devices 12 RQQHFW D 86 ÁDVK GULYH 12 Connect an external device 12 Connect speakers 13 Connect power 14 4 Get star...

Page 3: ... local authorities or the Electronic Industries Alliance www eiae org r Where the MAINS plug or an appliance coupler is used as the disconnect device the disconnect device shall remain readily operable Know these safety symbols 1 Important Safety a Read these instructions b Keep these instructions c Heed all warnings d Follow all instructions e Do not use this apparatus near water f Clean only wit...

Page 4: ...ized company Please observe the local regulations regarding the disposal of packaging materials exhausted batteries and old equipment This bolt of lightning indicates uninsulated material within your unit may cause an electrical shock For the safety of everyone in your household please do not remove product covering The exclamation point calls attention to features for which you should read the en...

Page 5: ... means that the product is covered by the European Directive 2002 96 EC Please inform yourself about the local separate collection system for electrical and electronic products Please act according to your local rules and do not dispose of your old products with your normal household waste Correct disposal of your old product helps to prevent potential negative consequences for the environment and...

Page 6: ...H WR 3KLOLSV 7R IXOO EHQHÀW IURP WKH support that Philips offers register your product at www Philips com welcome Introduction With this unit you can enjoy audio from discs tapes USB devices external devices or radio stations To enrich sound this unit offers you these sound effects Digital Sound Control DSC Dynamic Bass Boost DBB The unit supports the following media formats DVD region code Countr...

Page 7: ... f IR Infrared sensor for remote control g Display panel Display the current status of the system Overview of the main unit a OPEN CLOSE Open or close the disc tray b STANDBY ON Switch the unit on off c Disc tray d MP3 LINK Connect an external audio source EN ...

Page 8: ...reen k DBB Enable or disable dynamic bass enhancement l DSC Select a preset sound equalizer setting m VOLUME Adjust volume n SOURCE Select a source from DISC USB TUNER TAPE AUX and MP3 LINK o SEARCH In DISC mode skip to the previous next chapter track In TUNER mode search for radio stations manually p ALBUM PRESET For MP3 WMA select albums In TUNER mode select a preset radio station q PROG Program...

Page 9: ...Open or close the disc tray MUTE Mute or restore audio output d PROG For DVD VCD CD MP3 CD enter the program menu in STOP or prepare stop position In TUNER mode program preset radio stations e ALBUM PRESET For MP3 WMA select albums In TUNER mode select a preset radio station f SYSTEM MENU DISC USB mode only Enter or exit the system menu bar g Select movement direction in disc content menu system m...

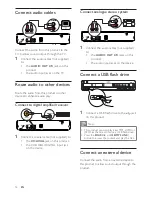
Page 10: ...MPONENT VIDEO IN Y Pr VIDEO IN 3 Connect Make the following connections to use this product Basic connections Video Audio Optional connections Route audio to other devices Multi channel receiver LJLWDO DPSOLÀHU UHFHLYHU Analogue stereo system 86 ÁDVK GULYH External audio player Note Refer to the type plate at the back or bottom RI WKH SURGXFW IRU LGHQWLÀFDWLRQ DQG VXSSO ratings Before you make or ...

Page 11: ...l device Connect the audio from an external device to this product to allow sound output through the product AUDIO IN Connect audio cables Connect the audio from this product to the TV to allow sound output through the TV 1 Connect the audio cables not supplied to the AUDIO OUT L R jacks on this product the audio input jacks on the TV Route audio to other devices Route the audio from this product ...

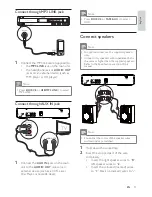
Page 12: ...of the wire completely Insert the right speaker wires to R left speaker wires to L Insert the coloured marked wires to black unmarked wires to Connect through MP3 LINK jack 1 Connect the MP3 link cable supplied to the MP3 LINK jack on the main unit the headphone jack or AUDIO OUT jacks on an external device such as MP3 player or CD player Note Press SOURCE or USB MP3 LINK to select MP3 LINK Connec...

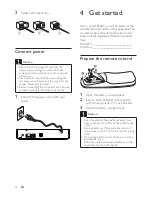
Page 13: ...U ÀUH 1HYHU GLVFDUG EDWWHULHV LQ ÀUH Remove batteries if they are exhausted or if the remote control is not to be used for a long time Do not mix batteries old and new or carbon and alkaline etc Batteries contain chemical substances so they should be disposed of properly 3 5HOHDVH WKH VRFNHW ÁDS Connect power Caution Risk of product damage Ensure that the power supply voltage corresponds to the vo...

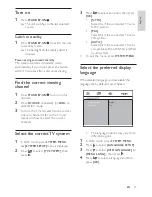
Page 14: ...ect a language and then press OK English Thai Turn on 1 Press STANDBY ON The unit switches to the last selected source Switch to standby 1 Press STANDBY ON to switch the unit to standby mode The backlight on the display panel is reduced Power saving automatic standby The system switches to Standby mode automatically if you do not press any button within 15 minutes after a disc stops playing Find t...

Page 15: ... resume normal play Note To play a locked DVD enter the 4 digit parental control password Turn on progressive scan Note To use the progressive scan feature you must connect a progressive scan TV with the component video jacks see Connect Connect video cables Option 1 Connect to the component video jacks for details 1 Turn on the TV to the correct viewing channel for this product 2 In DISC mode pre...

Page 16: ...ess DISC For USB devices press USB MP3 LINK The disc menu is displayed on theTV screen 3 Press WR VHOHFW WKH IROGHU ÀOH FROXPQ Access the disc menu When you load a DVD S VCD disc a menu may be displayed on the TV screen To access or exit the menu manually 1 Press SYSTEM MENU For VCD with PlayBack Control PBC feature version 2 0 only 1 During play press DISC MENU to enable disable PBC When PBC is e...

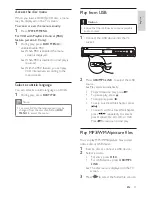
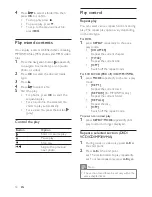
Page 17: ...s A B at the start point 2 Press A B at the end point The section starts to play repeatedly To cancel repeat play press A B again Note The section A and B can be set only within the same chapter track 4 Press WR VHOHFW D IROGHU ÀOH WKHQ press OK WR FRQÀUP To stop play press To pause play press 7R VNLS WR WKH SUHYLRXV QH W ÀOH press Play mixed contents RX FDQ SOD D GLVF RU 86 ÁDVK GLVN FRQWDLQLQJ 0...

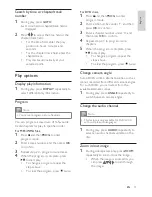
Page 18: ...ing video picture play press ZOOM repeatedly to zoom in out the image When the image is zoomed in you can press to pan through the image Search by time or chapter track number 1 During play press GOTO WLPH ÀHOG RU FKDSWHU WUDFN ÀHOG LV displayed 2 Press WR VHOHFW WKH WLPH ÀHOG RU WKH FKDSWHU WUDFN ÀHOG RU WKH WLPH ÀHOG HQWHU WKH SOD position in hours minutes and seconds RU WKH FKDSWHU WUDFN ÀHOG H...

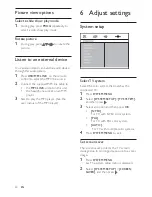
Page 19: ... image 1 Press SYSTEM MENU The system setup menu is displayed 2 Select SYSTEM SETUP SCREEN SAVER and then press Picture view options Select a slide show play mode 1 During play press PROG repeatedly to select a slide show play mode Rotate picture 1 During play press to rotate the picture Listen to an external device You can also listen to an external audio device through this audio system 1 Press ...

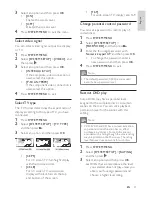
Page 20: ...SYSTEM MENU 2 Select SYSTEM SETUP RATING and then press 3 Select an option and then press OK DVDs that are rated above the level you selected does not play unless you enter your four digit password and choose a higher level rating 3 Select an option and then press OK ON Enable the screen saver OFF Disable the screen saver 4 Press SYSTEM MENU to exit the menu Select video signal You can select vide...

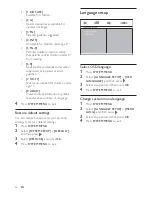
Page 21: ... Parental guidance suggested 4 PG13 Unsuitable for children under age 13 5 PG R Parental Guidance recommended that parents restrict children under 17 from viewing 6 R Restricted recommended only when supervised by a parent or adult guardian 7 NC 17 Not recommended for children under age 17 8 ADULT Viewed only by adults due to graphic sexual scenes violence or language 4 Press SYSTEM MENU to exit R...

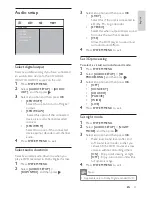
Page 22: ... without disturbing others ON Enjoy quiet viewing at night OFF Enjoy surround sound with a full dynamic range 4 Press SYSTEM MENU to exit Note Applicable only to Dolby Digital encoded DVD Audio setup Select digital output Select a suitable setting if you have connected an audio video device to the COAXIAL DIGITAL AUDIO socket on the unit 1 Press SYSTEM MENU 2 Select AUDIO SETUP AUDIO OUT and then ...

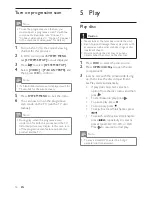
Page 23: ...M radio stations 1 In tuner mode press and hold PROG for 2 seconds to activate automatic program mode AUTO auto is displayed and begins to blink All available stations are programmed in the order of waveband reception strength 7KH ÀUVW SURJUDPPHG UDGLR VWDWLRQ LV broadcast automatically 7 Adjust sound Adjust volume 1 During play press VOL to increase decrease the volume Mute sound 1 During play pr...

Page 24: ...ank tape and close the tape compartment 5 Select the desired track s 7R UHFRUG D VSHFLÀF WUDFN SUHVV to select the track To start recording from a point within a track press at the point 7R UHFRUG WUDFNV LQ D VSHFLÀF sequence program the tracks see Play options Program Program radio stations manually You can program a maximum of 20 preset FM radio stations 1 Tune to a radio station 2 Press PROG to...

Page 25: ...sume press again To stop press Record from radio 1 Tune to a radio station 2 Press to open the tape door 3 Insert a blank tape and close the tape compartment 4 Press to start to record To pause press To resume press again To stop press Record from external source 1 Press USB MP3 LINK to select an external source 2 Connect the external device 3 Play the selected source 4 Insert a blank tape and clo...

Page 26: ...number 999 Supported sampling frequencies for MP3 disc 32 kHz 44 1 kHz 48 kHz Supported Bit rates of MP3 disc are 32 64 96 128 192 256 kbps These formats are not supported Files like VMA AAC DLF M3U PLS WAV Non English Album Title name Discs recorded in Joliet format MP3 Pro Digital Output SPDIF Sony Philips digital interface coaxial Total Harmonic Distortion 0 1 1 kHz Channel Separation 40 dB min...

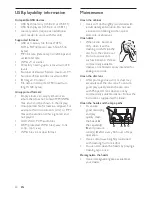
Page 27: ...slightly moistened ZLWK FOHDQLQJ ÁXLG RU DOFRKRO You can also clean the heads by playing a cleaning tape once Demagnetise the heads Use a demagnetising tape available at your dealer USB playability information Compatible USB devices 86 ÁDVK PHPRU 86 RU 86 86 ÁDVK SOD HUV 86 RU 86 memory cards requires an additional card reader to work with this unit Supported formats 86 RU PHPRU ÀOH IRUPDW 7 FAT16...

Page 28: ...e changed for some TV systems Audio or subtitle languages cannot be set The disc is not recorded with sound or subtitles in multiple languages The audio or subtitle language setting is prohibited on the disc 11 Troubleshooting Warning Never remove the casing of this apparatus To keep the warranty valid never try to repair the system yourself If you encounter problems when using this apparatus chec...

Page 29: ...multiple of bits per second kilobits per second kbps The term bit rate is a synonym for data transfer rate or simply data rate C Chapter Chapter Sections of a picture or a music piece on a DVD that are smaller than titles A title is composed of several chapters Each chapter is assigned a chapter number that enables you to ORFDWH D VSHFLÀF FKDSWHU The DVD player does not respond when buttons are pr...

Page 30: ...igital Audio is a sound signal that has been converted into numerical values Digital sound can be transmitted through multiple channels Analog sound can only be transmitted through two channels Disc menu A screen display that allows election of images sounds subtitles multi angles etc recorded on a DVD Dolby Digital A surround sound system developed by Dolby Laboratories that contains up to six ch...

Page 31: ... title is assigned a title number so that you can locate the title you want When you record programs they are stored as titles Depending on the recording settings recorded titles may automatically contain several chapters V VIDEO OUT socket Yellow socket that sends the DVD picture video to a TV EN ...

Page 32: ... 2009 Koninklijke Philips Electronics N V All rights reserved FWD14_98_UM_V1 1 ...

Reviews: