background image

installation steps 


2   

DUS704W Installation Manual Rev G.doc


1. * WARNING * Do not touch the Pyro Sensor with your fingers. For indoor use only. 
2. Select an appropriate indoor mounting location, as detailed in the location guidelines on the following 
pages. Note that this product has three functions, and the optimum mounting location for each individual 
function may conflict with each other, and may require the use of multiple sensors. 
3. Remove the cover from the base unit by un-clipping the bottom of the cover and hinging it upwards. 
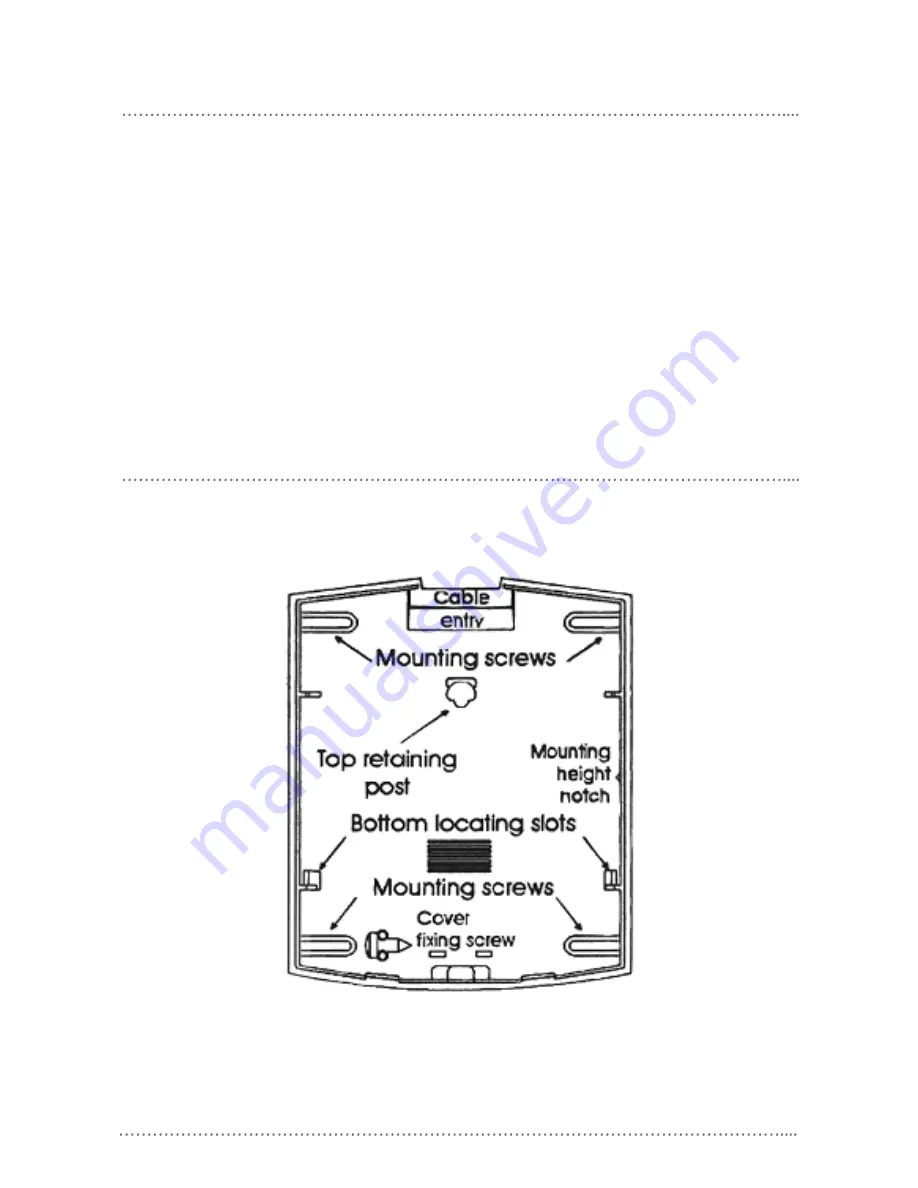
4. Screw the base unit to the wall, ensuring the unit is mounted vertically. Pass the data cable through the 
cable entry hole. 
5. Terminate the data cable as shown below. 
6. Use silicon sealant to seal any cable entry and screw holes to prevent air draughts, dust and insects from 
entering the enclosure. 
7. Replace the cover onto the base unit by locating it in the top clip position then hinging it downwards. 
Remove the screw cap at the bottom of the housing, insert and loosely tighten the supplied screw, then 
replace the screw cap. 


internal view 

Summary of Contents for Dynalite DUS704W

Page 1: ...be utilised to detect motion and switch on the lights When rooms are unoccupied lights can be automatically dimmed or switched off to provide energy savings The same sensor provides IR remote control reception to give full control over lights audio visual equipment and blinds A range of hand held infra red transmitters to complement DUS704 series universal sensors In situations where it is critica...

Page 2: ...ove the cover from the base unit by un clipping the bottom of the cover and hinging it upwards 4 Screw the base unit to the wall ensuring the unit is mounted vertically Pass the data cable through the cable entry hole 5 Terminate the data cable as shown below 6 Use silicon sealant to seal any cable entry and screw holes to prevent air draughts dust and insects from entering the enclosure 7 Replace...

Page 3: ... 1 x 230 V 10A MOUNT VERTIC ALLY AGAINST WALL ENSURE GOOD VENTILATI ON FOLL OW INSTALLATION INSTRUCTIONS Unit6 119 133McE VOY S t A l exandria NS W 2 015A UST R A LIA Manuf actured by I SO LA TE F R O M M A I N S S U PP LY B E FO R E R E M O V I N G TH I S C O V ER N O U S ER SE R V I C EA B LE PA R T S I N SI D E SE R V I C E B Y Q U A LI F I E D PE R SO N N EL O N LY INSTALLATI ON DETAILS DIMTEK...

Page 4: ...rating positions of the infrared transmitter Position the sensor so it is not directly exposed to light especially incandescent and sunlight both of which can substantially reduce IR range Keep data cables away from electrical wiring photo electric cell mounting location Position the sensor so it sees a combination of artificial light and natural light Position the sensor so it is not directly exp...

Page 5: ...y prepaid freight within the twenty four 24 month warranty period Where Dynalite or the Supplier agree to a site visit during the warranty period and it is found to be an operational problem and not subject to warranty in that event then a field service call out charge will apply Contact Dynalite or the Supplier for details Motion Detector Wide Angle Wall Mount PIR Detector Range 12m x 90O standar...

Page 6: ... F doc Specifications and design subject to change without notice Philips Dynalite manufactured by WMGD Pty Ltd ABN 33 097 246 921 Unit 6 691 Gardeners Road Mascot NSW 2020 Australia Tel 61 2 8338 9899 Fax 61 2 8338 9333 E Mail dynalite info philips com Web Philips com dynalite ...

Reviews: