background image

18

EN

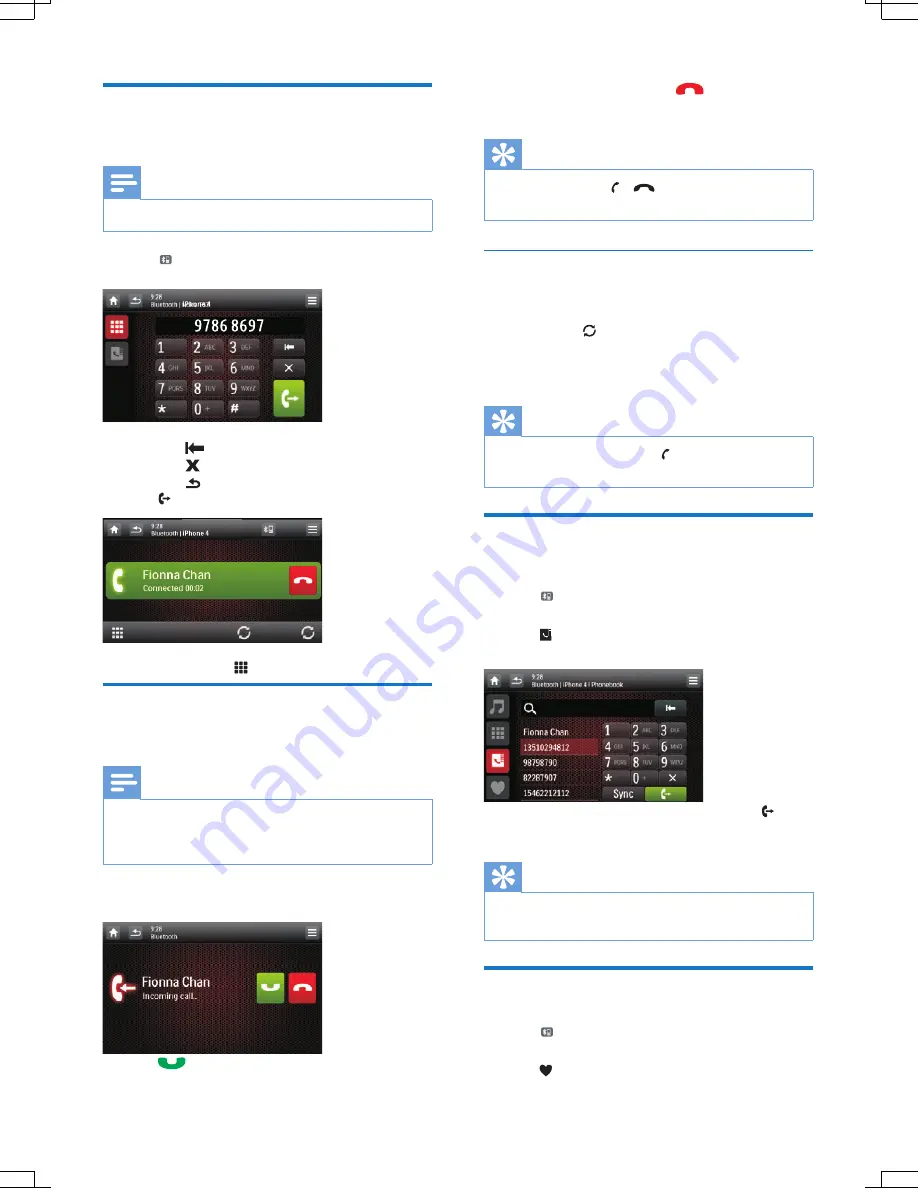
Make a call

You can make phone call with the unit under any mode.

Note


Ensure that the phone is connected to the unit via Bluetooth.

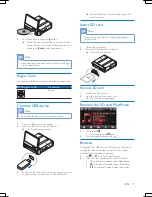
Tap   on top of the screen.


»

The dial screen is displayed.

Tap number icons directly to input phone number.

• 

Tap 

 to clear the last input.

• 

Tap   to clear all input.

• 

Tap   to go back to previous screen.

Tap   to start calling.

During talking, tap   to display the keypad.

Receive call

By default, all incoming calls are received automatically. 

Note


You can select to receive calls manually by set 

[Auto 

Answer]

 to 

[Off]

 status. For details, refer to "Adjust 

Bluetooth settings".

If there is an incoming call, 

[Incoming call…]

 is 

displayed on the screen. 

Tap 

 (green) to answer/accept the call.

When conversation ends, tap 

 (red) to terminate 

the call.

Tip


You can also press   / 

 on front panel to answer/

terminate the call.

Switch phone call to mobile phone

If you do not want your passenger to hear your incoming call, 

you can switch the call the mobile phone.

During talking, tap  .


»

The voice is transferred from the loudspeaker to the 

mobile phone.

Tip


You can also press and hold   on front panel to 

transfer the call.

Bluetooth phone book settings

The users are allowed to search and dial the number stored 

in the phone book.

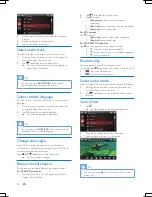
Tap   on top of the screen.


»

The dial screen is displayed.

Tap   to display the phone book mode.


»

Tap 

[Sync]

 to synchronize phone book.

Search the number you want to dial, then tap   to 

start calling.

Tip


You can enter desired name/number on the keypad to 

search quickly.

Favorite call

You can make a favorite call from the favorite call list.

Tap   on top of screen.


»

The dial screen is displayed.

Tap   to display the favorite call list.

Summary of Contents for CED780/12

Page 1: ... help you Question Contact Philips Register your product and get support at EN User manual 1 DE Benutzerhandbuch 27 FR Mode d emploi 53 IT Manuale utente 79 NL Gebruiksaanwijzing 105 www philips com welcome CED780 12 ...

Page 2: ...t station 15 6 Play with RDS 16 Turn on RDS 16 Select program type 16 RDS program types 16 Activate AF TA functions 16 7 Use navigation system 17 Insert map card 17 Use map 17 8 Play with Bluetooth device 17 Pair the Bluetooth enabled devices 17 Make a call 18 Receive call 18 Bluetooth phone book settings 19 Favorite call 19 Adjust Bluetooth settings 19 Listen to music from Bluetooth device 19 9 P...

Page 3: ...w camera 23 Adjust display design 23 Listen to other devices 23 Detach the front panel 23 Reset 24 Replace fuse 24 13 Product information 24 Playability information 25 14 Troubleshooting 25 About the Bluetooth device 26 ...

Page 4: ...s or registered trademarks of Microsoft Corporation in the United States and or other countries Made for iPod and Made for iPhone mean that an electronic accessory has been designed to connect specifically to iPod or iPhone respectively and has been certified by the developer to meet Apple performance standards Apple is not responsible for the operation of this device or its compliance with safety...

Page 5: ...rself about the local rules on separate collection of batteries The correct disposal of batteries helps prevent potentially negative consequences on the environment and human health Please visit www recycle philips com for additional information on a recycling center in your area Any changes or modifications made to this device that are not expressly approved by Philips Consumer Lifestyle may void...

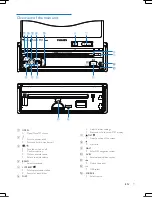
Page 6: ... adjust volume d BAND Select tuner band e PRESET Select preset radio station Search for track folder f DISP a b c d e i j k p a b c d e f g n h j k o m l q Adjust dimmer settings Press and hold to turn offTFT display g TILT Adjust position of the screen h Eject disc i NAVI Enter GPS navigation system j AV IN External audio video socket k Unlock the panel l USB socket m SOURCE Select source ...

Page 7: ...off k Return to previous menu or exit l DBB Turn Dynamic Bass Boost DBB sound on or off m EQ Access audio setting menu n View the clock o ZONE Switch music listening zone p Select video channel q Answer phone Dial or redial number r Terminate call s Browse photos t Switch to music playing mode u Skip to previous next preset station Skip to previous next folder Search backward forward for DVD video...

Page 8: ...supply lead yellow When you connect other devices to this system ensure that the rating of the car circuit is higher than the total fuse value of all the connected devices Notes on speaker connection Never connect speaker wires to the metal body or chassis of the car Never connect speaker wires with stripes to one another Connect wires Caution Ensure that all loose leads are insulated with electri...

Page 9: ... 1 above 9 Yellow cable Video out 10 Red cable Rear line out Right 11 White cable Rear line out Left 12 Red cable Front line out Right 13 White cable Front line out Left 14 Red cable Audio in Right 15 White cable Audio in Left 16 Yellow cable Video in 17 Brown cable Camera in 18 Blue cable Subwoofer 19 White wire OE remote 20 Black wire Radio antenna 21 Black wire External microphone 22 Black wire...

Page 10: ...e dashboard until you hear a click Note If the unit is fixed by the supplied screws instead of the sleeve skip this step Attach the front panel 1 Attach the trim plate 2 Insert the left side of the panel in the chassis until it is correctly engaged 3 Press the right side of the panel until the mechanism locks it into place Install remote control battery Caution Risk of explosion Keep battery away ...

Page 11: ... is changed to the selected radio region immediately 4 Tap Finish button to confirm Set date and time 1 Tap to display main menu 2 Tap to display the full menu 3 Tap The setup menu is displayed 4 Drag the bar downward with fingertip The date time setup menu is displayed 5 Tap on Date Clock Mode or Time 6 Tap or to set date time 7 When date time is set tap to return to main menu 4 Play audio video ...

Page 12: ...USB device When USB device is disconnected it plays the previous source Insert SD card Note This device supports Secure Digital High Capacity SDHC card 1 Detach the front panel 2 Insert the SD card into SD card slot Play starts automatically Remove SD card 1 Switch to another source 2 Press the card until you hear a click The card is now disengaged Remove the SD card Play Pause 1 To pause tap To r...

Page 13: ...iew angle is changed Repeat one all chapter During play you can select different repeat play modes For DVD VCD movie disc 1 Tap anywhere except for the upper left corner to display the control bar 2 Tap to display the second menu 3 Tap to select Rep chapter play the current chapter repeatedly Rep title play all chapters in the title repeatedly Rep disc cancel repeat play ForVCD karaoke Tap to sele...

Page 14: ...rom normal to high sensitivity Distance stations with strong or weak signals can be broadcast Local only stations with strong signals can be broadcast Store radio stations in memory You can store up to 6 stations in each band Store stations manually 1 Select band 2 Tune to the station by tapping or 3 Tap and hold one of the channels 1 to 6 over two seconds The station is saved under the selected c...

Page 15: ...ICS Classical music 15 OTHER M Special music programs 16 WEATHER Weather 17 FINANCE Finance 18 CHILDREN Children s programs 19 SOCIAL Social Affairs 20 RELIGION Religion 21 PHONE IN Phone In 22 TRAVEL Travel 23 LEISURE Leisure 24 JAZZ Jazz Music 25 COUNTRY Country Music 26 NATION M National Music 27 OLDIES Oldies Music 28 FOLK M Folk Music 29 DOCUMENT Documentary 30 TEST AlarmTest 31 ALARM Alarm A...

Page 16: ...th unit 1 Tap to display home menu 2 Tap The setting menu is displayed 3 Tap to display Bluetooth setting menu 4 Tap New Pairing to search for Bluetooth device with your device 5 Select the name of desired device in the pairing list 6 Enter default password 0000 in your device iI the pairing succeeds the phone call record is displayed Pairing with mobile phone 1 Open your mobile phone and switch o...

Page 17: ...ends tap red to terminate the call Tip You can also press on front panel to answer terminate the call Switch phone call to mobile phone If you do not want your passenger to hear your incoming call you can switch the call the mobile phone During talking tap The voice is transferred from the loudspeaker to the mobile phone Tip You can also press and hold on front panel to transfer the call Bluetooth...

Page 18: ... Bluetooth menu is displayed Tap switch to music mode Tap switch to dial screen mode Tap switch to phone book Tap switch to favorite list 9 Play iPod Compatible iPod iPhone The car audio system supports below iPod iPhone models Made for iPod touch 4th generation iPod touch 3rd generation iPod touch 2nd generation iPod touch 1st generation iPod classic iPod nano 6th generation iPod nano 5th generat...

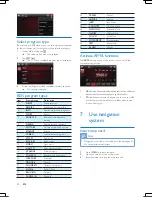
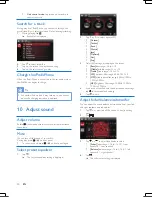
Page 19: ...ound press on front panel again Select preset equalizer 1 Tap The current equalizer setting is displayed 2 Tap or to select a preset EQ Custom Techno Rock Classic Jazz Optimal Flat Pop 3 Adjust EQ settings by tapping on the screen Bass bass range 14 to 14 Middle middle range 14 to 14 Treble treble range 14 to 14 LPF low pass filter range 60 80 100 160 MPF middle pass filter range 0 5KHz 1 0KHz 1 5...

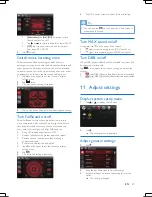
Page 20: ...s FullSound can Bring CD listening experience to MP3 Achieve fuller bass with greater depth and impact Restore sense of spaciousness that is lacking in compressed audio Enhance sound precision and detail 1 Tap on the upper line of the screen to display setting menu 2 Tap 3 The full sound setting is displayed 4 Tap 1 2 3 on the screen to adjust full sound setting Tip You can also tap on the upper l...

Page 21: ...ation settings Options Description Navigation On Turn the navigation on Off Turn the navigation off Navigation Program Path Access the Navigation Program Path mode Navigation Voice On Turn the navigation voice on Off Turn the navigation voice off Navigation Voice Gain High Select the navigation voice to high Low Select the navigation voice to low 3 Tap to exit Adjust Bluetooth settings 1 Tap 2 Tap...

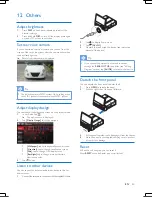
Page 22: ...alizer on screen Skin tap to change OSD display color Backlight tap to change main unit button illumination color 3 Tap to exit Listen to other devices You can connect an external audio video device to the car audio system 1 Connect the car audio to the device with the suppliedAV cable AV IN 2 Tap to display home menu 3 Tap AV IN1 4 Operate the connected the device see instruction manual of the de...

Page 23: ...le speaker impedance 4 8 Maximum power output 50 W x 4 channels Continuous power output 24 W x 4 channels 4 10 T H D Pre Amp output voltage 4 0V CD play mode 1 kHz 0 dB 10 k load Subwoofer output voltage 4 0V CD play mode 61 Hz 0 dB 10 k load Aux in level 800 mV Dimensions W x H x D 182 x 53 x 210 mm Weight main unit 3 1 kg Disc player System DVD CD audio MP3 system Frequency response 20 Hz 20k Hz...

Page 24: ...s not been started Start the car engine Connections are incorrect Fuse has been damaged Replace fuse No sound Volume is too low Adjust volume Speaker connections are incorrect No response to the remote control Ensure that the path between the remote control and the unit is clear from obstacles From a close distance point the remote control directly at the unit Switch F R to correct position F for ...

Page 25: ...r manual of the device to find out how to enable the function The system is not in the pairing mode The system is already connected with another Bluetooth enabled device Disconnect that device or all other connected devices and then try again The paired mobile phone connects and disconnects constantly The Bluetooth reception is poor Move the mobile phone closer to the system or remove any obstacle...

Page 26: ...Specifications are subject to change without notice 2012 Koninklijke Philips Electronics N V All rights reserved CED780_12_UM_V2 2 ...

Reviews: