background image

Y

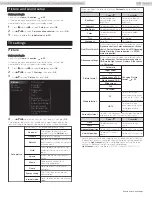
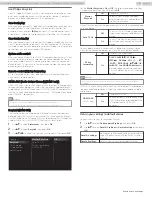
You may adjust picture quality and enhancement settings using Pixel
Plus Ultra HD and Advanced settings sub menus.

Color enhancement

MPEG artifact reduction

Dynamic contrast

4K UHD Upscaling

Perfect Motion Rate

Black stretch

Noise reduction

Clock

Auto adjustment

Mode selection

Picture format

Advanced settings

Sharpness

Tint

Color

Brightness

Contrast

Backlight

Auto picture

Pixel Plus Ultra HD

Maximum

Medium

Minimum

Off

Macro Dimming

Dynamic

contrast

To select the desired setting, then press 

OK

(

Off

Minimum

Medium

 and 

Maximum

)

Color

enhancement

Off

To set color enhancement to off

On

To make colors more vivid and bright

Black

stretch

To select the desired setting, then press 

OK

(

Off

Minimum

Medium

 and 

Maximum

)

Perfect

Motion Rate

To select the desired setting, then press 

OK

(

Off

Minimum

Medium

 and 

Maximum

)

4K UHD

Upscaling

To select the desired setting, then press 

OK

(

Off

Minimum

Medium

 and 

Maximum

)

Macro

Dimming

To select the desired setting, then press 

OK

(

Off

Minimum

Medium

 and 

Maximum

)

Noise

reduction

To select the desired setting, then press 

OK

(

Off

Minimum

Medium

 and 

Maximum

)

MPEG

artifact

reduction

To select the desired setting, then press 

OK

(

Off

Minimum

Medium

 and 

Maximum

)

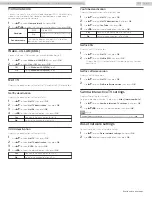
Blue offset

Green offset

Red offset

Blue gain

Green gain

Red gain

Mode

Custom color management

Gamma

Film mode

Light sensor

Color alignment

Clock

Auto adjustment

Mode selection

Picture format

Advanced settings

Sharpness

Tint

Color

Brightness

Contrast

Backlight

Auto picture

Pixel Plus Ultra HD

HDR mode

Blue stretch

Color

alignment

Mode

To set the color temperature to 

Personal

,

Cool

Normal

 and 

Warm

.

When you adjust the following settings,

Personal

 will be set automatically.

Cursor 


Cursor 

Red gain

To decrease red
contrast

To increase red
contrast

Green gain

To decrease green
contrast

To increase green
contrast

Blue gain

To decrease blue
contrast

To increase blue
contrast

Red offset

To decrease red
brightness

To increase red
brightness

Green offset

To decrease green
brightness

To increase green
brightness

Blue offset

To decrease blue
brightness

To increase blue
brightness

Custom color
management

To select the desired setting, then press 

OK

(

Red

Yellow

Green

Cyan

Blue

 and 

Magenta

)

Cursor 


Cursor 

Tint

To rotate only
selected color tint in
clockwise direction

To rotate only
selected color tint in
counterclockwise
direction

Saturation

To decrease color
with only selected
color

To increase color
with only selected
color

Brightness

To decrease
brightness with only
selected color

To increase
brightness with only
selected color

HDR mode

Off

To set HDR mode to off

Auto

Automatically switches to a dedicated
picture quality setting when receiving HDR
signal

Light sensor

*

Off

To set light sensor to off

On

To adjust backlight for the best picture
quality by dynamically adjusting the
backlight intensity in accordance with
lighting condition in the room

Gamma

To select the desired setting, then press 

OK

(

Very Dark Room

Dark Room

Normal

Bright Room

 and

Very Bright Room

)

Blue stretch

To select the desired setting, then press 

OK

(

Off

Minimum

Medium

 and 

Maximum

)

Film mode

Off

To set film mode to off

Auto

To optimize the picture recorded by the
original film

*

Adjusts backlight for the best picture quality by dynamically adjusting

the backlight intensity in accordance with the room lighting condition

when the 

Light sensor

 feature is set to 

On

. Please ensure the room

lighting is stable and the light sensor is not blocked.

Light sensor

 is not available for 75PFL6601 and 65PFL6601/F7 A.

Note(s)

Mode selection

 is available only if

–The external input modes are selected HDMI 1, HDMI 2, HDMI 3 or HDMI 4.

–The connected HDMI device is outputting a video signal.

31

.

English

Continued on next page.

65PFL6601 serial numbers beginning with DS4A1702 or lower numbers / 75PFL6601 serial numbers beginning with GZ1

Summary of Contents for 6000 Series

Page 1: ...ead this User Manual for 65PFL6601 and your television s serial number starts with DS4A1702 or lower number Please start to read from next page DS4A1703 or higher number Please start to read from p 60 If you read this User Manual for 75PFL6601 and your television s serial number starts with GZ1 Please start to read from next page GZ2 Please start to read from p 60 ES Si lee este Manual de Usuario ...

Page 2: ...V 29 Picture and sound setup 30 TV settings 30 Picture 30 Sound 32 Features 33 Installation 34 Search for channels 37 Install channels 37 Channel settings 37 Channel installation 37 Child lock 38 Change PIN 39 Digital audio language 39 Mono Stereo 39 Connect to network 40 Wireless setting 40 Wired setting 40 Network settings 41 Manual network settings 41 Connection test 43 Setting status 43 Home n...

Page 3: ... enjoyable As you enjoy your television please note that all televisions new and old must be supported on proper stands or installed according to the manufacturer s recommendations Televisions that are inappropriately situated on dressers bookcases shelves desks speakers chests carts etc may fall over resulting in injury TUNE IN TO SAFETY ALWAYS follow the manufacturer s recommendations for the sa...

Page 4: ...cted to the grounding system of the building as close to the point of cable entry as practical Example of antenna grounding as per NEC National Electric Code ANTENNA LEAD IN WIRE GROUND CLAMP ANTENNA DISCHARGE UNIT NEC SECTION 810 20 ELECTRIC SERVICE EQUIPMENT GROUNDING CONDUCTORS NEC SECTION 810 21 POWER SERVICE GROUNDING ELECTRODE SYSTEM NEC ART 250 PART H GROUND CLAMPS Wall mount bracket kit Br...

Page 5: ...onformity Trade name PHILIPS Responsible party Funai Corporation Inc Model 75PFL6601 65PFL6601 F7 65PFL6601 F7 A Address 12489 Lakeland Road Santa Fe Springs CA 90670 USA Telephone number 1 866 202 5960 This is not the mailing address for Open Source Software or Customer service Modifications This apparatus may generate or use radio frequency energy Changes or Modifications to this apparatus may c...

Page 6: ...c Used with permission CinemaNow and the CinemaNow logo are trademarks of BestBuy Stores L P and BestBuy Canada LTD Hotlist Samba Samba TV and associated logos are trademarks of Free Stream Media Corp Portions of this software are copyright The FreeType Project www freetype org The American Academy of Pediatrics discourages television viewing for children younger than two years of age Some feature...

Page 7: ... Plug to shut the unit Off when trouble is found or not in use The AC Plug shall remain readily available AC Power Plug Never use a gas duster on this TV The gas trapped inside of this unit may cause ignition and explosion CAUTION Danger of explosion if battery is incorrectly replaced Replace only with the same or equivalent type WARNING Batteries battery pack or battery installed should not be ex...

Page 8: ...Link allows your other HDMI link devices to be controlled by the HDMI cable connected to your TV HDMI input HDMI DVI input If your video device has a DVI output jack use an HDMI DVI conversion cable to connect the unit Component video input PC input AV input Audio and video input from an external device USB terminal The picture music and video files stored on a USB memory stick can be played back ...

Page 9: ...the packing joints from the box 4 Remove the outer slipbox with care 5 Unfold the left and right side of the bottom packaging 6 Remove the left and right side of the polystyrene foams 7 When removing the bottom packaging support both sides of the TV set to prevent it from falling 8 Remove the tape on the bottom of the TV set and the plastic bag 9 English Continued on next page 65PFL6601 serial num...

Page 10: ...er slipbox with care 5 Prepare a table and cover the top of it with a table cloth blanket or such to avoid damage to the TV set Support both sides of the TV set and move it onto the table 6 Carefully lay the TV set with the screen side down on the table 10 English Continued on next page 65PFL6601 serial numbers beginning with DS4A1702 or lower numbers 75PFL6601 serial numbers beginning with GZ1 ...

Page 11: ...ot properly attached it could cause the unit to fall resulting in injuries as well as damage to the unit To remove the stand from this unit unscrew the Phillips head screws by reversing the procedure Be careful not to drop the stand when you remove it Lifting the TV set Carefully lift the TV set as shown in the illustration and place it onto a stable level surface Removing cardboard Remove the car...

Page 12: ...g when the Home menu is displayed NAVIGATION buttons Moves the cursor selects the on screen menu items OPTIONS Displays a list of menu items applicable to the highlighted object or screen CH Selects a channel 0 9 NUMBER buttons Used to enter a channel program number DOT Use with 0 9 to select digital channels For example to enter 2 1 press PREV CH Returns to the previously viewed channel MUTE Turn...

Page 13: ...og audio L R jacks signal Composite video Analog audio L R jacks signal PC connection Analog audio L R jacks signal with stereo mini 3 5mm plug audio cable on PC Component Y Pb Pr Composite video VIDEO input jack s for VIDEO Composite video input VIDEO jack is a shared jack with component video input Y jack 75 ohm cable Antenna connection Signal input from an antenna or cable satellite set top box...

Page 14: ...tothescreenbecausesomerecorders can be susceptible to harmful interference from the TV Cable OUT RF cable IN IN OUT IN OUT IN IN IN OUT OUT RF cable IN Satellite IN Cable Set top Box Video Audio L R cables Video Audio L R cables Video Audio L R cables Video Audio L R cables Blu ray Disc DVD Recorder Note s If you have any question about the DTV s antenna visit www antennaweb org for further inform...

Page 15: ...single cable HD game console or Blu ray disc DVD player or Set top box OUT OUT OUT HDMI cable HDMI cable HDMI cable IN IN IN Note s If there are issues with picture color and or sound when connecting an external device using the HDMI port please try switching the HDMI mode Refer to HDMI mode p 35 Some HDMI cables and devices may not be compatible with the TV due to different HDMI specifications Us...

Page 16: ...t compositevideo Y VIDEO input jack green connect audio cables to the audio L R input jacks When the audio is monaural then only connect to the audio L input jack DVD Player DVD Player DVD Player OUT OUT OUT IN IN Video Audio L R cables Video Audio L R cables Video Audio L R cables Note s With this unit yellow cable must be connected to Y green jack on the component video input jacks Whenever you ...

Page 17: ...s unit can be connected to your PC that has an HDMI terminal Use an HDMI cable for this digital connection PC PC PC OUT OUT OUT HDMI cable HDMI cable HDMI cable IN IN HDMI DVI connection This unit can be connected to your PC that has a DVI terminal Use an HDMI DVI conversion cable for this video digital connection and it requires stereo mini 3 5mm plug audio cable for analog audio signal as well S...

Page 18: ...y 480i image which is not in compliance with EIA CEA 861 861B USB memory stick This unit offers easy playback of picture music and video files Insert the USB memory stick into the USB terminal shown below For a complete list of file formats and specifications supported refer to USB Section p 26 Note s The unit recognizes only a USB memory stick Do not use a USB hub or an extension cable to connect...

Page 19: ...ctions to complete the installation When you select On in the selection screen for Auto software update A message will appear later if there is the latest software on the network server 6 Use to select the signal type If the TV is connected to a cable or satellite set top box select the 2nd one and skip to step 8 1234 7 56 Installation Set top box Select Set top box to set up a TV signal from a ca...

Page 20: ...If you press during Autoprogram this setup of TV channels will be cancelled TheinitialAutoprogramfunctioncanbeexecutedforeitherAntennaorCableonlyonce When you change the connection Antenna Cable select Search for channels again p 37 A After an initial setup is completed If you want to scan the channels automatically again Search for channels p 37 If you want to change to another language Language ...

Page 21: ...ls by using CH or CH Press CH up 㸦down on the TV or press CH on the remote control To select channels by using the NUMBER buttons Digital TV operation For digital channels press a number followed by a dot and the corresponding sub channel number When selecting digital channel 1 1 1 Be sure to press before entering the subchannel number Cable NTSC Analog TV operation When selecting cable or analog ...

Page 22: ...ction describes how to lock or unlock specified device 1 Press SOURCE on the remote control 2 Use to select a device to lock or unlock 3 Press OPTIONS on the remote control 4 Use to select Lock or Unlock then press OK If device lock is unlocked Lock will be displayed If device lock is locked Unlock will be displayed at the top right of the device icons 5 Enter your PIN Change PIN p 39 Changing dev...

Page 23: ...ted when your TV receives a 16 9 or 4 3 video signal Three types of display modes can be selected for a PC input signal Press FORMAT repeatedly to switch the TV aspect ratio For 16 9 video signal 4096 x 2160p Full Unscaled For 16 9 video signal 3840 x 2160p Full Unscaled For 16 9 video signal not 2160p Wide screen 4 3 Automatic Full Automatic Other than DTV and HDMI connected devices enlarges the ...

Page 24: ... stretched picture Sidebars appear on both edges of the screen Wide screen Displays a picture that is stretched out of proportion to fill the screen Unscaled Displays a picture in its original size If the signal source has side or top bottom bars inserted into the picture the Picture format function will not eliminate them TV screen information You can display the currently selected channel or oth...

Page 25: ...iscs Note s Some of EasyLink functions may not be available depending on your EasyLink devices or discs You must connect this unit to our brand EasyLink devices and be sure its EasyLink HDMI CEC setting is also set to On We do not guarantee 100 interoperability with other brands of HDMI link compliant devices Picture and sound Following settings can be configured Auto picture To set predefined pic...

Page 26: ...ices to this unit Always directly insert the USB flash memory stick to this unit directly We cannot be held responsible if your USB memory stick is not supported nor will we accept any liability for damage or loss of stored data The USB memory stick is not included with this TV A maximum of 1 023 folders or files can be recognized A file name exceeding 256 characters or contains a dot character is...

Page 27: ...ze 2X Magnifies a current image by 2 times 4X Magnifies a current image by 4 times Auto picture 1 Selects the picture mode according to your preference Standard Natural Vivid Sports Movie Game Energy saving and Internet video 1 You can set Repeat Slide time Transitions and Auto picture when images are in slide show 2 You can set Rotate and Zoom when slide show is in pause mode Playing music 1 Use ...

Page 28: ... s speakers On The sound will be output from the unit s speakers Speakers EasyLink You can control audio output from your connected EasyLink compliant devices with VOL by using this unit s remote control Auto picture Selects the picture mode according to your preference Standard Natural Vivid Sports Movie Game Energy saving and Internet video Auto sound Selects the sound mode according to your pre...

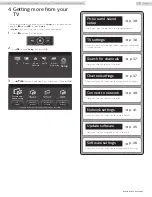
Page 29: ...re and sound setup Picture and sound setup p 30 Guides you to get the best picture and sound settings TV settings p 30 Accessesmenusthatallowyoutochangepicture soundand TV usage settings Search for channels p 37 Guides you through channel installation Channel settings p 37 Accesses menus that allow you to change channel settings Connect to network p 40 Guides you through network installation Netwo...

Page 30: ... settings Personal picture will be set automatically Cursor Cursor Backlight To reduce power consumption and brightness To increase power consumption and brightness Contrast To decrease contrast To increase contrast Brightness To decrease brightness To increase brightness Color To decrease color intensity To increase color intensity Tint To add green To add red Sharpness To soften To sharpen Pixel...

Page 31: ...rast Blue gain To decrease blue contrast To increase blue contrast Red offset To decrease red brightness To increase red brightness Green offset To decrease green brightness To increase green brightness Blue offset To decrease blue brightness To increase blue brightness Custom color management To select the desired setting then press OK Red Yellow Green Cyan Blue and Magenta Cursor Cursor Tint To ...

Page 32: ...Dialog Enhancement Off To set Dialog Enhancement to off On To set Dialog Enhancement to on Bass Enhancement Off To set Bass Enhancement to off On To set Bass Enhancement to on Absolute 3D Sound Off To set Absolute 3D Sound to off On To set Absolute 3D Sound to on This function keeps a constant Loudness differential between the TV commercials and the programs Auto volume leveling Off To remove the ...

Page 33: ...color and Font opacity You can change background color and transparency of the displayed caption Background color and Background opacity You can change edge color and type of the displayed caption text Edge color and Edge type So you must be Philip Hi So you must be Philip Hi I m pleased to meet you I m pleased to meet you So you must be Philip Hi I m pleased to meet you Background color and Backg...

Page 34: ...retains the closed caption setting if the power fails When the unit receives special effects playback signal e g search slow and still from a VCR s video output channel ch3 or ch4 the unit may not display the correct caption or text The EUT setting that satisfies 79 102 e is as follows Font Mono font Character size Large Sleeptimer Sleep timer can set the unit to go into standby mode after an incr...

Page 35: ...Home in the menu Otherwise personalized picture and sound settings will not be memorized after the unit goes into standby mode HDMI mode If there are issues with picture color and or sound when connecting an external device using the HDMI port please try switching the HDMI mode following the instructions below 1 Press and use to select Setup then press OK 2 Use to select TV settings then press OK ...

Page 36: ...ces and be sure its EasyLink HDMI CEC setting is also set to on 1 Use to select Preferences then press OK 2 Use to select EasyLink then press OK 3 Use to select the item you want to adjust then press OK On Off HDMI ARC RC key forwarding Auto TV On Master EasyLink TV placement EasyLink Location HDMI mode Retail Demo Set the Master EasyLink to On or Off The following additional settings will be gray...

Page 37: ... Mono Stereo Digital audio language Change PIN Child lock Channel installation Channel installation Be sure the RF cable is correctly connected to this unit and you are registered with your cable TV provider when you install cable channels Installation mode 1 Use to select Channel installation then press OK 2 Use to select Installation mode then press OK 3 Use to select Antenna or Cable then press...

Page 38: ...d access to individual programs based on their age ratings and content rating 3 Use to select TV ratings lock or Movie ratings lock then press OK 4 Use to select the desired rating then press OK repeatedly to switch between block and view indicates that the rating is locked Blocked indicates that the sub rating is locked Blocked indicates that the rating is not locked Viewable TV ratings lock TV M...

Page 39: ...nglish rating or Canadian French rating accordingly unusual results may occur and the unit may not receive emergency bulletins or other types of programming Emergency bulletins Such as EAS messages weather warnings and others Locally originated programming News Political Public service announcements Religious Sports Weather Change PIN Although the default PIN code 0000 is supplied with the unit yo...

Page 40: ...r home network Network settings 3 Adjust the following items Wireless setting Select to use a wireless LAN to connect to the internet by a wireless connection 1 Use to select Wireless then press OK 2 Use to select the desired setting then press OK and follow the on screen instructions Easy Connect Select this setting if your router has an easy connect button Start scanning for wireless networks on...

Page 41: ...ecttheSSIDhasaneasyconnect theeasyconnectsetting screen will appear Use to select a setting then press OK Easy Connect Select this setting if your router has an easy connect button Start scanning for wireless networks on the TV after pressing the easy connect button on your router If connection test fails try Easy Connect again 1 If it fails then refer to the router s manual for more details Pin c...

Page 42: ...A set of numbers which are assigned to devices participating in a computer network Subnet mask 1 3 A mask which is used to determine what subnet an IP address belongs to Default gateway 1 3 IP address of the network device such as router which provides internet access DNS setting mode Auto Sets the DNS setting automatically Manual Sets the DNS setting manually Primary DNS 2 3 A server which handle...

Page 43: ...as IP address DNS settings etc manually 1 Use to select Connection test then press OK Connection test will start automatically and the test result for home network and internet will appear right after the connection test finishes Testing is displayed while the connection test is in progress Home network Internet Description Pass Pass Connection test is successfully completed Fail Connection test f...

Page 44: ... then press OK 4 Use to select the desired option then press OK Yes Deactivate the connection to VUDU No Activate the connection to VUDU YouTube deactivation Displays the deactivation setting for YouTube 1 Use to select Net TV then press OK 2 Use to select Net TV deactivation then press OK 3 Use to select YouTube then press OK 4 Use to select the desired option then press OK Yes Deactivate the con...

Page 45: ... stick for software update Access www philips com support and download the latest version software to ablankUSBmemorystickusingaPCbyfollowingthedirectionsdescribed on the website Use a blank USB memory stick download the software on your PC and write the software in the root directory of the USB memory stick For more details on how to download the software please refer to the website USB upgrade Y...

Page 46: ...ware update a message may appear on the screen prompting for software update again In this case please select Update to start USB update or network update For further assistance please contact call center Software settings Software 1 Press and use to select Setup then press OK 2 Use to select Software settings then press OK 3 Use to select Software then press OK Checking your current software vers...

Page 47: ...performance across a rangeofsourcedevices FunaiCorporationInc doesnotwarrantcompatibilitywithspecificsource devices View photos play music and watch videos using home network On your TV you can play video music and photo files stored on home network certified home media servers connected to your home network In order to use this feature you must connect this unit to the internet It is recommended ...

Page 48: ...onal menu then use to select the desired item Repeat 1 Off Sets repeat playback to off One Sets repeat playback for a selected image file All Sets repeat playback for all image files in the current folder Slide time 1 Short Switches to the next image in 5 seconds Medium Switches to the next image in 10 seconds Long Switches to the next image in 15 seconds Transitions 1 None No effect when switchin...

Page 49: ...intatwhichplaybackwasstopped Press OK to play from the beginning of the file at which playback was stopped Press CH to play the next file Press CH to play the current file at the beginning Press CH twice within 5 seconds to play the previous file Press OPTIONS to display the optional menu then use to select the desired item Repeat Off Sets repeat playback to off One Sets repeat playback for a sele...

Page 50: ...move App then press OK The selected App will be removed from My Apps list Move App 1 Use to select the desired App then press OPTIONS 2 Use to select Move App then press OK The selected App icon will be smaller 3 Use to the point you want to place then press OK Guide to App Gallery a b c All App Gallery Category menu List of category menu Icon list Displays unregistered net service icons on My App...

Page 51: ...ounts Creating a new station By entering your favorite artists or tracks Pandora selects music and creates a new station for you on the basis of the entered information 1 On the station list screen Use to select New Station then press OK 2 Enter a name of your favorite artist or tracks then press OK while OK is selected Search result will appear on the right side of the TV screen Iftheselectionscr...

Page 52: ...How come there is no image from the connected external devices Check if the correct input mode is selected by pressing SOURCE p 22 Check the antenna cable or other input connection to the unit When using the component video connection check that the green Y blue Pb Cb and red Pr Cr connectors are connected to their corresponding colored jacks on the unit When I enter a channel number why does it c...

Page 53: ... is higher or lower then the loudness will change Make sure Auto volume leveling is set to On p 32 Picture Sound NosoundwithdistortedpictureoccurswhenusingtheHDMIdigitalconnection Some HDMI cables and devices may not be compatible with the TV due to different HDMI specifications No picture or sound Check if the power is on Check whether all the cables to the unit are connected to the correct outpu...

Page 54: ...The picture quality does not change during playback It differs depending on the speed of internet connection at the time of loading Cannot use VUDU feature VUDU is available only in the United States and Mexico Check if the network connection is properly made Cannot rent or buy movies TV episodes on VUDU You need to activate the VUDU account For detailed information please visit the service provid...

Page 55: ...gnal HDR capable products offer greater contrast through an expansionoftherangeoftheimage scolorluminance Thesource cableand display must all support HDR HDTV High Definition TV Ultimate digital format that produces high resolution and high picture quality PIN code A stored 4 digit number that allows access to parental control features SAP Secondary Audio Program Second audio channel delivered sep...

Page 56: ...Connectivity Component Video Input Y Pb Pr 1 Supporting Video Signals 480i p 720p 1080i p 60Hz Composite Video Input Shared Y Green Terminal with Component Video 1 HDMI Input 4 Supporting HDMI Video Signals 480i p 720p 1080i 60Hz 1080p 2160p 24 30 60Hz Supporting PC Input Video Signal up to 4096 x 2160 Analog Audio L R Input 1 L Audio R Audio PC Input Via VGA HDMI and HDMI DVI Analog Audio L R USB...

Page 57: ...not covered by this warranty Recovery or reinstallation of programs data or other information is not covered under this Limited Warranty This warranty does not apply a to damage caused by accident abuse misuse neglect misapplication or non supplied product b to damage caused by service performed by anyone other than company approved Authorized Service Location c to a product or a part that has bee...

Page 58: ...t OH43125 USA FunaiCorporation Inc disclaimsanyand all warranties and representations with respect to such software and related source code including quality reliability usability and accuracy and further disclaim all express implied statutory or otherwise including without limitation any implied warranties of title non infringement merchantability or fitness for a particular purpose Funai Corpora...

Page 59: ...d Funai Corporation Inc is the warrantor in relation to this product The Philips trademark and the Philips Shield Emblem are registered trademarks of Koninklijke Philips N V used under license Funai Corporation Inc 12489 Lakeland Road Santa Fe Springs CA 90670 USA AZ192U2 A6192U2 AZ186UH A6182UH A6186UH ...

Page 60: ...Rico o en las Islas Vírgenes de los Estados Unidos 1 866 202 5960 México D F y área metropolitana 58 87 97 36 Interior de la republica 01 800 839 19 89 FR Pour obtenir de l aide supplémentaire communiquez avec le centre de service à la clientèle de votre pays Pour obtenir de l aide communiquez avec le centre de service à la clientèle Philips au Dans le États Unis au Canada à Puerto Rico ou aux Île...

Page 61: ...ure and sound setup 30 TV settings 30 Picture 30 Sound 32 Features 33 Installation 33 Accessibility 35 Search for channels 37 Install channels 37 Channel settings 37 Channel installation 37 Child lock 38 Change PIN 39 Digital audio language 39 Mono Stereo 39 Connect to network 40 Wireless setting 40 Wired setting 40 Network settings 41 Manual network settings 41 Connection test 43 Setting status 4...

Page 62: ...enjoyable As you enjoy your television please note that all televisions new and old must be supported on proper stands or installed according to the manufacturer s recommendations Televisions that are inappropriately situated on dressers bookcases shelves desks speakers chests carts etc may fall over resulting in injury TUNE IN TO SAFETY ALWAYS follow the manufacturer s recommendations for the saf...

Page 63: ... connected to the grounding system of the building as close to the point of cable entry as practical Example of antenna grounding as per NEC National Electric Code ANTENNA LEAD IN WIRE GROUND CLAMP ANTENNA DISCHARGE UNIT NEC SECTION 810 20 ELECTRIC SERVICE EQUIPMENT GROUNDING CONDUCTORS NEC SECTION 810 21 POWER SERVICE GROUNDING ELECTRODE SYSTEM NEC ART 250 PART H GROUND CLAMPS Wall mount bracket ...

Page 64: ...n of conformity Trade name PHILIPS Responsible party Funai Corporation Inc Model 75PFL6601 65PFL6601 F7 B Address 12489 Lakeland Road Santa Fe Springs CA 90670 USA Telephone number 1 866 202 5960 This is not the mailing address for Open Source Software or Customer service Modifications This apparatus may generate or use radio frequency energy Changes or Modifications to this apparatus may cause ha...

Page 65: ...emy of Pediatrics discourages television viewing for children younger than two years of age Some features may require an always on broadband internet connection firmware update and or a minimum bandwidth Internet services vary by location Funai Corporation Inc does not warrant access to the portal or to any of the services content software and advertising Funai Corporation Inc may in its sole disc...

Page 66: ...n Off the unit you must unplug the AC power Plug from the AC Power Outlet Disconnect the AC Power Plug to shut the unit Off when trouble is found or not in use The AC Plug shall remain readily available AC Power Plug Never use a gas duster on this TV The gas trapped inside of this unit may cause ignition and explosion CAUTION Danger of explosion if battery is incorrectly replaced Replace only with...

Page 67: ...link EasyLink allows your other HDMI link devices to be controlled by the HDMI cable connected to your TV HDMI input HDMI DVI input If your video device has a DVI output jack use an HDMI DVI conversion cable to connect the unit Component video input PC input AV input Audio and video input from an external device USB terminal The picture music and video files stored on a USB memory stick can be pla...

Page 68: ...the packing joints from the box 4 Remove the outer slipbox with care 5 Unfold the left and right side of the bottom packaging 6 Remove the left and right side of the polystyrene foams 7 When removing the bottom packaging support both sides of the TV set to prevent it from falling 8 Remove the tape on the bottom of the TV set and the plastic bag 9 English Continued on next page 65PFL6601 serial num...

Page 69: ...box with care 5 Prepare a table and cover the top of it with a table cloth blanket or such to avoid damage to the TV set Support both sides of the TV set and move it onto the table 6 Carefully lay the TV set with the screen side down on the table 10 English Continued on next page 65PFL6601 serial numbers beginning with DS4A1703 or higher numbers 75PFL6601 serial numbers beginning with GZ2 ...

Page 70: ...y attached it could cause the unit to fall resulting in injuries as well as damage to the unit To remove the stand from this unit unscrew the Phillips head screws by reversing the procedure Be careful not to drop the stand when you remove it Lifting the TV set Carefully lift the TV set as shown in the illustration and place it onto a stable level surface Removing cardboard Remove the cardboard att...

Page 71: ... selects the on screen menu items OPTIONS Displays a list of menu items applicable to the highlighted object or screen SOURCE Selects connected devices CH Selects a channel COLOR buttons Works as direct access to user specified net apps 0 9 NUMBER buttons Used to enter a channel program number DOT Use with 0 9 to select digital channels For example to enter 2 1 press PREV CH Returns to the previou...

Page 72: ...stereo mini 3 5mm plug audio cable on PC Component Y Pb Pr Composite video VIDEO input jack s for VIDEO Composite video input VIDEO jack is a shared jack with component video input Y jack 75 ohm cable Antenna connection Signal input from an antenna or cable satellite set top boxes HDMI input jack s Digital audio and video input from high definition digital devices such as DVD Blu ray disc players ...

Page 73: ...tothescreenbecausesomerecorders can be susceptible to harmful interference from the TV Cable OUT RF cable IN IN OUT IN OUT IN IN IN OUT OUT RF cable IN Satellite IN Cable Set top box Video Audio L R cables Video Audio L R cables Video Audio L R cables Video Audio L R cables Blu ray disc DVD recorder Note s If you have any question about the DTV s antenna visit www antennaweb org for further inform...

Page 74: ...ingle cable HD game console or Blu ray disc DVD player or Set top box OUT OUT OUT HDMI cable HDMI cable HDMI cable IN IN IN Note s If there are issues with picture color and or sound when connecting an external device using the HDMI port please try switching the HDMI mode Refer to HDMI mode p 34 Some HDMI cables and devices may not be compatible with the TV due to different HDMI specifications Use...

Page 75: ... compositevideo Y VIDEO input jack green connect audio cables to the audio L R input jacks When the audio is monaural then only connect to the audio L input jack DVD player DVD player DVD player OUT OUT OUT IN IN Video Audio L R cables Video Audio L R cables Video Audio L R cables Note s With this unit yellow cable must be connected to Y green jack on the component video input jacks Whenever you c...

Page 76: ... unit can be connected to your PC that has an HDMI terminal Use an HDMI cable for this digital connection PC PC PC OUT OUT OUT HDMI cable HDMI cable HDMI cable IN IN HDMI DVI connection This unit can be connected to your PC that has a DVI terminal Use an HDMI DVI conversion cable for this video digital connection and it requires stereo mini 3 5mm plug audio cable for analog audio signal as well St...

Page 77: ...y 480i image which is not in compliance with EIA CEA 861 861B USB memory stick This unit offers easy playback of picture music and video files Insert the USB memory stick into the USB terminal shown below For a complete list of file formats and specifications supported refer to USB Section p 26 Note s The unit recognizes only a USB memory stick Do not use a USB hub or an extension cable to connect...

Page 78: ...s OK When you select On in the selection screen for Software update notification A message will appear later if there is the latest software on the network server 5 Use to select the signal type If the TV is connected to a cable or satellite set top box select the 2nd one and skip to step 7 1234 7 56 Installation Set top box Select Set top box to set up a TV signal from a cable TV box or satellite...

Page 79: ...els will be cancelled TheinitialAutoprogramfunctioncanbeexecutedforeitherAntennaorCableonlyonce When you change the connection Antenna Cable select Search for channels again p 37 A After an initial setup is completed If you want to scan the channels automatically again Search for channels p 37 If you want to change to another language Language p 33 If you want to change the country setting Country...

Page 80: ...ls by using CH or CH Press CH up 㸦down on the TV or press CH on the remote control To select channels by using the NUMBER buttons Digital TV operation For digital channels press a number followed by a dot and the corresponding sub channel number When selecting digital channel 1 1 1 Be sure to press before entering the subchannel number Cable NTSC Analog TV operation When selecting cable or analog ...

Page 81: ...tion describes how to lock or unlock specified device 1 Press SOURCE on the remote control 2 Use to select a device to lock or unlock 3 Press OPTIONS on the remote control 4 Use to select Lock or Unlock then press OK If device lock is unlocked Lock will be displayed If device lock is locked Unlock will be displayed at the top right of the device icons 5 Enter your PIN Change PIN p 39 Changing devi...

Page 82: ...ted when your TV receives a 16 9 or 4 3 video signal Three types of display modes can be selected for a PC input signal Press FORMAT repeatedly to switch the TV aspect ratio For 16 9 video signal 4096 x 2160p Full Unscaled For 16 9 video signal 3840 x 2160p Full Unscaled For 16 9 video signal not 2160p Wide screen 4 3 Automatic Full Automatic Other than DTV and HDMI connected devices enlarges the ...

Page 83: ...stretched picture Sidebars appear on both edges of the screen Wide screen Displays a picture that is stretched out of proportion to fill the screen Unscaled Displays a picture in its original size If the signal source has side or top bottom bars inserted into the picture the Picture format function will not eliminate them TV screen information You can display the currently selected channel or othe...

Page 84: ...p menu of your DVD or Blu ray discs Device favorite Controls the pop up menu of your Blu ray discs Note s Some of EasyLink functions may not be available depending on your EasyLink devices or discs You must connect this unit to our brand EasyLink devices and be sure its EasyLink HDMI CEC setting is also set to On We do not guarantee 100 interoperability with other brands of HDMI link compliant dev...

Page 85: ...his unit Always directly insert the USB flash memory stick to this unit directly We cannot be held responsible if your USB memory stick is not supported nor will we accept any liability for damage or loss of stored data The USB memory stick is not included with this TV A maximum of 1 023 folders or files can be recognized A file name exceeding 256 characters or contains a dot character is not supp...

Page 86: ...ates an image 270 degrees clockwise Zoom 3 1X Displays an image in its original size 2X Magnifies a current image by 2 times 4X Magnifies a current image by 4 times 1 Voice guide toggle is available in slide show and pause mode 2 You can set Repeat Slide time Transitions and Auto picture when images are in slide show 3 You can set Rotate and Zoom when slide show is in pause mode Playing music 1 Us...

Page 87: ...e unit s speakers On The sound will be output from the unit s speakers Speakers EasyLink You can control audio output from your connected EasyLink compliant devices with VOL by using this unit s remote control Auto picture Selects the picture mode according to your preference Standard Natural Vivid Sports Movie Game Energy saving and Internet video Auto sound Selects the sound mode according to yo...

Page 88: ...cture and sound setup Picture and sound setup p 30 Guides you to get the best picture and sound settings TV settings p 30 Accessesmenusthatallowyoutochangepicture soundand TV usage settings Search for channels p 37 Guides you through channel installation Channel settings p 37 Accesses menus that allow you to change channel settings Connect to network p 40 Guides you through network installation Ne...

Page 89: ... Optimized for PCs and game consoles Energy saving Eco TV settings for low power consumption Internet video Optimized for low bit rate internet video When you adjust the following settings Personal picture will be set automatically Cursor Cursor Backlight To reduce power consumption and brightness To increase power consumption and brightness Contrast To decrease contrast To increase contrast Brigh...

Page 90: ...r temperature to Personal Cool Normal and Warm When you adjust the following settings Personal will be set automatically Cursor Cursor Red gain To decrease red contrast To increase red contrast Green gain To decrease green contrast To increase green contrast Blue gain To decrease blue contrast To increase blue contrast Red offset To decrease red brightness To increase red brightness Green offset T...

Page 91: ... to on Dialog Enhancement Off To set Dialog Enhancement to off On To set Dialog Enhancement to on Bass Enhancement Off To set Bass Enhancement to off On To set Bass Enhancement to on Absolute 3D Sound Off To set Absolute 3D Sound to off On To set Absolute 3D Sound to on This function keeps a constant Loudness differential between the TV commercials and the programs Auto volume leveling Off To remo...

Page 92: ...rder of Dim Normal and Bright Normal Bright Installation 1 Press and use to select Setup then press OK 2 Use to select TV settings then press OK 3 Use to select Installation then press OK Installation Features Sound Picture Restore default settings Preferences Language Accessibility 4 Adjust the following items Language You can set the language for the on screen display 1 Use to select Language th...

Page 93: ...functionality in certain cases TV placement To apply the best settings for your TV select wall mount or stand mount 1 Use to select Preferences then press OK 2 Use to select TV placement then press OK 3 Use to select Wall mounted or On a TV stand then press OK Retail Demo WhenyousetLocationtoRetail E sticker ElectronicSticker isdisplayed E sticker can be turned off using procedure below 1 Use to s...

Page 94: ...hey are EasyLink HDMI CEC compliant HDMI ARC allows you to use Philips EasyLink to output TV audio directly to a connected audio device without the need for an additional digital audio cable HDMI ARC HDMI 1 only Off Disable HDMI ARC On You can output TV audio through the HDMI cable solely provided both the TV and device are HDMI ARC compliant Return your settings to default values You can return s...

Page 95: ...e characters are stored in memory they are displayed all at once Roll up Displays the characters continuously by scrolling max 4 lines Note s Digital caption service that you can switch differs depending on the broadcast description Closedcaptioningservicemaynotbecontrolledbythisunit smenuoptionsifyouarewatching television through an external cable or satellite set top box In which case you will n...

Page 96: ...0 12 34 Stop Total progress Analog channels found Digital channels found complete more than 20 minutes to Auto programming may take wait System searching Please Channel settings 1 Press and use to select Setup then press OK 2 Use to select Channel settings then press OK 3 Adjust the following items Uninstall channels Installation mode Mono Stereo Digital audio language Change PIN Child lock Channe...

Page 97: ...d access to individual programs based on their age ratings and content rating 3 Use to select TV ratings lock or Movie ratings lock then press OK 4 Use to select the desired rating then press OK repeatedly to switch between block and view indicates that the rating is locked Blocked indicates that the sub rating is locked Blocked indicates that the rating is not locked Viewable TV ratings lock TV M...

Page 98: ...glish rating or Canadian French rating accordingly unusual results may occur and the unit may not receive emergency bulletins or other types of programming Emergency bulletins Such as EAS messages weather warnings and others Locally originated programming News Political Public service announcements Religious Sports Weather Change PIN Although the default PIN code 0000 is supplied with the unit you...

Page 99: ...connected to your home network 3 Adjust the following items Wireless setting Select to use a wireless LAN to connect to the internet by a wireless connection 1 Use to select Wireless then press OK 2 Use to select the desired setting then press OK and follow the on screen instructions Easy Connect Select this setting if your router has an easy connect button Start scanning for wireless networks on ...

Page 100: ...cttheSSIDhasaneasyconnect theeasyconnectsetting screen will appear Use to select a setting then press OK Easy Connect Select this setting if your router has an easy connect button Start scanning for wireless networks on the TV after pressing the easy connect button on your router If connection test fails try Easy Connect again 1 If it fails then refer to the router s manual for more details Pin co...

Page 101: ...A set of numbers which are assigned to devices participating in a computer network Subnet mask 1 3 A mask which is used to determine what subnet an IP address belongs to Default gateway 1 3 IP address of the network device such as router which provides internet access DNS setting mode Auto Sets the DNS setting automatically Manual Sets the DNS setting manually Primary DNS 2 3 A server which handle...

Page 102: ...as IP address DNS settings etc manually 1 Use to select Connection test then press OK Connection test will start automatically and the test result for home network and internet will appear right after the connection test finishes Testing is displayed while the connection test is in progress Home network Internet Description Pass Pass Connection test is successfully completed Fail Connection test f...

Page 103: ...ct VUDU then press OK 4 Use to select the desired option then press OK Yes Deactivate the connection to VUDU No Activate the connection to VUDU YouTube deactivation Displays the deactivation setting for YouTube 1 Use to select Net TV then press OK 2 Use to select Net TV deactivation then press OK 3 Use to select YouTube then press OK 4 Use to select the desired option then press OK Yes Deactivate ...

Page 104: ...stick for software update Access www philips com support and download the latest version software to ablankUSBmemorystickusingaPCbyfollowingthedirectionsdescribed on the website Use a blank USB memory stick download the software on your PC and write the software in the root directory of the USB memory stick For more details on how to download the software please refer to the website USB upgrade Yo...

Page 105: ...tware update a message may appear on the screen prompting for software update again In this case please select Update to start USB update or network update For further assistance please contact call center Software settings Software 1 Press and use to select Setup then press OK 2 Use to select Software settings then press OK 3 Use to select Software then press OK Checking your current software ver...

Page 106: ...erformance across a rangeofsourcedevices FunaiCorporationInc doesnotwarrantcompatibilitywithspecificsource devices View photos play music and watch videos using home network On your TV you can play video music and photo files stored on home network certified home media servers connected to your home network In order to use this feature you must connect this unit to the internet It is recommended t...

Page 107: ...f Sets Voice guide to off On Sets Voice guide to on Repeat 2 Off Sets repeat playback to off One Sets repeat playback for a selected image file All Sets repeat playback for all image files in the current folder Slide time 2 Short Switches to the next image in 5 seconds Medium Switches to the next image in 10 seconds Long Switches to the next image in 15 seconds Transitions 2 None No effect when sw...

Page 108: ...intatwhichplaybackwasstopped Press OK to play from the beginning of the file at which playback was stopped Press CH to play the next file Press CH to play the current file at the beginning Press CH twice within 5 seconds to play the previous file Press OPTIONS to display the optional menu then use to select the desired item Voice guide toggle Off Sets Voice guide to off On Sets Voice guide to on R...

Page 109: ...hen press OK The selected App will be removed from My Apps list Move App 1 Use to select the desired App then press OPTIONS 2 Use to select Move App then press OK The selected App icon will be smaller 3 Use to the point you want to place then press OK Guide to App Gallery a b c All App Gallery Category menu List of category menu Icon list Displays unregistered net service icons on My Apps list Pag...

Page 110: ...nts Creating a new station By entering your favorite artists or tracks Pandora selects music and creates a new station for you on the basis of the entered information 1 On the station list screen Use to select New Station then press OK 2 Enter a name of your favorite artist or tracks then press OK while OK is selected Search result will appear on the right side of the TV screen Iftheselectionscree...

Page 111: ...ow come there is no image from the connected external devices Check if the correct input mode is selected by pressing SOURCE p 22 Check the antenna cable or other input connection to the unit When using the component video connection check that the green Y blue Pb Cb and red Pr Cr connectors are connected to their corresponding colored jacks on the unit When I enter a channel number why does it ch...

Page 112: ... is higher or lower then the loudness will change Make sure Auto volume leveling is set to On p 32 Picture Sound NosoundwithdistortedpictureoccurswhenusingtheHDMIdigitalconnection Some HDMI cables and devices may not be compatible with the TV due to different HDMI specifications No picture or sound Check if the power is on Check whether all the cables to the unit are connected to the correct outpu...

Page 113: ...he picture quality does not change during playback It differs depending on the speed of internet connection at the time of loading Cannot use VUDU feature VUDU is available only in the United States and Mexico Check if the network connection is properly made Cannot rent or buy movies TV episodes on VUDU You need to activate the VUDU account For detailed information please visit the service provide...

Page 114: ...nal HDR capable products offer greater contrast through an expansionoftherangeoftheimage scolorluminance Thesource cableand display must all support HDR HDTV High Definition TV Ultimate digital format that produces high resolution and high picture quality PIN code A stored 4 digit number that allows access to parental control features SAP Secondary Audio Program Second audio channel delivered sepa...

Page 115: ...le scan Channel up down and PREV CH Previous channel 1 Supporting wireless standards IEEE 802 1 1a b g n ac 2 4GHz 5GHz 1 1 Supporting Dolby Audio Dolby Digital and Dolby Digital Plus 1 1 8 inch 3 5mm 120V 10 60Hz 0 5 41 F 5 C to 104 F 40 C UHD Ultra HD 3840 x 2160 pixels 120Hz UHD Ultra HD 3840 x 2160 pixels 60Hz Model Picture Type Diagonal screen size aspect ratio Viewing angles Built in digital...

Page 116: ...not covered by this warranty Recovery or reinstallation of programs data or other information is not covered under this Limited Warranty This warranty does not apply a to damage caused by accident abuse misuse neglect misapplication or non supplied product b to damage caused by service performed by anyone other than company approved Authorized Service Location c to a product or a part that has bee...

Page 117: ...t OH43125 USA FunaiCorporation Inc disclaimsanyand all warranties and representations with respect to such software and related source code including quality reliability usability and accuracy and further disclaim all express implied statutory or otherwise including without limitation any implied warranties of title non infringement merchantability or fitness for a particular purpose Funai Corpora...

Page 118: ...d Funai Corporation Inc is the warrantor in relation to this product The Philips trademark and the Philips Shield Emblem are registered trademarks of Koninklijke Philips N V used under license Funai Corporation Inc 12489 Lakeland Road Santa Fe Springs CA 90670 USA AZ192U2 A6192U2 AZ186UH A6182UH A6186UH ...

Reviews: