background image

27

Use of the menus

Source

This menu allows you to select and/or name the peripheral equipment you
connect to one of the AV inputs.

&

Select 

Source

with the cursor right.

The Source menu items appear.

é

Press the cursor down to select the menu items..

When you select 

Select

, a list appears, showing the available sources. Selecting

a source causes the TV to begin showing video and playing audio from the
selected source.
When you select 

AV1

,

AV2

,

AV3, AV4

or 

SIDE

, a list appears allowing you to

identify which type of peripheral is attached to this input.
The TV detects the presence of the connected peripheral and the signal is
routed appropriately.
The name selected is automatically added to the source in the Select list.

Press the menu 

Ï

button on the remote control to turn off all menus on

screen.

Press the 

SOURCE

button on the remote control.

The Source Select menu appears in which you may select a source or
peripheral connected to be displayed on screen.

Source

Select

AV1

AV2

AV3

AV4

Side

Settings

TV
AV1: Name
AV2: Name
AV3: Name
AV4: Name
Side: Name

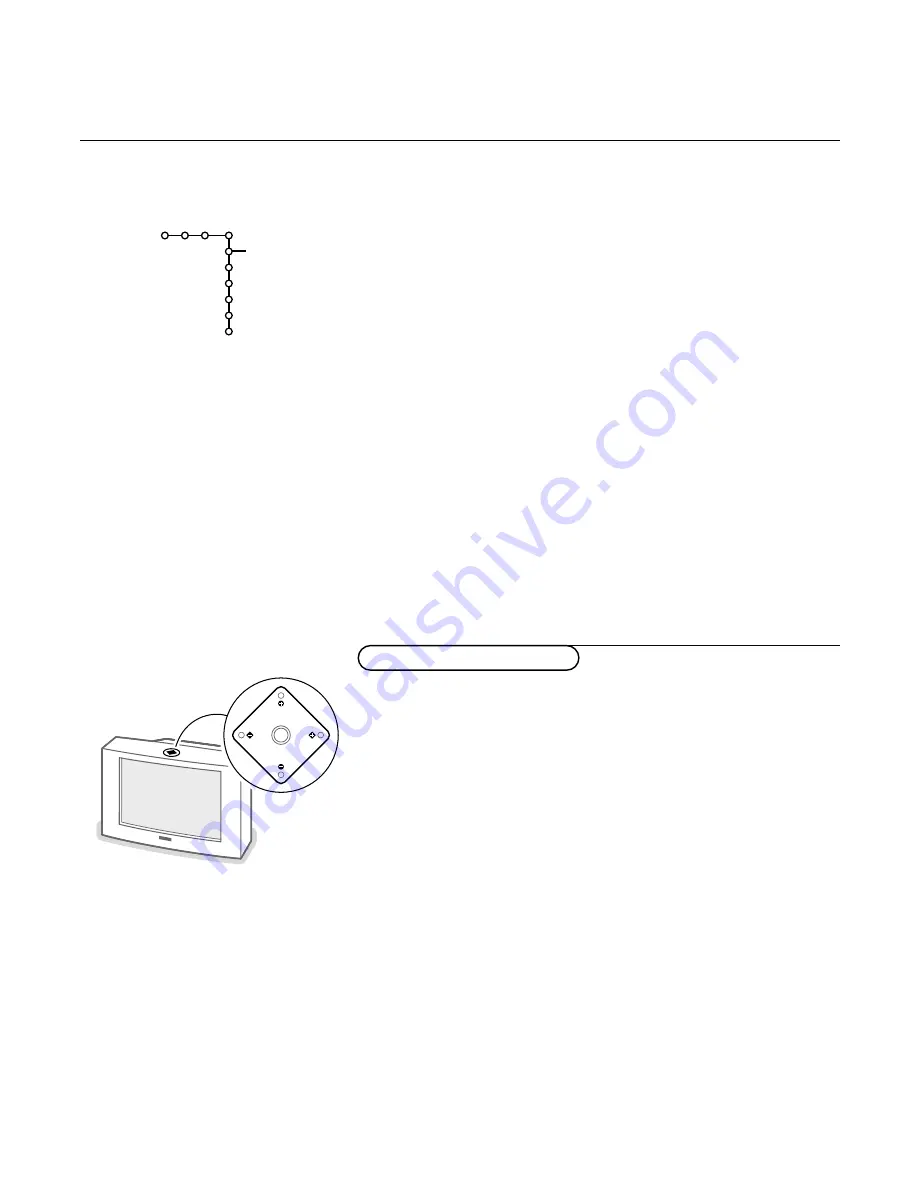
Should your Remote Control be temporarily unavailable, or lost or broken,
the buttonpad on top of the TV allows you to summon and to navigate the
Main Menu, to tune TV channels, and to control the volume.

When the Main Menu is not displayed, the 

CH-

or 

+

buttons enable you 

to select the TV channels, the 

V

- or + buttons to adjust the volume.

Press the 

M

button to summon the Main Menu and to confirm the selection

made (same function as the 

OK

button)

Press the 

V

- or + buttons to navigate left/right in the menu items.

Press the 

CH

- or + buttons to navigate up/down in the menus.

Select the 

M

button again or navigate to 

Exit

to dismiss the Main Menu.

Keypad on top of the TV

M

CH

V

Summary of Contents for 55PP9501/79

Page 1: ......

Page 2: ...Printed on recycled paper ...

Page 3: ... which may cause an electrical shock For the safety of everyone in your household please do not remove product covering The exclamation point calls attention to features for which you should read the enclosed literature closely to prevent operating and maintenance problems WARNING TO PREVENT FIRE OR SHOCK HAZARD DO NOT EXPOSETHIS EQUIPMENTTO RAIN OR MOISTURE CAUTION To prevent electric shock match...

Page 4: ...appliance 11 Power Cord Protection Power supply cords should be routed so that they are not likely to be walked on or pinched by items placed upon or against them paying particular attention to cords and plugs convenience receptacles and the point where they exit from the appliance 12 Cleaning The appliance should be cleaned only as recommended by the manufacturer 13 Power Lines An outdoor antenna...

Page 5: ... peripheral equipment 35 41 CR Control buttons 41 Record with your VCR 42 Before Calling Service 43 Tips 44 Index 44 Glossary 45 TM GEMSTAR IS NOT IN ANY WAY LIABLE FOR THE ACCURACY OF THE PROGRAM SCHEDULE INFORMATION PROVIDED BY THE GUIDE PLUS SYSTEM AMOUNTS REPRESENTING LOSS OF PROFITS LOSS OF BUSINESS OR INDIRECT SPECIAL OR CONSEQUENTIAL DAMAGES IN CONNECTION WITH THE PROVISION OR USE OR ANY IN...

Page 6: ...s to browse through pre defined list of programs p 12 VCR Controls p 41 no function æ GUIDE Plus on off p 30 Ï Menu on off p 14 cursor to select your choice VOL Volume Up Down p 12 Sound Mute p 12 CH Channel Up Down p 12 GUIDE Plus Page Up Down p 30 SOURCE SELECT p 11 selection of AV1 AV2 AV3 AV4 or SIDE Mode buttons p 11 TV HD CBL SAT VCR DVD AMP or CD selection Color buttons blue button G UIDE P...

Page 7: ...which could cause a fire or electric shock do not place the TV on the cord Remote Control Remove the cover of the battery compartment Insert the 2 batteries supplied Type R6 1 5V Press the TV button to be sure your remote control is in the TV mode The batteries supplied do not contain the heavy metals mercury and cadmium Nevertheless in many areas exhausted batteries may not be disposed of with yo...

Page 8: ...ers point of focus by surrounding the ball indicating the user s current position in the menu hierarchy The puck is always present when the menu system is displayed The puck is divided into 4 wedge shaped regions They correspond to the directional controls up down left right on the remote control In this way users can navigate through the menu hierarchy to arrive at the control they wish to adjust...

Page 9: ...ch Moving the puck up or down with the up down button causes the list to move down or up A single value list allows only one item to be selected at one time and de selects another In a multi value list any number of items can be selected even allowing more to be selected They are represented by a checkmark in the box next to the label E g TV Ratings lock Confirmation prompt or OK buttons A confirm...

Page 10: ...a a Menu Language English French Spanish Install TV Install Settings Picture Sound Channels Store TV channels Select Autoprogram in the Install menu é Press the cursor down The autoprogramming option label Start appears Press the cursor right Note All channels must be unlocked in order to autoprogram If requested enter your PIN code to unlock all channels See Channels in the TV menu p 17 The messa...

Page 11: ...ment VCR Cable Converter Box p 42 Navigate to GUIDE Plus in the Install menu é Select Install and navigate to Start with the cursor right Note If you do not wish to setup GUIDE Plus press OK on the remote control Note that some features and GUIDE Plus functions will not be available if you do not setup GUIDE Plus A GUIDE Plus window is displayed asking you what you would like to do Select with cur...

Page 12: ...n case you have a VCR connected Tune your VCR to channel 02 then turn it off Select your VCR brand from the list you can scroll through If your VCR does not switch to channel 02 try again until the correct code is found When the Setup is complete the TV menu returns confirming that GUIDE Plus has been installed Note When you turned on your TV for the first time no confirmation message is displayed...

Page 13: ...pand 14 9 or 16 9 or Superzoom display format you can make subtitles visible with the cursor up down Note Sometimes VCRs or TV programs carry special signals which will automatically switch the TV to the correct display format S Freeze Format See Settings menu General Freeze format p 24 where you can select among three modes to be displayed when the freeze button is pressed on the remote control F...

Page 14: ...the volume Mute Temporarily interrupt the sound or restore it CH Channel selection To browse through the TV channels or sources stored Auto Buttons To select predefined picture and sound settings M Auto Sound Press this button to show a list of predefined sound settings each corresponding with specific factory settings of treble and bass You can also use the cursor up down a Auto Picture Press thi...

Page 15: ...ly and automatically The Demo items cannot be selected The sliders will be moving showing how the TV is tweaking the current picture and dependent of the selected Auto Picture setting which is displayed above the sliders None of the sliders is user controllable Press the OK button to switch off the Demo Note Active Control is not available for digital signals via AV4 b Dual Screen PIP on off See S...

Page 16: ...select Minimum Maximum or Off Press the cursor right to enter the list é Select one of the settings with the cursor up down Press the cursor left or the OK button to return to the picture menu Sharpness not available for digital signals via AV4 This control allows you to adjust the edge definition of a picture Color temperature This control allows you to select from TV channels the color temperatu...

Page 17: ...ss Bass attenuates or amplifies the low frequency response of the audio output signal Sound Mode The Sound mode feature allows you to select the way that your TV plays audio that it receives from broadcast signals or from external inputs Each mode plays the audio in different configurations depending on the speaker configuration and the sound signal being broadcast The graphical representation of ...

Page 18: ...Dolby Surround or to a mono signal 3D Surround 3D Surround enables you to experience the effect of Dolby Surround Pro Logic without the need of having rear speakers connected or activated Select the level of 3D Surround Effect in the Sound menu Pro Logic with Dolby Surround broadcasting In addition to the left and right internal speakers the center and the rear surround speakers reproduce the Dolb...

Page 19: ...he diagonal cursor button upright upleft downright or downleft or press the Ï menu button Channels menu Channel Lock This feature provides the ability to prevent the viewing of a selected channel Blocked channels can still be tuned with the digit buttons only but the picture is blanked and the audio is muted Select Channel Lock with the cursor down é Press the cursor right A list with all stored c...

Page 20: ...ither have no rating information or have a rating of None When this is selected programs without a rating will be locked When an item on the age based list is selected all items below that item of the same group are locked as well When you select a content based rating all identical content based ratings in the younger age based categories are also selected TV Y appropriate for children of all age...

Page 21: ...e movie ratings list become selected All movies are locked If while All is selected any other item is unselected then All is automatically unselected When NR has been selected no other item is selected When any other item has been selected all ratings below are selected as well thus all movies with those ratings will be locked NR not rated G movies with a mild content suitable for all ages PG movi...

Page 22: ...et to Change PIN Follow the instructions on screen All number combinations from 0000 to 9999 are valid numbers The Channels menu reappears with a message confirming that the PIN has been created Important You have forgotten your PIN Select Change PIN in the Channels menu é Press OK Press the cursor right Enter the overriding code 0 7 1 1 Press the cursor again and enter a new personal 4 digit PIN ...

Page 23: ...ayback Each trim control can be adjusted to match test tone levels Depending on the output mode and sound mode see Main Menu TV Sound Sound mode p 16 selected some menu items may be grayed out and are not selectable Center Mode See Connect Peripheral Equipment External Speakers Amplifier p 40 If no External Front Speakers are connected do not change the predefined factory settings which is Center ...

Page 24: ...ual active speakers in a clockwise direction and is meant to be used with the adjustable trim controls Once turned on the Test Tone will continue to circulate through the Left Center Right and both Rear speakers if present Press the cursor left Press the cursor up down to select the desired speaker for individual volume level adjustment Press the cursor left right to adjust the trim level è Contin...

Page 25: ...ctions allow you to view two TV channels or sources at one time hearing audio from the main screen through the speakers and audio from the other screen through the headphones This menu allows you to select the preferred format which can then be displayed toggling the b button on and off See Dual Screen PIP p 28 Select Dual Screen Format with the cursor down é Press the cursor right Select Dual Scr...

Page 26: ...P 3 PIP 8 or PIP 12 with the cursor up down See Multi PIP p 29 how to operate Freeze Format not available for digital signals via AV4 Freeze Format allows you to select among three options Freeze Replay Photo Finish to be activated when you press the S button on the remote control See p 11 In this menu you can select which option you prefer In Dual Screen or PIP mode the highlighted screen is froz...

Page 27: ...ected Caption Service when the mute function is active When the mute function is not active the TV will not display Closed captions information Note Closed Captioning is disabled when a single PIP format is active When Dual Screen Format is selected Closed Captioning if activated appears for the main screen only and it covers the full screen When Multi PIP is activated Closed Caption is disabled C...

Page 28: ...aily or Off to set the On Timer for one time operation daily operation or Off When you have selected Once or Daily press the cursor right Enter the time with the digit buttons or with cursor up down Also enter AM A or PM P with the cursor up down Invalid digits can not be entered Press the OK button to return to the On Timer menu item If a valid hour has been entered and the minutes are left blank...

Page 29: ...control to turn off all menus on screen Press the SOURCE button on the remote control The Source Select menu appears in which you may select a source or peripheral connected to be displayed on screen Source Select AV1 AV2 AV3 AV4 Side Settings TV AV1 Name AV2 Name AV3 Name AV4 Name Side Name Should your Remote Control be temporarily unavailable or lost or broken the buttonpad on top of the TV allo...

Page 30: ...he main screen and the unmovable PIP screen Change TV channels in main screen auxiliary screen and PIP screen Press the channel up down button the digit buttons or the button in order to change the TV channels in the highlighted screen Deactivating Dual Screen mode Press the b button again to return to a full main screen picture The TV tunes to the picture which was highlighted in Dual Screen mode...

Page 31: ... sources selected in the Surf list from top to bottom or the channels from the channel map from the lowest to the highest numbered é Press the cursor left right up down or in case of PIP 12 cursor up down up right up left down right down left left right to highlight a PIP screen When the highlight is on one of the PIP screens it begins playing video and the other PIPs freeze The main screen always...

Page 32: ...tch certain programs or to cancel changes within the Channel Editor Press the green action button to set the TV to record certain programs or to turn Channel Editing options On or Off Press the INFO button to display detailed description of program content if available Use the CH button to select a next page if present Press the MENU Ï button to go back to the menu bar with Grid Sort etc è Press t...

Page 33: ...nlocked with the blue button If the channel has been locked with the blue button the current program of that channel will be displayed Blocked channels with Channel Lock are not displayed Channel Channel indication of highlighted program Time Duration Time the highlighted program is scheduled to appear and the length of the show Program Advertisements Network advertisements for upcoming programmin...

Page 34: ...e displayed and can be brought up on the screen just like an electronic type of newspaper Press the GUIDE æ button on the remote to display the GUIDE Plus system information grid é Press the cursor right to highlight the word News Press the cursor down to highlight a News Headline A brief description of the selected news article will appear at the top of the screen Press the cursor right to view t...

Page 35: ... recording or watch reminders can be set unless there is a time conflict If a conflict should occur the screen will let you know and ask if you would like to enter the Schedule to remove the previously scheduled show Press the green button to move to the Schedule screen to review the information stored Press the blue button to cancel a current program setting Follow the instructions on screen Guid...

Page 36: ...e to display the GUIDE Plus system program grid é Press the cursor right to highlight the word Editor The channel editor screen appears Press the cursor down to highlight the channel to which you wish to make changes Press the digit button s on the remote to change the number of a channel Press the green button on the remote to toggle between On or Off to display the channel reference information ...

Page 37: ...for daisy chaining or to record programs from your TV See Record with your VCR p 42 If your VCR has an S VHS video jack For improved picture quality connect a S video cable with the S VIDEO input instead of connecting the VCR to the VIDEO jack of AV1 IN S Video does not provide audio so audio cables must still be connected to provide sound CABLE VCR R AUDIO L AUDIO VIDEO AV 1 IN OUT OUT IN AV 2 IN...

Page 38: ...ndle CVBS and Y C AV2 IN CVBS AV3 IN CVBS and Y Pb Pr and Y C AV4 IN digital signals of a digital HD receiver SIDE can handle CVBS and Y C VCR with other AV peripherals CABLE VCR R AUDIO L AUDIO VIDEO AV 2 IN OUT AV 1 IN MONITOR OUT S VIDEO OUT OUT IN OUT IN 3 ANT CABLE Connect the satellite antenna cable 1 to the satellite receiver s SATELLITE IN jack é Connect the Video Audio left and right only...

Page 39: ...ur VCR p 42 DVD player with AV connectors Connect the AV cables to the DVD player s AV OUT jacks and to the TV s AV2 IN jacks If your DVD player has an S VIDEO OUT put jack Connect the AV cables to the DVD player s AV OUT jacks and to the TV s AV3 IN jacks Connect an S VIDEO cable with the S VIDEO input instead of connecting the DVD player to the video jack DVD player with Component Video Output C...

Page 40: ...t to the Pr Pb and Y jacks and to the L and R AUDIO jacks See also the manual of your High Definition Set top Box Warning in case you notice scrolling images wrong colors or no color no picture or even combinations of these on your screen check if the connections are done in the right way for Y Pb Pr 2Fh check if the cable colors match with the input connector colors for RGB 2Fh check additionally...

Page 41: ...ll sized remote transmitters to turn on and select channels on the VCR and Cable convertor box in order to accomplish a timed VCR Plus recording See GUIDE Plus p 34 Insert the connector end of the supplied Y shape IR Shooter cable into the GUIDE Plus IR SHOOTER output jack on the rear of the TV where you removed the Demo Pin é Position the control transmitter ends of the IR blaster under the front...

Page 42: ...s and to the Dolby surround output S in the VARIABLE LINE OUT grouping at the rear of your TV as shown opposite There is only one cinch output for both speakers Use a mono to stereo adaptor to connect two surround speakers Note Turn off the TV and the rear speakers before connecting them Rear Surround speakers should always be located behind or to either side of the listener at about 1 m above the...

Page 43: ...ing to the equipment you want to operate with this remote control See Use of the remote control p 11 VCR buttons After you pressed the VCR button press one of the VCR buttons under the door of the remote control for record C VCR timer º for pause Ò for rewind for stop π for play for fast forward CH for sequential channel selection from the video recorder tuner 0 to 9 to select a channel number fro...

Page 44: ...stem relies on code numbers listed in your local TV Guide or programming information printed in your local newspaper Programs are given PlusCode programming numbers and are printed next to the program listings The PlusCode programming number is required to properly setup your VCR for a VCR Plus system recording Press the VCR button on the remote control The GUIDE Plus Schedule display panel appear...

Page 45: ...st the volume see Sound Modes p 15 Adjust the contrast and brightness setting Check the transmission system s color settings of this set Sometimes poor picture quality occurs when having activated an S VHS camera or camcorder connected to the right side of of your TV and another peripheral is connected to AV1 or AV2 at the same time In this case switch off one of the other peripherals Check the an...

Page 46: ... sur le matériel brouilleur du Canada Regulatory Notices Federal Communications Commission Notice Care of the screen Clean the TV with a slightly damp soft cloth Do not use abrasive solvent as it can damage the TV screen End of life directives We are paying a lot of attention to using environmentally friendly production methods Your new TV contains materials which can be recycled and reused At the...

Page 47: ...natural NTSC analog video signals National Television Standards Committee format devised for TV broadcasting signals in the 1940s 525 lines 30 Hz On Screen Displays OSD Refers to the wording or messages generated by the TV to help the user with specific feature controls color adjustment programming etc Picture Freeze TV mode which allows you to freeze a certain image in order to study a specific d...

Page 48: ...r une preuve d achat pour bénéficier d un service sans frais Pour les produits non couverts par la garantie contactez le center le plus près de chez vous Nota Si Ud reside en una de nuestras zonas para sucursales Philips de servicio al de fábrica ver directorio más abajo Ud puede comunicarse con la sucursal de servicio más cercana para obtener una reparación oportuna y eficaz de su producto Si su ...

Page 49: ...comunicarse con el centro de servicio de fabrica mas cercano para estos lugares dentro de un radio de 80 a 120 km 50 a 75 millas del centro de servicio local GEORGIA Philips Factory Service of Georgia 200 N Cobb Pkwy Suite 120 Marietta GA 30062 770 795 0085 FLORIDA Philips Factory Service of Florida 1911 US Highway 301 North Tampa FL 33619 813 621 8181 WESTERN U S A Philips Factory Service Western...

Page 50: ...d technical manual s are not readily available MAKE SUREYOU KEEP Please keep your sales receipt or other document showing proof of purchase Attach it to this owner s manual and keep both nearby Also keep the original box and packing material in case you need to return your product BEFORE REQUESTING SERVICE Please check your owner s manual before requesting service Adjustments of the controls discu...

Page 51: ......

Page 52: ...Printed in Belgium 3104 305 4985 1 Printed on recycled paper ...

Reviews: