background image

2

Setting up

2.1

Read safety

Read the safety instructions first before you use the TV.

In Help, go to 

Safety and care

 > 

Safety

.

2.2

TV stand and wall mounting

TV stand

You can find the instructions for mounting the TV stand in the
Quick Start Guide that came with the TV. In case you lost this
guide, you can download it from 

www.philips.com

.

Use the product type number of the TV to look for the Quick
Start Guide to download.

Wall mounting

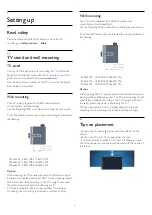
Your TV is also prepared for a VESA-compliant wall
mount bracket (sold separately).
Use the following VESA code when purchasing the wall mount .
. .
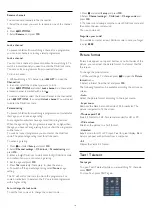
To fix the bracket securely, use screws with a length indicated in
the drawing.

- 32Pxx43x9 - VESA MIS-F 100x100, M4
- 40Pxx43x9 - VESA MIS-F 200x200, M4
- 50Pxx43x9 - VESA MIS-F 400x200, M6

Caution


Wall mounting the TV requires special skills and should only be
performed by qualified personnel. The TV wall mounting should
meet safety standards according to the TV's weight. Also read
the safety precautions before positioning the TV.
TP Vision Europe B.V. bears no responsibility for improper
mounting or any mounting that results in accident or injury.

Wall mounting

Your TV is also prepared for a VESA-compliant wall
mount bracket (sold separately).
Use the following VESA code when purchasing the wall mount .
. .
To fix the bracket securely, use screws with a length indicated in
the drawing.

- 42Pxx5199 - VESA MIS-F 200x200, M6
- 47Pxx5199 - VESA MIS-F 400x400, M6
- 55Pxx5199 - VESA MIS-F 400x400, M6

Caution


Wall mounting the TV requires special skills and should only be
performed by qualified personnel. The TV wall mounting should
meet safety standards according to the TV's weight. Also read
the safety precautions before positioning the TV.
TP Vision Europe B.V. bears no responsibility for improper
mounting or any mounting that results in accident or injury.

2.3

Tips on placement

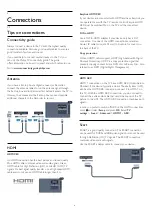
- Position the TV where light does not shine directly on the
screen.
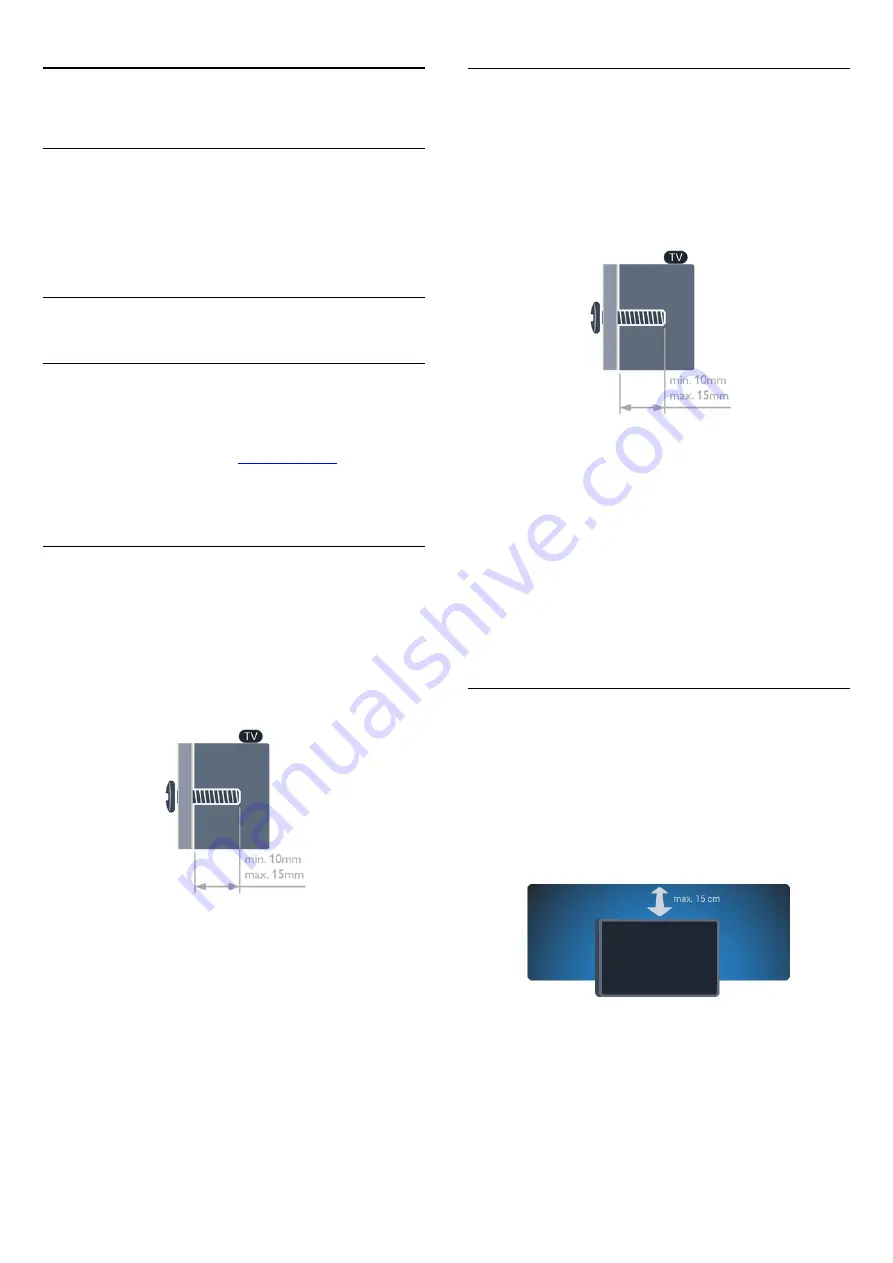
- Position the TV up to 15 cm away from the wall.
- The ideal distance to watch TV is 3 times its diagonal screen
size. When seated, your eyes should be level with the centre of
the screen.

4

Summary of Contents for 32PFH4309

Page 1: ... philips com welcome 32PFH4309 32PFH4399 32PFT4309 32PFT4309 32PHH4309 32PHH4309 32PHH4319 32PHH4329 32PHT4309 32PHT4319 40PFH4309 40PFH4319 40PFH4329 40PFH4399 40PFT4309 40PFT4309 40PFT4319 50PFH4309 50PFH4319 50PFH4329 50PFT4309 50PFT4319 User Manual ...

Page 2: ...es 25 8 1 Sources list 25 8 2 From standby 25 8 3 EasyLink 25 9 Timers and clock 26 9 1 Sleep timer 26 9 2 Clock 26 9 3 Auto switch off 26 10 Your photos videos and music 27 10 1 From a USB connection 27 11 Pause TV 29 11 1 Pause TV 29 12 Recording 30 12 1 What you need 30 12 2 Record a programme 30 12 3 Watch a recording 30 13 Settings 31 13 1 Picture 31 13 2 Game or computer 32 13 3 Format and e...

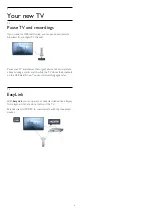
Page 3: ... answer that urgent phone call or simply take a break during a sports match while the TV stores the broadcast on the USB Hard Drive You can start watching again later 1 2 EasyLink With EasyLink you can operate a connected device like a Bluray Disc player with the remote control of the TV EasyLink uses HDMI CEC to communicate with the connected devices 3 ...

Page 4: ...so read the safety precautions before positioning the TV TP Vision Europe B V bears no responsibility for improper mounting or any mounting that results in accident or injury Wall mounting Your TV is also prepared for a VESA compliant wall mount bracket sold separately Use the following VESA code when purchasing the wall mount To fix the bracket securely use screws with a length indicated in the d...

Page 5: ... the plug never pull the cable Although this TV has a very low standby power consumption unplug the power cable to save energy if you do not use the TV for a long period of time 2 5 Antenna cable Insert the antenna plug firmly into the ANTENNA socket at the back of the TV You can connect your own antenna or an antenna signal from an antenna distribution system Use an IEC Coax 75 Ohm RF antenna con...

Page 6: ... them with the TV remote control EasyLink HDMI CEC must be switched On on the TV and the connected device DVI to HDMI Use a DVI to HDMI adapter if your device only has a DVI connection Use one of the HDMI connections and add an Audio L R cable mini jack 3 5mm to Audio In for sound on the back of the TV Copy protection DVI and HDMI cables support HDCP High bandwidth Digital Content Protection HDCP ...

Page 7: ...nding names are property of their respective owners Operate devices To operate a device connected to HDMI and set up with EasyLink select the device or its activity in the list of TV connections Press SOURCES select a device connected to an HDMI connection and press OK Once the device is selected the TV remote control can control the device However and OPTIONS keys and some other TV keys are not f...

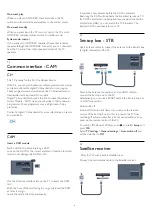
Page 8: ...tion Incorrect insertion can damage the CAM and TV Use the Common Interface slot on the TV to insert the CAM card With the front of the card facing to you gently insert the CAM as far as it will go Leave the card in the slot permanently It may take a few minutes before the CAM is activated Removing the CAM will deactivate the broadcast service on TV If a CAM is inserted and subscription fees are p...

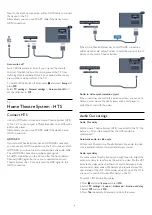
Page 9: ...once you connected the Home Theatre System the TV can only send the ARC signal to this HDMI connection If the Home Theatre System has no HDMI ARC connection add an optical audio cable Toslink to send the sound of the TV picture to the Home Theatre System Audio to video synchronisation sync If the sound does not match the video on screen you can set a delay on most Home Theatre Systems with a disc ...

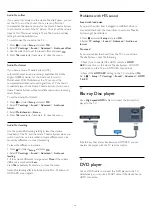
Page 10: ... of the TV and the Home Theatre System when you switch over from one to another Volume differences can be caused by differences in sound processing To level the difference in volume 1 Press and select Setup and press OK 2 Select TV settings Sound Advanced Audio out leveling 3 If the volume difference is large select More If the volume difference is small select Less Press repeatedly if necessary t...

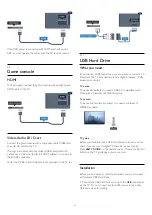
Page 11: ...Hard Drive you can pause or record a TV broadcast The TV broadcast must be a digital broadcast DVB broadcast or similar To pause To pause a broadcast you need a USB 2 0 compatible Hard Drive with a minimum of 32GB disc space To record To pause and record a broadcast you need a minimum of 250GB disc space TV guide Before you decide to buy a USB Hard Drive to record you can check if you can record d...

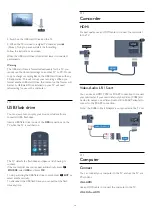
Page 12: ...ert a USB flash drive in one of the USB connections on the TV while the TV is switched on The TV detects the flash drive and opens a list showing its content If the contents list does not appear automatically press SOURCE select USB and press OK To stop watching the USB flash drive content press EXIT or select another activity To disconnect the USB flash drive you can pull out the flash drive anyt...

Page 13: ...ing manually 1 Press and select Setup and press OK 2 Select TV settings Picture Advanced Game or compter and press OK 3 Select Game for gaming or select Computer for watching a movie and press OK 4 Press repeatedly if necessary to close the menu Remember to set the Game or computer setting back to Computer when you stop playing the game 3 14 Headphones You can connect a set of headphones to connec...

Page 14: ...to switch the TV On Switch to standby To switch the TV to standby press on the remote control Switch Off To switch the TV Off press the power button on the side of the TV The red indicator light is off The TV is still connected to the mains power but consumes a minimum of energy To switch off the TV completely disconnect the power plug When disconnecting the power plug always pull the power plug n...

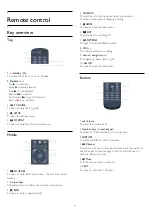
Page 15: ...tch back to the previous channel you selected To close a menu without changing a setting 5 HOME To open or close the home menu 6 EXIT To switch back to watching TV 7 OPTIONS To open or close the Options menu 8 OK key To confirm a selection or setting 9 Arrow navigation keys To navigate up down left or right 10 LIST To open or close the channel list Bottom 1 Volume To adjust the volume level 2 Numb...

Page 16: ...with 2 type AAA LR03 1 5V batteries Make sure the and the ends of the batteries line up correctly 3 Reposition the battery door 4 Slide it back until it clicks Remove the batteries if you are not using the remote control for a long time Safely dispose of your old batteries according to the end of use directions 5 4 Cleaning Your remote control is treated with a scratch resistant coating To clean t...

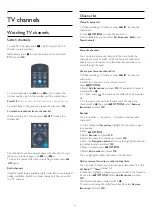
Page 17: ...vourite channel list selected you will only see your favourite channels when you switch through channels Create your favourite channel list 1 While watching a TV channel press LIST to open the channel list 2 Select the channel to mark as favourite and press OPTIONS 3 Select Add favourites and press OK The selected channel is marked with a 4 To finish press The channels are added to the Favourites ...

Page 18: ...git Child lock code and confirm Now you can set an age rating 4 Set the age and press OK 5 Press repeatedly if necessary to close the menu 6 To switch off the parental age rating select None as age setting The TV will ask for the code to unlock the programme For some broadcasters operators the TV only locks programmes with a higher rating Set or change the lock code To set the lock code or to chan...

Page 19: ...ey and press OK 3 Press to hide the device keys 4 To close Text press again Digital Text UK only Some digital broadcasters offer dedicated Digital Text or interactive TV on their digital TV channels This includes normal Text using the number colour and arrow keys to select and navigate To close Digital Text press Text options In Text press OPTIONS to select the following Freeze page Unfreeze page ...

Page 20: ...age If audio in one of these languages is available the TV will switch to this audio If none of the preferred audio languages is available you can select another audio language which is available To set the primary and secondary audio language 1 Press and select Setup and press OK 2 Select Channel settings and select Languages 3 Select Primary audio language or Secondary audio language and press O...

Page 21: ...d select Setup and press OK 2 Select TV settings General settings Factory settings and press OK 3 Press OK to confirm 4 Press repeatedly if necessary to close the menu Channel list copy Introduction Channel list copy is intended for dealers and expert users In some countries Channel list copy is only availble for copying satellite channels With Channel list copy you can copy the channels installed...

Page 22: ...omatic If your DVB C provider gave you specific DVB C values the network ID or network frequency enter these values when the TV asks for them during installation It might be necessary to adjust the scanning full or quick scan or enter a specific symbol rate in the Settings menu while installing To set a Symbol rate first set the Symbol rate to Manual Channel number conflicts In some countries diff...

Page 23: ...select Free scrambled If you did not subscribe to pay TV channels or services you can select Free channels only Manual installation Analogue TV channels can be manually installed channel by channel To install analogue channels manually 1 Press and select Setup and press OK 2 Select Channel settings Channel installation Analogue manual installation and press OK System To set up the TV system select...

Page 24: ... TV guide can show scheduled programmes for the upcoming days maximum up to 8 days If the TV guide information comes from the broadcaster you can press to view the schedule of one of the next days Press to go back to the previous day Alternatively you can press OPTIONS and select Change day Select Previous day Today or Next day and press OK to select the day of the schedule Search by genre If the ...

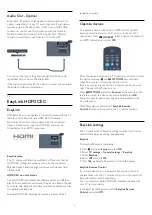
Page 25: ... switch on both disc player and TV from standby and start playing the disc or programme immediately press play on the TV remote control The device should be connected with an HDMI cable and both TV and device must have HDMI CEC switched on Home Theatre System You can switch on your Home Theatre System to listen to an audio disc or a radio channel and leave the TV in standby To only switch on the H...

Page 26: ...ht saving change might be ignored and the TV might show an incorrect time To correct the TV clock 1 Press and select Setup and press OK 2 Select TV settings General settings Clock Auto clock mode and select Country dependent 3 Select Daylight saving and select the appropriate setting 9 3 Auto switch off If you do not press a key on the remote control during a 4 hour period or if the TV receives no...

Page 27: ...ur folders to look for a file View photos In the USB browser select Picture and press OK Options Press OPTIONS Start slideshow Stop slideshow Start or stop slideshow Slideshow transitions Set the transition from one picture to the next Slideshow frequency Select the display time for each photo Repeat Play once View the pictures repeatedly or once only Shuffle off Shuffle on View the pictures in se...

Page 28: ... Repeat Play once Play videos repeatedly or once Shuffle on Shuffle off Play videos in sequence or at random Show info Display the file name To close Browse USB press and select another activity 28 ...

Page 29: ...o another digital channel the broadcast of the new channel is buffered and the broadcast of the former channel is cleared When you switch to a connected device a Blu ray Disc player or digital receiver the USB Hard Drive stops buffering and the broadcast is cleared Also when you switch the TV to standby the broadcast is cleared Whilst recording a programme on the USB Hard Drive you cannot pause a ...

Page 30: ...buffer at the end of the programme You can add some extra buffer if needed If you plan to record a programme in your absence remember to leave the TV switched to standby and the USB Hard Drive switched on List of recordings To view the list of recordings and scheduled recordings press select Recordings and press OK In this list you can select a recording to watch remove recorded programmes adjust ...

Page 31: ...4 Press repeatedly if necessary to close the menu Picture settings Backlight contrast With Backlight contrast you can adjust the brightness of the display backlight To adjust the level 1 Press and select Setup and press OK 2 Select TV settings Picture Backlight contrast 3 Press right and adjust the value with up or down 4 Press repeatedly if necessary to close the menu Colour With Colour you can a...

Page 32: ...g intended for expert users To set a custom colour temperature 1 Press and select Setup and press OK 2 Select TV settings Picture Advanced Custom tint 3 Press right 4 Select a setting with the arrow keys WP is white point and BL is black level 5 Press OK to confirm a setting You can also select one of the presets in this menu 6 Press repeatedly if necessary to close the menu Video contrast With Vi...

Page 33: ...and select Setup and press OK 3 Select TV settings navigate to the individual setting and adjust it 4 Press to close the menu to store your setting To return to the original Sound style values 1 Press and select Setup and press OK 2 Select TV settings Sound Restore style Sound settings Bass With Bass you can adjust the level of low tones in the sound To adjust the level 1 Press and select Setup an...

Page 34: ...o close the menu Clear sound With Clear sound you improve the sound for speech Ideal for news programmes You can switch the speech improvement on or off To switch on or off 1 Press and select Setup and press OK 2 Select TV settings Sound Advanced Clear sound 3 Press right and select On or Off 4 Press repeatedly if necessary to close the menu HDMI1 ARC If you do not need an Audio Return Channel ARC...

Page 35: ...kers and select TV or Amplifier audio system 3 Press repeatedly if necessary to close the menu TV placement As part of the first installation this setting is set to either On a TV stand or Wall mounted If you have changed the placement of the TV since then adjust this setting accordingly for best sound reproduction 1 Press and select Setup and press OK 2 Select TV settings General settings TV plac...

Page 36: ...s Active control Demo and press OK 3 Select a setting to check the corresponding values European energy label The European Energy Label informs you on the energy efficiency class of this product The greener the energy efficiency class of this product is the lower the energy it consumes On the label you can find the energy efficiency class the average power consumption of this product in use and th...

Page 37: ...certain sets only 14 4 Power Product specifications are subject to change without notice For more specification details of this product see www philips com support Power Mains power AC 220 240V 10 Ambient temperature 5 C to 35 C Standby power consumption less than 0 3W Power saving features Eco mode Picture mute for radio Auto switch off Eco settings menu The power rating stated on the product typ...

Page 38: ...V ANTENNA 75 ohm coaxial IEC SCART RGB CVBS SCART adaptor AUDIO IN DVI Stereo 3 5mm mini jack DIGITAL AUDIO OUT SPDIF Headphones Stereo 3 5mm mini jack TV Side CI Common Interface USB 14 7 Multimedia Note Multimedia file names must not exceed 128 characters Supported multimedia connections USB 2 0 FAT FAT 32 NTFS only connect USB devices that consume 500 mA of power or less Supported image files J...

Page 39: ...open source software TP Vision Europe B V hereby offers to deliver upon request a copy of the complete corresponding source code for the copyrighted open source software packages used in this product for which such offer is requested by the respective licences This offer is valid up to three years after product purchase to anyone in receipt of this information To obtain the source code please writ...

Page 40: ...ny express or implied warranty In no event will the authors be held liable for any damages arising from the use of this software Permission is granted to anyone to use this software for any purpose including commercial applications and to alter it and redistribute it freely subject to the following restrictions 1 The origin of this software must not be misrepresented you must not claim that you wr...

Page 41: ...rary is free software you can redistribute it and or modify it under the terms of the GNU Lesser General Public License as published by the Free Software Foundation either version 2 of the License or at your option any later version The complete text of the license is found in the file COPYING ________________________________________ GNU General Public LICENSE version 2 GPLv2 Copyright C 1989 1991...

Page 42: ...sees extend to the entire whole and thus to each and every part regardless of who wrote it Thus it is not the intent of this section to claim rights or contest your rights to work written entirely by you rather the intent is to exercise the right to control the distribution of derivative or collective works based on the Program In addition mere aggregation of another work not based on the Program ...

Page 43: ... License 9 The Free Software Foundation may publish revised and or new versions of the General Public License from time to time Such new versions will be similar in spirit to the present version but may differ in detail to address new problems or concerns Each version is given a distinguishing version number If the Program specifies a version number of this License which applies to it and any late...

Page 44: ...to any other program whose authors commit to using it Some other Free Software Foundation software is covered by the GNU Lesser General Public License instead You can apply it to your programs too When we speak of free software we are referring to freedom not price Our General Public Licenses are designed to make sure that you have the freedom to distribute copies of free software and charge for t...

Page 45: ...rms of Sections 1 and 2 above on a medium customarily used for software interchange or c Accompany it with the information you received as to the offer to distribute corresponding source code This alternative is allowed only for non commercial distribution and only if you received the program in object code or executable form with such an offer in accord with Subsection b above The source code for...

Page 46: ...OSE THE ENTIRE RISK AS TO THE QUALITY AND PERFORMANCE OF THE PROGRAM IS WITH YOU SHOULD THE PROGRAM PROVE DEFECTIVE YOU ASSUME THE COST OF ALL NECESSARY SERVICING REPAIR OR CORRECTION 12 IN NO EVENT UNLESS REQUIRED BY APPLICABLE LAW OR AGREED TO IN WRITING WILL ANY COPYRIGHT HOLDER OR ANY OTHER PARTY WHO MAY MODIFY AND OR REDISTRIBUTE THE PROGRAM AS PERMITTED ABOVE BE LIABLE TO YOU FOR DAMAGES INC...

Page 47: ...onent but which is not part of that Major Component and b serves only to enable use of the work with that Major Component or to implement a Standard Interface for which an implementation is available to the public in source code form A Major Component in this context means a major essential component kernel window system and so on of the specific operating system if any on which the executable wor...

Page 48: ...including a physical distribution medium accompanied by a written offer valid for at least three years and valid for as long as you offer spare parts or customer support for that product model to give anyone who possesses the object code either 1 a copy of the Corresponding Source for all the software in the product that is covered by this License on a durable physical medium customarily used for ...

Page 49: ... of it with contractual assumptions of liability to the recipient for any liability that these contractual assumptions directly impose on those licensors and authors All other non permissive additional terms are considered further restrictions within the meaning of section 10 If the Program as you received it or any part of it contains a notice stating that it is governed by this License along wit...

Page 50: ... pursuant to or in connection with a single transaction or arrangement you convey or propagate by procuring conveyance of a covered work and grant a patent license to some of the parties receiving the covered work authorizing them to use propagate modify or convey a specific copy of the covered work then the patent license you grant is automatically extended to all recipients of the covered work a...

Page 51: ...ftware to make sure the software is free for all its users This license the Lesser General Public License applies to some specially designated software packages typically libraries of the Free Software Foundation and other authors who decide to use it You can use it too but we suggest you first think carefully about whether this license or the ordinary General Public License is the better strategy...

Page 52: ...code for all modules it contains plus any associated interface definition files plus the scripts used to control compilation and installation of the library Source code for a work means the preferred form of the work for making modifications to it For a library complete source code means all the source code for all modules it contains plus any associated interface definition files plus the scripts...

Page 53: ...e that work under terms of your choice provided that the terms permit modification of the work for the customer s own use and reverse engineering for debugging such modifications You must give prominent notice with each copy of the work that the Library is used in it and that the Library and its use are covered by this License You must supply a copy of this License If the work during execution dis...

Page 54: ...r she is willing to distribute software through any other system and a licensee cannot impose that choice This section is intended to make thoroughly clear what is believed to be a consequence of the rest of this License 12 If the distribution and or use of the Library is restricted in certain countries either by patents or by copyrighted interfaces the original copyright holder who places the Lib...

Page 55: ...ined Work under terms of your choice that taken together effectively do not restrict modification of the portions of the Library contained in the Combined Work and reverse engineering for debugging such modifications if you also do each of the following a Give prominent notice with each copy of the Combined Work that the Library is used in it and that the Library and its use are covered by this Li...

Page 56: ...urce or Object form 3 Grant of Patent License Subject to the terms and conditions of this License each Contributor hereby grants to You a perpetual worldwide non exclusive no charge royalty free irrevocable except as stated in this section patent license to make have made use offer to sell sell import and otherwise transfer the Work where such license applies only to those patent claims licensable...

Page 57: ...ch as deliberate and grossly negligent acts or agreed to in writing shall any Contributor be liable to You for damages including any direct indirect special incidental or consequential damages of any character arising as a result of this License or out of the use or inability to use the Work including but not limited to damages for loss of goodwill work stoppage computer failure or malfunction or ...

Page 58: ...n the TV is in standby a Philips startup screen is displayed then the TV returns to standby mode This is normal behaviour When the TV is disconnected and reconnected to the power supply the startup screen is displayed at the next startup To switch on the TV from standby press on the remote control or the TV The standby light keeps on blinking Disconnect the power cable from the power outlet Wait 5...

Page 59: ... is connected to AUDIO IN mini jack only if available EasyLink does not work Make sure that your HDMI devices are HDMI CEC compatible EasyLink features only work with devices that are HDMI CEC compatible No volume icon shown When a HDMI CEC audio device is connected this behaviour is normal Photos videos and music from a USB device do not show Make sure that the USB storage device is set to Mass S...

Page 60: ...onsult our website www philips com support TV model number and serial number You might be asked to provide the TV product model number and serial number Find these numbers on the packaging label or on the type label on the back or bottom of the TV Warning Do not attemp to repair the TV yourself This may cause severe injury irreparable damage to your TV or void your warranty 60 ...

Page 61: ...he power plug power cord and outlet socket at all times Risk of injury or damage to the TV Two people are required to lift and carry a TV that weighs more than 25 kg or 55 lbs If you mount the TV on a stand only use the supplied stand Secure the stand to the TV tightly Place the TV on a flat level surface that can support the weight of the TV and the stand When wall mounted ensure that the wall mo...

Page 62: ...ot expose the TV to direct sunlight heat or extreme humidity If condensation occurs it will disappear spontaneously while the TV is playing for a few hours The condensation moisture will not harm the TV or cause malfunction 17 2 Screen care Never touch push rub or strike the screen with any object Unplug the TV before cleaning Clean the TV and frame with a soft damp cloth and wipe gently Never use...

Page 63: ...and assembly procedures not recommended or authorised in this manual shall void the warranty Pixel characteristics This LCD LED product has a high number of colour pixels Although it has effective pixels of 99 999 or more black dots or bright points of light red green or blue may appear constantly on the screen This is a structural property of the display within common industry standards and is no...

Page 64: ...tered US trademarks of ACCO World Corporation with issued registrations and pending applications in other countries throughout the world Other trademarks All other registered and unregistered trademarks are the property of their respective owners 64 ...

Page 65: ...Index 65 ...
Page 66: ...71 0 10 min Norge 22 97 19 14 Österreich 0820 40 11 33 0 145 Min Polska 22 397 15 04 Połączenie lokalne Portugal 707 78 02 25 0 12 min Móvel 0 30 min Romānä 031 6300042 Tarif local Россия 8 800 22 00004 бесплатно Suisse Schweiz Svizzera 0848 000 291 0 081 CHF Min Србија 011 321 6840 Lokalni poziv Slovakia 2 332 154 93 Vnútroštátny hovor Slovenija 1 888 83 12 Lokalni klic Suomi 09 88 62 50 40 Sveri...

Reviews: