


MJPEG IP Camera User’s Guide
71/94
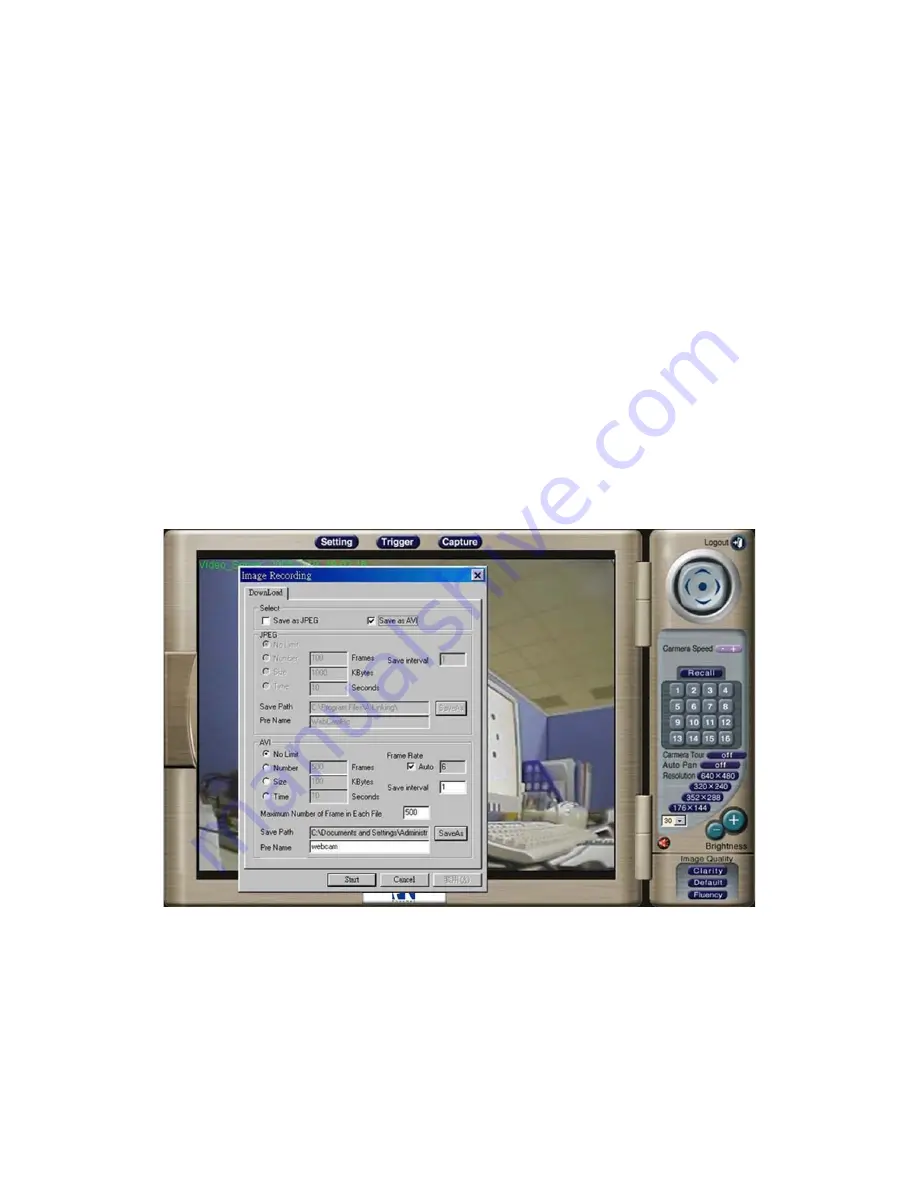
“Image Recording…-> Save as AVI”
1. Select “
Image Recording…”
2. The “Image Recording” pop-up window displays, select
3. “
Save as AVI
”
4. Input the ”
Avi Frame
” and “
Max Jpeg Num
” on each AVI file, until the “
Stop Image
Recording
” is selected. “
Avi Frame
” is the frame rate setting of the recorded AVI
file.
5. For each AVI file, the maximum saved images in each file are specified in
“Max
Jpeg Num”
, once the saves image on each AVI file are reached by this number,
then a new AVI file will created to save the following images, until the “
Stop
Image Recording
” is selected.
6. Select
“SaveAs
”, the pop-up window to select the save path and file name prefix,
select
“Save
” to continue.
Select “
Start
” to start the AVI files recording.
During the AVI file recording, a red icon displays on right-down position of the image to
indicate the AVI saving process.