


9:10
A
B
C
D
I
I
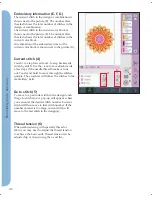
Precise positioning - example
When adding one design to one previously
embroidered, precise positioning is very useful.
1. Choose one of the corners to be the locking
point (A). Either move the locking point using
touch function - move on the screen or the
wheel.
2. Select the next function, position hoop (B), to
move the locking point to the right position in
the hoop.
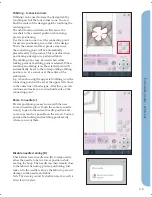
Move the locking point to the upper left corner
of the embroidered design. Use the touch
function - move. Check that the needle is at the
exact position.
If
satis
fi
ed, close precise positioning and start
embroidering.
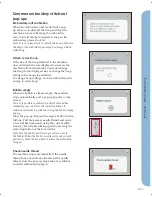
3. To line up the design on the screen with the
previously embroidered, select matching point
(C) to be the corner. Use the touch function -
move or the orbiting icons.
4. Select the next function, rotate design (D) to
move the matching point to the right position
in the hoop.
Use the touch function - rotate to line up the
designs. Check that the needle is at the exact
position.
5. Close precise positioning and start
embroidering.
Embr
oidery mode - stitch-out
Summary of Contents for Creative Vision
Page 1: ...Owner s manual creative ...
Page 7: ...Introduction ...
Page 21: ...Preparations ...
Page 37: ...PFAFF HD screen ...
Page 50: ...3 14 Pfaff HD screen ...
Page 51: ...Sewing mode ...
Page 69: ...Sequencing ...
Page 75: ...Stitch Creator ...
Page 81: ...Embroidery preparations ...
Page 87: ...Embroidery mode edit ...
Page 110: ...8 24 Embroidery mode edit ...
Page 111: ...Embroidery mode stitch out ...
Page 123: ...Files Folders ...
Page 131: ...Maintenance ...
Page 141: ...4D Embroidery Machine Communication CD For personal computer See page 2 13 ...