background image

39 

Care & Maintenance, Transport

User Manual VS

Always contact Service is defects are discovered on the seat, as the use of a defective 

seat could both injure the user and damage the seat.

m

    CAUTION

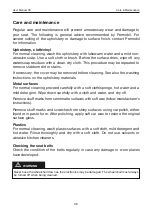
Care and maintenance 

Checks

At regular intervals check the following:
-  that the locking nuts on the swivel heads are tight.
-  that the actuators are in place in the actuator fixings.
-  that the knee stop tape and the tape to the leg rest/foot plate are not worn 

and that the seams are intact.

-  Check the condition of the belts regularly in case any damage or worn pla-

ces have developed.

-  that moving parts such as arm rest or parallel stay are in place and that all 

knobs are tightened, see safety rules, pages 10-11.

-  that the green indicator lamp on the button box goes out when the seat is 

raised above or lowered below the correct height for elevation.

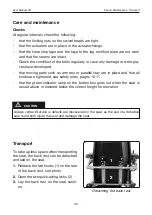
Transport

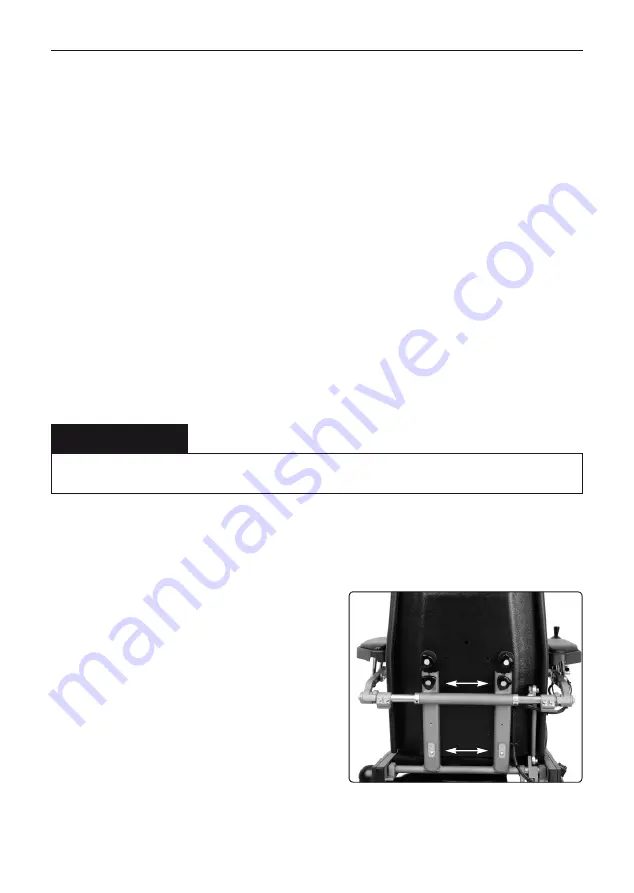
To take up less space when transporting 

the seat, the back rest can be detached 

and laid on the seat.

1. 

Release the two knobs (1) on the rear 

of the back rest, see photo.

2. 

Open the two quick-acting locks (2)

3.

  Lay the back rest on the seat cushi-

on.

Detaching the back rest.

1

2

Summary of Contents for vs

Page 1: ...USER MANUAL UK VS Seat system for Power Wheelchair...

Page 2: ......

Page 3: ...ce Quarter Waters Meeting Britannia Way BL1 8SW Bolton United Kingdom Tel 44 0 1484 722 888 Fax 44 0 1484 723 013 Email info permobil uk The Permobil Group s Head Office Permobil AB Box 120 861 23 Tim...

Page 4: ...Produced and published by Permobil AB Sweden Edition no 5 2010 10 Item No 205216 UK 0 VS Seat system for Power Wheelchair...

Page 5: ...nd service 7 Product approval 7 Safety rules and regulations 8 17 General introduction 18 Design Function 19 Operation 24 Settings and adjustment 29 Arm rest 29 Chest support 29 Head rest 30 Trunk sup...

Page 6: ...user manual on or near your wheelchair as you may need to consult its important information on use safety and maintenance You can also find information on our products on our website You will find us...

Page 7: ...contact page Here is the needed contact information and a guidance document in what information we need to investigate the incident Complete the information as much as possible This is of great help f...

Page 8: ...s in this manual before using your seat wheelchair Faulty use could both injure the user and damage the seat The user manual contains the following warning labels which are intended to draw attention...

Page 9: ...ntrols and with the various adjustment options etc before starting to use it Do not set out alone on your first test ride but make sure you have assistance close by if you should need help To ensure t...

Page 10: ...ther actions the following safety checks must be carried out 1 Check that the bolts on all actuators and articulated rod heads see photo have been properly tightened 2 Check that the stop chain is fit...

Page 11: ...11 Safety rules User Manual VS Leg rest stop chain Arm rest stop Articulated rod head Leg rest with foot plate seen from behind Safety rules 1 2...

Page 12: ...el surface and not on slopes ramps hills or other gradients Center of gravity Note that the following factors may affect the center of gravity of the seat wheelchair and thus the tipping risk Raising...

Page 13: ...p between the wheelchair and the place to which the user wish es to move If this distance is made wider it could mean the user loses bal ance and falls over Permobil recommends that users get in and o...

Page 14: ...ates Permobil s seats are designed to tolerate most weather conditions but you should avoid exposing the seat to severe cold persistent dampness heavy rain snowfall and similar situations If the seat...

Page 15: ...sport eyes at the front and rear marked with yellow stickers or by using a Permolock locking system If the wheelchair needs to be transported with the user seated in it be sure to use an approved atta...

Page 16: ...petent servicing engineer or Permobil The power supply must always be interrupted for all work or servicing on the seat s electrical system Read more on how you can do this in your wheelchair user in...

Page 17: ...ng that the seat and its various functions are not behaving as expected or if you suspect anything is wrong stop your test drive as soon as possible turn off the wheelchair and contact your aid center...

Page 18: ...ntrol panels for the wheelchair and seat If the seat has the standing operation function the chair may be operated at reduced speed with the seat in the standing position Elevation to standing positio...

Page 19: ...rm rest and leg rest To facilitate use of the elevation function it is also fitted with knee calf and chest supports The photo shows the seat detached from the chassis VS 1 Head Rest accessory 2 Contr...

Page 20: ...operate the front button and back to operate the rear button The functions of the control panel are here described when fitted with conven tional push buttons but the functions are the same whatever...

Page 21: ...green light means that the wheelchair can be operated at maximum speed A constant yellow light means that the maximum speed for the wheelchair is restricted due to the current position of the seat fun...

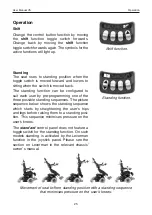
Page 22: ...sition when the toggle switch is moved forward and lowers to sitting when the switch is moved back The standing function can be configured to suit each user by pre programming one of the three possibl...

Page 23: ...ds and in when the toggle switch is moved back Shift Change the control button function by moving the shift function toggle switch forwards Change back by moving the shift function toggle switch forwa...

Page 24: ...toggle is used when a toggle switch has two function capability The active function is changed by pressing the shift toggle first The memory fun ction can save up to three favourite seating positions...

Page 25: ...e minimises pressure on the user s knees The standard control panel does not feature a toggle switch for the standing function On such models standing is activated by the Leverman function in the joys...

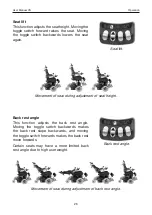
Page 26: ...makes the back rest move forwards Certain seats may have a more limited back rest angle due to high user weight Back rest angle Movement of seat during adjustment of back rest angle Seat lift This fun...

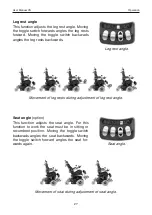
Page 27: ...the seat backwards Moving the toggle switch forward angles the seat for wards again Movement of seat during adjustment of seat angle Leg rest angle This function adjusts the leg rest angle Moving the...

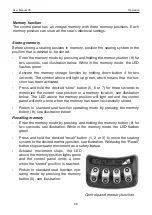
Page 28: ...ree seconds to memorize the current seat position in a memory location see illustration below The LED above the memory position will light red and the control panel will emit a tone when the memory ha...

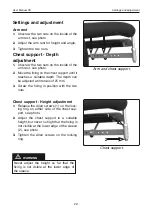
Page 29: ...depth The depth can be adjusted at intervals of 25 mm 3 Screw the fixing in position with the two nuts Arm and chest support Chest support 1 2 Never adjust the height so far that the fixing is not vi...

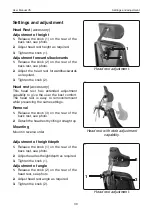
Page 30: ...ility Head rest adjustment Head rest accessory This head rest has extended adjustment capability to give the user the best comfort The head rest is easy to remove remount while preserving the same set...

Page 31: ...port Height depth adjustment 1 Remove the back 2 Adjust the lumbar support as requi red 3 Replace the back cushion Settings and adjustment Trunk support accessory Height adjustment 1 Release the knob...

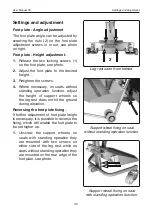
Page 32: ...peration function adjust the height of support wheels so the leg rest does not hit the ground during elevation Reversing the foot plate fixing If further adjustment of foot plate height is necessary i...

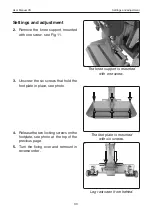
Page 33: ...3 Unscrew the six screws that hold the foot plate in place see photo 4 Release the two locking screws on the footplate see photo at the top of the previous page 5 Turn the fixing over and remount in...

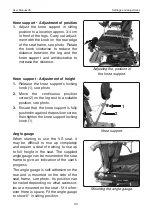
Page 34: ...he angle gauge to show 0 in sitting position 2 Adjusting the position of the knee support Knee support 1 Knee support Adjustment of position 1 Adjust the knee support in sitting position to a location...

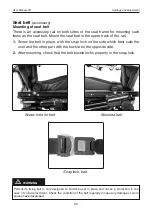
Page 35: ...with the snap lock on the side which best suits the user and the other part with the buckle on the opposite side 2 After mounting check that the belt buckle locks properly in the snap lock Mounted bel...

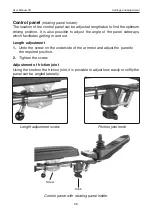
Page 36: ...nel sideways which facilitates getting in and out Length adjustment 1 Undo the screw on the underside of the armrest and adjust the panel to the required position 2 Tighten the screw Adjustment of fri...

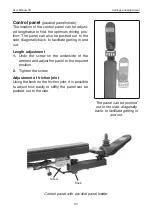
Page 37: ...t to the side diagonally back to facilitate getting in and out Length adjustment 1 Undo the screw on the underside of the armrest and adjust the panel to the re quired position 2 Tighten the screw Adj...

Page 38: ...materials Metal surfaces For normal cleaning proceed carefully with a soft cloth sponge hot water and a mild detergent Wipe down carefully with a cloth and water and dry off Remove skuff marks from s...

Page 39: ...the seams are intact Check the condition of the belts regularly in case any damage or worn pla ces have developed that moving parts such as arm rest or parallel stay are in place and that all knobs ar...

Page 40: ......

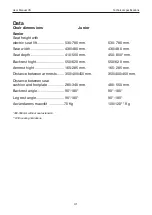
Page 41: ...depth 410 500 mm 450 600 mm Backrest hight 550 620 mm 550 620 mm Armrest hight 165 285 mm 165 285 mm Distance between armrests 350 400 450 mm 350 400 450 mm Distance between seat cushion and footplate...

Page 42: ...42 Notes User Manual VS...

Page 43: ......

Page 44: ...UK Product no 205216 UK 0 VS...

Reviews: