Changing the seat swivel direction
Changing the seat swivel direction
Manual seat swivel
1.
Raise the seat lift and unscrew the seat.
NB.
Before the seat can be lifted off, the cable
between the seat and the chassis must be
disconnected. Disconnect the cable from the
connection on the back. Loosen the centre
screw and lift off the seat.
42
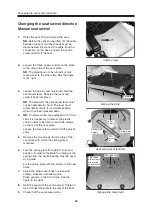
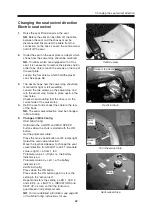
Centre screw
Spring plate holes (top)
Seat swivel lever (bottom)
Moving the plate
2.
Loosen the three screws and move the plate
to the other side of the seat plate.
NB.
The plate must not be turned but only
moved over to the other side. See the figure
to the right.
3.
Loosen the screws and nuts which hold the
seat swivel lever. Reverse the lever and
screw it back into place.
NB.
The screw for the seat swivel lever must
not be tightened too hard. The lever must
automatically return to its original position
when it has been pressed down.
4.
NB.
On chairs which are equipped with a Trax
seat, it is necessary to remove the plastic
shell in order to be able to reach the screws
on the top of the seat plate.
Loosen the four screws which hold the plastic
seat.
5.
Remove the two screws from the top of the
seat plate with which the spring plate is
mounted.
6.
Turn the spring plate through 90° to its new
position. In order to facilitate the raising of the
spring plate, the centre bearing must be used
as a guide.
Fix the spring plate with the screws in the new
holes.
7.
Screw the plastic seat back in place with
screws, washers and locking nuts.
Place spacers in the front holes. See the
figure to the right
8.
Refit the seat with the centre screw. Tighten it
well. Connect the cable to the rear of the back.
9.
Check that the seat swivel works.
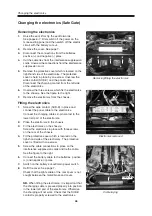
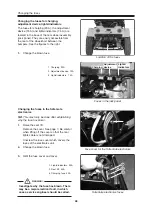
Forwards
The spring
plate screws
are moved
to new holes
Spring plate
Lever
screws
Centre bearing
Seat
screws
(4)
Spring plate
screws
Summary of Contents for Trax
Page 1: ...SERVICE MANUAL Trax US ...
Page 2: ......
Page 57: ...57 Notes ...
Page 60: ......
Page 61: ......
Page 62: ......
Page 63: ......
Page 64: ...Order no 201096 US 0 ...


