background image

SEBU8605-01

99

Maintenance Section

Fan Clearance - Check

NOTICE

Do not

fi

ll the oil

fi

lters with oil before installing them.

This oil would not be

fi

ltered and could be contaminat-

ed. Contaminated oil can cause accelerated wear to

engine components.

6.

Apply clean engine oil to O ring seal (3) for the

new oil

fi

lter (4).

7.

Install the new oil

fi

lter. Spin on the oil

fi

lter (4)

until the O ring contacts the sealing surface (2).

Then rotate the oil

fi

lter ¾ of a full turn. Remove

the container and disposal of the waste oil in

accordance with local regulations.

Fill the Oil Pan

1.

Remove the oil

fi

ller cap. Refer to this

Operation and Maintenance Manual, “Fluid

Recommendations” for more information on

suitable oils. Fill the oil pan with the correct

amount of new engine lubricating oil. Refer

to this Operation and Maintenance Manual,

“Re

fi

ll Capacities” for more information on re

fi

ll

capacities.

NOTICE

If equipped with an auxiliary oil

fi

lter system or a re-

mote

fi

lter system, follow the OEM or the

fi

lter manu-

factures recommendations. Under

fi

lling or over

fi

lling

the crankcase with oil can cause engine damage.

2.

Start the engine and run the engine at “LOW

IDLE” for 2 minutes. Perform this procedure in

order to ensure that the lubrication system has

oil and that the oil

fi

lters are

fi

lled. Inspect the oil

fi

lter for oil leaks.

3.

Stop the engine and allow the oil to drain back to

the oil pan for a minimum of 10 minutes.

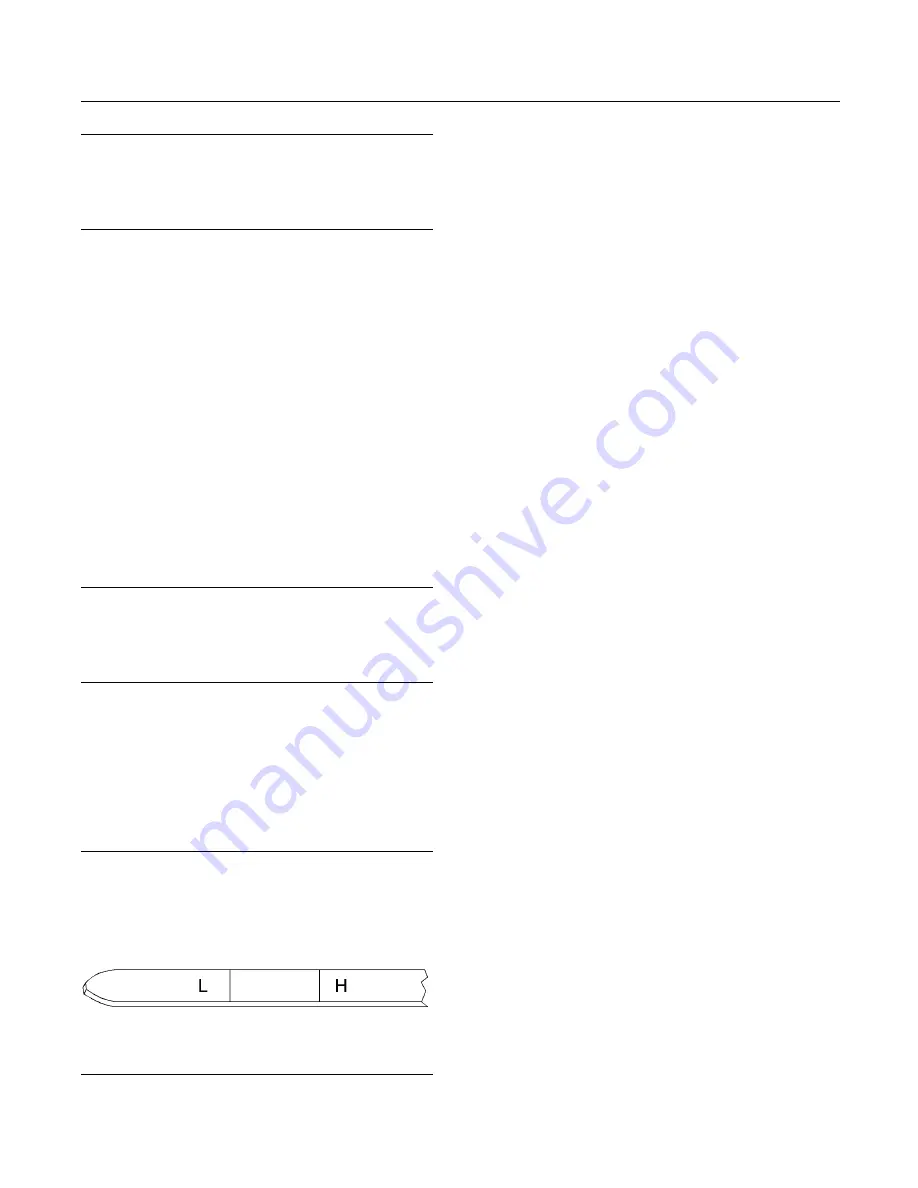
g02173847

Illustration 67
“L” Low
“H” High

4.

Remove the engine oil level gauge in order to

check the oil level. Maintain the oil level between

“L” and “H” marks on the engine oil level gauge.

Do not

fi

ll the crankcase above the “H” mark.

i04323342

Fan Clearance - Check


There are different types of cooling systems. Refer to

the OEM for information on clearance for the fan.

Ensure that the engine is stopped. Ensure that the

cooling system is full. The clearance between the

cover (1) and the fan (2) will require checking. The

gap (A) between the edge of the cover and the tip of

the fan blade must be checked in four equally spaced

positions.

Summary of Contents for 1204E-E44TA

Page 1: ...SEBU8605 01 May 2011 Operation and Maintenance Manual 1204E E44TA and 1204E E44TTA Industrial Engines MK Engine ML Engine ...

Page 2: ...ning explains the hazard and can be either written or pictorially presented Operations that may cause product damage are identified by NOTICE labels on the product and in this publication Perkins cannot anticipate every possible circumstance that might involve a potential hazard The warnings in this publication and on the product are therefore not all inclusive If a tool procedure work method or o...

Page 3: ... 16 Electrical System 16 Engine Electronics 17 Product Information Section Model Views 18 Product Identification Information 27 Operation Section Lifting and Storage 30 Gauges and Indicators 34 Features and Controls 36 Engine Diagnostics 46 Engine Starting 52 Engine Operation 55 Engine Stopping 57 Cold Weather Operation 59 Maintenance Section Refill Capacities 63 Maintenance Recommendations 78 Mai...

Page 4: ...e schedule are referenced to detailed instructions that follow Recommended service should be performed at the appropriate intervals as indicated in the Maintenance Interval Schedule The actual operating environment of the engine also governs the Maintenance Interval Schedule Therefore under extremely severe dusty wet or freezing cold operating conditions more frequent lubrication and maintenance t...

Page 5: ...hat secures the warning signs The warning signs that are loosened could drop off the engine Replace any warning sign that is damaged or missing If a warning sign is attached to a part of the engine that is replaced install a new warning sign on the replacement part Your Perkins distributor can provide new warning signs 1 Universal Warning Do not operate or work on this equipment unless you have re...

Page 6: ...and High Pressure Contact with high pressure fuel may cause fluid penetration and burn hazards High pressure fu el spray may cause a fire hazard Failure to fol low these inspection maintenance and service in structions may cause personal injury or death g02382677 Illustration 3 Typical example ...

Page 7: ...cal example i03566024 General Hazard Information g00104545 Illustration 6 Attach a Do Not Operate warning tag or a similar warning tag to the start switch or to the controls before the engine is serviced or before the engine is repaired Attach the warning tags to the engine and to each operator control station When it is appropriate disconnect the starting controls Do not allow unauthorized person...

Page 8: ...it injector terminals while the engine is operating Do not attempt any repairs or any adjustments to the engine while the engine is operating Do not attempt any repairs that are not understood Use the proper tools Replace any equipment that is damaged or repair the equipment For initial start up of a new engine or for starting an engine that has been serviced make provisions to stop the engine if ...

Page 9: ...i The maximum water pressure for cleaning purposes must be below 275 kPa 40 psi Fluid Penetration Pressure can be trapped in the hydraulic circuit long after the engine has been stopped The pressure can cause hydraulic fluid or items such as pipe plugs to escape rapidly if the pressure is not relieved correctly Do not remove any hydraulic components or parts until pressure has been relieved or per...

Page 10: ...lations for the work place In the United States use Occupational Safety and Health Administration OSHA requirements These OSHA requirements can be found in 29 CFR 1910 1001 Obey environmental regulations for the disposal of asbestos Stay away from areas that might have asbestos particles in the air Dispose of Waste Properly g00706404 Illustration 10 Improperly disposing of waste can threaten the e...

Page 11: ...filler cap slowly in order to relieve pressure Cooling system conditioner contains alkali Alkali can cause personal injury Do not allow alkali to contact the skin the eyes or the mouth Oils Hot oil and hot lubricating components can cause personal injury Do not allow hot oil to contact the skin Also do not allow hot components to contact the skin Batteries Electrolyte is an acid Electrolyte can ca...

Page 12: ...ire Secure connections recommended wiring and correctly maintained battery cables will help to prevent arcing or sparking Contact with high pressure fuel may cause fluid penetration and burn hazards High pressure fu el spray may cause a fire hazard Failure to fol low these inspection maintenance and service in structions may cause personal injury or death After the engine has stopped you must wait...

Page 13: ... displaced Make sure that all clamps guards and heat shields are installed correctly During engine operation this will help to prevent vibration rubbing against other parts and excessive heat i02143194 Crushing Prevention and Cutting Prevention Support the component correctly when work beneath the component is performed Unless other maintenance instructions are provided never attempt adjustments w...

Page 14: ...ause a point of weakness and potential failure Do not check the high pressure fuel lines with the engine or the starting motor in operation After the engine has stopped wait 10 minutes in order to allow the fuel pressure to be purged from the high pressure fuel lines before any service or repair is performed Do not loosen the high pressure fuel lines in order to remove air from the fuel system Thi...

Page 15: ... Such use could result in an explosion and personal injury If a warning tag is attached to the engine start switch or to the controls DO NOT start the engine or move the controls Consult with the person that attached the warning tag before the engine is started All protective guards and all protective covers must be installed if the engine must be started in order to perform service procedures To ...

Page 16: ... the charging unit is operating A spark can cause the combustible gases that are produced by some batteries to ignite To help prevent sparks from igniting combustible gases that are produced by some batteries the negative cable should be connected last from the external power source to the primary position for grounding Check the electrical wires daily for wires that are loose or frayed Tighten al...

Page 17: ...e harness connector for the elec tronic unit injectors while the engine is operating Failure to follow this instruction could result in personal injury or death This engine has a comprehensive programmable Engine Monitoring System The Electronic Control Module ECM has the ability to monitor the engine operating conditions If any of the engine parameters extend outside an allowable range the ECM wi...

Page 18: ...e to individual applications your engine or your aftertreatment may appear different from the illustrations 1204E E44TTA g02409511 Illustration 17 1 Front lifting eye 2 Crankcase breather 3 NOx Reduction system NRS 4 Primary fuel filter 5 Secondary fuel filter 6 Electronic control module ECM 7 Fuel priming pump 8 Oil gauge dipstick 9 Fuel strainer 10 Oil filter 11 Oil sampling valve 12 Oil filler ...

Page 19: ...on Model Views g02409512 Illustration 18 14 Rear lifting eye 15 High pressure turbocharger 16 Low pressure turbocharger 17 Back pressure valve 18 Starting motor 19 Oil drain plug 20 Exhaust outlet 21 Flywheel housing 22 Flywheel 23 NRS cooler ...

Page 20: ...Information Section Model Views g02409862 Illustration 19 24 Belt 25 Air intake 26 Coolant outlet connection 27 Thermostat housing 28 Water pump 29 Coolant inlet connection 30 Crankshaft pulley 31 Belt tensioner 32 Alternator ...

Page 21: ...g02407436 Illustration 20 1 Front lifting eye 2 Crankcase breather 3 NOx reduction system NRS 4 Secondary fuel filter 5 Primary fuel filter 6 Fuel priming pump 7 Fuel strainer 8 Electronic control module ECM 9 Oil filter 10 Oil sampling valve 11 High pressure fuel pump ...

Page 22: ...ion Model Views g02407536 Illustration 21 12 Rear lifting eye 13 Oil gauge dipstick 14 Turbocharger 15 Starting motor 16 Oil drain valve 17 Oil drain plug 18 Back pressure valve 19 Flywheel housing 20 Flywheel 21 Exhaust outlet 22 NRS cooler ...

Page 23: ...on Section Model Views g02407537 Illustration 22 23 Oil filler 24 Air intake 25 Outlet connection for coolant 26 Thermostat housing 27 Water pump 28 Coolant intake connector 29 Rear lifting eye 30 Belt tensioner 31 Alternator 32 Belt ...

Page 24: ...ne is equipped with a single turbocharger The 1204E E44TTA ML engine is equipped with series turbochargers An engine that is equipped with series turbochargers have a low pressure turbocharger and a high pressure turbocharger The Perkins 1204E industrial engines have the following characteristics In line four cylinder Four stroke cycle Turbocharged charge cooled Engine Specifications The front end...

Page 25: ...es Engine monitoring Engine speed governing Control of the injection pressure Cold start strategy Automatic air fuel ratio control Torque rise shaping Injection timing control System diagnostics Aftertreatment low temperature regeneration For more information on electronic engine features refer to the Operation and Maintenance Manual Features and Controls topic Operation Section Engine Diagnostics...

Page 26: ...nts carbon monoxide and hydrocarbons The exhaust gases then enter the DPF where any particulate matter soot and ash will be trapped The CEM uses a passive regeneration process to ensure that normal operation of the engine removes the soot The soot is removed at an equal rate of which the soot is captured The ash remains in the DPF and must be removed at an engine overhaul Engine Service Life Engin...

Page 27: ...rrangement exhaust plate is installed on the mounting plate 1 The location of the arrangement plate mounting plate can alter depending on the application g02109493 Illustration 26 Module Arrangement Exhaust Plate Record the information that is on the plate This information identifies the engine aftertreatment system This information will be required by your Perkins distributor The information is e...

Page 28: ... serial number plate is located on the left side of the cylinder block to the rear of the front engine mounting g02101733 Illustration 28 Serial number plate i03867276 Reference Numbers Information for the following items may be needed to order parts Locate the information for your engine Record the information in the appropriate space Make a copy of this list for a record Keep the information for...

Page 29: ...______________________________ Serial Number _________ _____________________________________ i04274850 Emissions Certification Film An emission label is installed on the front gear cover Note A second emission label will be supplied with the engine If necessary the second emission label will be installed on the application by the original equipment manufacturer g02443596 Illustration 29 Typical ex...

Page 30: ...s Use an adjustable lifting beam to lift the engine All supporting members chains and cables should be parallel to each other The chains and cables should be perpendicular to the top of the object that is being lifted Some removals require lifting the fixtures in order to obtain correct balance and safety To remove the engine ONLY use the lifting eyes that are on the engine Lifting eyes are design...

Page 31: ...SEBU8605 01 31 Operation Section Lifting and Storage Industrial Open Power Unit g02488437 Illustration 31 Typical example 1 Location of front lifting eye 2 Location of rear lifting eye ...

Page 32: ...orage The engine must be stored in a water proof building The building must be kept at a constant temperature Engines that are filled with Perkins ELC will have coolant protection to an ambient temperature of 36 C 32 8 F The engine must not be subjected to extreme variations in temperature and humidity Storage Period An engine can be stored for up to 6 months provided all the recommendation are ad...

Page 33: ... of the vapor phase inhibitor will be lost if the cooling system is open to the atmosphere For maintenance procedures ref to this Operation and Maintenance Manual Aftertreatment No special procedures are required The exhaust outlet of the aftertreatment should be capped Before storing the engine and the aftertreatment must be enclosed in a cover Monthly Checks The crankshaft must be rotated in ord...

Page 34: ...A lower oil pressure is normal at low idle If the load is stable and the gauge reading changes perform the following procedure 1 Remove the load 2 Stop the engine 3 Check and maintain the oil level Jacket Water Coolant Temperature Typical temperature range is 82 to 94 C 179 6 to 201 2 F This temperature range will vary according to engine load and the ambient temperature A 100 kPa 14 5 psi radiato...

Page 35: ...ion of the low pressure lamp should be investigated immediately All lamps will illuminate for 2 seconds in order to check that the lamps are functioning when the keyswitch is turned to the ON position If any of the lamps stay illuminated the reason for illumination should be investigated immediately Instrument panels and Displays In order to monitor the engine a wide verity of instrument panels ar...

Page 36: ...d personal injury The engine can be programmed to the following modes Warning The orange Warning lamp will turn ON and the warning signal is activated continuously in order to alert the operator that one or more of the engine parameters is not within normal operating range Derate The orange warning lamp will be flashing After the warning the engine power will be derated The engine will be derated ...

Page 37: ...down lamp refer to this Operation and Maintenance Manual Monitoring System Table for Indicator Lamps For each of the programmed modes refer to Troubleshooting Guide Indicator Lamps for more information on Indicator Lamps For more information or assistance for repairs consult your Perkins distributor or your Perkins dealer ...

Page 38: ... operation there are no active warnings diagnostic codes or event codes The engine is operating with no detected faults On Solid Off Warning Level 1 warning The engine is operating normally but there is one or more faults with the electronic management system for the engine Flashing Off Warning Level 2 warning The engine continues to be operated but the level of importance of the warning has incre...

Page 39: ...to the application g02395776 Illustration 33 1 Temperature Sensor 2 Connector for Temperature Sensor 3 Soot Sensor Connection 4 Aftertreatment Identification Module 5 Soot Sensor Connection 6 Soot Sensor Note The location of the soot sensor will depend on the application i04238530 Sensors and Electrical Components The illustration within the section shows the typical locations of the sensors and o...

Page 40: ...ectronic Control Module ECM 6 Atmospheric Pressure Sensor Barometric Pressure Sensor 7 Primary Speed Timing sensor Crankshaft Position Sensor 8 Diagnostic Connector 9 Oil Pressure Sensor 10 Fuel Temperature Sensor 11 Solenoid for the High Pressure Fuel Pump 12 Wastegate Regulator 13 Inlet Pressure Sensor for the NOx Reduction System NRS 14 Outlet Pressure Sensor for the NRS 15 Control Valve for th...

Page 41: ...g Sensor Camshaft Position Sensor 20 Starting Motor 21 Water in Fuel Switch 22 Oil Level Switch if Equipped 23 Electric Priming Pump g02413838 Illustration 36 1 Coolant Temperature Sensor 2 Fuel Pressure Sensor Fuel Rail Pressure Sensor 3 Intake Manifold Air Temperature Sensor 4 Intake Manifold Pressure Sensor 5 Electronic Control Module ECM ...

Page 42: ...ure Sensor 7 Primary Speed Timing sensor Crankshaft Position Sensor 8 Diagnostic Connector 9 Oil Pressure Sensor g02413840 Illustration 38 10 Fuel Temperature Sensor 11 Solenoid for the High Pressure Fuel Pump 12 Wastegate Regulator 13 Inlet Pressure Sensor for the NOx Reduction System NRS 14 Outlet Pressure Sensor for the NRS ...

Page 43: ...s and Controls g02414076 Illustration 39 15 Control Valve for the NRS 16 Temperature Sensor for the NRS 17 Back Pressure Valve g02414077 Illustration 40 18 Alternator 19 Secondary Speed Timing Sensor Camshaft Position Sensor 20 Starting Motor ...

Page 44: ...gine Be familiar with the following items Types and locations of the shutoff Conditions which cause each shutoff to function The resetting procedure that is required to restart the engine Alarms The alarms are electrically operated The operation of the alarms is controlled by the ECM The alarm is operated by a sensor or by a switch When the sensor or the switch is activated a signal is sent to the...

Page 45: ...ert the operator when undesirable operating conditions occur NOTICE When an alarm is activated corrective measures must be taken before the situation becomes an emergency in order to avoid possible engine damage If corrective measures are not taken within a reasonable time engine damage could result The alarm will continue until the condition is corrected The alarm may need to be reset Testing Tur...

Page 46: ...diagnostic code will remain active until the problem is repaired The diagnostic code may be retrieved by using the electronic service tool Refer to Troubleshooting Electronic Service Tools for more information i04215570 Diagnostic Flash Code Retrieval Use the DIAGNOSTIC lamp or an electronic service tool to determine the diagnostic flash code Use the following procedure to retrieve the flash codes...

Page 47: ...ator position voltage out of range 249 Engine Fuel Supply Lift Pump Relay out of range 253 Personality module erratic intermittent or incorrect 415 Machine security system module abnormal update rate 426 Ignition key switch loss of signal 429 Electrical System Voltage fault 511 SAE J1939 Data Link abnormal update rate 514 5 Volt sensor DC power supply voltage out of range 516 continued Table 3 con...

Page 48: ...ostic lamp shuts off an intermittent fault may have occurred If a fault has occurred the fault will be logged into the memory of the Electronic Control Module ECM In most cases it is not necessary to stop the engine because of an intermittent code However the operator should retrieve the logged fault codes and the operator should reference the appropriate information in order to identify the natur...

Page 49: ...the customer configuration parameters Customer parameters may be changed repeatedly as operational requirements change Table 5 Customer Specified Parameters Specified Parameters Record Low Idle Parameters ECM Identification Parameter Ether Solenoid Configuration PTO and Throttle Lock Parameters Throttle Lock Feature Installation Status PTO Mode Throttle Lock Engine Set Speed 1 Throttle Lock Engine...

Page 50: ...um Current Solenoid Maximum Current Solenoid Dither Frequency Solenoid Dither Amplitude Charge Air Cooler Outlet Temperature Input Enable Maximum Air Flow Charge Air Cooler Outlet Temperature Minimum Air Flow Charge Air Cooler Outlet Temperature Coolant Temperature Input Enable Status Maximum Air Flow Coolant Temperature Minimum Air Flow Coolant Temperature Transmission Oil Temperature Input Enabl...

Page 51: ...ion Switch Installation Status Air Filter Restriction Switch Configuration Water in Fuel Switch Installation Status User Defined Switch Installation Status Auxiliary Temperature Sensor Installation Status Auxiliary Pressure Sensor Installation Status Diesel Particulate Filter Regeneration Force Inhibit Switch Installation Remote Torque Speed Control Enable Status System Operating Voltage Configura...

Page 52: ...there is a DO NOT OPERATE warning tag or similar warning tag attached to the start switch or to the controls Reset all of the shutoffs or alarm components Ensure that any driven equipment has been disengaged Minimize electrical loads or remove any electrical loads i04084389 Starting the Engine Note Do not adjust the engine speed control during start up The electronic control module ECM will contro...

Page 53: ...ase the engine rpm from 1000 to 1200 rpm This will warm up the engine more quickly Maintaining an elevated low idle speed for extended periods will be easier with the installation of a hand throttle Allow the white smoke to disperse before proceeding with normal operation 7 Operate the engine at low load until all systems reach operating temperature Check the gauges during the warm up period i0366...

Page 54: ...Battery Test i02330138 After Starting Engine Note In ambient temperatures from 0 to 60 C 32 to 140 F the warm up time is approximately three minutes In temperatures below 0 C 32 F additional warm up time may be required When the engine idles during warm up observe the following conditions Do not check the high pressure fuel lines with the engine or the starting motor in operation If you inspect th...

Page 55: ...ings should be observed and the data should be recorded frequently while the engine is operating Comparing the data over time will help to determine normal readings for each gauge Comparing data over time will also help detect abnormal operating developments Significant changes in the readings should be investigated Reduction of Particulate Emissions The Diesel Particulate Filter DPF will reduce p...

Page 56: ...of time Observe the service indicator frequently Keep the air cleaner elements clean Ensure that the turbocharger is operating correctly For more information refer to this Operation and Maintenance Manual Turbocharger Inspect Maintain a good electrical system One faulty battery cell will overwork the alternator This fault will consume excess power and excess fuel The belt should be in good conditi...

Page 57: ...east 10 minutes in order to allow the engine oil to return to the oil pan Contact with high pressure fuel may cause fluid penetration and burn hazards High pressure fu el spray may cause a fire hazard Failure to fol low these inspection maintenance and service in structions may cause personal injury or death After the engine has stopped you must wait for 10 minutes in order to allow the fuel press...

Page 58: ...e coolant for correct antifreeze protection and the correct corrosion protection Add the correct coolant water mixture if necessary Perform all required periodic maintenance on all driven equipment This maintenance is outlined in the instructions from the OEM ...

Page 59: ...diately upon shutdown This means that an engine can be shut down for a period and the engine can still have the ability to start readily Install the correct specification of engine lubricant before the beginning of cold weather Check all rubber parts hoses fan drive belts weekly Check all electrical wiring and connections for any fraying or damaged insulation Keep all batteries fully charged and w...

Page 60: ...gine operating temperatures When starting and stopping an engine many times without being operated in order to warm up completely the carbon deposits become thicker This starting and stopping can cause the following problems Free operation of the valves is prevented Valves become stuck Pushrods may become bent Other damage to valve train components can result For this reason when the engine is sta...

Page 61: ...Weather Note Only use grades of fuel that are recommended by Perkins Refer to this Operation and Maintenance Manual Fluid Recommendations The following components provide a means of minimizing problems in cold weather Glow plugs if equipped Engine coolant heaters which may be an OEM option Fuel heaters which may be an OEM option Fuel line insulation which may be an OEM option The cloud point is a ...

Page 62: ...vals and refueling of the fuel tank This will help prevent water and or sediment from being pumped from the fuel storage tank and into the engine fuel tank Fuel Filters A primary fuel filter is installed between the fuel tank and the engine fuel inlet After you change the fuel filter always prime the fuel system in order to remove air bubbles from the fuel system Refer to the Operation and Mainten...

Page 63: ...partment or System Minimum 1 Maximum 2 Crankcase Oil Sump 6 L 1 32 Imp gal 14 L 3 1 Imp gal 1 The minimum value is the approximate capacity for the crankcase oil sump aluminum which includes the standard factory installed oil filters Engines with auxiliary oil filters will require additional oil Refer to the OEM specifications for the capacity of the auxiliary oil filter The design of the oil pan ...

Page 64: ...cooling system Water temperature regulators help to maintain the engine coolant at the proper operating temperature Cooling system prob lems can develop without water temperature regula tors Many engine failures are related to the cooling system The following problems are related to cooling system failures Overheating leakage of the water pump and plugged radiators or heat exchangers These failure...

Page 65: ...ble 9 and refer to table 10 Table 9 Ethylene Glycol Concentration Freeze Protection 50 Percent 36 C 33 F 60 Percent 51 C 60 F NOTICE Do not use propylene glycol in concentrations that ex ceed 50 percent glycol because of the reduced heat transfer capability of propylene glycol Use ethylene glycol in conditions that require additional protection against boiling or freezing Table 10 Propylene Glycol...

Page 66: ...oling System Maintenance Correct additions to the Extended Life Coolant NOTICE Use only Perkins products for pre mixed or concen trated coolants Mixing Extended Life Coolant with other products re duces the Extended Life Coolant service life Failure to follow the recommendations can reduce cooling sys tem components life unless appropriate corrective ac tion is performed In order to maintain the c...

Page 67: ...ystem Contamination NOTICE Mixing ELC with other products reduces the effective ness of the ELC and shortens the ELC service life Use only Perkins Products for premixed or concen trate coolants Failure to follow these recommenda tions can result in shortened cooling system compo nent life ELC cooling systems can withstand contamination to a maximum of 10 percent of conventional heavy duty antifree...

Page 68: ...CA that is required if necessary Table 14 Equation For Adding The SCA To The Heavy Duty Coolant For Maintenance V 0 014 X V is the total volume of the cooling system X is the amount of SCA that is required Table 15 is an example for using the equation that is in Table 14 Table 15 Example Of The Equation For Adding The SCA To The Heavy Duty Coolant For Maintenance Total Volume of the Cooling System...

Page 69: ...er Ash is the inert part of the particulate matter The system is designed in order to collect this particulate matter There is a very small percentage of particulate matter that is left behind as the soot is burnt This matter will eventually block the filter causing loss of performance and increased fuel consumption Most of the ash comes from the engine oil which is gradually consumed during norma...

Page 70: ...3 in order to find the correct oil viscosity grade for your engine At the specified interval service the engine Use new oil and install a new oil filter Perform maintenance at the intervals that are specified in the Operation and Maintenance Manual Maintenance Interval Schedule Oil analysis Some engines may be equipped with an oil sampling valve If oil analysis is required the oil sampling valve i...

Page 71: ...logical societies The Perkins Specification for Distillate Diesel Fuel provides a known reliable baseline in order to judge the expected performance of distillate diesel fuels that are derived from conventional sources Satisfactory engine performance is dependent on the use of a good quality fuel The use of a good quality fuel will give the following results long engine life and acceptable exhaust...

Page 72: ... API gravity for the minimum density of 801 kg m3 kilograms per cubic meter is 45 and for the maximum density of 876 kg m3 is 30 4 The values of the fuel viscosity are the values as the fuel is delivered to the fuel injection pumps Fuel should also meet the minimum viscosity requirement and the fuel should meet the maximum viscosity requirements at 40 C 104 F of either the ASTM D445 test method or...

Page 73: ...entation of the label that will be installed next to the fuel filler cap on the fuel tank of the application The fuel specifications that are listed in the table 18 are released as acceptable to use on all 1200 series of engine Table 18 Acceptable Fuel Specification for the 1200 Series of Engines 1 Fuel Specification Comments EN590 European Automotive Diesel Fuel DERV ASDM D975 GRADE 1D S15 North ...

Page 74: ...l injection pump If a fuel with a low viscosity is used cooling of the fuel may be required to maintain 1 4 cSt or greater viscosity at the fuel injection pump Fuels with a high viscosity might require fuel heaters in order to lower the viscosity to 4 5 cSt at the fuel injection pump Density Density is the mass of the fuel per unit volume at a specific temperature This parameter has a direct influ...

Page 75: ...l The blends can be used as fuel The most commonly available biodiesel blends are B5 which is 5 percent biodiesel and 95 percent distillate diesel fuel B20 which is 20 percent biodiesel and 80 percent distillate diesel fuel Note The percentages given are volume based The U S distillate diesel fuel specification ASTM D975 09a includes up to B5 5 percent biodiesel European distillate diesel fuel spe...

Page 76: ...vices and can accumulate in DPF The ash accumulation may cause the need for more frequent ash service intervals and cause loss of performance General Requirements Biodiesel has poor oxidation stability which can result in long term problems in the storage of biodiesel Biodiesel fuel should be used within 6 months of manufacture Equipment should not be stored with the B20 biodiesel blends in the fu...

Page 77: ...to be used Perkins require the use of Perkins fuel cleaner The use of the fuel is in order to remove deposits within the fuel system that is created with the use of biodiesel For more information on the use of biodiesel and biodiesel blends refer to Recommendation for Biodiesel Perkins fuel cleaner will remove deposits that can form in the fuel system with the use of biodiesel and biodiesel blends...

Page 78: ... fuel system Before any service or repair is performed on the engine fuel lines perform the following tasks 1 Stop the engine 2 Wait for 10 minutes Do not loosen the high pressure fuel lines in order to remove air from the fuel system Engine Oil To relieve pressure from the lubricating system turn off the engine i04103081 Welding on Engines with Electronic Controls NOTICE Because the strength of t...

Page 79: ...ch in the OFF position 4 Battery disconnect switch in the open position 5 Disconnected battery cables 6 Battery 7 Electrical Electronic component 8 Minimum distance between the component that is being welded and any electrical electronic component 9 The component that is being welded 10 Current path of the welder 11 Ground clamp for the welder 5 Connect the welding ground cable directly to the par...

Page 80: ...7 Fan Clearance Check 99 Every 500 Service Hours or 1 Year Battery Electrolyte Level Check 82 Cooling System Supplemental Coolant Additive SCA Test Add 88 Engine Air Cleaner Element Dual Element Clean Replace 90 Engine Air Cleaner Element Single Element Inspect Replace 92 Fuel System Primary Filter Water Separator Element Replace 101 Fuel System Secondary Filter Replace 103 Radiator Clean 107 Ever...

Page 81: ...ommended Inspect these items for good condition Welds mounting brackets air lines connections clamps and seals Make repairs if necessary i02322311 Alternator Inspect Perkins recommends a scheduled inspection of the alternator Inspect the alternator for loose connections and correct battery charging Check the ammeter if equipped during engine operation in order to ensure correct battery performance...

Page 82: ... battery from freezing If batteries are correctly charged the ammeter reading should be very near zero when the engine is in operation All lead acid batteries contain sulfuric acid which can burn the skin and clothing Always wear a face shield and protective clothing when working on or near batteries 1 Remove the filler caps Maintain the electrolyte level to the FULL mark on the battery If the add...

Page 83: ...amaged Inspect the belt for cracks splits glazing grease displacement of the cord and evidence of fluid contamination The belt must be replaced if the following conditions are present The belt has a crack in more than one rib More than one section of the belt is displaced in one rib of a maximum length of 50 8 mm 2 inch To replace the belt refer to Disassembly and Assembly Alternator Belt Remove a...

Page 84: ...ne cool ing system is performed the procedure must be performed with the engine on level ground This pro cedure will allow you to accurately check the coolant level This procedure will also help in avoiding the risk of introducing an air lock into the coolant system Drain Pressurized System Hot coolant can cause seri ous burns To open the cooling system filler cap stop the engine and wait until th...

Page 85: ...s topic Maintenance Section for more information on cooling system specifications Do not install the cooling system filler cap 3 Start and run the engine at low idle Increase the engine rpm to high idle Operate the engine in order to open the engine thermostat This procedure will allow any air in the system to be purged Decrease the engine speed to low idle Stop the engine 4 Maintain the coolant l...

Page 86: ...ts are cool Loosen the cooling system pressure cap slowly in order to relieve the pres sure 1 Stop the engine and allow the engine to cool Loosen the cooling system filler cap slowly in order to relieve any pressure Remove the cooling system filler cap g02119093 Illustration 50 Typical example 2 Open the drain cock or remove the drain plug 1 on the engine Also remove the drain plug 2 Open the drai...

Page 87: ...rk that is correct for your application g00103639 Illustration 51 Filler cap 5 Clean the cooling system filler cap and inspect the gasket If the gasket is damaged discard the old filler cap and install a new filler cap If the gasket is not damaged use a suitable pressurizing pump in order to test the pressure of the filler cap The correct pressure is stamped on the face of the filler cap If the fi...

Page 88: ...d wait until the cooling system components are cool Loosen the cooling system pressure cap slowly in order to relieve the pres sure 1 Remove the cooling system filler cap slowly in order to relieve pressure 2 Maintain the coolant level at the maximum mark that is correct for your application If the engine is equipped with a sight glass maintain the coolant level to the correct level in the sight g...

Page 89: ...re Remove the cooling system filler cap Note Always discard drained fluids according to local regulations 2 If necessary drain some coolant from the cooling system into a suitable container in order to allow space for the extra SCA 3 Add the correct amount of SCA Refer to the Operation and Maintenance Manual Refill Capacities and Recommendations for more information on SCA requirements 4 Clean the...

Page 90: ...nt becomes plugged the air can split the material of the air cleaner element Unfiltered air will drastically accelerate internal engine wear Refer to the OEM information for the correct air cleaner elements for your application Check the precleaner if equipped and the dust bowl daily for accumulation of dirt and debris Remove any dirt and debris as needed Operating in dirty conditions may require ...

Page 91: ...ation in order to determine the number of times that the primary air cleaner element can be cleaned Do not clean the primary air filter element more than three times The primary air cleaner element must be replaced at least one time per year Cleaning the air filter element will not extend the life of the air filter element Visually inspect the primary air cleaner element before cleaning Inspect ai...

Page 92: ...s or seals Discard damaged primary air cleaner elements i02152042 Engine Air Cleaner Element Single Element Inspect Replace Refer to Operation and Maintenance Manual Engine Air Cleaner Service Indicator Inspect NOTICE Never run the engine without an air cleaner element installed Never run the engine with a damaged air cleaner element Do not use air cleaner elements with damaged pleats gaskets or s...

Page 93: ...set easily or if the yellow core does not latch at the greatest vacuum the service indicator should be replaced If the new service indicator will not reset the hole for the service indicator may be restricted The service indicator may need to be replaced frequently in environments that are severely dusty i02343354 Engine Air Precleaner Check Clean g00287039 Illustration 58 Typical example 1 Wing n...

Page 94: ...stalled is very important The filter element protects the engine from excessive quantities of oil from entering the induction system The filter element also protects the engine aftertreatment system Note Excessive quantities of oil that enter the induction system of the engine can rapidly increase the engine speed without control For information on aftermarket products refer to Operation and Maint...

Page 95: ...the container Check the System g02416001 Illustration 62 Typical example 1 Connection to breather cap for the engine 2 Oil drain 3 Tube assembly to atmosphere 4 Outlet Check the system for damage Replace any component that is damaged Ensure that the outlet 4 is clear and free from obstructions i02323089 Engine Mounts Inspect Note The engine mounts may not have been supplied by Perkins Refer to the...

Page 96: ...to Troubleshooting Oil Contains Fuel i01907674 Engine Oil Sample Obtain The condition of the engine lubricating oil may be checked at regular intervals as part of a preventive maintenance program Perkins include an oil sampling valve as an option The oil sampling valve if equipped is included in order to regularly sample the engine lubricating oil The oil sampling valve is positioned on the oil fi...

Page 97: ... to be drained properly Failure to follow this recommended procedure will cause the waste particles to be recirculated through the engine lubrication system with the new oil Drain the Engine Lubricating Oil Note Ensure that the vessel that will be used is large enough to collect the waste oil After the engine has been run at the normal operating temperature stop the engine Use one of the following...

Page 98: ... 2 Remove the oil filter with a suitable tool Note The following actions can be carried out as part of the preventive maintenance program 3 Cut the oil filter open with a suitable tool Break apart the pleats and inspect the oil filter for metal debris An excessive amount of metal debris in the oil filter may indicate early wear or a pending failure Use a magnet to differentiate between the ferrous...

Page 99: ...ry oil filter system or a re mote filter system follow the OEM or the filter manu factures recommendations Under filling or over filling the crankcase with oil can cause engine damage 2 Start the engine and run the engine at LOW IDLE for 2 minutes Perform this procedure in order to ensure that the lubrication system has oil and that the oil filters are filled Inspect the oil filter for oil leaks 3...

Page 100: ...ved during ALL work on the fuel system Ensure that all adjustments and repairs are performed by authorized personnel that have had the correct training NOTICE Do not crank the engine continuously for more than 30 seconds Allow the starting motor to cool for two minutes before cranking the engine again If air enters the fuel system the air must be purged from the fuel system before the engine can b...

Page 101: ...nspection procedure in order to avoid a fluid penetration hazard Refer to Operation and Maintenance Manual General hazard Information If the engine will not start refer to Troubleshooting Engine Cranks but will not Start i04224203 Fuel System Primary Filter Water Separator Element Replace Fuel leaked or spilled onto hot surfaces or elec trical components can cause a fire To help pre vent possible ...

Page 102: ...9 Spin on the element Do not tighten 2 Lubricate the O ring seal 7 with clean engine oil Do NOT fill the bowl with fuel before the assembly is installed 3 Do not use a tool in order to install the filter assembly Tighten the filter bowl 6 by hand Install the filter bowl 6 and align with your temporary marks A 4 Tighten the valve 2 securely Remove the container and dispose of the fuel in a safe pla...

Page 103: ...l turns are required Loosen vent screw 1 Note Two complete rotations of the valve will release the valve from the filter element 4 Allow the fluid to drain into the container 5 Engage the threads of the valve into the filter element and tighten the drain valve by hand pressure only Remove the tube and remove the container 6 Tighten vent screw securely i04380994 Fuel System Secondary Filter Replace...

Page 104: ...ilter element Engage the threads of the valve into the filter element Do not secure the valve 5 Tighten the vent screw 1 securely 6 Remove the filter bowl 2 Rotate the filter assembly counterclockwise in order to remove the assembly Use a suitable tool in order to remove the filter bowl g02546456 Illustration 74 Typical example 7 Rotate the filter element counterclockwise and remove the filter ele...

Page 105: ...ter and the Sediment Fuel tanks should contain some provision for draining water and draining sediment from the bottom of the fuel tanks Open the drain valve on the bottom of the fuel tank in order to drain the water and the sediment Close the drain valve Check the fuel daily Allow five minutes after the fuel tank has been filled before draining water and sediment from the fuel tank Fill the fuel ...

Page 106: ...e Clamps Refer to the OEM information for further information on removing and replacing fuel hoses if equipped The coolant system and the hoses for the coolant system are not usually supplied by Perkins The following text describes a typical method of replacing coolant hoses Refer to the OEM information for further information on the coolant system and the hoses for the coolant system Pressurized ...

Page 107: ...and steam for removal of oil and grease Clean both sides of the core Wash the core with detergent and hot water Thoroughly rinse the core with clean water If the radiator is blocked internally refer to the OEM Manual for information regarding flushing the cooling system After cleaning the radiator start the engine Allow the engine to operate at low idle speed for 3 to 5 minutes Accelerate the engi...

Page 108: ...es and incorrect maintenance procedures can be factors which contribute to a severe service application Environmental Factors Ambient temperatures The engine may be exposed to extended operation in extremely cold environments or hot environments Valve components can be damaged by carbon buildup if the engine is frequently started and stopped in very cold temperatures Extremely hot intake air reduc...

Page 109: ... turbochargers can also reduce the chance for potential damage to other engine parts Do not inspect the engine with the engine in operation Single Turbocharger g02136079 Illustration 76 Typical example 1 Ensure that the turbocharger is clean and free from dirt before removing components for inspection 2 Remove the pipe from the turbocharger exhaust outlet and remove the air intake pipe 1 Visually ...

Page 110: ...e pipes in order to prevent dirt from entering during reassembly 3 Remove elbow 2 and check for the presence of engine oil 4 Check for obvious heat discoloration of the turbocharger Check for any loose bolts or any missing bolts Check for damage to the oil supply line and the oil drain line Check for cracks in the housing of the turbocharger Ensure that the compressor wheel can rotate freely 5 Che...

Page 111: ...em for leaks at the front crankshaft seal the rear crankshaft seal the oil pan the oil filters and the rocker cover Inspect the piping for the air intake system and the elbows for cracks and for loose clamps Ensure that hoses and tubes are not contacting other hoses tubes wiring harnesses Ensure that the areas around the rotating parts are clear Inspect the alternator belts and any accessory drive...

Page 112: ...pump may cause severe engine overheating problems that could result in the following conditions Cracks in the cylinder head A piston seizure Other potential damage to the engine g01904773 Illustration 79 A Weep hole B Vent hole Note The water pump seals are lubricated by the coolant in the cooling system It is normal for a small amount of leakage to occur Refer to illustration 79 for the position ...

Page 113: ...ngine Company limited parts Perkins Engine Company limited will reimburse the owner for their expenses including diagnostic charges for such an emergency repair These expenses shall not exceed the Perkins Engine Company limited suggested retail price for all warranted parts replaced and labor charges based on Perkins Engine Company limited recommended time allowance for the warranty repair and the...

Page 114: ... be designed built and equipped in order to meet the state s stringent anti smog standards Perkins Engines Company Limited must warrant the emission control system on your engine for the duration of time listed below provided there has not been any abuse neglect or improper maintenance of your engine or your engine aftertreatment system Perkins Engines Company Limited warrants to the initial owner...

Page 115: ...o investigate complaints which are not caused by a defect in Perkins Engines Company Limited material or Perkins Engines Company Limited workmanship Providing timely notice of a warrantable failure and promptly making the product available for repair Limitations Perkins Engines Company Limited is not responsible for resultant damages to an emission related part or component resulting from the foll...

Page 116: ...peration and Maintenance Manual Maintenance Interval Schedule Maintenance Section for the specific interval for the following items ENGINE AFTERTREATMENT SYSTEM The Engine Aftertreatment Systems are sensitive to the type of fuel and lubricants that is used Also the engine aftertreatment systems are sensitive to the operating schedule Low quality fuel lubricants or fluids may cause increases in exh...

Page 117: ...erkins global network 3 Genuine Perkins parts ensure continued engine performance 4 Highly trained technicians carry out all repairs 5 Transferable coverage should you sell your machine Flexible coverage provides the right level of protection for your Perkins Engine Coverage can be extended to 2 years 1 000 hours right up to 10 year 40 000 You can buy an ESC at any time during standard warranty ev...

Page 118: ...vention 13 D Diagnostic Flash Code Retrieval 46 Diagnostic Lamp 46 Driven Equipment Check 89 E Electrical System 16 Grounding Practices 16 Emergency Stopping 57 Emissions Certification Film 29 Emissions Warranty Information 115 Maintenance Recommendations 116 Engine Clean 89 Aftertreatment 90 Engine Air Cleaner Element Dual Element Clean Replace 90 Cleaning the Primary Air Cleaner Elements 91 Serv...

Page 119: ...03 Install the Element 104 Remove the Element 103 Fuel Tank Water and Sediment Drain 105 Drain the Water and the Sediment 105 Fuel Storage Tanks 105 Fuel Tank 105 G Gauges and Indicators 34 Indicator Lamps 35 Instrument panels and Displays 35 General Hazard Information 7 Asbestos Information 9 Containing Fluid Spillage 9 Dispose of Waste Properly 10 Fluid Penetration 9 Pressurized Air and Water 9 ...

Page 120: ...cation Check 108 Environmental Factors 108 Incorrect Maintenance Procedures 108 Incorrect Operating Procedures 108 Starting Motor Inspect 108 Starting the Engine 52 Starting the Engine 52 Starting with Jump Start Cables 53 Stopping the Engine 57 System Pressure Release 78 Coolant System 78 Engine Oil 78 Fuel System 78 T Table of Contents 3 Turbocharger Inspect 109 Engine Install with High Pressure...

Page 121: ...Maintenance Manual Delivery Date Product Information Model Product Identification Number Engine Serial Number Transmission Serial Number Generator Serial Number Attachment Serial Numbers Attachment Information Customer Equipment Number Dealer Equipment Number Dealer Information Name Branch Address Dealer Contact Phone Number Hours Sales Parts Service ...

Page 122: ... 2011Perkins Engines Company Limited Printed in UK All Rights Reserved ...

Reviews: