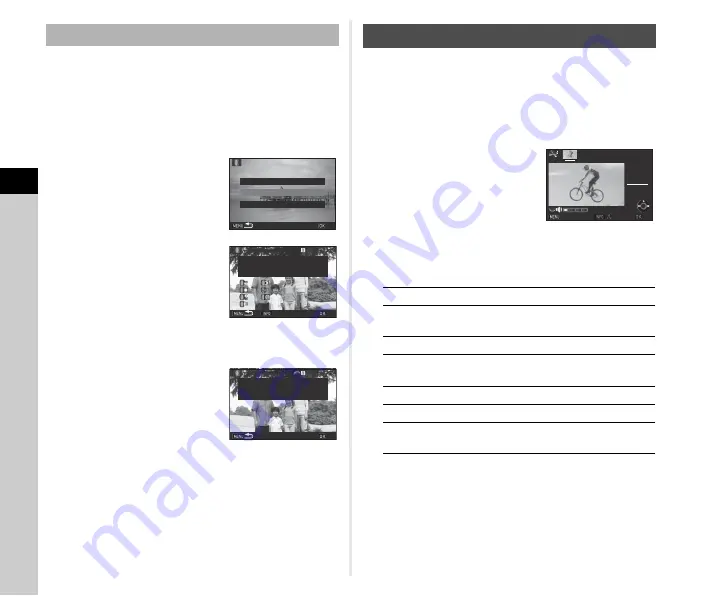
background image

4

Pla
y

ba
ck

84

Retrieves the filter effects of the selected image and applies the 
same filter effects to other images.

1

Display a filter-processed image in single image 
display.

2

Select 

b

 in the playback mode palette.

3

Select [Recreating filter 
effects] and press 

E

.

The filter effects used for the 
selected image appear.

4

To check the parameter 
details, press 

G

.

Press 

G

 again to return to the 

previous screen.

5

Press 

E

.

The image selection screen appears.

6

Use 

Q

 to select an 

image for applying the 
same filter effects, and 
press 

E

.

You can only select an image 
saved in the same memory card 
that has not been processed with a filter.
The save confirmation screen appears.

7

Select [Save to SD1] or [Save to SD2] and press 

E

.

t

 Memo

• If [Searching for the original image] is selected in Step 3, the 

original image prior to digital filter application can be retrieved.

1

Display the movie to edit in single image 
display.

2

Select 

l

 in the playback mode palette.

The movie editing screen appears.

3

Select the point where you 
want to divide the movie.

The frame at the dividing point is 
displayed at the top of the 
screen.
Up to four points can be selected 
to divide the original movie into 
five segments.

Available operations

Proceed to Step 7 if you do not want to delete any segment.

4

Press 

L

.

The screen to select the segments to delete is displayed.

Recreating Filter Effects

Applying the digital filter

Applying the digital filter

Recreating filter effects

Recreating filter effects

Searching for original image

Searching for original image

OK

OK

100-0001

100-0001

20

20

19

19

18

18

17

17

16

16--

--

--

--

--

--

--

--

--

--

--

--

--

--

--

--

--

--

--

--

--

--

--

--

--

--

15

15

14

14

13

13

12

12

11

11

10

10

99

88

77

66

55

44

33

22

11

Reapplies following digital filter

Reapplies following digital filter

effects from previous image

effects from previous image

Details

Details

OK

OK

100-0001

100-0001

Performs digital filter

Performs digital filter

processing to this image

processing to this image

OK

OK

Editing Movies

A

Plays back/pauses a movie.

D

Forwards a frame (when 
paused).

Press and hold 

D

Fast-forwards playback.

C

Reverses a frame (when 
paused).

Press and hold 

C

Fast-reverses playback.

R

Adjusts the sound volume.

G

Confirms/cancels the selected 
dividing point.

00 ' 00"

00 ' 00"
10 ' 00"

10 ' 00"

Stop

Stop

OK

OK

Summary of Contents for K-1

Page 1: ...3D Jun Yao International Plaza 789 Zhaojiabang Road Xu Hui District Shanghai 200032 CHINA http www ricoh imaging com cn http www ricoh imaging co jp english This contact information may change without notice Please check the latest information on our websites SLR Digital Camera Operating Manual To ensure the best performance from your camera please read the Operating Manual before using the camera...

Page 2: ...tective cover Installed on camera Battery grip terminal cover Installed on camera Rechargeable lithium ion battery D LI90 Battery charger D BC90 AC plug cord Strap O ST162 Software CD ROM S SW162 Operating Manual this manual Lenses you can use Lenses that can be used with this camera are D FA DA DA L FA and FA J lenses and lenses that have an 9 Auto position on the aperture ring To use any other l...

Page 3: ...1 1 2 3 4 5 6 7 Introducing the K 1 Getting Started Taking Pictures Playback Functions Sharing Images Changing the Settings Appendix ...

Page 4: ...tures p 44 Recording Movies p 47 Setting the Exposure p 49 Setting the Focus Method p 51 Setting the Drive Mode p 56 Setting the White Balance p 63 Using a Flash p 65 Controlling the Image Finishing Tone p 66 Correcting Images p 68 Using the GPS p 72 How to Use This Manual 1 Introducing the K 1 p 7 Gives you an overview of the K 1 Read this and get to know your K 1 2 Getting Started p 32 Explains ...

Page 5: ... Main Specifications p 115 Index p 122 For Using Your Camera Safely p 126 Care to be Taken During Handling p 127 WARRANTY POLICY p 131 There is a possibility that the illustrations and the display screen of the monitor in this manual are different from the actual ones 4 Playback Functions p 76 Explains various operations for playing back and editing images 5 Sharing Images p 87 Explains how to con...

Page 6: ...n 36 Setting the Display Language 36 Setting the Date and Time 37 Setting the LCD Display 38 Formatting a Memory Card 38 Basic Shooting Operation 39 Shooting with the Viewfinder 39 Shooting with Live View 40 Reviewing Images 42 Taking Pictures 43 Configuring the Capture Settings 43 Memory Card Settings 43 Image Capture Settings 43 Movie Capture Settings 43 Setting the Angle of View 43 Taking Still...

Page 7: ...igital Filters 83 Editing Movies 84 Developing RAW Images 85 Sharing Images 87 Using the Camera with a Computer 87 Setting the Connection Mode 87 Copying an Image in the Memory Card 87 Operating the Camera with a Computer 88 Using the Camera with a Communication Device 88 Enabling the Wi Fi Function 88 Operating the Camera with a Communication Device 89 Changing the Settings 98 Camera Settings 98 ...

Page 8: ...ic fields Strong static charges or the magnetic fields produced by equipment such as radio transmitters could interfere with the monitor damage the stored data or affect the camera s internal circuitry and cause camera misoperation The liquid crystal panel used for the monitor is manufactured using extremely high precision technology Although the level of functioning pixels is 99 99 or better you ...

Page 9: ...minal Dial indicator LED light for backside controls located on backside of the monitor Card access lamp LCD panel Cable switch terminal Self timer lamp Remote control receiver Diopter adjustment dial Dual card slot for SD Memory Cards Tripod socket Battery grip contacts Battery cover unlock knob Battery cover Image plane indicator Wi Fi lamp LED light for lens mount Self timer lamp Remote control...

Page 10: ...ure compensation value p 46 7 Mode dial lock button Press to allow the mode dial to be turned p 39 8 Mode dial Changes the capture mode p 44 9 Mode dial lock release lever Use this lever to release the mode dial lock to operate the mode dial without pressing the mode dial lock button p 41 0 Lock button 7 Temporarily disables dial and button operations to prevent misoperation p 41 a RAW Fx1 button ...

Page 11: ... the same time p 42 p 77 o Playback button 3 Switches to playback mode p 42 Press the button again to switch to capture mode p Change AF Point Card slot switch button c d Enables changing the focusing area p 52 In playback mode press this button to switch between the memory cards inserted in the two slots SD1 and SD2 p 42 q Four way controller ABCD Displays the Drive Mode White Balance or Custom I...

Page 12: ...when carrying the camera t Memo The monitor can be moved in four directions with it placed on the base cradle When the monitor is pulled up from the base cradle as shown in the illustration on the right you can take pictures by holding the camera at the waist high position When the monitor is pulled out you can illuminate the backside controls by pressing 8 Default setting Off Change the setting i...

Page 13: ...the status screen control panel and menu cursor in Initial Settings p 36 Display Indicators Monitor Capture Mode G G 1 1 250 250 1600 1600 F F 5 6 5 6 99999 99999 99999 99999 1 1 250 250 1600 1600 F F 5 6 5 6 99999 99999 99999 99999 99999 99999 99999 99999 10 23 10 23 3200 3200 Status Screen Status Screen Status Screen AUTO ISO Maximum AUTO ISO Maximum AUTO ISO Maximum 02 02 2016 02 02 2016 Standb...

Page 14: ...ration guide for Smart Function p 19 1 9 10 11 12 14 13 15 16 17 20 22 30 29 28 27 26 25 24 23 25 24 23 21 18 19 9 9 9 2 3 4 5 6 7 8 1 1 250 250 1600 1600 F F 5 6 5 6 99999 99999 99999 99999 1 0 1 0 G1A1 G1A1 2000 2000 Live View 1 Capture mode p 44 14 Crop p 43 2 Flash Mode p 65 15 Histogram 3 Drive Mode p 56 16 Operation guide for Smart Function p 19 4 White Balance p 63 5 Custom Image p 66 17 El...

Page 15: ... Pixels p 43 Movie Recorded Pixels p 43 9 High ISO NR p 49 10 Clarity p 70 24 AF Assist Light p 51 11 Skin Tone p 70 25 Contrast AF p 53 12 Digital Filter p 67 26 Focus Peaking p 54 13 HDR Capture p 68 27 Recording Sound Level p 47 14 Pixel Shift Resolution p 70 10 23 10 23 1 2 3 4 3 4 9 8 11 16 21 10 15 20 12 6 5 7 17 22 13 18 23 24 14 19 31 33 32 3200 3200 99999 99999 99999 99999 Highlight Corre...

Page 16: ...function and displays the current latitude longitude altitude lens direction Coordinated Universal Time UTC capture mode and other information 1 1 250 250 1600 1600 F F 5 6 5 6 99999 99999 99999 99999 Status Screen Status Screen 1 250 1 250 F5 6 F5 6 1600 1600 0 0 0 0 Example Tilted 1 5 to the left yellow Vertically level green 1 250 1 250 F5 6 F5 6 1600 1600 0 0 0 0 10 00 00 10 00 00 0 N 36 45 41...

Page 17: ...F2 8 200 200 0 3 0 3 100 0001 100 0001 1 2000 1 2000 F2 8 F2 8 200 200 0 3 0 3 100 0001 100 0001 G Standard Information Display Standard Information Display Single image display Standard Information Display Playback Info Display selection screen Detailed Information Display 1 Captured image 11 AE Metering p 50 2 Rotation information p 79 12 Focusing area AF point p 52 3 Capture mode p 44 13 Shutte...

Page 18: ... 68 46 Tampered image warning 29 Shadow Correction p 68 47 Photographer p 106 48 Copyright Holder p 106 30 AA Filter Simulator p 71 49 Altitude 31 Shake Reduction p 69 Horizon Correction Movie SR 50 Lens direction 51 Latitude 52 Longitude 32 Crop p 43 53 Universal Coordinated Time 33 File Format p 43 34 JPEG Recorded Pixels p 43 Movie Recorded Pixels p 43 Histogram Display 1 Histogram Brightness 2...

Page 19: ... frame p 43 10 Shutter speed Remaining processing time for Slow Shutter Speed NR p 45 AF Mode p 51 Number of shots for Bracketing p 59 2 Spot metering frame p 50 3 AF point p 52 4 Grid Display 5 AF frame p 40 6 Electronic Level vertical tilt p 18 11 Aperture value Bracket value p 59 7 Electronic Level horizontal tilt p 18 12 Focus indicator 8 Flash indicator 13 EV bar scale 9 Focus Method p 51 14 ...

Page 20: ...an turn the electronic level display on or off by a simple button operation p 98 t Memo The LCD panel is illuminated when 8 is pressed You can set the brightness of the LCD panel when 8 is pressed in Illumination Settings of the D2 menu p 100 Electronic Level LCD Panel 1 Shutter speed Number of shots for Bracketing p 59 USB connection mode p 87 Sensor cleaning in progress p 113 2 Aperture value Br...

Page 21: ...tom Image p 66 Using the Smart Function Function Dial Function Page R Disables the setting dial operation p 40 Changes the exposure compensation value p 46 ISO Changes the ISO sensitivity p 49 CH CL Switches between Continuous Shooting and Single Frame Shooting and changes the shooting speed for Continuous Shooting p 57 BKT Changes the bracket value for Bracketing p 59 HDR Changes the type for HDR...

Page 22: ... function 6 Press E The screen of Step 3 reappears 7 Press J The control panel reappears 8 Press F The camera returns to standby mode Using the Control Panel 99999 99999 99999 99999 99999 99999 99999 99999 10 23 10 23 3200 3200 File Format File Format Cancel Cancel OK OK 02 02 2016 02 02 2016 File Format File Format File Format Use ABCD to select an item Use R to change settings Press F to cancel ...

Page 23: ...O AUTO Setting Flash Mode Flash Mode Program Line Program Line Program Line Program Line Exit Exit Crop Crop Memory Card Options Memory Card Options D Range Settings D Range Settings Image Capture Settings Image Capture Settings Noise Reduction Noise Reduction Crop Crop Memory Card Options Memory Card Options D Range Settings D Range Settings Image Capture Settings Image Capture Settings Noise Red...

Page 24: ...Contrast Detection AF Contrast AF 1 Sets the autofocus mode for shooting with Live View Face Detection p 53 Focus Peaking 1 Emphasizes the outline of the subject in focus and makes it easier to check the focus Off p 54 Contrast AF Options Sets the action priority for when 0 is fully pressed Focus priority p 54 AF Assist Light 1 Discharges the assist light when autofocusing in dark locations On p 5...

Page 25: ...gh ISO NR 1 Sets the Noise Reduction setting when shooting with a high ISO sensitivity Auto p 49 A3 Clarity 1 Changes the clarity of images using an image processing function 0 p 70 Skin Tone 1 Enhances the skin tone of images using an image processing function Off p 70 Digital Filter 1 Applies a digital filter effect when taking pictures No Filter p 67 HDR Capture 1 Sets the type of high dynamic ...

Page 26: ...d color of the grid lines displayed during Live View Off Black p 12 Electronic Level 1 Displays the electronic level during Live View On Histogram Display Displays the histogram during Live View Off Highlight Alert Sets overexposed areas to blink red during Live View Off Flicker Reduction Cuts down on the Live View screen flicker by setting the power frequency 50Hz Instant Review Display Time Sets...

Page 27: ...ction for when the main switch is turned to the U position Optical Preview p 55 E Dial Program ming G Sets the Q R M operation for each exposure mode I J XG p 99 H ISO I I J J K I J GLINE L I J GLINE M J N J Rotation Direction Reverses the effect obtained when Q or R is turned Rotate Right Memory Determines which settings to save when the power is turned off On for settings other than Clarity Skin...

Page 28: ...the movie 30p Sound Volume Setting Recording Sound Level 1 Sets the sound level for recording Auto p 47 Wind Noise Reduction 1 Reduces wind noise Off Headphone Volume 1 Sets the sound volume when a headphone is connected 10 C2 D Range Settings Highlight Correction 1 Expands the dynamic range and prevents overexposed areas from occurring Auto p 68 Shadow Correction 1 Expands the dynamic range and p...

Page 29: ...ideshow again from the beginning after the last image is displayed Off Auto Movie Playback Plays back movies during the slideshow On Protect All Images Protects all stored images at once p 103 Delete All Images Deletes all stored images at once Quick Zoom Sets the initial magnification when magnifying images Off p 42 Playback Sound Volume Sets the sound volume during movie playback 10 p 48 Image D...

Page 30: ...ightness of the monitor for outdoor shooting Off p 11 D2 Illumination Settings LCD Panel Sets whether to illuminate the LCD panel when 8 is pressed High p 100 Backside Controls Sets whether to illuminate the backside controls when 8 is pressed after the monitor is pulled out Off Lens Mount Sets whether to illuminate the lens mount when 8 is pressed Off Card Slot Connector Sets whether to illuminat...

Page 31: ... a new folder is created Copyright Information Sets the photographer and copyright information embedded in the Exif data Off p 106 Format Formats a memory card p 38 D4 Pixel Mapping Maps out and corrects defective pixels on the sensor p 112 Dust Removal Cleans the sensor by applying high frequency ultrasonic vibrations On On p 112 Sensor Cleaning Locks the mirror in the up position for cleaning th...

Page 32: ...whether to lock the exposure value when the focus is locked Off 9 Viewfinder Light Sets whether to light up the viewfinder when focusing the subject or changing the focusing area Auto p 17 10 AF with Remote Control Sets whether to use autofocus when shooting with a remote control unit Off p 58 11 Bracketing Order Sets the order for Bracketing shooting 0 p 59 12 One Push Bracketing Shoots all frame...

Page 33: ...e select type options Type1 p 53 21 Auto SR Off Automatically turns off the Shake Reduction function when the drive mode is set to Self timer or Remote Control Enable Auto SR Off p 56 E4 22 Save Rotation Info Saves rotation information when shooting On p 79 23 Save Menu Location Saves the last menu tab displayed on the monitor and displays it again the next time F is pressed Reset Menu Location p ...

Page 34: ...After removing the cover be sure to put the lens down with the lens mount side facing upward 3 Align the lens mount indexes red dots 4 on the camera and the lens and secure by turning the lens clockwise until it clicks To remove the lens Attach the lens cap and then turn the lens counterclockwise while pressing the lens unlock button Attaching the Strap When the Battery Grip is Used When the optio...

Page 35: ...unctions of each lens You can illuminate the lens mount by pressing 8 Default setting Off The lens mount is illuminated even when the camera is turned off Change the setting in Lens Mount of Illumination Settings in the D2 menu p 100 Use the battery D LI90 and battery charger D BC90 exclusively developed for this camera Note AC plug cord UL Listed Type SPT 2 or NISPT 2 18 2 flexible cord rated 125...

Page 36: ...high temperatures The date and time may be reset if you leave the battery out of the camera for long periods of time If this happens set the current date and time again 1 Open the battery cover Lift the battery cover unlock knob turn it towards OPEN to unlock and then pull the cover open 2 Face the A mark on the battery towards the outside of the camera and insert the battery until it locks into p...

Page 37: ...nnections are secure between the terminals The memory card or data may be corrupted if the connection to the power supply is lost while the card is being accessed Be sure to read the manual of the AC adapter kit before using the AC adapter The following memory cards can be used with this camera SD Memory Card SDHC Memory Card SDXC Memory Card In this manual these cards are referred to as memory ca...

Page 38: ...tion Settings in the D2 menu p 100 Turn the camera on and make the initial settings 1 Turn the main switch to ON The first time the camera is turned on after purchase the Language W screen appears t Memo The power automatically turns off when you do not perform any operations within a set period of time Default setting 1min You can change the setting in Auto Power Off of the D2 menu 1 Use ABCD to ...

Page 39: ...plete and press E The LCD Display screen appears Text Size Text Size Std Std Large Large New York New York Initial Setting Initial Setting Settings complete Settings complete Cancel Cancel OK OK Text Size Text Size Std Std New York New York English English Initial Setting Initial Setting Settings complete Settings complete Cancel Cancel OK OK Setting the Date and Time Time Time Date Date Date Form...

Page 40: ...d slot in which the memory card to format is inserted and press D 5 Press A to select Format and press E Formatting starts When formatting is completed the screen of Step 4 reappears 6 Press F twice u Caution Do not remove the memory card while formatting or the card may be damaged Formatting deletes all data both protected and unprotected t Memo When a memory card is formatted the volume label K ...

Page 41: ...n When a retractable lens is attached extend the lens before turning the camera on y How to Use a Retractable Lens p 41 2 Turn the camera on 3 Turn the capture mode selector switch to A 4 Set the focus mode switch to v 5 Set the mode dial to R while pressing the mode dial lock button Basic Shooting Operation Shooting with the Viewfinder ISO Wi Fi HDR BK T CH CL ISO Wi Fi Cro p SR Gr id Sv P AU TO ...

Page 42: ...le operations during Live View Subsequent steps are the same as shooting with the viewfinder t Memo You can use I to focus on the subject p 51 You can preview the image on the monitor and check the depth of field before shooting p 55 You can set the operation and display settings for Instant Review in Instant Review of the A5 menu p 24 When Display Time is set to Hold Instant Review is displayed u...

Page 43: ... the viewfinder while the operation of buttons and dials is disabled The group of buttons and dials to be disabled can be selected in 19 Enable Disable Control of the E3 menu 1 1 250 250 1600 1600 F F 5 6 5 6 99999 99999 99999 99999 Type Buttons and Dials Disabled Type1 Q R J N M H Type2 c ABCD E F How to Use a Retractable Lens If the camera is turned on when a retractable lens such as HD PENTAX D...

Page 44: ...n also be saved in RAW format Save RAW Data You can display grid lines in single image display Set in Grid Display of Image Display in the B1 menu p 27 Reviewing Images C Q to the left Displays the previous image D Q to the right Displays the next image L Deletes the image R to the right Magnifies the image up to 16 Use ABCD to change the area to display Press M to return the display area to the c...

Page 45: ...amera to select automatically the angle of view between the 35mm full frame and the APS C size depending on the lens in use When changing the angle of view the cropping frame is displayed in the viewfinder p 17 Configuring the Capture Settings Memory Card Settings A2 C1 W Sequential Use When the memory card in the SD1 slot becomes full data is saved to the card in the SD2 slot Y Save to Both Saves...

Page 46: ...ng settings p 39 G H I J K L M N Exposure modes Allows you to change the shutter speed aperture value and sensitivity p 44 O to 5 USER modes Allows you to save frequently used exposure modes and capture settings together p 101 Exposure Modes Mode Change Shutter Speed Change Aperture Value Change Sensitivity EV Compen sation G Program Automatic Exposure 1 1 x x H Sensitivity Priority Automatic Expo...

Page 47: ...ure is adjusted For each exposure mode you can set the camera operation for when Q or R is turned or M is pressed Set in E Dial Programming of Button Customization in the A5 menu p 99 u Caution The correct exposure may not be obtained with the selected shutter speed and aperture value when the sensitivity is fixed at a certain sensitivity In M mode the drive mode cannot be set to Continuous Shooti...

Page 48: ...ustment Available operations t Memo The compensation value can also be adjusted by the Smart Function p 19 Program Line A1 A AUTO Determines the appropriate settings B Normal Sets to the basic program automatic exposure all around mode C Hi speed Priority Prioritizes high shutter speeds D DOF Priority Deep Closes the aperture for a deep depth of field E DOF Priority Shallow Opens the aperture for ...

Page 49: ...ture of the camera becomes high during recording recording may be terminated When a retractable lens is attached recording stops if the lens is retracted during recording and an error message is displayed In C mode the Wi Fi function is disabled t Memo When the mode dial is set to other than the modes described in Step 2 the camera operates in G mode You can change the movie settings in the C1 2 m...

Page 50: ...ifications are recommended for external microphones You can record and play back movies while listening to the sound by connecting commercially available headphones to the headphone terminal Microphone terminal Headphone terminal Plug Stereo mini plug ø3 5 mm Format Stereo electret condenser Power Plug in Power Method operating voltage of 2 0 V or lower Impedance 2 2 kΩ Playing Back Movies A Plays...

Page 51: ...ise Reduction in A2 menu and press D The Noise Reduction screen appears 2 Select High ISO NR and press D 3 Select the Noise Reduction level and press E Proceed to Step 7 when other than CUSTOM is selected 4 Select Setting and press D Setting the Exposure Sensitivity Setting the Range of ISO AUTO A1 H Increases the sensitivity as little as possible I Increases the sensitivity at the intermediate le...

Page 52: ...800 800 1600 1600 3200 3200 6400 6400 ISO ISO ISO ISO ISO ISO ISO ISO ISO ISO ISO ISO ISO ISO High ISO NR High ISO NR Reset Reset AE Metering A1 C1 A Multi segment Meters the brightness in multiple different zones of the sensor In backlit conditions this mode automatically adjusts the exposure B Center weighted Meters the brightness with an emphasis on the center of the sensor The sensitivity incr...

Page 53: ...ive View Contrast detection AF Face Detection and Tracking are available p 53 Focusing on the Subject Using the I Button You can use I to focus on the subject The I button operation can be set in Button Customization of the A5 and C2 menus p 98 Setting the AF Mode when Shooting with the Viewfinder A1 x Single mode When 0 is pressed halfway and the subject comes into focus the focus is locked at th...

Page 54: ...ed 8 peripheral points are used as back up points Available only in y mode G Expanded Area AF M Sets the focusing area to the user selected point from 33 points When the subject happens tomove out of the selectedfocusing area after being focused 24 peripheral points are used as back up points Available only in y mode H Expanded Area AF L Sets the focusing area to the user selected point from 33 po...

Page 55: ...priority Release priority 1st Frame Action in AF C Auto Focus priority Release priority Action in AF C Cont Auto Focus priority FPS priority Hold AF Status Off Low Medium High Type1 Switches the function of the arrow keys ABCD to the AF point change mode or the direct key operation mode when c is pressed Type2 Switches the function of the arrow keys ABCD to the AF point change mode only when c is ...

Page 56: ...ppears 2 Select Apply All or Apply One and press E 3 Select Setting and adjust the value Available operations 4 Press E The adjustment value is saved 5 Press F twice The camera returns to standby mode Selecting the Desired Focusing Area ABCD Changes the position of the AF area R Increases reduces the size of the AF area when g is selected M Returns the AF area to the center Contrast AF e f g h i F...

Page 57: ... to Mirror Lock up Shooting Multi exposure or Interval Shooting When using the ASTROTRACER function In C mode u Caution The effects of some functions cannot be checked during Digital Preview or are not applied to the saved preview image Checking the Depth of Field Preview Optical Preview Activates the Optical Preview function to check the depth of field with the viewfinder Digital Preview Activate...

Page 58: ... b Continuously takes pictures while 0 is kept pressed p 57 Self timer O P Y Releases the shutter about 12 seconds or 2 seconds after 0 is pressed p 57 Remote Control Q R S Enables shooting with remote control p 58 Bracketing T 1 U Takes consecutive pictures at different exposure levels p 59 Mirror Lock up Shooting c d Takes images with the mirror raised p 60 Multi exposure V z W X Creates a compo...

Page 59: ... reappears 6 Press E The camera returns to standby mode 7 Press 0 halfway and then fully The shutter is released after about 12 seconds or 2 seconds Continuous Shooting Z Continuous Shooting at high speed a Continuous Shooting at medium speed b Continuous Shooting at low speed Self timer Continuous Shooting H Continuous Shooting H Cancel Cancel OK OK Self timer 12 sec Self timer 12 sec Cancel Canc...

Page 60: ...emo The maximum operating distance of the remote control unit is approximately 4 m from the front of the camera To adjust focus with remote control set in 10 AF with Remote Control of the E2 menu When using the Remote Control Waterproof O RC1 the autofocus system can be operated with the q button on the remote control unit The r button cannot be used Remote Control Q Remote Control R Remote Contro...

Page 61: ...enu The following settings for Bracketing can be set in the E2 menu The bracket value can also be changed by the Smart Function p 19 Bracketing T Bracketing 1 Bracketing Self timer U Bracketing Remote Control 0 3EV 0 3EV x3 x3 Bracketing Bracketing Cancel Cancel OK OK Reset Reset Bracketing Bracketing Self timer Self timer Cancel Cancel OK OK Bracketing Bracketing Remote Control Remote Control Can...

Page 62: ...reen of Step 1 reappears 6 Press E The camera returns to standby mode Mirror Lock up Shooting c Mirror Lock up Shooting d Mirror Lock up Shooting Remote Control Mirror Lock up Shooting Mirror Lock up Shooting Cancel Cancel OK OK Multi exposure V Multi exposure z Multi exposure Continuous Shooting W Multi exposure Self timer X Multi exposure Remote Control Composite Mode Select from Average Additiv...

Page 63: ...osite image replacing only the portions that are brighter compared with the first image Interval Shooting q Interval Shooting Takes pictures at set intervals and saves them U Interval Composite Takes pictures at set intervals and merges them into a single image V Interval Movie Record Takes still pictures at set intervals and saves them as a single movie file Motion JPEG file extension AVI w Star ...

Page 64: ... the specified number of shots are taken In such cases you can set Standby Interval in 13 Interval Shooting Options of the E2 menu so that every picture is taken at the set intervals after each exposure ends The screen displayed in Step 4 varies depending on the 13 Interval Shooting Options setting For q and U the focus position used when the first picture is taken is locked When performing autofo...

Page 65: ...ra automatically adjusts the white balance according to the light source of each area u is not available in C mode The following settings for the white balance can be set in the E3 menu Setting the White Balance g Auto White Balance u Multi Auto White Balance h Daylight i Shade j Cloudy k q Fluorescent Daylight Color r Fluorescent Daylight White s Fluorescent Cool White t Fluorescent Warm White l ...

Page 66: ... Specify the white balance with the color temperature 1 Select p in Step 2 of Setting the White Balance p 63 2 Use R to select 1 to 3 3 Press G 4 Adjust the color temperature Set the color temperature value within the range from 2 500K to 10 000K Available operations 5 Press E The White Balance setting screen reappears t Memo Select Mired in 18 Color Temperature Steps of the E3 menu to set the col...

Page 67: ...speed of 1 200 seconds or slower can be set When Flash Mode is assigned to X or Y you can display the Flash Mode screen in Step 2 by a simple button operation p 98 Using a Flash Connecting a Flash Setting the Flash Mode A1 A Auto Flash Discharge Automatically measures the ambient light and determines whether to use the flash B Auto Flash Red eye Discharges a pre flash for red eye reduction before ...

Page 68: ...ode is set to Multi exposure or Interval Shooting Controlling the Image Finishing Tone Custom Image Auto Select Bright Natural Portrait Landscape Vibrant Radiant Muted Flat Bleach Bypass Reversal Film Monochrome Cross Processing Main switch to U Uses Digital Preview to preview the background image with the selected setting applied H Saves the preview image only when the image can be saved 0 0 0 0 ...

Page 69: ...te settings 1 to 3 for the parameter 1 Select Digital Filter in A3 or C2 menu and press D The Digital Filter setting screen appears 2 Select a filter Select No Filter to not shoot with a digital filter Available operations when shooting with the viewfinder Proceed to Step 6 if you do not need to change the parameters 3 Press G The parameter setting screen appears Saving the Cross Processing Settin...

Page 70: ...rrection functions from D Range Settings of the A2 or C2 menu u Caution When the sensitivity is set to less than ISO 200 Highlight Correction cannot be set to ON t Memo Highlight Correction in C mode can be set to AUTO or OFF Takes three consecutive images at three different exposure levels to create a single composite image with them 1 Select HDR Capture in A3 menu and press D The HDR Capture scr...

Page 71: ... p 108 The features are disabled when using an accessory such as rear converters that is attached between the camera and the lens When File Format is set to RAW or RAW in Image Capture Settings of the A2 menu correction information is saved as a RAW file parameter and you can select whether to apply the correction to the images when developing them For the RAW Development function Color Fringe Cor...

Page 72: ... a moving object exists in the frame mosaic pattern noise may appear in the image In such case select Motion Correction On When taking pictures with Pixel Shift Resolution use a tripod and mount the camera on it securely The use of Self timer Remote Control or Mirror Lock up Shooting is recommended Quality Level and Texture Adjustment Clarity A3 Skin Tone A3 3 Skin Tone Skin Tone Digital Filter Di...

Page 73: ... returns to standby mode 3 Press K Live View is displayed and the message Adjust the composition of the image appears 4 Adjust the composition The amount of adjustment the number of steps is displayed at the top right of the screen Available operations 5 Press E The camera returns to standby mode in Live View Anti Aliasing Filter Simulator A4 Type1 Takes pictures while balancing the resolution and...

Page 74: ... while the GPS is on the GPS information is stored internally in the image file The GPS information is not stored in the movie file You can check the GPS information in Detailed Information Display in playback mode p 15 Using the GPS GPS Logging Saves the GPS positioning data received periodically to the memory card p 74 ASTROTRACER Tracks and captures celestial bodies p 75 By matching the movemen...

Page 75: ...ct Calibration and press D The Calibration screen appears 3 Rotate the camera according to the instruction displayed on the monitor The result of calibration appears 4 Press E The screen of Step 2 reappears If The operation could not be completed correctly appears change the camera direction and perform a calibration again u Caution When performing a calibration be careful not to drop the camera W...

Page 76: ...e the GPS log data as a log file LOG END is displayed also when the power is turned off due to low battery level or when the battery is replaced In this case save the GPS log file before restarting GPS logging During GPS logging you cannot change the settings of Logging Interval and Logging Duration A log file KML format is saved in the GPSLOG folder on the memory card with a file name of a sequen...

Page 77: ...he Exposure Mode to M and set the Focus Method to w 2 Set the shooting conditions Available operations 3 Adjust the focus and press 0 fully Shooting starts 4 Press 0 fully again Shooting stops When the timed exposure is enabled shooting stops automatically after the set time has elapsed u Caution This function cannot be used in combination with some other functions p 107 Shooting Celestial Bodies ...

Page 78: ...s p 79 b Digital Filter 1 Processes images with digital filters p 83 c Color Moiré Correction 1 2 Reduces color moiré in images p 82 d Resize 1 2 Changes the number of recorded pixels of the image p 81 e Cropping 1 Crops out only the desired area of an image p 82 f Protect Protects images from being accidentally erased p 103 h Slideshow Plays back images one after another p 79 i Save as Manual WB ...

Page 79: ...he images selected individually along with the images selected by specifying the range to delete Use the same steps to select multiple images for the following functions Image Copy p 81 RAW Development p 85 Protect p 103 Changing the Playback Method Displaying Multiple Images ABCD Moves the selection frame Q Shows the next previous page d Switches between the SD1 card and the SD2 card G Shows the ...

Page 80: ...ng Multiple Images p 77 The display style selection screen appears 2 Select Calendar Filmstrip Display Available operations 3 Press E The selected image appears in single image display Displaying Images by Folder ABCD Moves the selection frame L Deletes the selected folder Deleting a Folder 100_0707 100_0707 100 100 101 101 102 102 103 103 104 104 105 105 106 106 107 107 123 123 Displaying Images ...

Page 81: ...e image display 2 Select a in the playback mode palette The selected image is rotated in 90 increments and the four thumbnail images are displayed 3 Use ABCD to select the desired rotation direction and press E The image rotation information is saved and the camera returns to single image display mode u Caution When 22 Save Rotation Info is set to Off in the E4 menu image rotation information is n...

Page 82: ...e camera information is displayed on the screen of the connected AV device u Caution While the camera is connected to an AV device nothing is displayed on the camera monitor Also you cannot adjust the sound volume on the camera Adjust the volume on the AV device t Memo Check the operating manual of the AV device and select a suitable input terminal for connecting the camera By default the maximum ...

Page 83: ...G images captured with this camera can be resized or cropped Images already resized or cropped to the minimum file size cannot be processed Changes the number of recorded pixels of the selected image and saves it as a new file 1 Display the image to edit in single image display 2 Select d in the playback mode palette The screen to select the number of recorded pixels appears 3 Use CD to select the...

Page 84: ...iré in images 1 Display the image to edit in single image display 2 Select c in the playback mode palette If the image cannot be edited This image cannot be processed appears 3 Use CD to select the correction level and press E The save confirmation screen appears 4 Select Save to SD1 or Save to SD2 and press E u Caution The Color Moiré Correction function can be used only for the JPEG images captu...

Page 85: ...he screen of Step 3 reappears u Caution Only JPEG and RAW images captured with this camera can be edited with the digital filters RAW images captured using HDR Capture or Pixel Shift Resolution cannot be processed with Digital Filter t Memo Up to 20 filters including the digital filter used during shooting p 67 can be applied to the same image Processing Images with Digital Filters Base Parameter ...

Page 86: ...t to divide the movie The frame at the dividing point is displayed at the top of the screen Up to four points can be selected to divide the original movie into five segments Available operations Proceed to Step 7 if you do not want to delete any segment 4 Press L The screen to select the segments to delete is displayed Recreating Filter Effects Applying the digital filter Applying the digital filt...

Page 87: ...playback mode palette The screen for selecting the processing type appears 2 Select the desired option and press E When Select single image is selected proceed to Step 6 The image folder selection screen appears 3 Select image s or a folder Refer to Step 2 of Deleting Selected Images p 77 for how to select image s Proceed to Step 5 if a folder is selected 4 Press G The screen for selecting the par...

Page 88: ...ting item of which parameters can be changed varies depending on the item used during shooting With the provided software Digital Camera Utility 5 you can develop RAW images on a computer Develop images as shot Allows you to change only File Format Aspect Ratio JPEG Recorded Pixels JPEG Quality and Color Space Develop images with modified settings Allows you to change all setting items White Balan...

Page 89: ...the camera and connect the USB cable to the USB terminal 4 Connect the USB cable to the USB port of the computer 5 Turn the camera on The camera is recognized as a removable disk 6 Save the captured images to the computer 7 Disconnect the camera from the computer u Caution The camera cannot be operated while it is connected to a computer To operate the camera terminate the USB connection on the co...

Page 90: ...ion p 89 When the Wi Fi function is enabled the Wi Fi lamp lights up and the 7 white icon indicating the wireless LAN status is displayed on the status screen and Live View screen When 8 gray is displayed a connection with the communication device is not established correctly t Memo Even after the Wi Fi function is enabled it returns to an inactive state when the camera is turned off and on again ...

Page 91: ...e download site t Memo The Image Sync screenshots used in this manual are the ones under development and may differ from the actual display The screen layout and elements may be also changed due to causes such as the version upgrade of the application For details on how to operate the communication device refer to the operating manual of the device Setting from the Menus D2 Setting with the Smart ...

Page 92: ...n device 3 Tap PENTAX K 1 The Choose a Network screen appears on the communication device 4 Tap PENTAX_xxxxxx in the Network List The Enter Password screen appears 5 Enter the password and tap Connect A Wi Fi connection is established between the camera and the communication device The list of images appears on the Image Sync screen t Memo Refer to Communication Info in Wi Fi of the D2 menu for th...

Page 93: ...ished between the camera and the communication device 4 Start Image Sync on the communication device Image Sync is started and the list of images appears Flick left or right on the screen to change screens t Memo You can change operation modes also by tapping the buttons displayed at the bottom of each screen When an iOS Device is Used Screens of Image Sync Application image list Camera image list...

Page 94: ...cessary Shooting with a Communication Device 1 Settings p 96 2 Capture mode 3 Live View 4 AF frame 5 White Balance Shutter Speed Aperture value EV Compensation Sensitivity 6 Live View on off 7 Operation modes 8 Communication icon 9 Battery level 10 Thumbnail of the last captured image When tapped the camera image list is displayed 11 Card slot number File Format Image storage capacity 12 Drive Mod...

Page 95: ...ing the ASTROTRACER function The captured images are saved to the memory card inserted in the camera Shooting cannot be performed if there is not enough available space on the memory card t Memo Shooting can also be performed by tapping the Live View image Set in Touch AF on the Settings screen p 96 While shooting with Image Sync the shutter release always has priority regardless of the Contrast A...

Page 96: ...ing images in application image list display you can select the image storage location album from Application or Gallery or Camera Roll 1 Tap 4 2 Select the album The images in the selected album are displayed Flick left right Shows the previous next image Pinch out in Magnifies reduces the image Selecting the Image Storage Location ...

Page 97: ... hold one of the selected images 4 Select the desired action t Memo When you touch and hold the desired image on the image list display screen or the shooting information display screen the same screen as Step 4 appears and you can select the action to apply Selecting Multiple Images ...

Page 98: ...e changed Communication Settings The password and wireless channel can be changed Changing the Settings Touch AF Sets whether to perform only autofocus or perform shooting after autofocus when touching the Live View image Image Capture Settings Changes the settings for Memory Card Options File Format and JPEG Recorded Pixels General Settings Changes the communication settings and the display langu...

Page 99: ...5 Sharing 97 Device Information Language 4 Change the settings and tap 1 ...

Page 100: ...ing Fx1 Button Fx1 Button Setting Function Page Fx1 Button Fx2 Button One Push File Format Temporarily changes the file format p 99 Outdoor View Setting Adjusts the brightness of the monitor for outdoor shooting p 11 Flash Mode Sets the flash mode p 65 Pixel Shift Resolution Changes the setting of the Pixel Shift Resolution function p 70 Shake Reduction Turns the Shake Reduction and Movie SR funct...

Page 101: ...ation in A5 or C2 menu and press D The E Dial Programming screen appears 2 Select an exposure mode and press D The screen for the selected exposure mode appears 3 Press D and use AB to select the combination of functions for when Q and R are turned and M is pressed Setting the One Push File Format Z The recording format returns to the File Format setting of Image Capture Settings in the A2 menu af...

Page 102: ... For Remote Control the remote control receiver lamp blinks during the standby for shooting Setting the Lighting on the Camera Body D2 Specifying the Illumination Button Settings LCD Panel Off Low High Backside Controls Off Low High Lens Mount Off On Card Slot Connector Off On Setting the Illumination of the Indicator Lamps Wi Fi Off Low High GPS Off Low High Self timer Off On Remote Control Off O...

Page 103: ...SER1 to USER5 and press D The text entry screen appears 3 Change the text Up to 18 single byte alphanumeric characters and symbols can be entered Available operations Saving Frequently Used Settings A5 Exposure Mode except for R Sensitivity EV Compensation Drive Mode White Balance Custom Image A1 5 menu settings with exceptions E1 4 menu settings Saving the Settings Save USER Mode Save USER Mode R...

Page 104: ...o display the local date and time on the monitor when traveling abroad and also save images time stamped with the local date and time 1 Select World Time in D1 menu The World Time screen appears 2 Select the time you wish to display in Time Setting F Hometown or G Destination can be selected 3 Select G Destination and press D The G Destination screen appears 4 Use CD to select a city Use R to chan...

Page 105: ...e inserted memory card is formatted 1 Select f in the playback mode palette The screen for selecting the processing type appears 2 Select Select image s or Select a folder and press E 3 Select the image s or folder to protect Refer to Step 2 of Deleting Selected Images p 77 for how to select image s Proceed to Step 5 if Select a folder is selected 4 Press G The confirmation screen appears 5 Select...

Page 106: ...cter string 3 Press B and then press D The text entry screen appears 4 Change the text Enter five single byte alphanumeric characters Available operations Selecting the Folder File Settings D3 Create New Folder Folder Name Date The four digits of the month and day of the shooting date are assigned after the folder number The month and day appear according to the date format set in Date Adjustment ...

Page 107: ...nding on the Color Space setting of Image Capture Settings in the A2 menu The first four characters can be changed to a character string of your choice 1 Select File Name in D3 menu and press D The File Name screen appears 2 Select A or C and press D The text entry screen appears 3 Change the text Up to four single byte alphanumeric characters can be entered as an alternative for the first part of...

Page 108: ...be entered Refer to Steps 3 and 4 of Editing a Setting Name p 101 for how to enter text 5 Press F twice t Memo The Exif information can be checked in Detailed Information Display of the playback mode p 15 or using the provided software Digital Camera Utility 5 File No Z Continues the sequential numbering for the file name even if a new folder is created Y Returns the file number of the first image...

Page 109: ...l Functions Clarity Skin Tone Digital Filter HDR Capture Pixel Shift Resolution Distortion Correction Diffraction Correction ASTRO TRACER AA Filter Simulator Save RAW Data Flash Drive Mode Continuous Shooting 2 Bracketing 2 Mirror Lock up Shooting 2 Multi exposure 2 Interval Shooting 1 1 2 3 Interval Composite 2 Interval Movie Record 1 1 Star Stream 2 HDR Capture Pixel Shift Resolution AA Filter S...

Page 110: ... FAk 250 600mm F5 6 ED IF 9 Fixed to Spot 10 J with the aperture set to wide open The aperture ring has no effect on the actual aperture value u Caution Set the angle of view in Crop of the A2 and C1 menus when using a DA or DA L lens p 43 When the angle of view is changed to be equivalent to that of the APS C size image sensor the cropping frame is displayed in the viewfinder p 17 Perform shootin...

Page 111: ... the aperture ring FA For 35mm full frame size Power zoom not compatible FA J For 35mm full frame size Without the aperture ring F For 35mm full frame size KAF2 DA For APS C size SDM compatible Without the aperture ring FA For 35mm full frame size Power zoom compatible KAF3 D FA For both 35mm full frame size and APS C size DA For APS C size Dedicated for SDM Without the aperture ring Using the Ape...

Page 112: ...26 Using Aperture Ring to Enable in the E4 menu 2 Turn the camera off 3 Attach a lens to the camera and turn the camera on The Input Focal Length screen appears 4 Use AB to set the focal length Press C to select a value from the list When using a zoom lens select the actual focal length which the zoom is set to 5 Press E The camera returns to standby mode t Memo The focal length setting can be cha...

Page 113: ...360FGZ II you can use the high speed sync flash to discharge a flash and take a picture at a shutter speed faster than 1 200 seconds Set the exposure mode to I K or L By using two or more external flashes AF540FGZ AF540FGZ II AF360FGZ or AF360FGZ II you can use the wireless mode to shoot in P TTL flash mode without connecting the flash units with a cord In this case set the camera channel on the e...

Page 114: ...ow contrast objects the sky white walls etc dark colors intricate designs rapidly moving objects or scenery shot through a window or a net like pattern Lock focus on another object located at the same distance as your subject then aim at the target and take a picture Alternatively use w The subject is too close Move away from the subject and take a picture The flash does not discharge The flash mo...

Page 115: ...side the lens mount area If the power is turned off during cleaning it may cause damage to the shutter the CMOS sensor and the mirror Hold the camera with the lens mount down while cleaning the sensor so dust will fall away from the sensor when the blower is used When the battery level is low the message Not enough battery power remaining to clean sensor is displayed on the monitor Install a fully...

Page 116: ...ot enough battery power remaining to clean sensor Not enough battery power remaining to update the firmware Unable to update firmware There is a problem with the firmware update file The firmware cannot be updated The update file is damaged Try downloading the update file again Image folder cannot be created The maximum folder number 999 is being used and no more images can be saved Insert a new m...

Page 117: ...neously recordable Color Space sRGB AdobeRGB Storage Media SD SDHC SDXC memory card UHS I compatible Dual Card Slots Sequential Use Save to Both Separate RAW JPEG Copying images between slots possible Storage Folder Folder Name Date 100_1018 101_1019 or a user assigned name default PENTX Storage File File Name user assigned name default IMGP File No Sequential Numbering Reset Type Pentaprism Finde...

Page 118: ...Resolution Shutter Speed Auto 1 8000 to 30 seconds Manual 1 8000 to 30 seconds 1 3 EV steps or 1 2 EV steps Bulb Mode Selection Still picture Single frame Continuous H M L Self timer 12 sec 2 sec continuous Remote Control immediately 3 sec continuous Bracketing 1 2 3 or 5 frames Mirror Lock up Shooting 2 Multi exposure 3 Interval Shooting 1 Interval Composite 1 Interval Movie Record 1 Star Stream ...

Page 119: ...Correction D Range Settings Highlight Correction Shadow Correction Noise Reduction Slow Shutter Speed NR High ISO NR GPS GPS Logging Logging Interval Logging Duration Memory Card Options GPS Time Sync Electronic Compass Available ASTROTRACER Available Horizon Correction SR On corrects up to 1 degree SR Off corrects up to 2 degrees Composition Adjustment Adjustment range of 1 5 mm up down left or r...

Page 120: ...tion in AF C Auto Focus priority Release priority Action in AF C Continuous Auto Focus priority FPS priority Hold AF Status Off Low Medium High AF in Interval Shooting Locks focus at 1st exposure Adjusts focus for each shot AF with Remote Control Off On Operation Control Lock Type1 QR J N M H Type2 ABCD c E F Text Size Standard Large World Time World Time settings for 75 cities 28 time zones AF Fi...

Page 121: ...cy 2412 to 2462 MHz channels Ch 1 to Ch 11 Security Authentication WPA2 Encryption AES Dimensions Approx 136 5 mm W 110 mm H 85 5 mm D excluding protrusions Weight Approx 1010 g Including the dedicated battery and an SD Memory Card Approx 925 g body only Temperature 10 to 40 C 14 to 104 F Humidity 85 or less no condensation Package Contents Strap O ST162 ME Viewfinder Cap Rechargeable Lithium ion ...

Page 122: ...ao Paulo Rio de Janeiro Europe Lisbon Madrid London Paris Amsterdam Milan Rome Copenhagen Berlin Prague Stockholm Budapest Warsaw Athens Helsinki Moscow Africa West Asia Dakar Algiers Johannesburg Istanbul Cairo Jerusalem Nairobi Jeddah Tehran Dubai Karachi Kabul Male Delhi Colombo Kathmandu Dacca East Asia Yangon Bangkok Kuala Lumpur Vientiane Singapore Phnom Penh Ho chi Minh Jakarta Hong Kong Be...

Page 123: ... following site http www apple com quicktime download Operating Environment for USB Connection and Provided Software Windows OS Windows 10 Windows 8 1 32 bit 64 bit Windows 8 32 bit 64 bit Windows 7 32 bit 64 bit or Windows Vista 32 bit 64 bit CPU Intel Core 2 Duo or higher RAM 4 GB or more HDD For installing and starting up the program Approx 100 MB or more of available space For saving image fil...

Page 124: ...ting 59 Bracketing Order 59 Bright Custom Image 66 Brightness adjustment 68 Brightness histogram 16 Bulb B Mode Options 30 Bulb Exposure 44 Button 8 Button Customization 98 C Cable switch terminal 7 Calendar Filmstrip Display 78 Calibration 73 Camera route 74 Capture mode 44 Capture mode selector switch 39 Card access lamp 7 Catch in Focus 110 Center weighted metering 50 Certification Marks 129 Ch...

Page 125: ...r 40 Focus Method 51 Focus mode switch 39 51 Focus Peaking 54 Folder display 78 Folder Name 104 Format 38 Four way controller 9 19 Framerate 43 Fx1 Fx2 button 98 G GPS 72 GPS Indicator Lamp 72 GPS Logging 74 GPS Time Sync 72 GPS E Compass 74 Grid Display 17 42 Guide Display 40 H HDMI Out 80 HDR Capture 68 Headphone Volume 47 Headphones 48 High Contrast Digital Filter 67 83 High ISO NR 49 Highlight...

Page 126: ...mode 42 Playback mode palette 76 Playback Sound Volume 48 Portrait Custom Image 66 Posterization Digital Filter 83 Power 36 Preview 55 Preview Dial 55 Processing images 81 Program Automatic Exposure 44 Program Line 46 Protect 103 Protect All Images 103 Provided software 121 PTP 112 Q Quality 43 Quality level adjustment 70 Quick Zoom 42 QuickTime 121 R Radiant Custom Image 66 RAW 43 RAW Development...

Page 127: ...de 44 Tethered shooting 88 Text input 101 Text Size 37 Texture adjustment 70 Thumbnail display 42 77 Time Setting 102 Tone Expansion Digital Filter 83 Toy Camera Digital Filter 67 83 Tracking Contrast AF 53 Tripod socket 7 TTL phase matching autofocus 51 Tungsten White Balance 63 I mode 44 U Unicolor Bold Digital Filter 67 83 USB Connection 87 121 USB terminal 87 User registration 6 Using Aperture...

Page 128: ...fied power or voltage can cause a fire electric shock or camera breakdown The specified voltage is 100 240V AC Do not disassemble or modify the product This can cause a fire or electric shock If the generation of smoke or strange odor from the product or other abnormality occurs immediately discontinue using and consult your nearest service center Continued use can cause a fire or electric shock I...

Page 129: ... or transferring your data to a computer etc is not possible due to a malfunction of your camera or recording media memory cards etc To keep the battery in optimum condition avoid storing it in a fully charged state or in high temperatures If the battery is left inserted and the camera is not used for a long time the battery will over discharge and shorten the battery s life Charging the battery a...

Page 130: ...of important data on a computer Format new SD Memory Cards Also format SD Memory Cards previously used with other cameras Please note that deleting data stored on an SD Memory Card or formatting an SD Memory Card does not completely erase the original data Deleted data can sometimes be recovered using commercially available software If you are going to discard give away or sell your SD Memory Card...

Page 131: ...of America and other countries Macintosh OS X QuickTime iPhone and App Store are trademarks of Apple Inc registered in the U S and other countries Intel and Intel Core are trademarks of Intel Corporation in the U S and or other countries SDXC Logo is a trademark of SD 3C LLC Google Google Play Android and Google Earth are trademarks or registered trademarks of Google Inc Wi Fi is a registered trad...

Page 132: ...m must reproduce the above copyright notice this list of conditions and the following disclaimer in the documentation and or other materials provided with the distribution 3 The name of the author may not be used to endorse or promote products derived from this software without specific prior written permission THIS SOFTWARE IS PROVIDED BY THE AUTHOR AS IS AND ANY EXPRESS OR IMPLIED WARRANTIES INC...

Page 133: ...can be returned to you owing to the complicated customs procedures required If the camera is covered by warranty repairs will be made and parts replaced free of charge and the camera will be returned to you upon completion of servicing If the camera is not covered by warranty regular charges of the manufacturer or of its representatives will apply Shipping charges are to be borne by the owner If y...

Page 134: ...nto an outlet on a circuit different from that to which the receiver is connected Consult the dealer or an experienced radio TV technician for help FOR CALIFORNIA U S A ONLY Perchlorate Material special handling may apply The lithium battery used in this camera contains perchlorate material which may require special handling See www dtsc ca gov hazardouswaste perchlorate Declaration of Conformity ...

Page 135: ...té Cet appareil numérique de la classe B est conforme à la norme NMB 003 B du Canada Le présent appareil est conforme aux CNR d Industrie Canada applicables aux appareils radio exempts de licence L exploitation est autorisée aux deux conditions suivantes 1 l appareil ne doit pas produire de brouillage et 2 l utilisateur de l appareil doit accepter tout brouillage radioélectrique subi même si le br...

Page 136: ...ing and thus prevent potential negative effects on the environment and human health which could otherwise arise due to inappropriate waste handling If a chemical symbol is added beneath the symbol shown above in accordance with the Battery Directive this indicates that a heavy metal Hg Mercury Cd Cadmium Pb Lead is present in the battery at a concentration above an applicable threshold specified i...

Page 137: ...Memo ...

Page 138: ...Memo ...

Page 139: ... Battery grip terminal cover Installed on camera Rechargeable lithium ion battery D LI90 Battery charger D BC90 AC plug cord Strap O ST162 Software CD ROM S SW162 Operating Manual this manual Lenses you can use Lenses that can be used with this camera are D FA DA DA L FA and FA J lenses and lenses that have an 9 Auto position on the aperture ring To use any other lens or accessory see p 108 Memo e...

Page 140: ...3D Jun Yao International Plaza 789 Zhaojiabang Road Xu Hui District Shanghai 200032 CHINA http www ricoh imaging com cn http www ricoh imaging co jp english This contact information may change without notice Please check the latest information on our websites SLR Digital Camera Operating Manual To ensure the best performance from your camera please read the Operating Manual before using the camera...

Reviews: