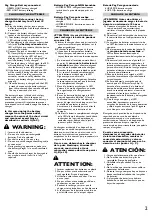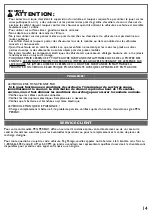
INITIAL BATTERY CHARGE
!
• Connect battery charger to a 120vac wall
recepticle. Connect battery charger to
battery.
BATTERY RECHARGE
WARNING:
WARNING: BATTERY CHARGING
AND ANY OTHER OPERATION
ON THE ELECTRICAL SYSTEM
MUST BE CARRIED OUT BY
ADULTS ONLY.
•Unscrew the seat (1) and release it (2).
•Connect the battery charger to a socket (1)
and insert the jack into its housing (2).
•Replace the seat (1) and screw (2).
ENGLISH
FRANÇAIS
ESPAÑOL
PREMIERE CHARGE DE BATTERIE
!
• Reliez le chargeur de batterie à une prise
domestique. Reliez le chargeur de batterie
à la batterie.
MISE EN CHARGE DE LA BATTERIE
ATTENTION:
L'OPÉRATION DE CHARGE DES
BATTERIES ET TOUTES AUTRES
INTERVENTIONS SUR
L'ÉQUIPEMENT ÉLECTRIQUE
DOIVENT ÊTRE EFFECTUÉES
EXCLUSIVEMENT PAR DES
ADULTES.
•Dévisser le siège (1) et le dégager (2).
•Brancher le chargeur de batterie à une prise
(1) et introduire la fiche dans son logement
(2).
•Replacer le siège (1) et visser (2).
PRIMERA CARGA DE LA BATERÍA
!
• Conecte el cargador de la batería con un
socket doméstico. Conecte el cargador de
batería con la batería.
CARGA DE LA BATERÍA
ATENCIÓN:
LA OPERACIÓN DE CARGA DE
LA BATERÍA ASÍ COMO
CUALQUIER INTERVENCIÓN
ELÉCTRICA, DEBEN SER
REALIZADAS ÚNICAMENTE POR
ADULTOS.
SÓLO PARA EL BRASIL: TENSIÓN DEL
CARGADOR: 127V - 60 HZ.
OBSERVACIÓN: NO UTILIZAR EL
CARGADOR DE LA BATERÍA CON
UNA TENSIÓN DE 220V.
•Desatornillar el asiento (1) y soltarlo (2).
•Conectar el cargador de la batería a un
enchufe (1) e introducir el jack en su
alojamiento (2).
•Cambiar el asiento (1) y atornillar (2).
4
ASSEMBLY INSTRUCTIONS
INSTRUCTIONS D'ASSEMBLAGE
INSTRUCCIONES DE MONTAJE
CAUTION:
ADULT ASSEMBLY REQUIRED.
USE CARE WHEN UNPACKING AS
COMPONENTS TO BE ASSEMBLED
MAY POSE A SMALL PARTS/SHARP
EDGE HAZARD.
IF THE PRODUCT IS DAMAGED
WHEN YOU OPEN THE
PACKAGING, CONTACT THE
SERVICE CENTER AND DO NOT
USE THE PRODUCT.
BATTERY IS INCLUDED
AND MUST BE
CONNECTED.
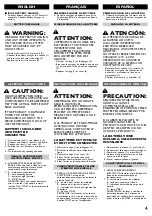
1 •Unscrew the seat (1) and release it (2).
2 •Connect the cable as shown in the figure.
3 •Replace the seat (1) and screw (2).
4 •Position the rear bracket in its place, as
shown.
5 •Fix the bracket by rotating the hook.
VEHICLE FEATURES AND
INSTRUCTIONS FOR USE
6 •ACCELERATOR PEDAL/ELECTRIC
BRAKE. When the foot is lifted from the
accelerator pedal, the electric brake
automatically stops the tractor.
7 •A - melody activating button
B - horn activating button
C - battery charge indicator
D - START button
WARNING: lights and sounds deactivate
after 3 minutes if the vehicle remains
inactive. Press START or the accelerator to
reactivate them.
ATTENTION:
ASSEMBLAGE PAR UN ADULTE
REQUIS. OUVRIR LES
EMBALLAGES AVEC PRÉCAUTION
CAR LES PIÈCES À ASSEMBLER
PEUVENT COMPORTER DES
RISQUES DE COUPURES OU DE
BLESSURES.
SI LE PRODUIT EST ENDOMMAGÉ
LORSQUE VOUS OUVREZ
L’EMBALLAGE, CONTACTEZ LE
SERVICE APRÈS-VENTE ET
N’UTILISEZ PAS LE PRODUIT.
LA BATTERIE EST INCLUSE
ET DOIT ETRE CONNECTÉE.
1 •Dévisser le siège (1) et le dégager (2).
2 •Brancher le câble comme indiqué sur la
figure.
3 •Replacer le siège (1) et visser (2).
4 •Placer l’étrier postérieur dans son
logement comme indiqué sur la figure.
5 •Fixer l’étrier en faisant pivoter le crochet.
CARACTERISTIQUES ET MODE
D’EMPLOI DU VEHICULE
6 •PÉDALE D’ACCÉLÉRATEUR/DE FREIN
ÉLECTRIQUE. Le frein entre
automatiquement en fonction en levant le
pied de la pédale.
7 •A - bouton pour activer les mélodies
B - bouton pour activer le klaxon
C - indicateur de l’état de chargement de
la batterie
D - bouton START
REMARQUE : les lumières et les sons se
désactivent après 3 minutes d’inactivité du
véhicule. Pour les réactiver, appuyer sur le
bouton START ou sur l’accélérateur.
PRECAUTION:
REQUIERE MONTAJE DE UN
ADULTO. ALGUNOS
COMPONENTES AL SER
ENSAMBLADOS PODRÍAN TENER
PARTES PEQUEÑAS/RIESGO POR
BORDES CONTANTES.
SI AL ABRIR EL PAQUETE SE
NOTASEN DAÑOS EN EL
PRODUCTO, CONTACTE CON EL
CENTRO DE ASISTENCIA. NO
UTILICE EL PRODUCTO.
LA BATERÍA VIENE
INCLUIDA, SOLO NECESITA
INSTALARSE.
1 •Desatornillar el asiento (1) y soltarlo (2).
2 •Conectar el cable como muestra la figura
3 •Cambiar el asiento (1) y atornillar (2).
4 •Colocar el soporte trasero en su sitio
como muestra la figura.
5 •Fijar el soporte girando el gancho.
CARACTERÍSTICAS Y USO DEL
VEHÍCULO
6 •PEDAL ACELERADOR/FRENO
ELÉCTRICO. Al levantar el pie del pedal, el
freno entra automáticamente en
funcionamiento.
7 •A - tecla para accionar las melodías
B - tecla para accionar el claxon
C - indicador del estado de carga de la
batería
D - tecla START
ADVERTENCIA: las luces y sonidos se
desactivan después de 3 minutos de
inactividad del vehículo. Para reactivarlas,
pulsar el botón de START o el acelerador.


