Manual
16
6.3.11 Date
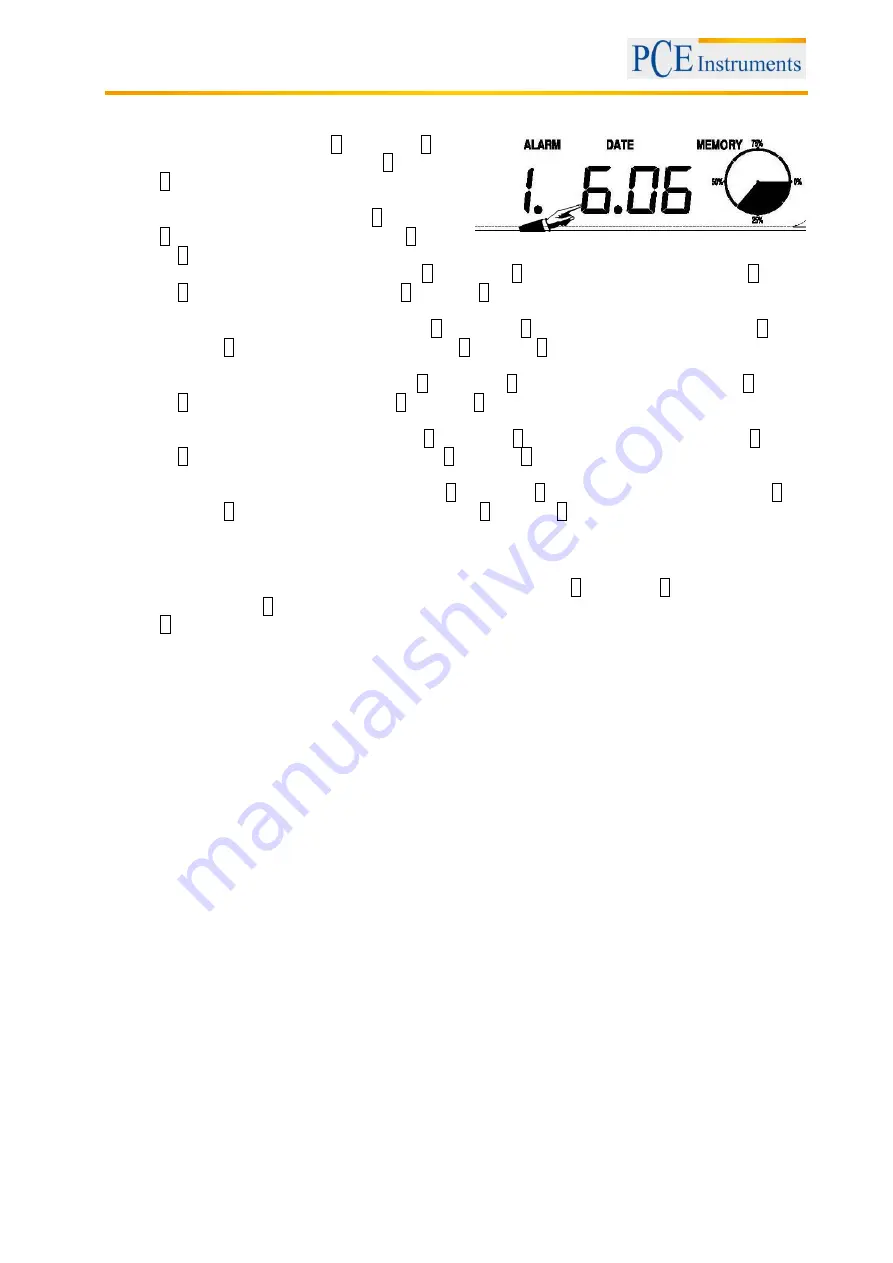
1. Touch the DATE section,
+
button and
–
button will be flashing. Touch the
+
button or
–
button to shift between alarm time, date
and week date.
2. Touch the DATE section again,
+
button and
–
button will be flashing. Touch the +
+
button
or
–
button to Shift between DD-MM format and MM-DD format for the date.
3. Touch the DATE section the third time,
+
button and
–
button will be flashing. Touch the
+
button
or
–
button to set the year. Hold the
+
button or
–
button for 3s to change the number in great
step.
4. Touch the DATE section the fourth time,
+
button and
–
button will be flashing. Touch the
+
button or
–
button to set the month. Hold the
+
button or
–
button for 3s to change the number in
great step.
5. Touch the DATE section the fifth time,
+
button and
–
button will be flashing. Touch the
+
button
or
–
button to set the day. Hold the
+
button or
–
button for 3s to change the number in great
step.
6. Touch the DATE section the sixth time,
+
button and
–
button will be flashing. Touch the
+
button
or
–
button to set the alarm hour. Hold the
+
button or
–
button for 3s to change the number in
great step.
7. Touch the DATE section the seventh time,
+
button and
–
button will be flashing. Touch the
+
button or
–
button to set alarm minute. Hold the
+
button or
–
button for 3s to change the number
in great step. Touch ON/OFF to enable or disable time alarm function.
6.3.12 Memory
1. Touch Memory section to activate history data toggle display,
+
button and
–
button will be
flashing. Press
–
to toggle forward to see earlier weather history data together time stamp, press
+
to see later history weather data. When history data displayed, the corresponding time will be
displayed at the time section area (History data saving interval can only be changed using the PC
software that comes with this product, the default history data saving time interval is present to 30
minutes prior to shipment).
2. Touch Memory section again will trigger the memory clear procedure: the word of “CLEAR” will
be flashing, the full memory usage icon will be flashing. Press and hold the memory full icon for 3
seconds will clear the memory.
6.4
PC Connection
As an important feature in addition to the display on the Touch Screen, the Weather Station allows the
read-out of all measured and displayed time and weather data in form of complete history data sets on a
PC.
6.5
Data Storage
For a comprehensive weather history, the Base Station allows the internal storage of up to 4080 complete
sets of weather data with time and date. These data sets are being stored in ring buffer memory. In case
the memory capacity of the Weather Station is exhausted the oldest data sets stored will be overwritten
by the new ones entered.
6.6
Data Recall
Certain weather data or setting values can only be read out, processed, and displayed by means of a PC.
Also the settings of the storing intervals from 5 minutes to 250 minutes for the storage of data sets can
only be performed by means of a PC.
6.7
Connections and Software
The wiring between Weather Station and PC takes place by means of an included USB cable. The
EasyWeather software package, also included in the shipping contents, must be installed on the PC. This
software allows the display of all present weather data with graphic symbols. It also allows the display,
storage, and printing of history data sets, whose volume exceeding the maximum 4080 data sets of the
Weather Station is only limited by the capacity of the PC’s main memory.
Summary of Contents for PCE-FWS-20
Page 5: ...Manual 5 4 Setup...
Page 6: ...Manual 6...
Page 7: ...Manual 7...
Page 32: ...BETRIEBSANLEITUNG 5 4 Aufbau...
Page 33: ...BETRIEBSANLEITUNG 6...
Page 34: ...BETRIEBSANLEITUNG 7...
Page 62: ...Manuel d Utilisation 7 Fixer l ensemble sur un poteau avec les deux anneaux de r glage...
Page 95: ...6 Instrucciones de Uso www pce iberica es...
Page 126: ...6 Istruzioni d uso 4 1 Installazione dei sensori...
Page 127: ...7 Istruzioni d uso...
Page 128: ...8 Istruzioni d uso...


