background image

Manual 


If there are any samples attached to a standard, you can view those by pressing Enter 

If there is more than one sample, you can use the arrow keys (

 and 

) for selection. 


If you want to delete a sample, select it and hold the Back button 

 for ca. 3 seconds. 

If you press Back 

 shortly, you get back to the main screen of the record function. 


If you want to subsequently add samples to an existing standard, select the standard and press 
the Menu button 

. You are now redirected to the standard measurement screen. Press Enter 

 to go to the sample measurement screen. Now you can perform a sample measurement, 

which will be automatically added to the selected standard. 


If you want to turn a sample into a standard, select the standard which the sample is attached to 

and press Enter 

. Now, select the sample and press the Menu button 

. The sample has now 

turned into a standard. 

5.3.2 

Calibration 

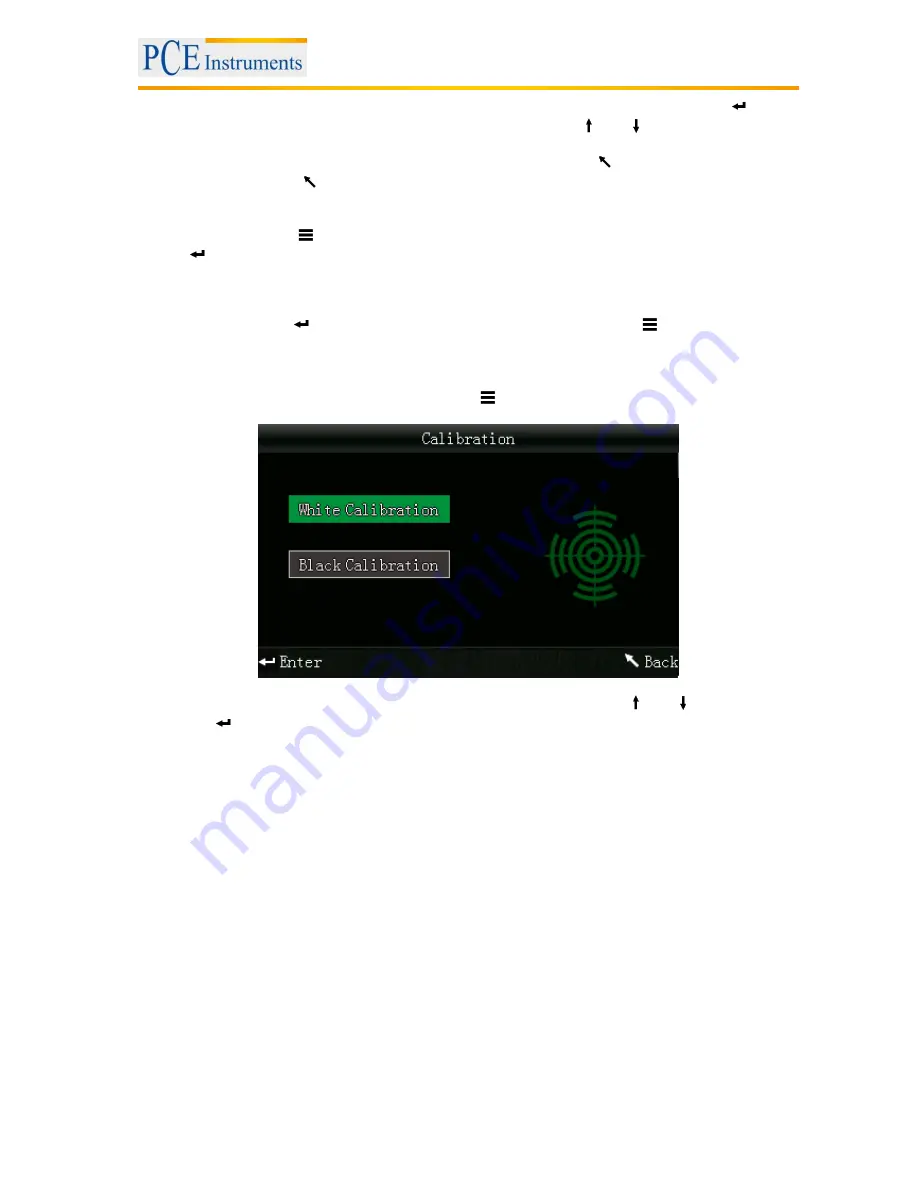
To get to the calibration menu, press the Menu button 

, select “Calibrate“ and press Enter .  


Here you can select between white and black calibration. Use the arrow keys (

 and 

) to select and 

press Enter 

 to confirm. A confirmation screen with instructions will appear. 


White calibration 

If you want to perform a white calibration, place the white calibration plate on the measuring aperture. 
After that, press the Testing button to start the calibration. 
 

Black calibration 

If you wish to perform a black calibration, remove the calibration plate and place the device with the 
measuring aperture oriented upwards. Make sure that this calibration is carried out in a dark environment. 
Additionally, keep the device away at least 1 meter from reflecting objects like walls, tables or other 
objects. To start the calibration process, press the Testing button. 

 
Note: A calibration is only reasonable in the following cases: when first using the device, after strong 
changes in the environmental conditions, when the device has been used for a long time or when the 
measurement results are inaccurate.


Summary of Contents for PCE-CSM 3

Page 1: ...ter FL 33458 USA From outside US 1 Tel 561 320 9162 Fax 561 320 9176 info pce americas com www pce instruments com english www pce instruments com PCE Instruments UK Ltd Units 12 13 Southpoint Busines...

Page 2: ...PC or printer 10 5 3 4 Tolerances 10 5 3 5 Delete recorded data 10 5 3 6 Averaging 10 5 3 7 Display mode 11 5 3 8 Language 11 6 Settings 11 6 1 Auto save 11 6 2 Time setting 12 6 3 Print settings 12...

Page 3: ...suring device Please avoid strong changes in the environmental conditions This includes flickering lights as well as changes of the air temperature or air humidity The device may only be used in the a...

Page 4: ...Lamp life 3 years more than 1 million measurements Storage 100 reference values standards 20 000 samples Interface USB RS 232 Power supply Rechargeable lithium ion battery 3 7 V at 3 200 mAh Charging...

Page 5: ...Manual 5 4 System description 4 1 Button description 4 2 Interfaces...

Page 6: ...USB interface you can transfer data from the colorimeter to a PC The baud rate is 115 200 bps 4 3 Battery Installing the battery 1 Make sure that the colorimeter is turned off 2 Open the cover of the...

Page 7: ...easuring mode is L a b C h 5 2 Take a measurement If you turn on the device you are directed to the Standard Measurement screen To take a measurement follow these steps 1 Press and hold the testing bu...

Page 8: ...took the standard measurement 3 Now you can see the results and the deviation to the standard in the following screen Note While the measurement is in progress time duration 1 second all buttons are i...

Page 9: ...ation To get to the calibration menu press the Menu button select Calibrate and press Enter Here you can select between white and black calibration Use the arrow keys and to select and press Enter to...

Page 10: ...ta To delete the recorded data press the Menu button select Delete and press Enter Now you get to the deletion screen Here you have two different options You can either delete all sample measurements...

Page 11: ...nguage and press Enter Now you get to the language selection You can choose between English and Chinese Select an option by using the arrow keys and and press Enter to confirm 6 Settings To get to the...

Page 12: ...he arrow keys and for selection and press Enter to confirm 6 3 Print settings Here you can choose if the measurement results are printed automatically or not when a printer is connected to the colorim...

Page 13: ...alibration After that perform a black calibration 2 Fill in the powder Fill the powder into the powder compartment of the measuring plate After that put the powder test box back together see 7 1 1 Mak...

Page 14: ...u can determine the colorimetric parameters of liquids pastes and powders 7 2 1 Build up The PCE CSM UTC is built up of a base plate 1 an alignment plate for the colorimeter 2 a measuring chamber 3 wi...

Page 15: ...e measuring hole of the measuring chamber 3 Make sure that the colorimeter is in the right place and tightened properly before moving on 2 Fill the tank 4 with the desired medium and put it into the m...

Page 16: ...mber Please make sure that these indications are aligned properly see picture below 4 Perform a measurement with the colorimeter 5 Clean the measuring device before each use Do not use abrasive or cor...

Page 17: ...contact PCE Instruments 8 1 PCE Instruments UK By post PCE Instruments UK Ltd Units 12 13 Southpoint Business Park Ensign Way Southampton Hampshire United Kingdom SO31 4RF By phone 02380 987 035 8 2...

Reviews: