background image

Powering Up Your 1001R14 Rack

The power supplies that come with your 1001R14 rack system

are equipped with a power entry connector on the rear card.  The
power supplies are 

Hot-Swappable, so you are not required to

remove the cards from the rack while applying power to the sys-
tem.

The power switch is located on the front panel.  When plugged in

and switched on, a red front panel LED will glow.  Since the Model
1001R14 is a "hot swappable" rack, 

it is not necessary for any cards to

be installed before switching on the power supply.  The power supply
may be switched off at any time without harming the installed cards.

4.2  INSTALLING  MODEL 1095RC SERIES INTO THE CHASSIS

The Model 1095RC Series is comprised of a front card and a rear

card.  The two cards meet inside the rack chassis and plug into each
other by way of mating 50 pin card edge connectors.  Use the follow-
ing steps as a guideline for installing each Model 1095RC Series into
the rack chassis:

1.

Slide the rear card into the back of the chassis along the
metal rails provided.

2.

Secure the rear card using the metal screws provided.

3.

Slide the front card into the front of the chassis.  It should
meet the rear card when it’s almost all the way into the chas-
sis.

4.

Push the front card 

gently into the card-edge receptacle of the

rear card.  It should “click” into place.

5.

Secure the front card using the thumb screws. 

4.3  WIRING THE MODEL 1095RC SERIES

Each of the rear interface cards compatible with the Model

1095RC Series has one terminal interface port and one 2-wire (twisted
pair) port.  For specific interface pin-outs, refer to the diagrams in
Appendix C and E of this manual.

4.0  INSTALLATION

This section describes the functions of the Model 1001R14 rack

chassis, tells how to install front and rear Model 1095RC Series cards
into the chassis, and how to connect to the twisted pair interface and
the serial interface.

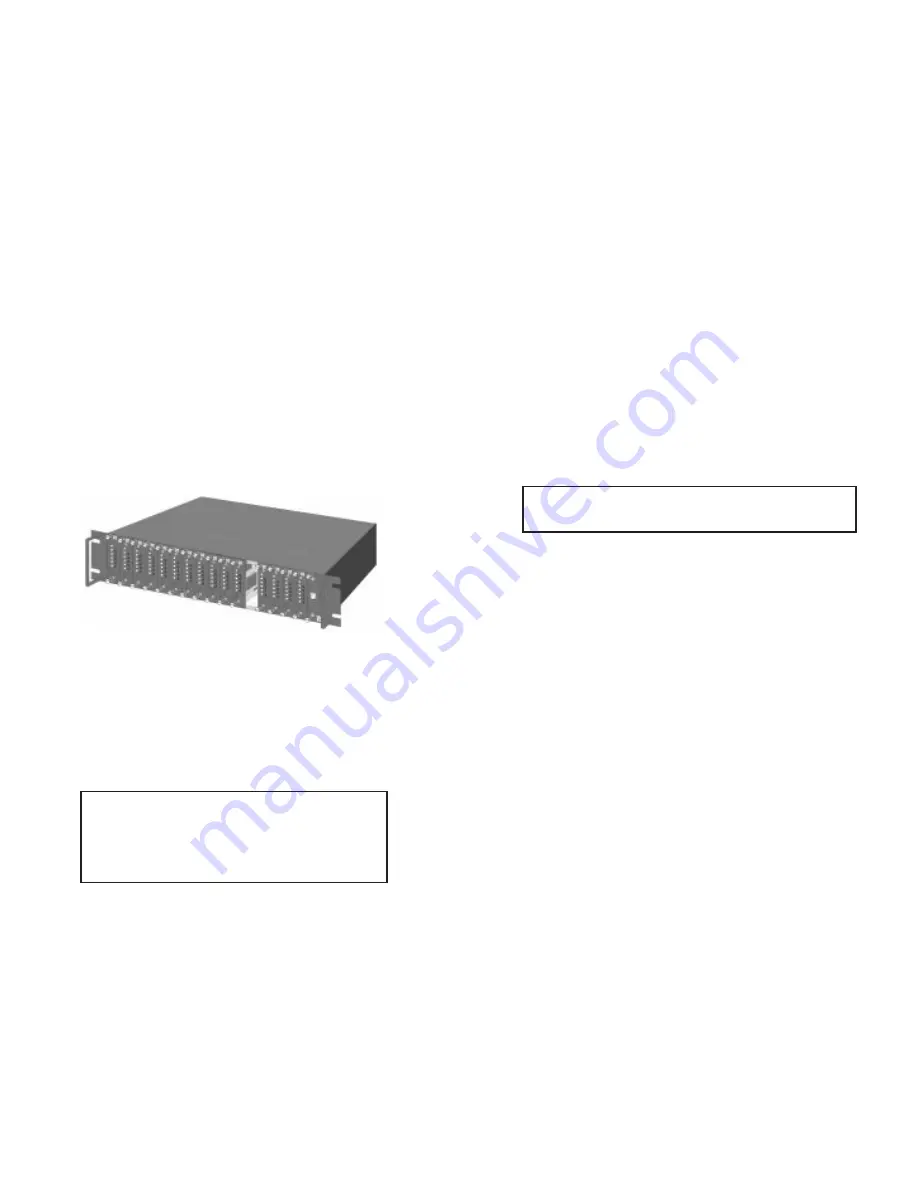
4.1  THE MODEL 1001R14 RACK CHASSIS

The Model 1001R14 Rack Chassis (Figure 10, below) has four-

teenshort range modem card slots, plus its own power supply.
Measuring only 3.5” high, the Model 1001R14 is designed to occupy
only 2U in a 19” rack.  Sturdy front handles allow the Model 1001R14
to be extracted and transported conveniently.

4.1.1  The Rack Power Supply

The power supply included in the Model 1001R14 rack uses the

same mid-plane architecture as the modem cards.  The front card of
the power supply slides in from the front, and the rear card slides in
from the rear.  They plug into one another in the middle of the rack.
The front card is then secured by thumb screws and the rear card by
conventional metal screws.

19

NOTE:  

Please refer to the Model 1001RP14 Series User

Manual 

AC & DC Rack Mount Power Supplies for fuse and 

power card replacement information.

20

Figure 10:  Model 1001R14 Rack Chassis with power supply

WARNING!

There are no user-serviceable parts in the

power supply section of the Model 1095RC Series.
Voltage setting changes and fuse replacement should
only be performed   by qualified service personnel.
Contact Patton Electronics Technical support at (301)975-
1007 for more information.

Summary of Contents for NetLink 1095RC

Page 1: ...mDSL Multi Rate Symmetric DSL Rack Mount Modem Card SALES OFFICE 301 975 1000 TECHNICAL SUPPO RT 301 975 1007 http ww w patton com Part 07M1095RC D Doc 033061UD Revised 07 06 99 An ISO 9001 Certified...

Page 2: ...tronics be liable for any damages incurred by the use of this product These damages include but are not limited to the following lost profits lost savings and incidental or consequen tial damages aris...

Page 3: ...locking options LED indicators for TD RD CTS CD DTR TM ER and NS 2 2 DESCRIPTION The Patton Electronics NetLinkTM mDSL Model 1095RC Multi Rate DSL Modem provides high speed 2 wire connectivity to ISPs...

Page 4: ...interface connections Figure 3 shows the Interface Driver Board on the top of the 1095RC PC board Follow the instructions below to select the correct interface for your application 1 With the 1095RC...

Page 5: ...red as a DCE Reverse the DCE DTE orientation by pulling the strap out of its socket rotating it 180 then plugging the strap back into the socket You will see that the DCE DTE arrows now point in the o...

Page 6: ...efault positions of DIP Switch S3 Detailed descriptions of each switch follow the table Switch S3 1 DTE Rate Use Switch S3 1 through S3 6 to set the rate adaptive DTE bit rate S3 1 S3 2 S3 3 S3 4 S3 5...

Page 7: ...ise CP site will automati cally configure itself to the DTE rate of the rack card Other configura tion parameters fall to the default state This allows changes in the configuration to be handled from...

Page 8: ...AR INTERFACE CARD The Model 1095RC Series has six interface card options the Model 1001RCM12545 DB 25 RJ 45 the Model 1001RCM13445 M 34 RJ 45 the Model 1001RCM125TB DB25 TB the Model 1001RCM134TB M 34...

Page 9: ...nction DTE Shield DB 25 Pin 1 FRGND JB3 In the connected position this strap links DB 25 pin 1 frame ground In the open position pin 1 is disconnected from frame ground JB3 Position 1 2 DTE Shield Pin...

Page 10: ...descriptions of each strap s function 17 DTE Shield DB 15 Pin 1 FRGND JB3 In the connected position this strap links DB 15 pin 1 frame ground In the open position pin 1 is disconnected from frame gro...

Page 11: ...s compatible with the Model 1095RC Series has one terminal interface port and one 2 wire twisted pair port For specific interface pin outs refer to the diagrams in Appendix C and E of this manual 4 0...

Page 12: ...unction properly the Model 1095RC needs one twisted pair of metallic wire This twisted pair must be uncondi tioned dry metallic wire between 19 9mm and 26 AWG 4mm the higher number gauges may limit di...

Page 13: ...gure 13 are descriptions that show how the ele ments are used during Test Modes Figure 13 Block Diagram Model 1095 24 5 5 0 0 O OP PE ER RA AT TI IO ON N Once the Model 1095RC is properly configured a...

Page 14: ...received CTS and CD will be inactive The restart procedure uses this information to determine if a valid con nection is made cable disconnect poor cable quality etc In normal Data Mode if the box rec...

Page 15: ...e status of the units at the time that the Local Loop is initiated If the units are not linked NS LED on and the Local Loop is initiated either by the front panel switch or the DTE interface the unit...

Page 16: ...ase the switch will be ignored until it is placed back into the normal position Figure 17 Block Diagram Remote Loop 30 Local Loop It will remain this way until the pattern generator with 511 511E swit...

Page 17: ...of the link Once a 511 511E pattern is selected on one end of the link the pattern gen erator will begin transmitting unframed 511 511E through the line to the Remote end A possible problem with this...

Page 18: ...0 384 448 512 576 640 704 768 832 896 960 1024 1088 1152 1216 1280 1344 1408 1472 1536 1600 1664 1728 1792 1856 1920 1984 2048 2112 2176 2240 and 2304 kbps Diagnostics V 52 compliant bit error rate pa...

Page 19: ...Card 1001RCM13445 M 34 RJ 45 Rear Card 1001RCM134TB M 34 TB Rear Card 1001RCM11545 DB 15 RJ 45 Rear Card 1001RCM115TB DB 15 TB Rear Card 1000MC Management Card IM2RC F 64K G703 Rear Card IM2RC B RS 53...

Page 20: ...trol 16 RD Receive Data A 17 RC Receive Timing A 18 LLB Local Line Loop 19 RTS Request to Send B 20 DTR Data Transfer Rate A 21 DL Remote Digital Loop 22 DSR Data Set Ready B 23 DTR Data Transfer Rate...

Page 21: ...192 256 15088 2 9 4 6 22000 4 2 6 8 400 320 384 13264 2 6 4 2 20000 3 8 6 2 528 448 512 12300 2 3 3 8 18000 3 4 5 5 784 576 640 704 768 10216 1 9 3 1 14000 2 6 4 3 1040 832 896 960 1024 8417 1 6 2 6...

Reviews: