


α
4
4.
INSTALLAZIONE E MODO D’USO
• Inserire la spina di alimentazione nell’apposita presa sul posteriore [
10
],
inserire l’alimentatore in una presa di corrente.
• Collegare l’apparecchio al sistema d’ampli
fi
cazione secondo le proprie
necessità (vedi Fig. 3.1.1 e Fig. 3.1.3).
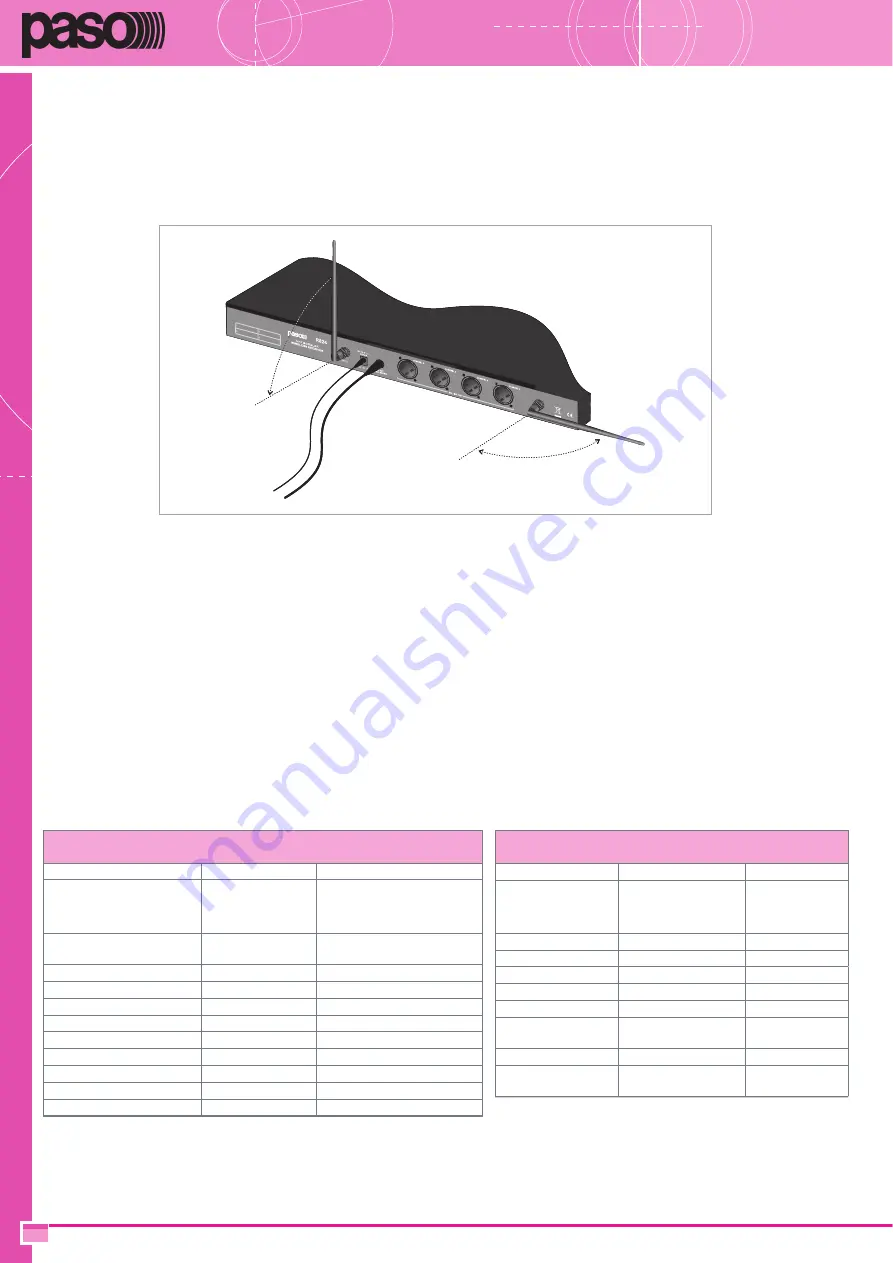
• Montare le due antenne fornite in dotazione nelle apposite prese presenti
sul pannello posteriore [
9
], (vedi Fig. 4.1).
• Accendere il ricevitore tramite l’interruttore [
7
].
• Inserire le batterie nei radiomicrofoni rispettandone le polarità.
• Accendere i radiomicrofoni, veri
fi
cando la momentanea accensione del
led [
14
].
• Regolare
gli
SQUELCH
[
5
] al minimo (senso antiorario).
• Regolare i livelli dell’ampli
fi
catore/mixer in modo da evitare retroazioni
acustiche (Effetto Larsen).
Qualora con radiomicrofono spento la spia di rilevazione di radiofrequenza
[
3
] fosse accesa e fosse presente un disturbo audio, regolare tramite il
cacciavite in dotazione lo
SQUELCH
[
5
] del ricevitore in modo da eliminare
il disturbo audio.
Nel caso di mancato utilizzo per un lungo periodo di tempo si consiglia
di estrarre l’alimentatore dalla presa di rete e di togliere le batterie dai
radiomicrofoni.
Fig. 4.1
4.
INSTALLATION AND INSTRUCTIONS FOR USE
• Plug the power cable into the socket on the rear panel [
10
], plug the
power-supply unit into a power outlet.
• Connect the equipment to the ampli
fi
cation system as required (see Fig.
3.1.1 and Fig. 3.1.3).
• Mount the two aerials supplied with the equipment,
fi
tting them into the
sockets provided for them on the rear panel [
9
], (see Fig. 4.1).
• Switch the receiver on using the ON/OFF switch [
7
].
• Insert the batteries into the wireless microphones, paying attention to
the correct polarity.
• Switch the wireless microphones on, checking that the LEDs light up
momentarily [
14
].
• Adjust the
SQUELCH
[
5
] levels to the minimum (by turning in an
anticlockwise direction).
• Adjust the levels of the ampli
fi
er/mixer so as to avoid any acoustic
feedback (Larsen effect).
If the radiofrequency signalling lamp [
3
] lights up with the radio microphone
switched off, and there is audio interference, adjust the
SQUELCH
[
5
] level
of the receiver using the screwdriver supplied with the equipment, so as
to eliminate the interference. If the equipment is not going to be used for
a long period, it is advisable to disconnect the power-supply unit from the
mains outlet and to take the battery out of the wireless microphone.
DATI TECNICI RICEVITORE
RECEIVER TECHNICAL DATA
Gamma di ricezione
UHF
Receiving range
Gamma di Frequenza
741.55 ÷ 812.70 MHz
Frequency range
Sensibilità RF
1.8
µ
V
(sinad=12 dB)
RF sensitivity
Reiezione alle spurie
≥
80 dB
Spurius Rejection
Reiezione frequenza immagine
≥
80dB
Image frequency Rejection
Rapporto S/N
≥
90 dB
S/N ratio
Livello di uscita
0-300 mV
Output level
Alimentazione esterna in CC
12÷18 V
External DC power supply
Consumo
10W
Power consumption
Dimensioni
480 x 170 x 45 mm
Dimensions
Peso
2,650 Kg
Weight
Sicurezza
CEI EN 60065
Safety
DATI TECNICI RADIOMICROFONO
WIRELESS MICROPHONE TECHNICAL DATA
Tipo di microfono
Dinamico/Dynamic
Microphone Type
Gamma di Frequenza
741.55 ÷ 812.70 MHz
Frequency range
Stabilità in Frequenza
≤
20 PPM
Frequency stability
Potenza di uscita RF
30 mW
RF Output Power
Corrente assorbita
≤
55 mA
Absorbed power
Portata in campo libero
80 m
Free-
fi
eld range
Batterie
1,5V x2
Batteries
Durata delle batterie
(ore)
8-10
Battery life (hours)
Dimensioni
50 x 260 mm
Dimensions
Peso con batterie
242 g
Weight (incl.
batteries)


