21
GB/IE/NI
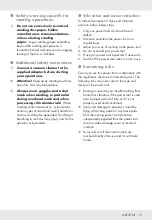
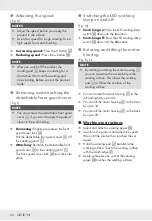
Move the sanding paper
[
33]
continuously
across the working surface . Do not keep the
sanding paper on one spot for too long . This
may lead to irregular results .
Before switching off: Lift the product from the
working surface .
Before putting the product aside: Wait until
the sanding pad
[
2]
stops rotating .
Sanding walls
(Fig . P)
Always hold the product with 2 hands .
Sanding ceilings
(Fig . Q)
You can turn the product by 180° to reach
the surface more easily and comfortably .
After use
Switch off the product and disconnect it from
the mains . Let the product cool down .
Check, clean and store the product
(see “Cleaning and care”) .
Cleaning and care
m
WARNING!
Always switch the product off,
disconnect it from the mains and let the
product cool down before performing
inspection, maintenance and cleaning
work!
Cleaning
Never allow fluids to get into the product .
The product must always be kept clean, dry
and free from oil or grease . Remove dust from
it after each use and before storage .
Regular and proper cleaning will help ensure
safe use and prolong the life of the product .
Clean the product with a dry cloth . Use a soft
brush for areas that are hard to reach .
NOTE
u
Do not use chemical, alkaline, abrasive or
other aggressive detergents or disinfectants
to clean this product . These detergents
and disinfectants might be harmful to the
product's surfaces .
Maintenance
Before and after each use, check the product
and accessories (e . g . sanding paper) for
wear and damage . If required, exchange
them for new ones as described in this
instruction manual . Observe the technical
requirements (see “Technical data”) .
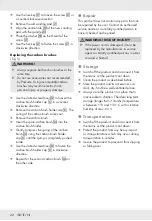
Replacing the sanding pad
(Fig . R)
m
WARNING!
u
Do not use accessories not recommended
by Parkside . Using an incompatible sanding
pad may result in personal injury or
property damage .
Hold the sanding pad
[
2]
firmly .
Summary of Contents for PWDS 920 B2
Page 3: ...A B 1 2 12 3 4 6 11 5 9 10 13 14 15 8 7 C 13 11 Max D 21 22 14 20 E 14 24 29 28 26 20 23...
Page 5: ...J 1 2 33 7 K 17 16 18 19 L 4 3 1 1 M 12 N 30 30 5 0 30 90 5...
Page 6: ...P Q 180 R 31 37 2 37 38 40 39 S 32 34 6...
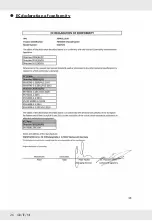
Page 28: ...26 GB IE NI EC declaration of conformity...
Page 50: ...48 FR BE D claration de conformit CE...
Page 72: ...70 NL BE EG verklaring van overeenstemming...


