background image

8  GB/IE/NI

… / Cleaning  and  Maintenance / Environmental  instructions / Troubleshooting

Safety  instructions / Initial  use

   Replace the protective visor if 

scratches or damages appear.

   The welding helmet does not pro-

vide protection against impact.


Frequent use, cleaning or storage 
can mean that the service life is 
less than 6 years. Replace the 
welding helmet immediately if 
the viewing panel gets scratched 
or the viewing panel is visibly 
damaged in any other way.

 ATTENTION! 

Materials that 

come into contact with the wearer‘s 
skin may cause allergic reactions in 
people with sensitive skin.


ATTENTION! 

Eye protection 

can represent a hazard for the 
wearer if it is worn over normal cor-
rective glasses due to the impact 
from high-speed particles.


ATTENTION! 

If protection 

against high-speed particles at  
extreme temperatures is required, 
the eye protection chosen must be 
labelled with the letter T directly af-
ter the letter for the impact intensity, 
i. e. FT, BT or AT. If the letter for the 
impact intensity is not followed by 
the letter T, the eye protection may 
only be used against high-speed 
particles at room temperature.

   Initial  use

Note:

 Only use the welding helmet with the rear 

pane mounted 

4

.

Note:

 Keep the UV filter‘s sensors 

8

 clean and 

clear.


Check that the welding helmet and the protective 

screen are intact before each use. If the protective 
screen has scratches, cracks or irregularities, it must 
be replaced before use, as serious injuries may oc-
cur otherwise.


Remove the protective film from the inside and 
the outside of the visor.

   Put on the welding helmet with the help of the 

headband 

5

. Press the adjustment buttons 

6


to make the welding helmet tighter and the ad-
justment button 

7

, to fix the welding helmet. 

When adjusting, ensure that your head is placed 
as far into the helmet as possible and that it sits 
as close as possible to your face.


Set the appropriate darkening shade before the 
welding procedure (see the following table). 
The darkening shade may be manually adjusted 
from 9 to 13 by twisting the darkening regula-
tor 

9

 on the outside of the helmet.

  ATTENTION! 

The darkening regulator 

9

 has 

the setting position “grind“. If the darkening 
regulator 

9

 is set to this position the automatic 

darkening is deactivated.


 Only use this setting when you do not wish to 
use the welding helmet for welding. The auto-
matic darkening is then no longer active.


Check the light density before each use.


Test procedure: Bring the viewing panel closer 
to an external light source with a value of more 
than 40 W and examine whether or not the 
screen darkens or illuminates.


 To change the UV filter / solar cells, push in both 
tabs and pull the front frame outward. Fig. B 
(Item no. 2000) or loosen the two screws as 
shown in Fig. A (Item no. 2001, 2002).

Summary of Contents for PSH 3 A1

Page 1: ...T PSH 3 A1 AUTO DARKENING WELDING HELMET Installation operating and safety information Translation of the original instructions AUTOMATIK SCHWEISSHELM Montage Bedienungs und Sicherheitshinweise Originalbetriebsanleitung IAN 281392 ...

Page 2: ...gs und Sicherheitshinweise Seite 13 Before reading unfold the page containing the illustrations and familiarise yourself with all functions of the device Klappen Sie vor dem Lesen die Seite mit den Abbildungen aus und machen Sie sich anschließend mit allen Funktionen des Gerätes vertraut ...

Page 3: ...2 8 3 4 5 1 9 7 6 A B ...

Page 4: ...age 7 Safety instructions Page 7 Initial use Page 8 Cleaning and Maintenance Page 9 Environmental instructions and disposal information Page 9 Troubleshooting Page 9 Warranty and service information Page 10 Warranty terms Page 10 Extent of warranty Page 10 Processing of warranty claims Page 11 Service Page 11 Label meanings Page 11 EU Conformity Declaration Page 12 ...

Page 5: ...tion as well as automatic illumination at the end of the welding procedure including a short delay to protect against afterglow This weld ing helmet provides a freely adjustable DIN protection level with a lateral adjustment wheel and is also ad justable for flying sparks during grinding work Only use the product as described and for its indicated purpose Keep these instructions in a safe place Wh...

Page 6: ... or knowledge so long as they are supervised or instructed in the safe use of the device and understand the associated risks Do not allow children to play with the product Cleaning and user maintenance should not be performed by children without supervision The welding helmet with automatic darkening is not suitable for laser and gas welding Never place the welding helmet on hot surfaces Never ope...

Page 7: ...e intact before each use If the protective screen has scratches cracks or irregularities it must be replaced before use as serious injuries may oc cur otherwise Remove the protective film from the inside and the outside of the visor Put on the welding helmet with the help of the headband 5 Press the adjustment buttons 6 to make the welding helmet tighter and the ad justment button 7 to fix the wel...

Page 8: ... clean the helmet casing 2 Never bring the UV filter 8 into contact with water Clean the product with a soft dry cloth with a cloth dampened with pure alcohol or with a cloth dampened with disinfectant Environmental instructions and disposal information Don t waste recycle The device accessories and packaging should be recycled in an environmen tally friendly manner Do not throw the auto darkening...

Page 9: ...ase Should this device show any fault in materials or manufacture within 3 years from the date of pur chase it will be repaired or replaced at our choice by us free of charge This warranty is conditional on the defective device and the receipt of purchase being presented within the 3 year warranty period and that there is a brief written description of the nature of the defect and of the date it a...

Page 10: ... original accessory parts Viewing pane 114 5mm x 89 5mm Rear pane 103 8mm x 47 3mm How to contact us GB IE Name C M C GmbH Website www cmc creative de E mail service gb cmc creative de service ie cmc creative de Phone 0 808 189 0652 0 10 Min Registered office Germany IAN 281392 Please note that the following address is not a service address Please first contact the service point named above Addres...

Page 11: ...E 66386 St Ingbert GERMANY declare in our sole responsibility the product Auto Darkening Welding Helmet Series number 2000 2001 2002 Year of manufacture 2017 15 IAN 281392 Model PSH 3 A2 meets the basic safety requirements of European Directives EC Electromagnetic Compatibility Directive 2014 30 EU RoHS Directive 2011 65 EU Personal Protective Equipment Directive 89 686 EEC and its amendments The ...

Page 12: ...fang Seite 15 Sicherheitshinweise Seite 15 Inbetriebnahme Seite 16 Reinigung und Wartung Seite 17 Umwelthinweise und Entsorgungsangaben Seite 18 Fehlerbehebung Seite 18 Hinweise zu Garantie und Serviceabwicklung Seite 19 Garantiebedingungen Seite 19 Garantieumfang Seite 19 Abwicklung im Garantiefall Seite 19 Service Seite 20 Bedeutung der Kennzeichnung Seite 20 EG Konformitätserklärung Seite 20 ...

Page 13: ...ältnisse an Er sorgt für eine sofortige sensorgesteuerte Ab dunkelung bei Zündung des Lichtbogens sowie ein selbsttätiges Wiederaufhellen bei Beendigung des Schweißvorgangs inklusive kurzer Verzögerung zum Schutz vor Nachglühen Der Schweißhelm verfügt über eine stufenlos einstellbare DIN Schutzstufe mit seitlichem Stellrad und ist auch auf Funkenflug bei Schleifarbeiten einstellbar Benutzen Sie da...

Page 14: ... über die technischen Gegebenheiten dieses Produkts Dieses Gerät kann von Kindern ab 16 Jahren und darüber sowie von Personen mit verringerten physischen sensorischen oder mentalen Fähigkeiten oder Man gel an Erfahrung und Wissen benutzt werden wenn sie beauf sichtigt oder bezüglich des sicheren Gebrauchs des Gerätes unter wiesen wurden und die daraus resultierenden Gefahren verstehen Kinder dürfe...

Page 15: ...ugenschutzge räte können gegen Teilchen hoher Geschwindigkeit durch das Übertra gen von Stößen für den Träger eine Gefährdung darstellen wenn sie über üblichen Korrektionsbrillen getragen werden ACHTUNG Falls ein Schutz ge gen Teilchen hoher Geschwindig keit bei extremen Temperaturen erforderlich ist muss das gewählte Augenschutzgerät mit dem Buchsta ben T direkt nach dem Buchstaben für die Aufpra...

Page 16: ...externen Lichtquelle mit mehr als 40W der Sichtscheibe und überprüfen Sie ob sich die Scheibe verdunkelt bzw erhellt Um den UV Filter die Solarzelle zu wechseln drücken Sie auf die beiden Rastnasen und ziehen den vorderen Rahmen nach außen weg Abb B Art Nr 2000 oder lösen Sie die beiden Schrauben wie in Abb A Art Nr 2001 2002 Tabelle zur Einstellung der Verdunklungsstufen Lichtbogenstrom Ampere 1 ...

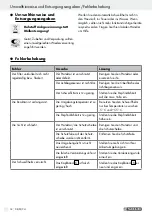
Page 17: ...Der Schweißstrom ist zu gering Stellen Sie die Empfindlichkeit auf die max Stufe ein Die Reaktion ist verlangsamt Die Umgebungstemperatur ist zu gering hoch Benutzen Sie den Schweißhelm nur bei Temperaturen zwischen 5 C und 55 C Die Empfindlichkeit ist zu gering Stellen Sie die Empfindlichkeit höher ein Die Sicht ist schlecht Der Protektor die Schutzscheibe ist verschmutzt Reinigen Sie den Protekt...

Page 18: ...esetzt sind und daher als Verschleißteile angesehen werden können oder für Beschädigungen an zerbrechlichen Teilen z B Schalter Akkus oder solchen die aus Glas gefertigt sind Diese Garantie verfällt wenn das Produkt beschädigt nicht sachgemäß benutzt oder gewartet wurde Für eine sachgemäße Benutzung des Produkts sind alle in der Bedienungsanleitung aufgeführten Anwei sungen genau einzuhalten Verwe...

Page 19: ...asse Ziffer 2 Streulichtklasse Ziffer 3 Homogenitäts klasse Ziffer 4 Winkelabhängigkeitsklasse 379 Prüfnorm CE CE Zeichen Schweißhelmschale Identifizierung des Herstellers CMC GmbH Die Nummer der vorliegenden Norm EN 175 Anwendungsbereich e gegebenenfalls S F B Masse in Gramm gegebenenfalls Symbol Schutzart Beschreibung des Anwendungs bereichs S erhöhte Festigkeit Mechanische Festigkeit F Aufprall...

Page 20: ...chen Richtlinien EG Richtlinie Elektromagnetische Verträglichkeit 2014 30 EU RoHS Richtlinie 2011 65 EU Persönliche Schutzausrüstung Richtlinie 89 686 EWG und deren Änderungen festgelegt sind Für die Konformitätsbewertung wurden folgende harmonisierte Normen herangezogen EN 379 2009 07 EN 175 1997 08 EN 166 2002 04 St Ingbert 31 01 2017 i A Andre Scheer Leiter Qualitätssicherung ...

Page 21: ...22 ...

Page 22: ...23 ...

Page 23: ...24 ...

Page 24: ...C M C GmbH Katharina Loth Str 15 DE 66386 St Ingbert GERMANY Last Information Update Stand der Informationen 01 2017 Ident No PSH3A2012017 GB IE NI IAN 281392 ...

Reviews: