P
P
P
OW
E
R
OW
ER
OW
E
R
O
O
O
N
N
N
R
E F ER E NC E
S
E Q U EN C I N G
•
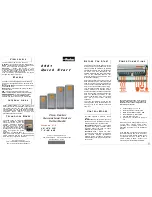
Speed potentiometer across 1(low), 9(high),
2(wiper) OR
•
External 2-wire speed reference between
1(-) and 2(+)
•
Jumper 19 and 20 if no external trip contact
•
Start contact between 12 and 20
•
Jog contact between 16 and 20
•
Reverse Direction contact between 15 and 20
•
Health volt-free contacts between 21 and 22
•
Running volt-free contacts between 23 and 24
C
A LIB R AT IO N
AC MOTOR DRIVE
7.5KW 400V 1.3
DIAGNOSTICS
Menu at Level 1
QUICK SETUP
Menu at Level 1
OPERATOR
Menu at Level 1
DOWN arrow to get to the DIAGNOSTICS menu
Press the M key to get to OPERATOR LEVEL
DOWN arrow to get to the QUICK SETUP menu
Press M to enter QUICK SETUP and set parameters relevant
to the operating mode of the drive by scrolling UP or DOWN
All calibration is done in software, through
the keypad
The 690+ can also be calibrated using the programming tool software
ESCAPE ONE LEVEL
ENTER MENU
SCROLL
UP
SCROLL
DOWN
The following is a list of the relevant parameters that you may need to check before starting the
drive. Several of these may not need adjustment if you are running a standard 60Hz, 460V 1800
RPM induction motor
V/Hz SV Vector
1
Control Mode Select the intended operating mode x x x
2
Max Speed Set max speed in RPM x x x
3
Min Speed Set min speed in % x x x
4
V/Hz shape Choose fan only for square curve x
5
Motor Current Motor full load current x x x
6
Motor Base Freq Motor nameplate frequency x x x
7
Motor Voltage Motor nameplate voltage x x x
8
Nameplate RPM Motor nameplate RPM x x x
9
Motor Poles for 1800rpm=4, for 1200rpm=6 x x x
10 Encoder Supply set between 5-15V to match encoder x
11 Encoder Lines Pulses per Revolution of encoder x
12 Encoder Invert Changes polarity of encoder feedback x
13 Autotune Enable Drive will Autotune if started x x
A
UTOTU NE
•
In the QUICK SETUP menu, set AUTOTUNE ENABLE to TRUE
•
MAX SPEED should be greater than NAMEPLATE RPM for a successful autotune
•
On the keypad press L/R for LOCAL mode
•
Ensure that the motor is uncoupled and free to rotate without causing problems
•
Press RUN. Drive will begin autotuning, The drive will stop without errors if autotune is successful
•
Go to SYSTEM\SAVE CONFIG\APPLICATION and UP arrow to save your settings
•
The 6054 Encoder Techbox is required
only for closed loop Flux Vector Control
•
Plug the 6054 into the left hand techbox
port, as shown. Securely snap into place,
then tighten the ground screw
•
DIP switches 1,2,3,4 (blue arrow) set the
threshold voltage of the encoder signals.
Set all switches to ON (up position) for
complementary encoder signals
•
Encoder connections to terminal block are:
1
(FUTURE) Health pulse H
2
(FUTURE) Health pulse H complement
3
Channel A
4
Channel A complement
5
Channel B
6
Channel B complement
7
Marker pulse M
8
Marker pulse M complement
9
Encoder Supply positive (5–15VDC)
10 Encoder Supply negative (0V)
11 Ground / Shield
S
P E ED
F
E ED BAC K
Note
In V/Hz mode, Autotune is not
necessary and will not activate
This is the power-up welcome screen. If a different screen
appears, press E a few times to return to the this screen
ST
A
R
T
ST
AR
T
JOGJO
G
RE
V
D
IR
RE
V
D
IR
HE
A
L
T
H
HE
AL
T
H
N.
O
.
C
O
N
T
AC
T
N
.O.
CON
T
ACT
R
U
NNI
NG
N.
O.
CONT
A
CT
RUN
NI
NG
N.
O.
C
O
N
T
AC
T
SPEED
SPEED
REFERENCE
REFERENCE
EX
T
.
TR
IP
EX
T
.
T
R
IP
+2
4
V
D
C
+2
4V
D
C

