background image

Collect Image 

 
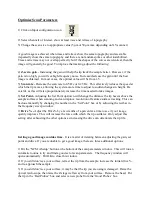
1) Click on Scan Parameters icon to select image resolution (128x128, 256x256, etc).   

1a) You may need to adjust the scan parameters slightly after making a change. 

2) Click Start button under Image label. 

3) Once complete, double click on the color bars next to the images.  This will flatten the image. 

 
You can send the image to the Scan Area Control by right clicking on the image, and hit “Send 
to Scan Area Control”.  Click on the ‘Scan Area’ tab at the bottom of the scan control window.  
This will allow you to shift your next scan area relative to the image you just collected, and 
automatically adjusts the software settings to the appropriate scan size, x/y offsets, and rotation. 
 
To take an image in a different region of the sample, disengage from surface using the Z-stage 
control, adjust position with the x/y stage controls, and repeat the surface approach procedure. 


Modify with XEI 

 
You can send images directly to the XEI data analysis software from the ‘Buffer’ in XEP by 
right clicking on them.  Or you can open them from the ‘spmdata’ or ‘User Files’ folders. 
 

Flattening your sample: 

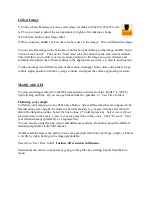
To flatten your sample, go to the flatten area button.  Select all the areas that are supposed to be 
flat and on the same height.  Exclude any non-flat features (e.g. mesas, trenches etc) that will 
distort the flattening routine. Select the line routine (1

st

 order regression).  Select x-axis if your 

scan was done in the x-axis, y-axis if your scan was done in the y-axis.  Click “Execute”.  Save 
your flattened image (preferably as a separate file). 
You can also try using the line, whole, and difference routines.  Read more about the different 
flattening algorithms in the XEI manual. 
 
Another useful feature is the ability to save the numerical data from any image, graph, or table as 
a .txt file by right clicking on the image/graph/table. 
 
Save file to ‘User Files’ folder.  

Include .tiff extension in filename

 
Screenshots can also be exported as jpg, png, of bmp files by selecting Export from the File 
menu. 


Summary of Contents for XE-100

Page 1: ...ser will move on the quadrant photodetector This is relayed to a motor controlling the tip which adjusts the tip s vertical position until the laser is aimed in the center of the quadrant photodetecto...

Page 2: ...ting tip and place it in the good tips box Ensure new tip is rested in place and that bearings fit into tip slots 4 Replace head and push flaps away from you until slightly tight This secures the head...

Page 3: ...n Look at where the light from the microscope is shining on the tip assembly as this will help you to center the microscope Position laser on cantilever If you don t see the laser reflected off the ca...

Page 4: ...e appropriate value If after several tries you still can t get the sum high enough remove the head and check mirror 2 s position visually it should be roughly parallel to the base Adjust mirror 2 knob...

Page 5: ...o 1 00 Cantilever General 4 Click OK 5 Turn Head back on in software Frequency Sweep Window will open 6 The software will automatically detect the cantilever s resonance peak and select a driving freq...

Page 6: ...B and C D are still less than 0 3 V 9 Shut acoustic enclosure 10 Click Approach button in Z stage control When the approach stops the light in the Z stage Control window will stop blinking Ensure tha...

Page 7: ...will change the distance the tip hovers above the sample surface when scanning and can improve resolution of features surface tracking This can be done manually by changing the number in the Set Poin...

Page 8: ...h XEI You can send images directly to the XEI data analysis software from the Buffer in XEP by right clicking on them Or you can open them from the spmdata or User Files folders Flattening your sample...

Page 9: ...er as needed 5 Turn off laser switch unplug head and remove head 5a If the tip you used was good leave it on the AFM Otherwise remove head and place tip in the Bad Probes box 6 Remove sample from stag...

Page 10: ...ion on center of photodetector A B 3 5V A B and C D 0 3V 6 Select appropriate mode scanner and frequency 7 Approach surface i Get optically close several mm ii Focus microscope 50 100um from surface m...

Reviews: