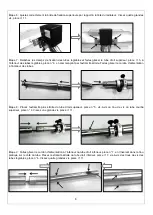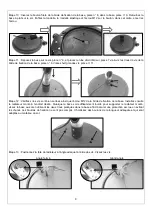
Step 10: Insert the base bracket threaded bolt, item 8 into the base assembly, item 9. Invert the base assembly and fit
the large flat washer, the spring washer and the M12 nut, items 12 onto the bolt, in that sequence and tighten the nut.
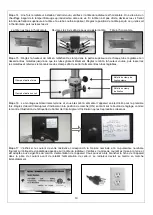
Step 11: Place the base assembly item 9 on the floor and align the lower straight tube, item 7 with the screw holes in
the base bracket, item 8. Insert and tighten eight large screws, items 11.
Step 12: Recheck the tightness of all screws and the M12 base bracket mounting nut, then position the complete
heater assembly on a flat surface in the preferred location. Whilst the base is heavy enough to support the heater
assembly, for extra safety against being knocked over, bolt the base to the floor through the two holes in the base.
These fixing bolts are not supplied, but select bolts of adequate length and type to suit the floor surface material.
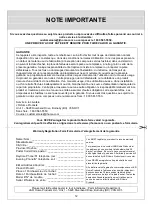
Step 13: Select the required heater head angle limits screw position. Tighten the screw.
Narrow angle Wide angle
9


