


User Manual -
Typhoon Open –
01/2018 edition
.
PARAMINA SA
– Byway Evaggelistrias str. 19300 Aspropirgos, Greece, Tel: 0030 210 5575860-1
Fax: 0030 210 5575868, email:
- website:
www.paramina-compressors.com
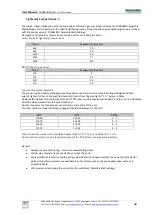
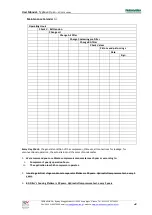
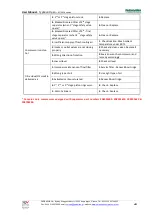
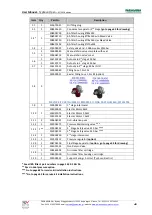
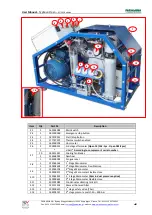
33
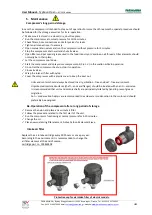
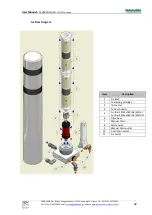
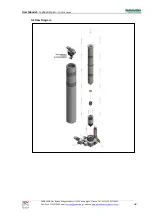
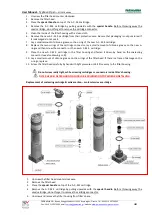
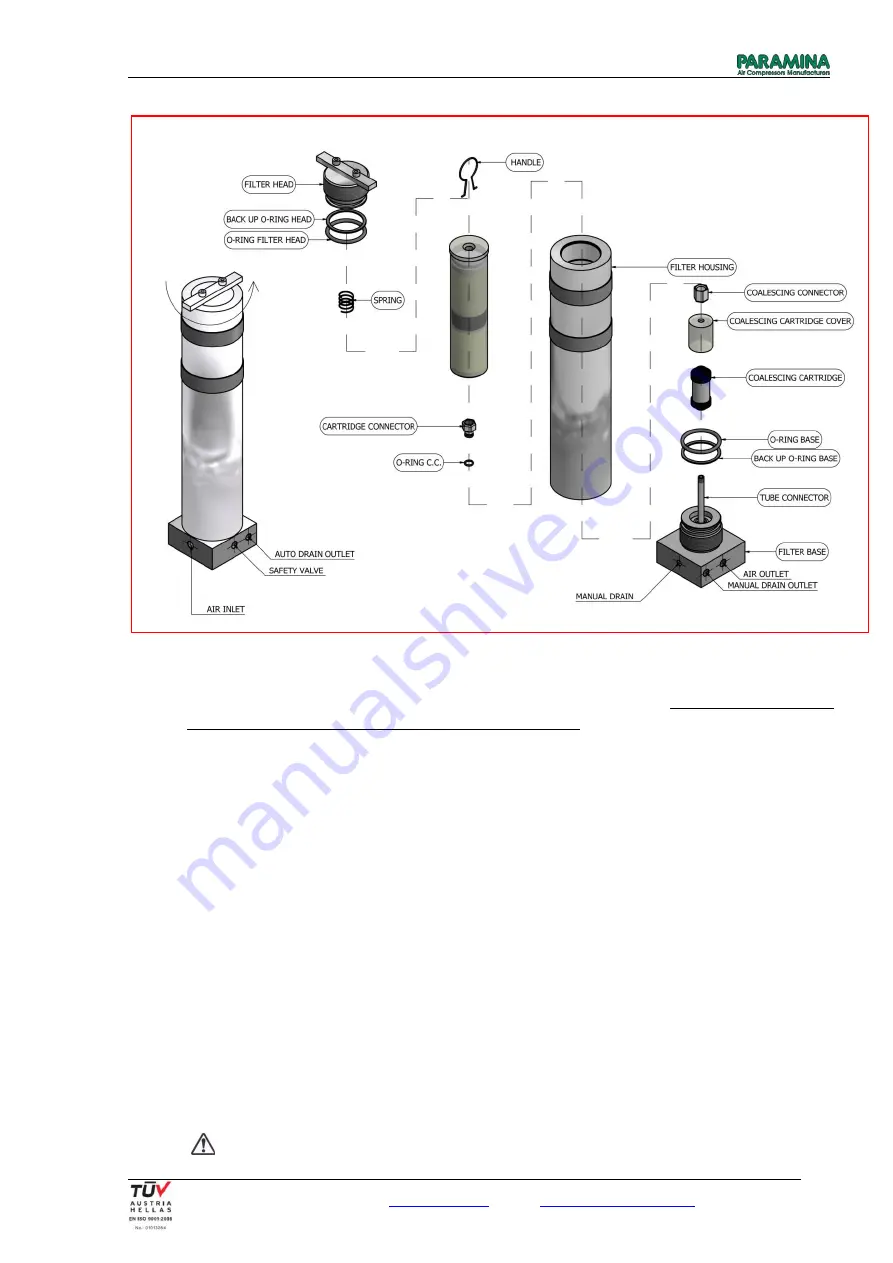
Replacement of coalescing cartridge & active carbon – molecular sieve cartridge
1.
Unscrew the filter head counter clockwise.
2.
Remove the filter head and the spring.
3.
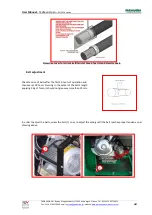
Place the
special handle
on top of the A.C.-M.S cartridge.
4.
Remove the A.C.-M.S. cartridge by pulling upwards with the
special handle.
Before throwing away the
used cartridge, do not forget to remove the cartridge connector.
5.
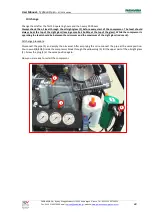
Unscrew and remove the filter housing from filter’s base.
6.
Unscrew and remove the coalescing connector & cover.
7.
Remove the coalescing cartridge by pulling upwards.
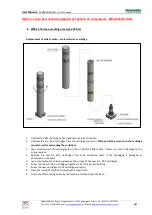
8.
Lay a small amount of silicone grease on the o-rings of filter’s base. If there is a trace of damage on the o-
rings, replace.
9.
Install the new coalescing cartridge on filter’s base by fastening it down with your hand.
10.
Wrap a small amount of Teflon around the thread of the tube connector.
11.
Screw the cartridge connector & cover on the tube connector (on top of the coalescing cartridge).
12.
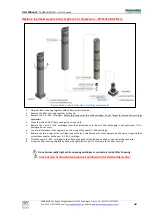
Clean the inside of the filter housing with a clean cloth.
13.
Screw the filter housing back on its base.
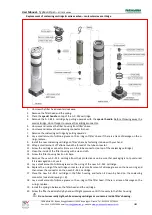
14.
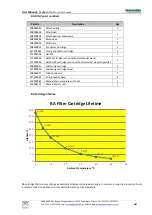
Remove the new A.C.-M.S. cartridge from their protective case. Be sure that packaging is not punctured.
If it is damaged do not use it.
15.
Lay a small amount of silicone grease on the o-ring of the new A.C.-M.S. cartridge.
16.
Replace the o-ring of the cartridge connector, lay a small amount of silicone grease on the new o-ring and
then screw the connector on the new A.C.-M.S. cartridge.
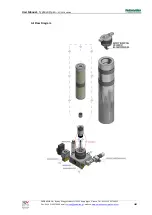
17.
Place the new A.C.-M.S. cartridge in the filter housing and fasten it down by hand on the coalescing
connector (see also drawing nr. B).
18.
Lay a small amount of silicone grease on the o-rings of the filter head. If there is a trace of damage on the
o-rings, replace.
19.
Install the spring in between the filter head and the cartridge.
20.
Screw the filter head carefully by hand with light pressure until it fits evenly to the filter housing.
Do not screw really tight, while screwing cartridges or connectors inside filter’s housing.


