


BA_PH_680-100_EN_08-22.docx
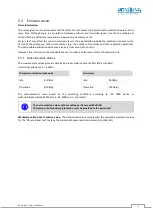
38
10.5
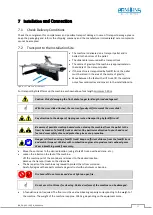
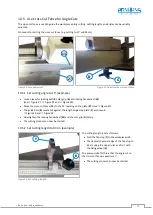
Use Cross-Cut Fence for Angle Cuts
The cross-cut fence is used to guide the workpiece during cutting. Cutting lengths and angles can be variably
adjusted.
Procedure for setting the cross-cut fence (e.g. setting to 15° and 93 cm):
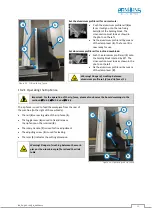
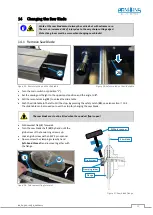
Figure 31: Set angular cuts
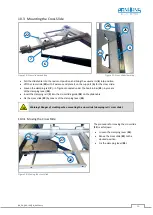
Figure 32: Adjusting the cross-cut fence
10.5.1
Set cutting angle to 15° (example)
•
Loosen lever for locking bolt (
K
), star grip (
G
) and locking handwheel (
W
)
(see
Figure 29 and
•
Move the cross-cut fence (
13
) to the 15° marking on the plate (
27
) (see
•
The guide bolt (
B
) must abut against the length angle stop plate (
P
) as shown in
•
Now tighten the locking handwheel (
W
) and the star grip (
G
) firmly.
•
The cutting process can now be started.
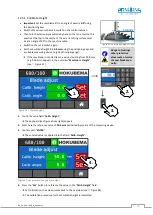
10.5.2
Set cutting length to 93 cm (example)
Figure 33:
Set cutting length
The cutting length is set as follows:
•
Fold the flip stop (
Y
) to the workpiece side.
•
Then adjust the inner edge of the flip stop to
93 cm using the upper ruler and fix it with
the fixing wheel (
R
).
The prerequisite for this is that the angle cut on
the cross-cut fence is exactly set!
•
The cutting process can now be started.
13
27
B
G
R
Y