INSTALLATION INSTRUCTIONS CM310
For Technical Support: www.panduit.com/resources/install_maintain.asp
Page 4 of 8
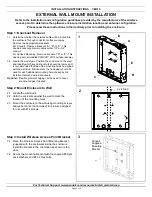
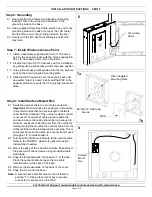
2.1 Place the Wireless Access Point Mounting Bracket
(supplied with the enclosure) inside the enclosure
Install the bracket in the orientation as shown in the
view.
2.2 Secure the mounting bracket with the supplied #8
Split Lock Washers and #8-32 Hex Nuts.
Step 2: Install Wireless Access Point Bracket
IN-CEILING MOUNT INSTALLATION
2
Panduit
Supplied
Mounting
Bracket
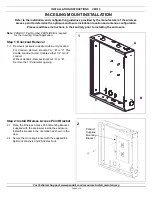
1.1
Remove knockouts in desired cable entry location:
For Conduit - Remove knockout “A”, “B” or “C”. This
double knockout accommodates either 1/2” or 3/4”
conduit.
Without Conduit - Remove knockout “A” or “B”.
Remove the 1/2” diameter opening.
1
A
B
C
Step 1: Knockout Removal
Refer to the installation and configuration guidelines provided by the manufacturer of the wireless
access point to determine the optimum enclosure installation location and antenna configuration.
Please read these instructions in their entirety prior to installing the enclosure.
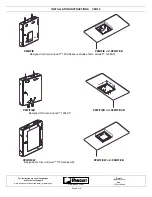
Note: PANDUIT Part Number PZWIFIDCB is required
for the in-ceiling mount application.


