


10
Installation Guide
AT-UHD-SW-510W
By default, the AT-UHD-SW-510W is set to DHCP mode, allowing a DHCP server (if present) to
assign the unit an IP address. If a DHCP server is not found within 15 seconds, then the unit
will be placed in Auto IP mode and use a self-assigned IP address within the range of
169.254.
xxx.xxx
. If DHCP or Auto IP mode are not desired, the unit can be placed into static IP mode by
using the
INPUT
button on the front panel.
Once the desired IP mode is set, refer to
Obtaining the IP Address
, on the next page, for
information on retrieving the IP address of the unit.
IP Configuration
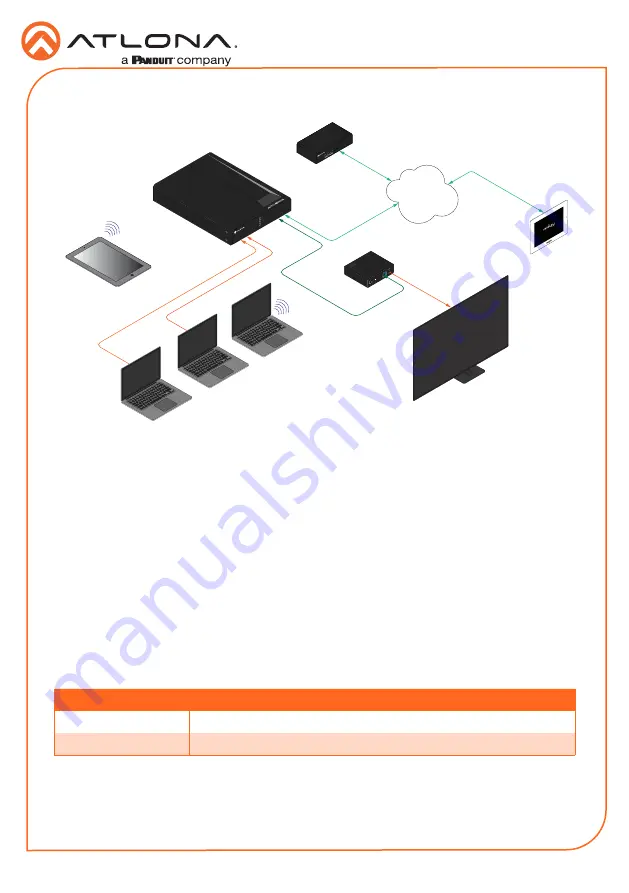
Connection Diagram
Press and hold the
INPUT
button for approximately 15 seconds. Release the
INPUT
button.
All the front-panel LED indicators will begin to flash, then the unit will reboot. The number of
flashes will indicate the currently selected IP mode:
LED flashes
Description
Two
DHCP mode
Four
Factory Static IP mode (IP address set to
192.168.1.254
)
Switching the IP mode
USB-C
DP
HDMI 3
HDMI 4
BYOD
DISPLAY
INPUT
IP
POWER
AT-UHD-SW-510W
DC 48V
RS-232
HDBaseT IN
HDMI OUT
RX
TX
AT-UHD-EX-100CE-RX-PSE
HDMI
UHD/HD Display
DisplayP
ort
AT-UHD-SW-510W
Ethernet / P
oE
Ethernet / P
oE
HDBaseT
USB-C
Ethernet
LAN
Laptop
Tablet
(BYOD)
Laptop
Laptop
AT-VGW-250
Miracast™
USB-C
AUDIO OUT
Velocity
TM
USB
US
B
US
B
US
B
AT-VTP-800-WH


