background image

Before attempting to connect or operate this product,

please read these instructions carefully and save this manual for future use.

No model number suffix is shown in this manual.

Operating Instructions

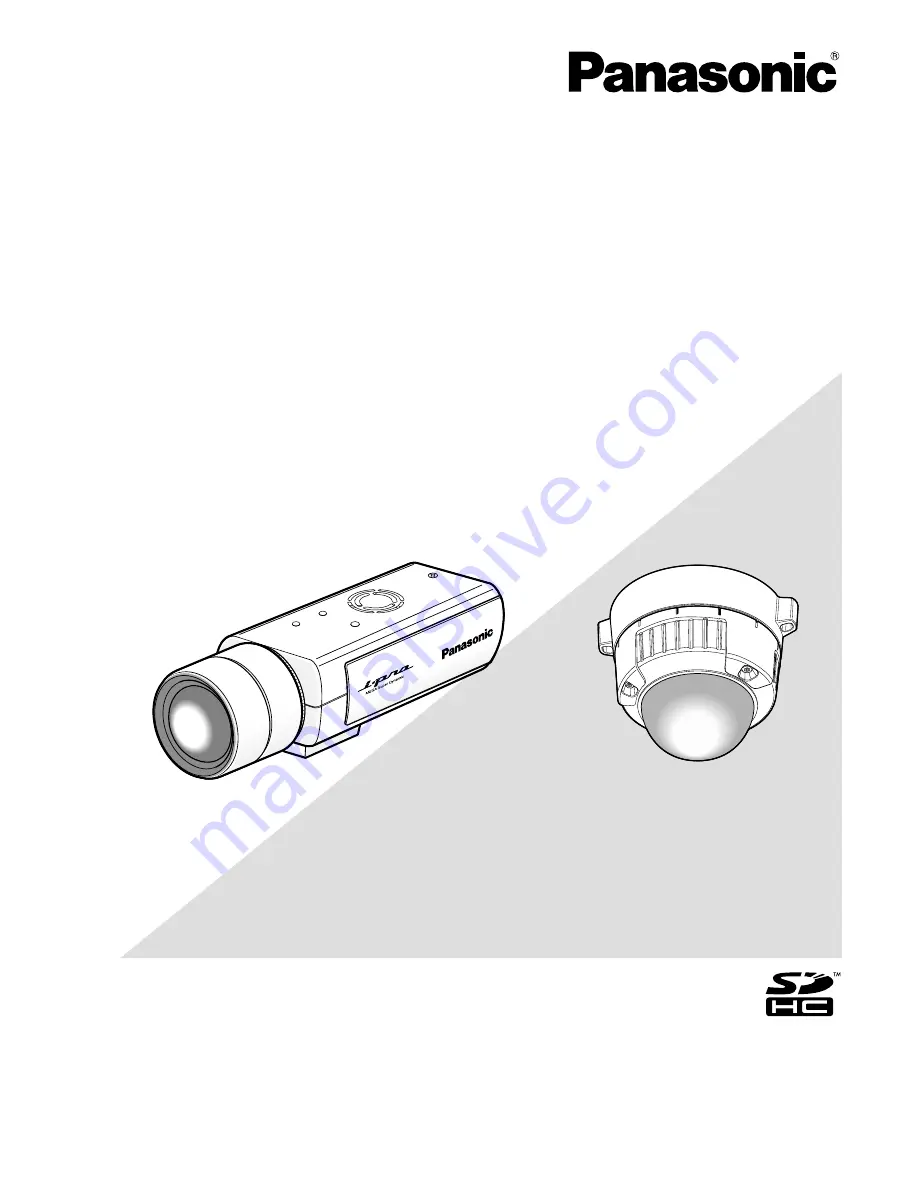
Network Camera

Model No.

WV-NP502

WV-NW502S

WV

-NP

502

(Lens is option for WV-NP502.)

WV-NW502S

WV-NP502

Summary of Contents for WV-NW502S

Page 1: ...uct please read these instructions carefully and save this manual for future use No model number suffix is shown in this manual Operating Instructions Network Camera Model No WV NP502 WV NW502S WV NP5...

Page 2: ...the settings relating to image quality Image adjust setup menu 44 Set mask areas 48 Back focus setting Back focus setup menu 49 Configure the settings relating to the privacy zone Privacy zone setup m...

Page 3: ...ule 80 Maintenance of the camera Maintenance 81 Check the system log System log 81 Upgrade the firmware Upgrade 82 Reset the settings Reboot the camera Default reset 83 Viewing Help 84 Displaying the...

Page 4: ...ective owners Abbreviations The following abbreviations are used in these operating instructions Microsoft Windows Vista Business SP1 32 bit is described as Windows Vista Microsoft Windows XP Professi...

Page 5: ...ter key on the keyboard The Live page will be displayed Refer to page 7 for further information about the Live page When On is selected for User auth the authentica tion window will be displayed befor...

Page 6: ...mum number The second and sub sequent users who are monitoring H 264 or MPEG 4 images will not be included in the maximum number When On is selected for H 264 transmission or MPEG 4 transmission pages...

Page 7: ...apture size buttons These buttons will be displayed only when a JPEG image is displayed VGA button The letters VGA will turn green and images in the main area will be displayed in VGA size QVGA button...

Page 8: ...Alarm occurrence indication button 2 This button will be displayed and will blink when an alarm has occurred When this button is clicked the alarm output terminal will be reset and this button will di...

Page 9: ...ndicator will light red It will go off when the SD recording stops This indicator will be displayed only when Manual is selected for Save trigger on the setup menu page 27 8 Main area Images from the...

Page 10: ...rations are available only for images from the Panasonic PTZ network cameras Only JPEG images can be displayed on a multi screen Audio will not be heard When the power is turned off or the LAN cable i...

Page 11: ...the Live page page 7 Step 2 Click the SD button in the SD memory card box The SD recording window will open Step 3 Click the Start button to start recording images on the SD memory card The SD recordi...

Page 12: ...Alarm tab of the Alarm page page 54 Transmit an image onto a server automatically An alarm image can be transmitted at an alarm occurrence to the server designated in advance The settings required to...

Page 13: ...ork traffic the number of the transmitted images may not reach the set number of images to be transmitted Alarm images failed to be transmitted to the FTP server at an alarm occurrence will not be sav...

Page 14: ...on the SD memory card can be obtained from the SD memory card tab of the Basic page page 26 To use the SD memory recording function featured in Panasonic s network disk recorder select Off for FTP per...

Page 15: ...ge page 32 respectively Step1 Display the Live page page 7 Step 2 Click the List button The log list will be displayed in a newly opened win dow log list window Important Only a single user can operat...

Page 16: ...ill be displayed in 24 hour format The recording timing of logs are as follows Alarm log Alarm occurrence time and date will be filed as a log Manual log Time and date when recording of images onto th...

Page 17: ...r the Transmission interval setting on the FTP img trans tab is 1min or less About the playback page Number of images When clicking a time and date listed on the log list win dow total number of image...

Page 18: ...n while the mouse pointer is on this button the image number will be incremented When the mouse button is released the increment of the image number will stop and the image number displayed at the mom...

Page 19: ...restrictions by changing the HTTP port It is possible to prevent illegal access such as port scanning etc by changing the HTTP port number page 73 Important Design and enhance security countermeasures...

Page 20: ...page 66 for how to configure the access level How to display the setup menu Step1 Display the Live page page 7 Step 2 Click the Setup button on the Live page The window with the user name and passwor...

Page 21: ...window Step 3 After completing each setting item click the Set button to apply them Important When there are two or more Set and Execute but tons on the page click the respective button to the edited...

Page 22: ...the Advanced func page The setting relating to the XML notification destinations of infor mation about the face detection and the settings relating to the face detection can be configure on the Advan...

Page 23: ...ystem log check firmware upgrade and initialization of the setup menu can be carried out on the Maintenance page page 81 2 Help button Displays the Help page page 84 3 Status display area The title of...

Page 24: ...ng when entering the current time and date for Date time To hide time and date select Off Default 24h Date time display format Select a date time display format When 2009 04 01 13 10 00 is set for Dat...

Page 25: ...ct Off to turn off the LEDs at all times Power LED Link LED Access LED SD memory card error LED ABF LED Default On Note Power LED Green This LED will light when the power is on Link LED Orange This LE...

Page 26: ...apacity notification When the mail notification function or the Panasonic alarm protocol function is used to provide notification of the remaining capacity of the SD memory card select a level to be n...

Page 27: ...ber Available number of characters 1 8 characters Note When FTP error is selected for Save trigger the file name entered for File name on the FTP img trans tab of the Network page will be used for the...

Page 28: ...matted on the SD memory card tab the following functions may not work correctly Save obtain images that failed to transmit to the FTP server using the FTP periodic image trans mission function Save o...

Page 29: ...y card In this case retry later Depending on the settings of a proxy server or a firewall images may not be obtained via a network In this case refer to the network administrator Step1 Click the Execu...

Page 30: ...B 2 GB 1 GB 512 MB 256 MB 128 MB 64 MB Approx 64 000 pics Approx 32 000 pics Approx 16 000 pics Approx 8 000 pics Approx 4 000 pics Approx 2 000 pics Approx 1 000 pics Approx 500 pics Approx 250 pics...

Page 31: ...5 pics 5 Normal 6 7 8 9 Low Image quality 32 GB 16 GB 8 GB 4 GB 2 GB 1 GB 512 MB 256 MB 128 MB 64 MB 0 Super fine 1 Fine 2 3 4 Capacity of SD SDHC memory card 32 GB 16 GB 8 GB 4 GB 2 GB 1 GB 512 MB 25...

Page 32: ...ogs are to be downloaded For example enter C alarm to designate the folder alarm under drive C Available number of characters 3 128 characters Available characters Alphanumeric characters the slash th...

Page 33: ...n out the older images will be overwritten by the newer images Even when avail able capacity of the SD memory card is enough the older images will be overwritten by the newer images when more than 5 0...

Page 34: ...l not be saved Images Images will not be saved Logs Logs will not be saved Images Images will not be saved Logs Logs will not be saved Images Images will be saved When available capacity of the SD mem...

Page 35: ...Logs will not be saved Images Images will not be saved Logs Logs will not be saved Images Images will not be saved Log tab On FTP error Save logs SD memory card tab SD memory card Use Save trigger FT...

Page 36: ...ge 77 On is not selected for Activation of Priority stream and JPEG is not selected for Stream type page 68 Check the following before changing Image capture mode from 3 mega pixel to 1 3 mega pixel 2...

Page 37: ...e 40 The tab name will be changed to JPEG MPEG 4 Default H 264 H 264 1 H 264 2 H 264 transmission Select On or Off to determine whether or not to transmit H 264 images On Transmits H 264 images Off Do...

Page 38: ...frame rate for H 264 images from the following 1fps 3fps 5fps 7 5fps 10fps 15fps 20fps 30fps Default 30fps Note When Frame rate is selected for Transmission pri ority this setting is available Frame r...

Page 39: ...Default Unicast port AUTO Unicast port1 Image 1 Enter the unicast port number used to transmit images from the camera Available port number 1024 50000 Only even num bers are available Default 32004 U...

Page 40: ...ilable When On is selected for MPEG 4 transmission in MPEG 4 1 and MPEG 4 2 MPEG 4 images are viewable using other devices with each setting When On is selected for MPEG 4 transmission in MPEG 4 1 or...

Page 41: ...s 2048kbps 3072kbps 4096kbps Unlimited Default MPEG 4 1 2048kbps MPEG 4 2 2048kbps Unlimited is available only when Frame rate is selected for Transmission priority Note The MPEG 4 bit rate is synchro...

Page 42: ...he multicast IP address Images and audio will be transmitted to the designated IP address Available IPv4 address 224 0 0 0 239 255 255 255 Available IPv6 address Multicast address starting with FF Def...

Page 43: ...ptions of how to configure the settings relating to image adjust back focus and privacy zone Image adjust Click the Setup button to display the setup menu that can configure the settings relating to i...

Page 44: ...ction is available only when 1 3 mega pixel is selected for Image capture mode on the JPEG H 264 or JPEG MPEG 4 tab This setting is available only when Outdoor scene or Indoor scene is selected for Li...

Page 45: ...ompensation function can make darker parts of images brighter by digital image processing Default Off Important When On is selected for Adaptive black stretch noise in the darker parts may be increase...

Page 46: ...ack white mode when the ambient brightness illuminance of the camera is approx 2 lx or less High Switches from the color mode to the black white mode when the ambient brightness illumi nance of the ca...

Page 47: ...e resolution becomes lower When On is selected for the image stabilizer check the view angle and resolution at camera installation The image stabilizer function may not work for the following subjects...

Page 48: ...ders will appear and the image displayed on the Image Privacy tab will be divided into 48 6x8 Step 3 Click the divided areas to be masked The clicked areas will be masked and will become white To canc...

Page 49: ...and black white images Preset Performs the preset movement to each speci fied back focus position when switching between color and black white images The preset position is the back focus position sp...

Page 50: ...en an area is designated by dragging the mouse Each zone can be overlapped Up to 8 privacy zones can be created and they will be numbered in the order of creation Display type Select a display type of...

Page 51: ...MPEG 4 tab of the Image Audio page audio output will become unavailable during monitoring H 264 or MPEG 4 images To transmit audio from a PC to the camera click the JPEG button on the Live page When O...

Page 52: ...Audio may temporarily be interrupted or noise may be heard the camera or when multiple users are accessing concurrently It may be possible to dimin ish the interruption or noise by setting a longer i...

Page 53: ...ample of entry Example when entering an IPv4 address 192 168 0 10 8080 Example when entering an IPv6 address 2001 db8 0 0 0 0 0 1 8080 Available number of characters 1 128 characters Note When using t...

Page 54: ...he settings for Alarm output terminal setup page 57 Off Not used Default Off Terminal 3 Determine how to use terminal 3 Alarm input Receives alarms AUX output AUX output will be supplied The AUX butto...

Page 55: ...ame Enter the directory name where the alarm images are to be saved For example enter ALARM to designate the directory ALARM under the root directory of the FTP server Available number of characters 1...

Page 56: ...be transmitted with the image quality selected for Image quality upon alarm detection Off Does not change the image quality upon alarm detection Default Off Image quality upon alarm detection Image q...

Page 57: ...alarm occurrence Latch When an alarm is detected the alarm output ter minal will be in the state selected for Trigger output until the alarm occurrence indication button is clicked Pulse When an alarm...

Page 58: ...for Open of AUX on the Live page Default Open Close Up to 5 characters Enter the name for Close of AUX on the Live page Default Close Change the AUX name Alarm Click the Alarm tab on the Alarm page p...

Page 59: ...e whether or not to detect video motion affected by brightness change such by a dimming level control Default Off Important Light detection control may not work when bright ness change is too small Wh...

Page 60: ...f the outline to be set for the area will become On Step 2 Adjust Detection area and Detection sensitivity using the slide bar Refer to page 59 for further information about the Detection sensitivity...

Page 61: ...Alarm image section on the Alarm tab page 55 will be applied to the size of the image to be attached Destination of notification Address 1 Address 4 Enter the destination mail address Up to 4 destina...

Page 62: ...a destination port for the Panasonic alarm proto col from the following Available range 1 65 535 Default 1 818 Retry times Select a retry time for the Panasonic alarm protocol Available range 0 30 De...

Page 63: ...tab Configure the settings relating to the XML notification XML notification Click the XML notification tab on the Advanced func page The settings relating to the XML notification can be configured i...

Page 64: ...ion 2 Destination address Configure the IP address or host name of the destina tion for XML notification of the face detection informa tion Destination port number Configure the port number settings f...

Page 65: ...tection Determine whether or not to enable the face detection function On Information about the face detection frame will be attached and the test frame will be displayed on the image of this page Off...

Page 66: ...ff User name Enter a user name Available number of characters 1 32 characters Default None blank Password Retype password Enter a password Available number of characters 4 32 characters Default None b...

Page 67: ...ed and 2 Camera control is selected for the access level the PCs whose IP address is between 192 168 0 0 192 168 0 255 can access the camera with the access level 2 Camera control When the IP address...

Page 68: ...tion IP address Stream type Select either JPEG H 264 MPEG 4 1 or H 264 MPEG 4 2 JPEG JPEG images will be transmitted H 264 MPEG 4 1 H 264 1 or MPEG 4 1 images will be transmitted H 264 MPEG 4 2 H 264...

Page 69: ...ecessary to clear the SMTP server authen tication to send e mails Default None Note When you don t know the authentication method to send e mails refer to the network administrator User name Enter the...

Page 70: ...to access the FTP server Available number of characters 0 32 characters Control port Enter a control port number to be used for the FTP serv er Available port number 1 65 535 Default 21 FTP mode Selec...

Page 71: ...hen entering the host name for NTP server address it is necessary to configure the DNS set tings on the Network tab of the Network page page 73 NTP port Enter a port number of the NTP server Available...

Page 72: ...the camera Default 255 255 255 0 Default gateway When not using the DHCP function enter the Default gateway of the camera Default 192 168 0 1 Note Multiple IP addresses for the default gateway are una...

Page 73: ...r about the IP address of the DNS server Note It is impossible to use both an IPv4 DNS server and an IPv6 DNS server HTTP port Assign the port numbers independently The following port numbers are unav...

Page 74: ...tion is to be set in a router To access the camera via the Internet by connecting the camera to a router it is necessary to assign a respec tive HTTP port number for each camera and address translatio...

Page 75: ...ault 1h Configure the settings relating to DDNS DDNS Click the DDNS tab on the Network page pages 20 and 21 How to display operate the setup menu When communicating using IPv4 obtain a global IP addre...

Page 76: ...haracters 0 32 characters Default None blank Important When using the SNMP function it is necessary to enter the community name When no community name is entered the SNMP function will not work System...

Page 77: ...ailed to transmit using the FTP periodic image transmission can be saved automatically on the SD memory card page 27 FTP periodic image transmission FTP When FTP is clicked the FTP tab of the Server p...

Page 78: ...om of the win dow Configure the schedule settings of the FTP periodic image transmission FTP img trans Click the FTP img trans tab on the Network page pages 20 and 21 How to display operate the setup...

Page 79: ...How to delete the set schedule Step1 Uncheck the check box of the set day of the week Step 2 Click the Set button after completing the settings The result will be displayed at the bottom of the win d...

Page 80: ...will be received during the period of the schedule VMD permission The Video motion detection VMD function will be active during the period of the sched ule Access permission Users whose access level i...

Page 81: ...newer logs will overwrite the older system logs In this case the oldest log is the first to be overwritten The system logs will be displayed in group of 100 logs each When using the SD memory card the...

Page 82: ...irmware upgrade Step 4 Click the Execute button The confirmation window will be displayed When Do not reset the settings to the default after the upgrade is selected the confirmation window will not b...

Page 83: ...e Execute button to reset the settings of the camera and the HTML files to the default Note that the network settings will not be reset It is impossible to operate the camera for around 2 min utes aft...

Page 84: ...Click the Setup button The setup screen is displayed Clicking an underlined item win display the Help pop window It is possible to configure the settings while dis playing the Help pop up menu Step 2...

Page 85: ...correctly The DNS server may be down Ask the network administrator The IP address of the server may be incorrect Check if the IP address of the server is configured correctly The SMTP server may be d...

Page 86: ...may be down Ask the network administrator The login user name will be displayed when On is selected for User auth The IP address of the PC currently accessing to the camera will be displayed when On...

Page 87: ...2 168 0 10 After the camera is initialized access the camera and set the IP address again When the camera is initialized all the settings of the camera previously configured on the setup menus will be...

Page 88: ...the entered password correct Restart the web browser and enter the password again Access to the SD memory card may be failed Restart the browser and retry to obtain images 66 Is the same IP address p...

Page 89: ...e for Check for newer versions of stored pages on the Settings win dow 89 When flicker occurs frequently select Indoor scene for Light control mode Is the brightness setting set at an appropriate leve...

Page 90: ...Automatic prompting for file downloads Click the OK button The Warning window will be displayed Click the Yes button Cannot download the log list Are the microphone and the speaker connected cor rectl...

Page 91: ...Exclude the port number of the camera from the list of the port numbers to be filtered by the anti virus soft ware Is Off selected for Link Access LED on the Basic page Select On for Link Access LED I...

Page 92: ...is installed on the PC in use 1 Right click on the desktop and select Properties from the displayed pop up menu 2 Select Settings from Display Properties and then click the Advanced button 3 Click th...

Page 93: ...wing message is dis played on the information bar Pop up blocked To see this pop up or additional options click here The following message is dis played on the information bar This site might require...

Page 94: ...not be displayed correctly Click the Settings tab on the Properties window of Screen in the control panel and then click the Advanced button Change the DPI setting to Large size 120 DPI Images are not...

Page 95: ...tination where images are to be saved by the SD memory recording function of Panasonic network disk recorder Destination where log files are to be saved Image failed to transmit to the FTP server by t...

Page 96: ...1 800 528 6747 Three Panasonic Way 2H 2 Secaucus New Jersey 07094 Panasonic Canada Inc 5770 Ambler Drive Mississauga Ontario L4W 2T3 Canada 905 624 5010 http www panasonic ca Panasonic Sales Company P...

Reviews: