-16-
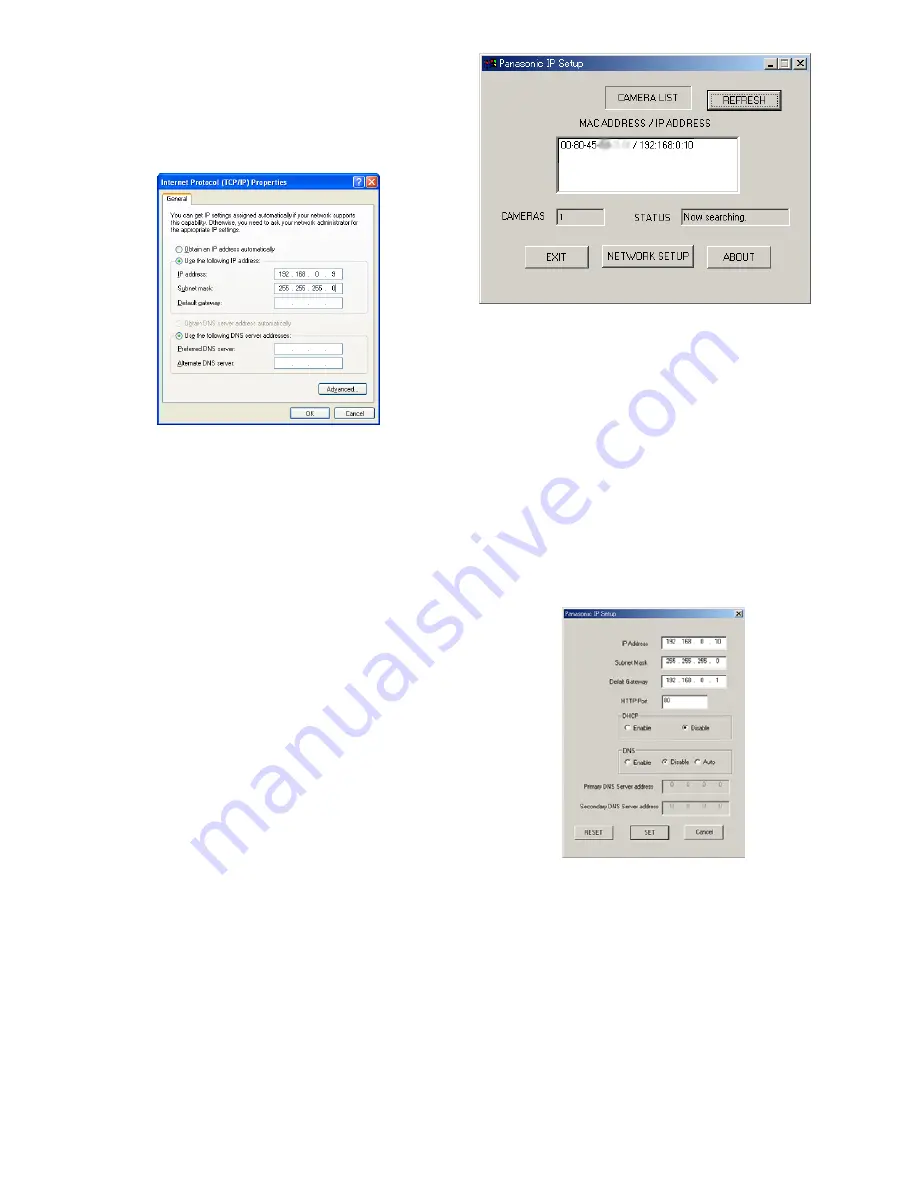
7. Click the "Use the following IP address" radio button
and enter the IP address and the subnet mask as
follows.
IP address
: 192.168.0.9
Subnet mask
: 255.255.255.0
8. Click the [OK] button, and the window dialog box
closes.
Note:
Use a small sized picture when a blue picture
appears instead of the live picture due to Internet
traffic congestion.
■
Network Setup of the Camera
●
Using Panasonic IP Setup Software
Set up the network of the camera using the "Panasonic
IP Setup" software included on the CD-ROM provided
with the camera.
Notes:
• Do not access this menu through HTML or con-
trollers during the Panasonic IP Setup procedure.
• Only one administrator is required.
• If a firewall (including software) exists, allow access
to all UDP ports. Otherwise, it is impossible to use
the "Panasonic IP Setup" software.
Double-click IP setup.exe.
The "Panasonic IP Setup" starts up.
The MAC address and the IP address of the connected
camera will be displayed. (Click the [REFRESH] button
if they are not displayed.)
1. Click the MAC ADDRESS/IP ADDRESS of the cam-
era to be set up.
2. Click the [NETWORK SETUP] button.
The setup window appears.
Notes:
• When two or more cameras are connected, the
MAC addresses and the IP addresses of all the
connected cameras will be displayed.
• The "Panasonic IP Setup" software can recognize
only those cameras in the same subnet.
• Pressing the [REFRESH] button will display the
updated MAC addresses and IP addresses of all
the connected cameras that are in the same sub-
net.
3. Set parameters for each item.
"IP Address"
"Subnet Mask"
"Default Gateway"
"HTTP Port"
4. Input the parameters for your environment.
"DHCP"
"DNS"


