Auto T
uning
15
Setup the network connection
Set up the network connection to enable the network service functions such as VIERA Connect, etc.
(p. 17, 78).
•
To set up the wireless connection, the Wireless LAN Adaptor is required.
•
Please note that this TV does not support wireless public access points.
•
Ensure the network connections and network environment are completed before starting setup.
1
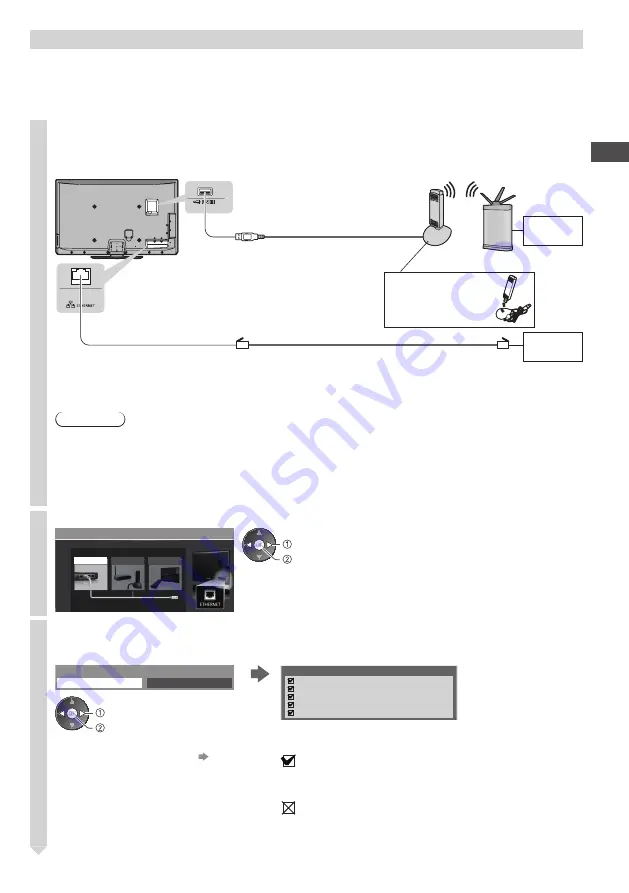
Connect the LAN cable or Wireless LAN Adaptor
To enable the network service functions (VIERA Connect, etc.), you need to connect the TV to a
broadband network environment.
Internet
environment
Internet
environment
Wired connection
Wireless connection
Access point
LAN cable
•
Use the Shielded Twist Pair (STP) LAN cable.
Wireless LAN Adaptor
(supplied)
•
Connect to the
USB 1, 2 or 3 port.
or
Rear of the TV
■
Setup Wireless
LAN Adaptor
Insert straight in
•
If you do not have any broadband network services, please consult your retailer for assistance.
•
For more information of the network connections (p. 70)
Caution
•
To use the Wireless LAN Adaptor, an Access Point needs to be obtained.
•
It is recommended to use the Wireless LAN Adaptor with the extension cable.
•
To avoid radio wave interference, keep the TV away from the devices such as other wireless
LAN devices, microwaves and the devices that use 2.4 GHz and 5 GHz signals when using the
Wireless LAN Adaptor.
Otherwise malfunction may occur.
2
Select [Wired] or [Wireless]
Network Setup
Select Wired or Wireless
Wired
Wireless
Set later
access
select
3
Start the settings
■
[Wired]
Select [Auto]
Acquire IP Address
Auto
Manual
access
select
•
To set manually, select [Manual] and
set each item. For details
(p. 72 - 73)
Check network cable connection.
Check acquired IP address.
Check for devices using same IP address.
Check gateway connection.
Check server connection.
Connection Test
Automatically setup is done and the test of the
network connection starts.
: succeeded
The test is successful and the TV is
connected to the network.
: failed
Check the settings and connections, and
then select [Retry]


