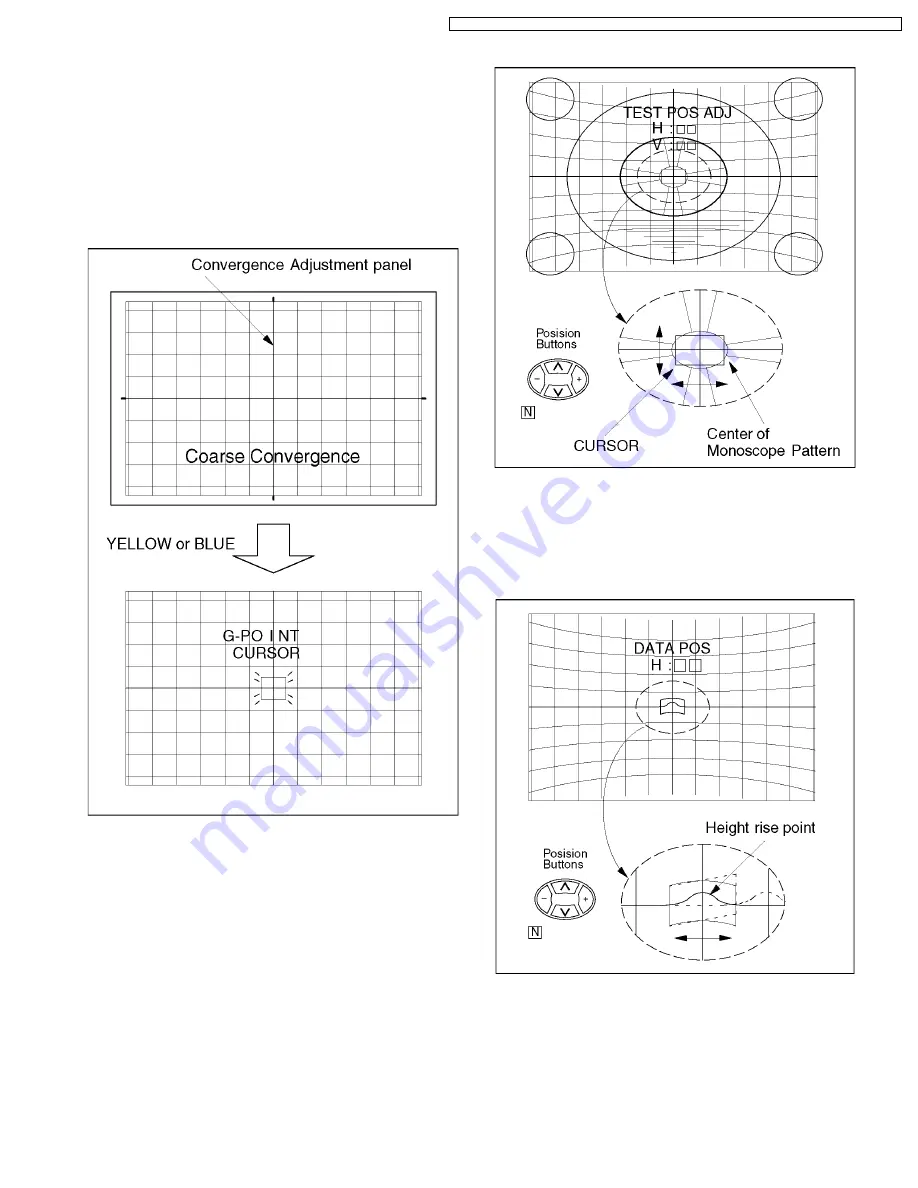
1. Input a monoscope pattern of PAL.
2. Enter the Service Mode1.
3. Select the Coarse Convergence by pushing "RED" or
"GREEN" buttons. Then push "YELLOW" button, and push
Position and [N] buttons to set the data to zero.
4. Stick the Convergence Adjustment Sheet (PAL 50Hz) onto
the screen.
5. Push the “YELLOW” or “BLUE” on the remote control, and
enter the Coarse Convergence Adjustment mode.
6. Push the "0" of 10 key buttons, and then push the "N" of
position buttons on the remote control.
7. Enter to "TEST POS." mode.
8. Push the "5" button to display the monoscope pattern on
the screen.
9. Adjust the position buttons so that the cursor in the center
of the test pattern is aligned with the center of the
monoscope pattern.
10. Push the "TV/AV" button on the remote control, and enter
the "DATA POS." mode.
11. Push the "5" button and close the background image
(monoscope pattern).
12. Use the "+" and "-" of the position buttons so that the bump
in the screen center line is at the center of the cursor.
13. Push the "TV/AV" button twice, and enter the "OSD POS"
mode.
14. Adjust the position buttons so that the cross-cursor is
aligned near cross-bar.
15. Push the "SET UP" button, and "N" button to store data.
16. Push the "0" of 10 key buttons, and return to Coarse
Convergence Adjustment mode.
10.2. Convergence Adjustment Procedure
33
TX-51P800X / TX-51P800HM / TX-51P800HQ / TX-43P800X / TX-43P800HM / TX-43P800HQ / TX-43P800HZ
Summary of Contents for TX-51P800X
Page 16: ...16 TX 51P800X TX 51P800HM TX 51P800HQ TX 43P800X TX 43P800HM TX 43P800HQ TX 43P800HZ ...
Page 18: ...18 TX 51P800X TX 51P800HM TX 51P800HQ TX 43P800X TX 43P800HM TX 43P800HQ TX 43P800HZ ...
Page 19: ...19 TX 51P800X TX 51P800HM TX 51P800HQ TX 43P800X TX 43P800HM TX 43P800HQ TX 43P800HZ ...
Page 43: ...43 TX 51P800X TX 51P800HM TX 51P800HQ TX 43P800X TX 43P800HM TX 43P800HQ TX 43P800HZ ...


