


33
H POS— H POS+ V POS— V POS+
S-ZOOM
V SIZE— V SIZE+ V POS— V POS+
ZOOM
4 : 3
JUST
4 : 3
JUST
V POS— V POS+
14 : 9
AUTO
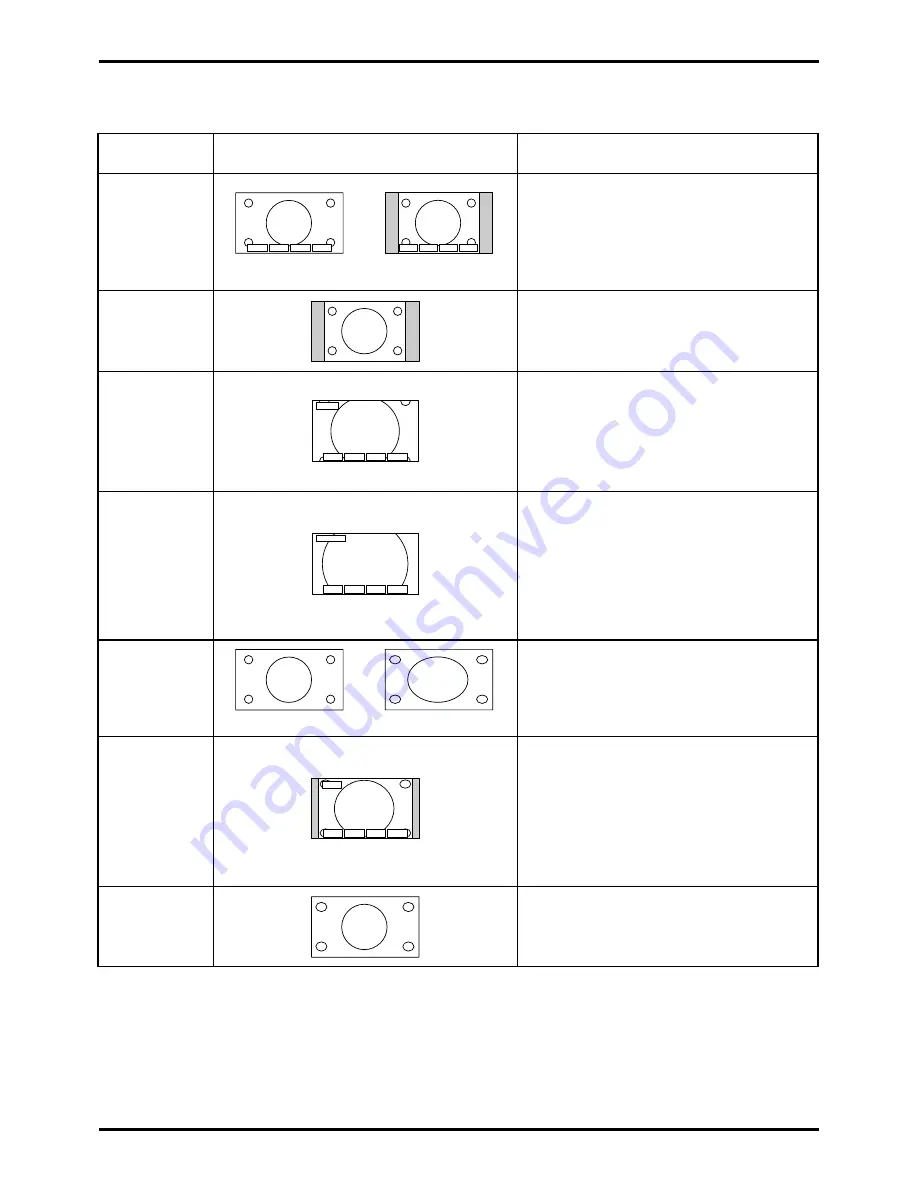
Explanation
Picture
Mode
4 : 3
ZOOM
16 : 9
16:9 Signal
4:3 Signal
14 : 9
JUST
S-ZOOM
16:9 Signal
4:3 Signal
The AUTO position can be set to 4:3 or to
JUST. When a wide screen signal is
detected at the Video terminal the TV will
select the 16:9 aspect ratio.
This option will display a standard 4:3
p i c t u r e w i t h o u t a n y s t r e t c h i n g o r
compression. There will be vertical gray
lines down either side of the picture.
S-Zoom displays part of the picture at a
greater magnification than the Zoom mode
does. The coloured buttons let you change
the position of the magnified area.
The 16:9 option will display the picture at
its maximum size. Signals in the 4:3 format
will be stretched to fit the picture.
The 14:9 option will display a 4:3 signal in
simulated wide screen. The picture is
slightly stretched. It is also slightly cropped
top and bottom.
The colour buttons let you change the
position of the stretched area.
JUST gives you a best fit option when
showing 4:3 on wide screen. The centre of
the picture is not affected but there is some
stretching at the edges.
Red
H POS -
Move picture Left
Green H POS +
Move picture Right
Yellow V POS -
Move picture Down
Blue
V POS +
Move picture Up
Yellow V POS -
Move picture Down
Blue
V POS +
Move picture Up
This option allows you to magnify or reduce
part of the picture.
Red
V SIZE -
Reduce the picture
Green
V SIZE +
Magnify the picture
Yellow
V POS -
Move picture Down
Blue
V POS +
Move picture Up
(Australia and
New Zealand only)
Red
4 : 3
Select
4 : 3
mode
Green
JUST
Select
JUST mode
Note:
ASPECT operations cannot be made during progressive (Y, P
B
, P
R
) or 1080i signal input.
Aspect Controls


