English
27
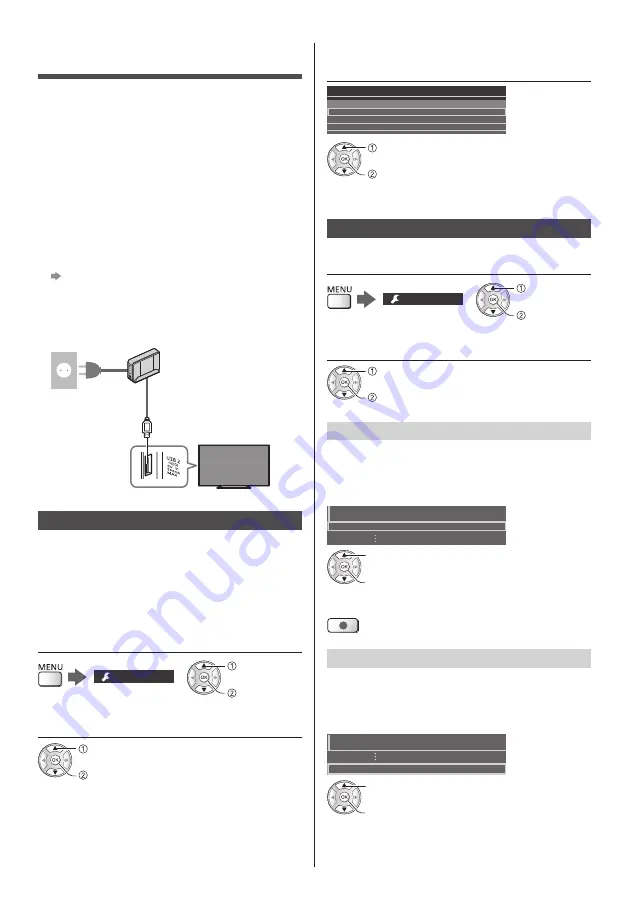
USB HDD Recording
You can record the digital TV programmes to the
connected USB HDD and enjoy playing back in various
ways.
●
For details, refer to [eHELP] (Recording).
■
Preparation
Connect the USB HDD to the USB 2 port with the USB
cable.
●
Prepare the USB HDD for the exclusive use of
recording with this TV.
●
Be sure to connect the USB HDD to the mains
socket.
●
To remove the USB HDD safely from the TV
[Safely remove USB] in [USB Device Setup]
(Setup Menu)
●
Check the terminal type and cable plugs are correct
for connection.
Mains socket
USB HDD
USB cable
Setting for USB HDD
Format and set up the USB HDD with this TV in order to
use it for recording.
●
Please note that USB HDD will be formatted and all
data in it will be erased after this setup.
●
Before setting, connect the USB HDD and be sure to
turn on the USB HDD.
1
Display the menu and select [Setup]
Setup
select
access
2
Select [USB Device Setup]
select
access
3
Select the USB HDD for recording and
start setup
USB Drive A
USB Flash Disk
USB Device Setup
Product
Name
select
start setup
●
Follow the on-screen instructions.
Recording
1
Display the menu and select [Setup]
Setup
select
access
2
Select [Recording Setup]
select
access
[One Touch Recording]
Records the current programme to the USB HDD
immediately.
●
Confirm the remote control code is “73” (p. 24).
Select the maximum recording time
1/2
One Touch Recording
180 minutes
Recording Setup
select
access / store
■
To start One Touch Recording
[REW LIVE TV]
Records the current programme to the USB HDD
constantly within the maximum recordable time.
●
Confirm the remote control code is “73” (p. 24).
Select [Auto] to start [REW LIVE TV]
REW LIVE TV
Auto
Recording Setup
select
access / start [REW LIVE TV]
●
When you select [Auto], recording will start
automatically.


