English
17
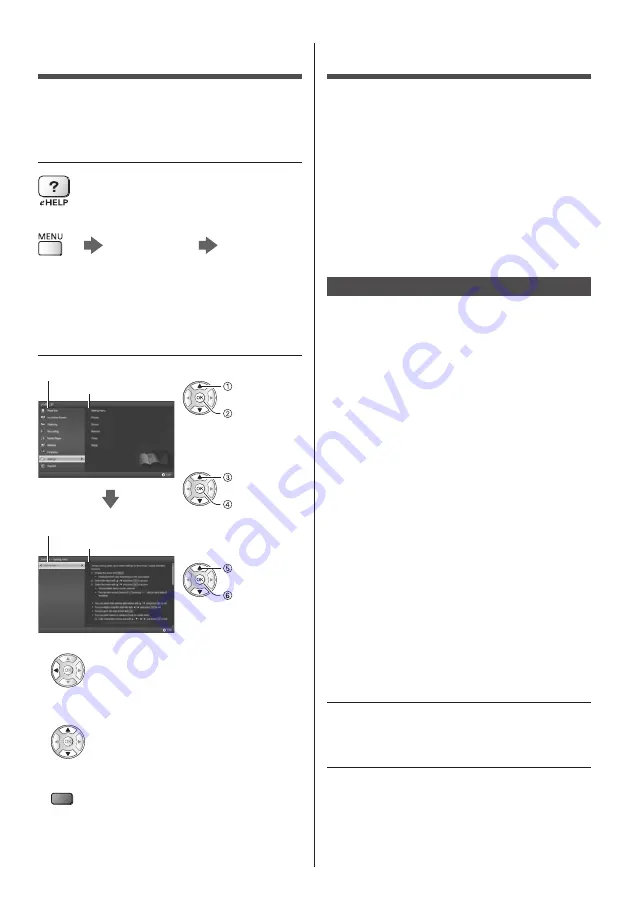
How to Use eHELP
[eHELP] is the detailed operating instructions built into
the TV, and gives a more detailed explanation for a
better understanding of the operation of each feature.
1
Display [eHELP]
or
[Help]
[eHELP]
●
If the [eHELP] has been accessed previously since
the TV was turned on, the confirmation screen is
displayed to select whether to go to the [First page] or
to the [Last viewed page].
2
Select the category and item
Category field
Item field
select
category
access
select item
access
select sub
item
access
Sub item field
Description
●
To return to the previous field
●
To scroll the description (if more than 1 page)
While the description is highlighted
●
To display the menu related to the description (only
for some descriptions)
(red)
●
To check the features of this TV
Read first > Features
Viewing 3D images
You can enjoy viewing 3D images of content or
programmes supporting 3D effects by wearing the 3D
Eyewear (optional).
●
The 3D Eyewear must be worn to view 3D images.
●
When using the 3D Eyewear, please also read the
manual of the 3D Eyewear.
●
This TV supports [Frame Sequential]
*
, [Side by Side]
and [Top and Bottom] 3D formats.
●
For details, refer to [eHELP] (Watching > 3D).
*
: Frame Sequential is the 3D format that the images for
right and left eyes are recorded with high definition
quality and alternately played back.
To view the 3D images
Use Panasonic 3D Eyewear supporting Bluetooth
wireless technology for active 3D.
■
Playing back 3D-compatible Blu-ray disc
(Frame Sequential format)
●
Connect the 3D-compatible player via a fully
wired HDMI compliant cable. (If you use the non
3D-compatible player, the images will be displayed in
2D mode.)
●
If the input mode is not switched automatically, select
the input mode connected to the player using the AV
button.
■
3D-supported broadcast
●
Please consult the suppliers of content or
programmes for availability of this service.
■
3D photos and 3D videos taken by
3D-compatible Panasonic products
●
Available in Media Player and Network services.
■
2D images converted to 3D
●
Set to [
2D→3D
] mode in [3D Mode Selection
(Manual)] ([Picture] > [3D Settings] > [3D Mode] > [3D
Mode Selection]).
Ensure that the registration of the 3D Eyewear has
been completed. For details, read the manual of the 3D
Eyewear.
1
Turn the 3D Eyewear on and put it on
Connection status and battery status are displayed on
the bottom right of the screen.
2
View the 3D images
Safety precautions will be displayed when you first
watch the 3D image. Select [Yes] or [No] to continue to
view 3D images.


