28
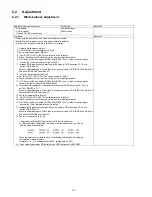
8.1.2.
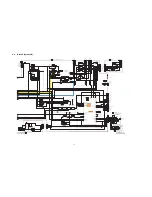
Initialization Pulse Adjust
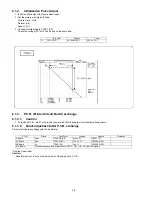
1. Input the White signal to plasma video input.
2. Set the picture controls as follows.
Picture menu : Vivid
Normal : Set
Aspect : Full
3. Connect Oscilloscope to TPSC1 (SC).
Check the voltage (T2) at 100 us period on the down slop.
8.1.3.
P.C.B. (Printed Circuit Board) exchange
8.1.3.1.
Caution
1. To remove P.C.B. , wait 1 minute after power was off for discharge from electrolysis capacitors.
8.1.3.2.
Quick adjustment after P.C.B. exchange
Adjust the following voltages with the multimeter.
*See the Panel label.
Caution:
Absolutely do not reduce Vsus below Ve not to damage the P.C.B.
Test point
Volume
Level
T2
TPSC1 (SC)
VR16602 (SC)
250 V ± 10 V
P.C.B.
Name
Test Point
Voltage
Volume
Remarks
P Board
Vsus
TPVSUS (SS)
Vsus ± 2V
VR251 (P)
*
SC Board
Vad
TPVAD (SC)
-140V ± 1V
VR16600 (SC)
SS Board
Ve
TPVE (SS)
Ve ± 1V
VR16000 (SS)
*
A, D Board
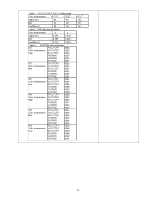
White balance and Sub brightness for NTSC, PAL, HD, PC and 625i signals
Summary of Contents for TH46PZ850UA - 46" PLASMA TV
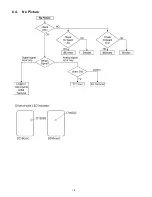
Page 16: ...16 6 4 No Picture ...
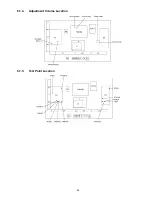
Page 29: ...29 8 1 4 Adjustment Volume Location 8 1 5 Test Point Location ...
Page 31: ...31 ...
Page 32: ...32 ...
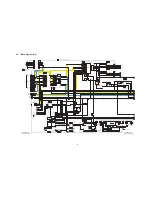
Page 40: ...40 10 3 Wiring 2 ...
Page 41: ...41 10 4 Wiring 3 ...
Page 42: ...42 10 5 Wiring 4 10 6 Wiring 5 ...
Page 43: ...43 11 Schematic Diagram 11 1 Schematic Diagram Note ...
Page 108: ...108 ...
Page 110: ...110 13 1 2 Fan part location ...
Page 111: ...111 13 1 3 Accessories ...
Page 112: ...112 13 1 4 Mechanical Replacement Parts List ...
Page 116: ...116 13 2 Electrical Replacement Parts List 13 2 1 Replacement Parts List Notes ...

