


60
English
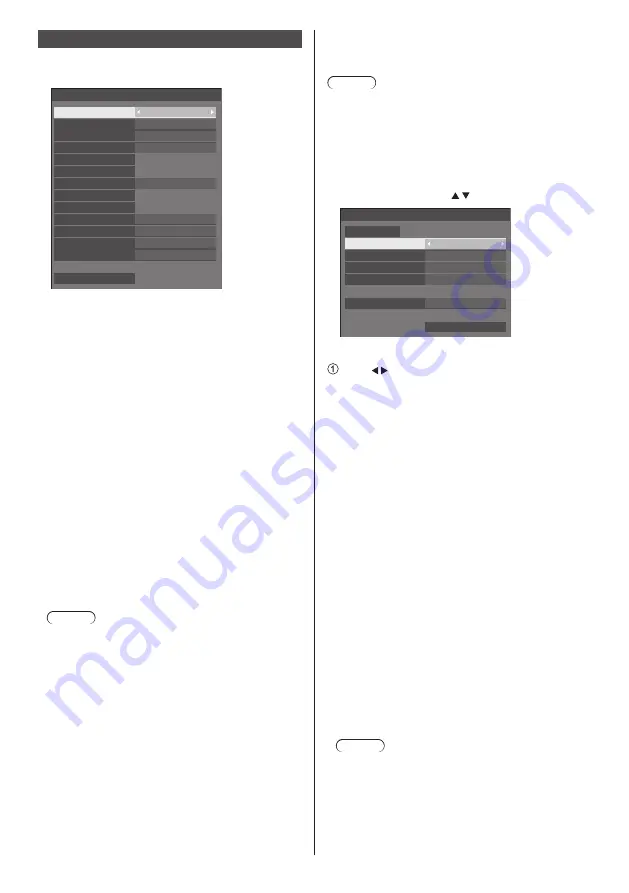
Network settings
Set when networking with a computer.
[Network settings] submenu will be displayed.
Network settings
Serial control
SF2H-000
Off
SERIAL IN
Off
Off
Display name
DIGITAL LINK status
DIGITAL LINK menu
Network status
LAN setup
AMX D. D.
Extron XTP
Crestron Connected™
Reset
Off
Auto display name
Permit
USB memory network settings
DIGITAL LINK mode
Auto
Network control
Off
■
[Serial control]
Selects the RS232-C control terminal.
[SERIAL IN]:
Controls using the SERIAL IN terminal of the
display.
[DIGITAL LINK]:
Controls via the optional device that supports
DIGITAL LINK output (ET-YFB100G, ET-
YFB200G) and the DIGITAL LINK / LAN terminal.
■
[Network control]
Set when controlling with the unit’s LAN terminal.
[On]:
Controls via LAN using the LAN terminal. The
power indicator lights orange when the power is
turned off with the remote control (standby).
[Off]:
Invalidates control with LAN terminal.
(In this case, the power consumption of Standby
condition (when the power is turned off with the
remote control) will be slightly reduced.)
Note
●
When using the LAN control function for “Using
Network Function” (see page 78
‒
94), set this
function to [On]. Even if [Off] is selected, the HDMI
communication via a twisted pair cable transmitter
is possible while the power is on.
■
[Auto display name]
Sets whether to change the display name automatically.
[On]:
Changes the display name automatically in
accordance with the set point of the display ID.
[Off]:
The display name is not changed automatically.
■
[Display name]
The name of the Display that is shown on the network
can be changed.
Note
●
The name can be changed only when [Auto display
name] is set to [Off].
●
Display ID is not reset to default with [Network
settings] - [Reset].
■
[LAN setup]
Detailed network settings for the LAN can be configured.
Select [LAN setup] with and press <ENTER>.
192.168. 0. 8
255.255.255. 0
192.168. 0. 1
1024
12:34:56:78:9A:BC
LAN setup
Save
DHCP
Off
IP address
Subnet mask
Gateway
Port
MAC address
[DHCP], [IP address], [Subnet mask], [Gateway]
Press to set [On] / [Off] of [DHCP].
When [Off] is selected, IP address and other settings
can be set manually.
[DHCP]:
(DHCP client function)
[On]:
Obtains an IP address automatically when a DHCP
server exists in the network the Display is going to
be connected.
[Off]:
When a DHCP server does not exist in the network
the Display is going to be connected, set [IP
address], [Subnet mask] and [Gateway] manually.
[IP address]:
(IP address display and setting)
Enter an IP address when DHCP server is not
used.
[Subnet mask]:
(Subnet mask display and setting)
Enter a Subnet mask when DHCP server is not
used.
[Gateway]:
(Gateway address display and setting)
Enter a gateway address when DHCP server is
not used.
Note
●
When [DHCP] is set to [On], the IP address, etc.
will be displayed in grey.


