background image

5

Safety Precautions


If problems occur during use

If a problem occurs (such as no picture or no sound), or if smoke or an abnormal odour starts to come out
from the Plasma TV, immediately unplug the power cord plug from the wall outlet.

   • If you continue to use the Plasma TV in this condition, 

fi

 re or electric shock could result. After checking that the 

smoke has stopped, contact your local Panasonic dealer so that the necessary repairs can be made. Repairing 
the Plasma TV yourself is extremely dangerous, and should never be attempted.

If water or foreign objects get inside the Plasma TV, if the Plasma TV is dropped, or if the cabinet becomes 
damages, disconnect the power cord plug immediately.

   • A short circuit may occur, which could cause 

fi

 re. Contact your local Panasonic dealer for any repairs that need to 

be made.

 CAUTION


When using the Plasma TV

Do not bring your hands, face or objects close to the ventilation holes of the Plasma TV.

   • Heated air comes out from the ventilation holes at the top of Plasma TV will be hot. Do not bring your hands or 

face, or objects which cannot withstand heat, close to this port, otherwise burns or deformation could result.

Be sure to disconnect all cables before moving the Plasma TV.

   • If the Plasma TV is moved while some of the cables are still connected, the cables may become damaged, and 

fi

 re or electric shock could result.

Disconnect the power cord plug from the wall socket as a safety precaution before carrying out any 
cleaning.

   • Electric shocks can result if this is not done.

Clean the power cable regularly to prevent it becoming dusty.

   • If dust built up on the power cord plug, the resultant humidity can damage the insulation, which could result in 

fi

 re.


Pull the power cord plug out from the wall outlet and wipe the mains lead with a dry cloth.

This Plasma TV radiates infrared rays, therefore it may affect other infrared communication equipment.
Install your infrared sensor in a place away from direct or re

fl

 ected light from your Plasma TV.

Maintenance

The front of the display panel has been specially treated. Wipe the panel surface gently using only a cleaning 
cloth or a soft, lint-free cloth.

   • If the surface is particularly dirty, wipe with a soft, lint-free cloth which has been soaked in pure water or water to 

which a small amount of neutral detergent has been added, and then wipe it evenly with a dry cloth of the same 
type until the surface is dry.

   • Do not scratch or hit the surface of the panel with 

fi

 ngernails or other hard objects, otherwise the surface may 

become damaged. Furthermore, avoid contact with volatile substances such as insect sprays, solvents and thinner, 
otherwise the quality of the surface may be adversely affected.

If the cabinet becomes dirty, wipe it with a soft, dry cloth.

   • If the cabinet is particularly dirty, soak the cloth in water to which a small amount of neutral detergent has been 

added and then wring the cloth dry. Use this cloth to wipe the cabinet, and then wipe it dry with a dry cloth.

   • Do not allow any detergent to come into direct contact with the surface of the Plasma TV.
 

If water droplets get inside the unit, operating problems may result.

   • Avoid contact with volatile substances such as insect sprays, solvents and thinner, otherwise the quality of the 

cabinet surface may be adversely affected or the coating may peel off. Furthermore, do not leave it for long periods 
in contact with articles made from rubber or PVC.

Summary of Contents for TH-65PV500B

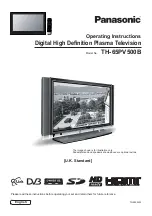
Page 1: ...em for future reference TQB0E0230 English U K Standard TV 1 2 3 4 5 6 7 8 9 C 0 OK The image shown is for illustration only Pedestal stand and speakers shown above are optional extras TH 65PV500B Mode...

Page 2: ...59 Analogue and Digital television what are they Analogue transmission is the system that has been used for many years for broadcasting television programmes With continuous improvements in technology...

Page 3: ...d convenience A 10 amp fuse is fitted in this plug Shall the fuse need to be replaced please ensure that the replacement fuse has a rating of 10 amps and that it is approved by ASTA or BSI to BS1362 C...

Page 4: ...needed small parts and other objects out of the reach of small children These objects can be accidentally swallowed Also be careful about packaging materials and plastic sheets When using the Plasma T...

Page 5: ...power cord plug the resultant humidity can damage the insulation which could result in fire Pull the power cord plug out from the wall outlet and wipe the mains lead with a dry cloth This Plasma TV ra...

Page 6: ...not mix different battery types i e Alkaline and Manganese or use rechargeable Ni Cad batteries Pull and hold the hook then open the battery cover Insert batteries note correct polarity and R6 UM3 si...

Page 7: ...il it clicks 3 Attach the screw 1 Remove the screw 2 Push down hooks and pull the cover slightly towards yourself to disengage the claws at 2 points 3 Slowly pull out in the downward direction Cable c...

Page 8: ...rt cable Use the TV s AV1 or AV4 Scart terminal for Satellite Receiver Always use a fully wired Scart cable RF Connection Connect the RF cable to the Aerial In terminal of the VCR DVD Recorder and an...

Page 9: ...rder Download If a Q Link NEXTVIEWLINK or compatible recording device has been connected to a Scart terminal AV2 or AV4 before starting Step 1 programme information will be downloaded to that device O...

Page 10: ...y category press the Yellow button to show a category The chosen category name is shown on screen For example if you select Free TV and press the OK button only free to air stations will be listed you...

Page 11: ...on see page 37 TIMER On Off button Switches Timer recording On or Off The default setting is Off see page 25 SD Record button see page 42 Sound mute On Off SD button Access Card operations see page 40...

Page 12: ...t menus The left and right cursor buttons are used to access menus adjust levels or to select from a range of options The OK button is used with a number of features to store settings after adjustment...

Page 13: ...MPEG noise Allows you to choose from Off Min Mid and Max This function is effective in reducing the digital block noise when viewing DVD VCD SD card or digital broadcasting The effect will be changed...

Page 14: ...M Mono sound output If Nicam Mono is being transmitted select either FM Mono Off Nicam Mono I M1 or Nicam Mono II M2 The options depend upon the signal being transmitted If reception deteriorates it i...

Page 15: ...l equipment must be switched on and sending a control signal for automatic switching at power on to occur Tuning Menu Provides access to many other features including Programme edit and Auto setup See...

Page 16: ...ze your programme settings e g adding or deleting a programme position See page 17 18 Auto setup Allows you to automatically retune the TV Useful if you move house and wish to retune your TV to the lo...

Page 17: ...g Chan Name Lock 1 2 3 4 5 CH44 CH51 CH41 CH47 CH37 Off Off Off Off Off ABC XYZ FTP 123 456 Move the cursor to the programme to be deleted or added Press the Green button to add a programme channel to...

Page 18: ...Press the OK button to store the new setting You can copy programme information to a compatible recording device connected to AV2 AV4 See page 52 for connection information Press the Download Blue but...

Page 19: ...ings can be stored If you exit the procedure after this point and before Auto setup is complete no station information will be stored Restart and complete the Auto setup procedure so that the TV is re...

Page 20: ...ccess Tuning mode Press the TV AV button to move between Change programme and Search Press the or button to change programme position or start search When the desired station is found press the STR bu...

Page 21: ...u wish to check the personal details already entered into the TV except your PIN number press the F button Front panel and hold for 6 seconds initially the volume level function will appear as you con...

Page 22: ...nt the TV to tune itself to your new local stations Note Owner ID information will not be affected by this function This can be done either through the Shipping condition menu or through the Auto setu...

Page 23: ...Multi audio which will only appear when a DVB programme is selected allows you to select an alternative sound track The number of options available depends on each broadcast Press the MENU button Mov...

Page 24: ...gress press GUIDE then EXIT You may not be able to cancel recording just before it starts Use the recording device to cancel it Two minutes before the recording is due to start a reminder will appear...

Page 25: ...imer programme data overlaps any part of an existing timer programme a warning message will appear The TV set must be On or in Standby mode for the DVB programme signals to be output to the recording...

Page 26: ...he Blue button to add all the channels to the profile list Press the OK button to store your Profile list Edit the Profile list When the profile list is highlighted Press the Red button to edit the pr...

Page 27: ...you wish to watch a locked channel If the unit is turned off it will be necessary to input the PIN number again to access any locked channels Change the PIN number In Child Lock menu Move to Change P...

Page 28: ...e best picture When viewing analogue pictures interference such as signal reflection from nearby buildings or mountains causes ghosting but still provides a viewable picture For the DVB system interfe...

Page 29: ...Module System Update DVB System Setup Access Display Timeout Preferred Subtitles Timer Programming Child Lock DVB Setup menu Multi Audio Access DVB System Setup eng DVB Tuning Menu Profile Edit Common...

Page 30: ...nsert the viewing card into the reader If no module is inserted the message No module inserted will be displayed If you have inserted a module check that it is fully inserted The features that now app...

Page 31: ...V will download this automatically Auto Update Search in Standby will only occur if The unit is in Standby mode No timer recording is set for 03 00 or 05 00 No recording is being made at 03 00 or 05 0...

Page 32: ...2 BBC2 44 Channel4 444 SC4 Exit Select Enter Category Prog type 24 Hr 24 Hr DVB TV Guide Landscape Wed 12 05 04 10 46 BBC1 BBC2 ITV1 Channel4 five ITV2 SC4 Eastender Hot Wars Emmerdal 10 O clock me P...

Page 33: ...ow and Next can also be used in this mode While the banner appears Press the button to display an extended banner showing any information available on the current selected programme Press the button w...

Page 34: ...and leave the device recording in the normal way The tape or disc may have been write protected missing or may be damaged The device may already be recording Refer to the device s instruction book Rec...

Page 35: ...WIDE will appear in the top left corner of the screen and picture aspect changes accordingly in any aspect modes if a widescreen identification signal WSS is detected or a control signal is found thr...

Page 36: ...n The 4 3 picture will be stretched horizontally so that the image fills the screen this is done in such a way that the stretching is only obvious at the left and right edges of the screen Just for MP...

Page 37: ...l to select a TV channel or an AV source to appear in the main window Picture out of picture Allows two pictures to be viewed at the same time as picture in picture does The difference is how the two...

Page 38: ...olour balance About settings see page 13 Advanced setting Access to adjust to the fine picture at a professional level W B High R W B High B W B Low R W B Low B Gamma Adjusts the white balance for lig...

Page 39: ...ents to reduce the noise to the lowest level H pos Adjust the horizontal position V pos Adjust the vertical position Clock phase Eliminate the flickering and distortion Carry out this adjustment after...

Page 40: ...ding Before inserting or removing the PC card make sure that the TV is turned Off Otherwise it may damage the unit Do not touch the terminals on the back of the SD card PC card Always insert a card in...

Page 41: ...ror display If the image is imported from a PC it must follow the EXIF Exchangeable image file format 2 0 2 1 2 2 in addition to the DCF design rule for Camera File system format The JPEG modified usi...

Page 42: ...data being recorded and other data stored on the SD card may become unreadable SD recording may not be fully compatible or playable in some PC software or PDA devices When two pictures are shown on t...

Page 43: ...XIT button To exit Card operation During the SD card menu is displayed press the SD button to return to normal picture MPEG4 view The moving pictures recorded by this unit DIGA or D snap will be playe...

Page 44: ...atio can be changed by pressing the ASPECT button Lock Unlock the file Select the file you want to lock in the thumbnail Press the Blue button to lock the file Press again to unlock Delete the file Se...

Page 45: ...ration guide is displayed Press the Red button to zoom the view During zoom mode you can move the position by using the cursor buttons Viewing setup Press the MENU button during Photo view Move to Vie...

Page 46: ...0min Set the recording time before recording Note If you set Rec time to No setting the recording does not stop until the card is fully recorded Card format You can format the card Notes If the card i...

Page 47: ...card is inserted Broken file Cannot display image The file is broken Memory full The card memory is full Not enough memory The card does not have enough memory to operate Cannot read file The file is...

Page 48: ...Standby mode Press again to switch back on Play Press to playback the tape or DVD Stop Press to stop the tape or DVD Skip Fast Forward Cue VCR Press to fast forward the tape In Play mode press to vie...

Page 49: ...button the page numbers will change to white indicating that the page is stored HOLD HOLD To hold the Teletext page when viewing multi page information Press again to return to automatic page update T...

Page 50: ...require As each sub page is found its number is displayed at the top of the page so that you may select it as more sub pages are picked up the display at the top of the page changes so that you are a...

Page 51: ...OK VCR 1 2 3 4 5 6 7 8 9 0 TEXT DVB teletext services DVB teletext services differ greatly from analogue teletext When you switch to a DVB teletext service the images you see can contain graphics and...

Page 52: ...hen the keys are not shown press any one of the coloured buttons and the keys will reappear Notes The volume level of the headphones can be adjusted by selecting Headphone volume from the Sound menu A...

Page 53: ...ee page 58 DVD PLAYER Amplifier to Speaker System Example Example AV4 VCR S VIDEO VCR Q Link COMPATIBLE VCR SET TOP BOX DVD PLAYER DVD RECORDER Q Link COMPATIBLE DVD RECORDER CAMCORDER S VIDEO CAMCORD...

Page 54: ...atted to view on your display If the external devices have the aspect adjustment set to 16 9 For applicable HDMI signals information see page 58 Compatible sampling frequency of AUDIO signal through H...

Page 55: ...ow fine detail with sufficient clarity Some PC models cannot be connected to the set There is no need to use an adapter for computers with DOS V compatible D sub 15P terminal The computer shown in the...

Page 56: ...em is due to the digital audio connection change to the analogue audio connection The error message appears Please consult an Authorized Service Center The SD card cannot be used even when it is forma...

Page 57: ...mode Select channel Select Programme Category Prog type 24 Hr DVB TV Guide Landscape Wed 12 05 04 10 46 Wed 12th Time 19 30 20 00 Prog type Category All Services 20 30 21 00 21 30 All Types Category...

Page 58: ...Earth CVBS out video CVBS earth Red in S C in Red earth Green in Green earth Blue in Blue earth Audio out L Audio out R CVBS in video Earth Status RGB Earth Q Link data Status CVBS Audio in L Audio e...

Page 59: ...from DVD player and recorder DVB Digital terrestrial services via UHF aerial input M NTSC Playback from M NTSC Video recorders VCR NTSC AV input only Playback from NTSC Video recorders VCR Aerial Rear...

Page 60: ...r care panasonic co uk for more details This product incorporates copyright protection technology that is protected by U S patents and other intellectual property rights Use of this copyright protecti...

Reviews: